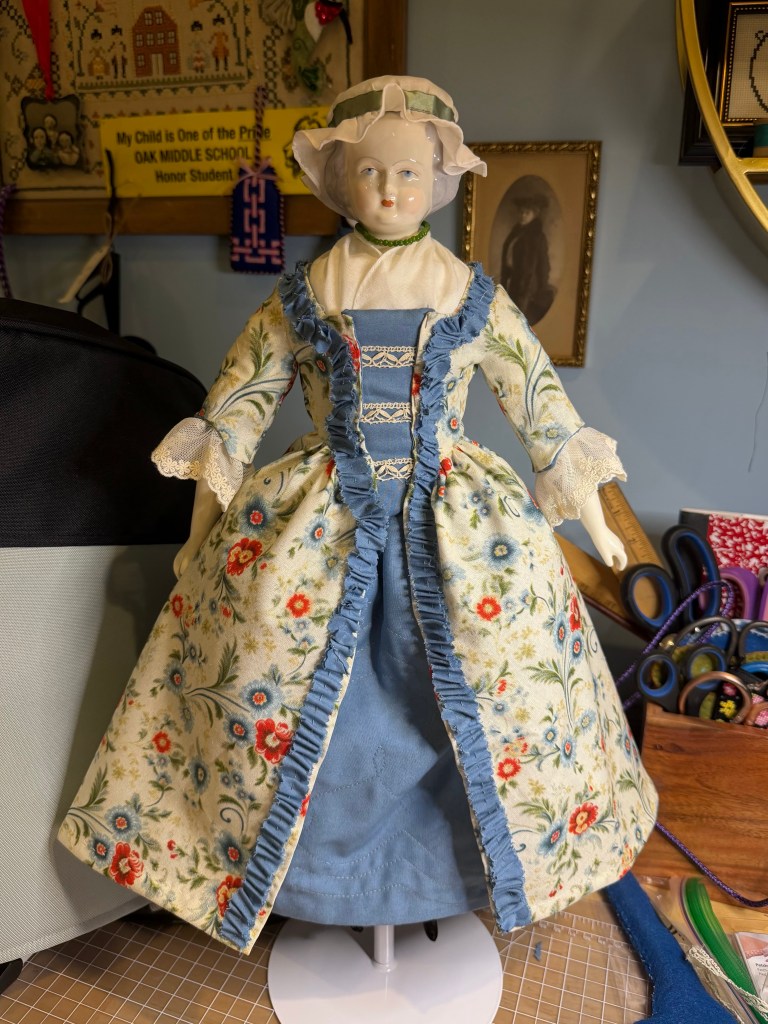
The last time I posted, Martha Tudor was in her undergarments. I’ve made tremendous progress and she now has a lovely robe à la francaise for the spring.
The fabrics are cotton, which was popular in the 18th century.
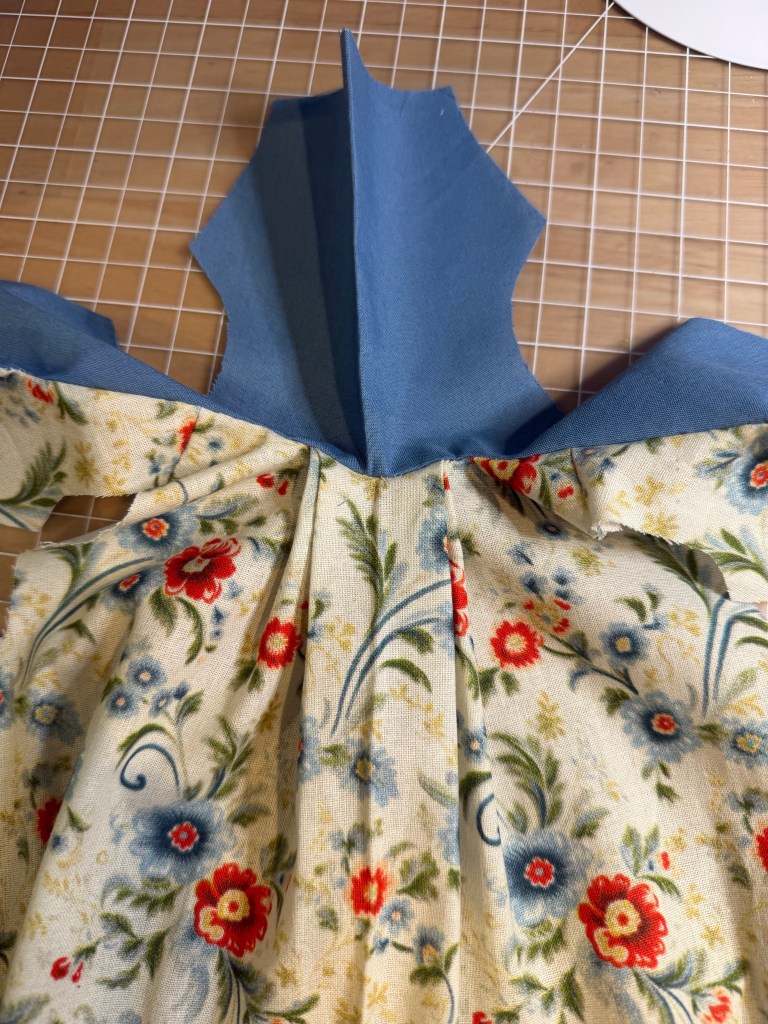
The robe à la francaise is characterized by pleats at the center back of the gown. I found the instructions from The Doll Book downright confusing so I drafted my own pleats.
The bodice also includes a lining that is separate from the outer fabric. I do not know if this is historically accurate but it did allow for lovely draping of the pleats in back.
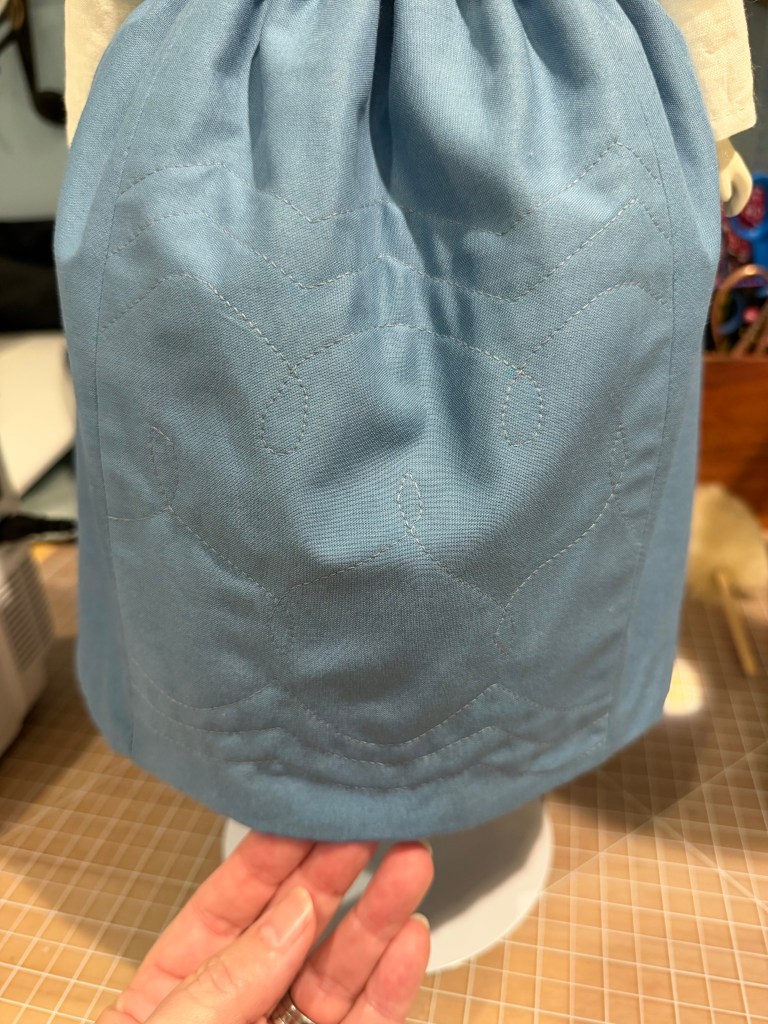
Here you can see the quilting on the front panel of her petticoat. This was sewn by machine and is backed by a piece of plush flannel to give dimension.
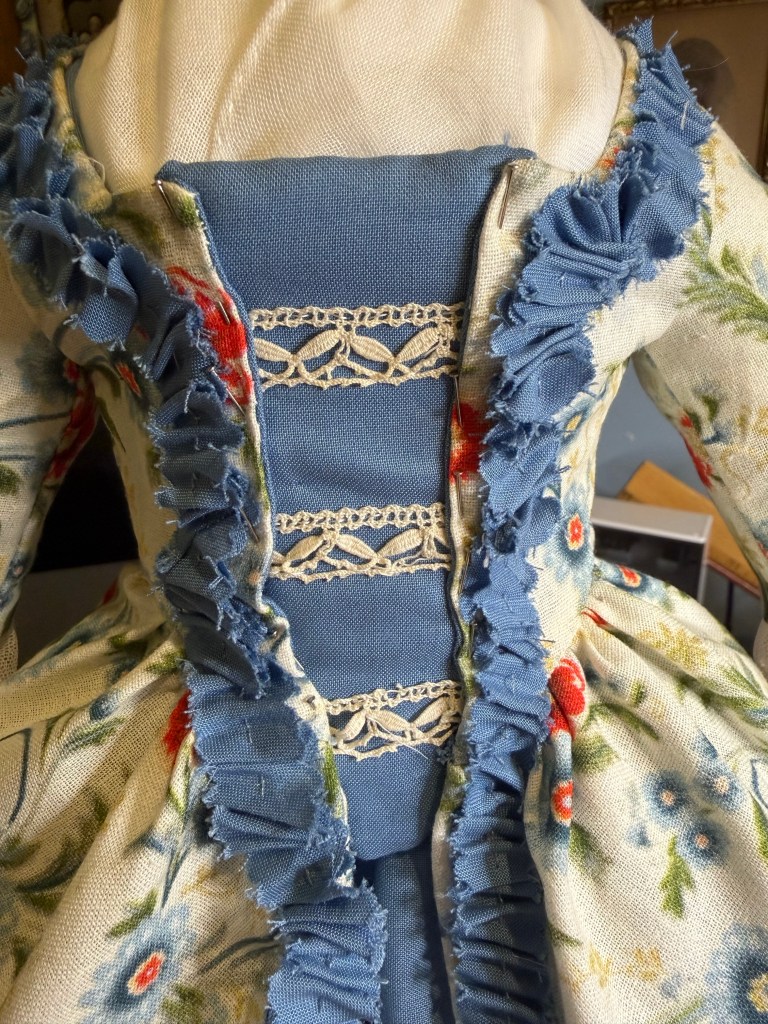
This center piece of the bodice is called a stomacher. It is a firmer piece that is pinned in between the two sides of the bodice. In this case, I cut the base from the back of a notepad, then made a “pocket of the blue and also added a piece of the flannel to soften the front. The lace decoration is vintage tatting I had in my stash.
Yes I hand gathered all the trim. It was more of a pain to stitch it down than it was to make it, honestly!
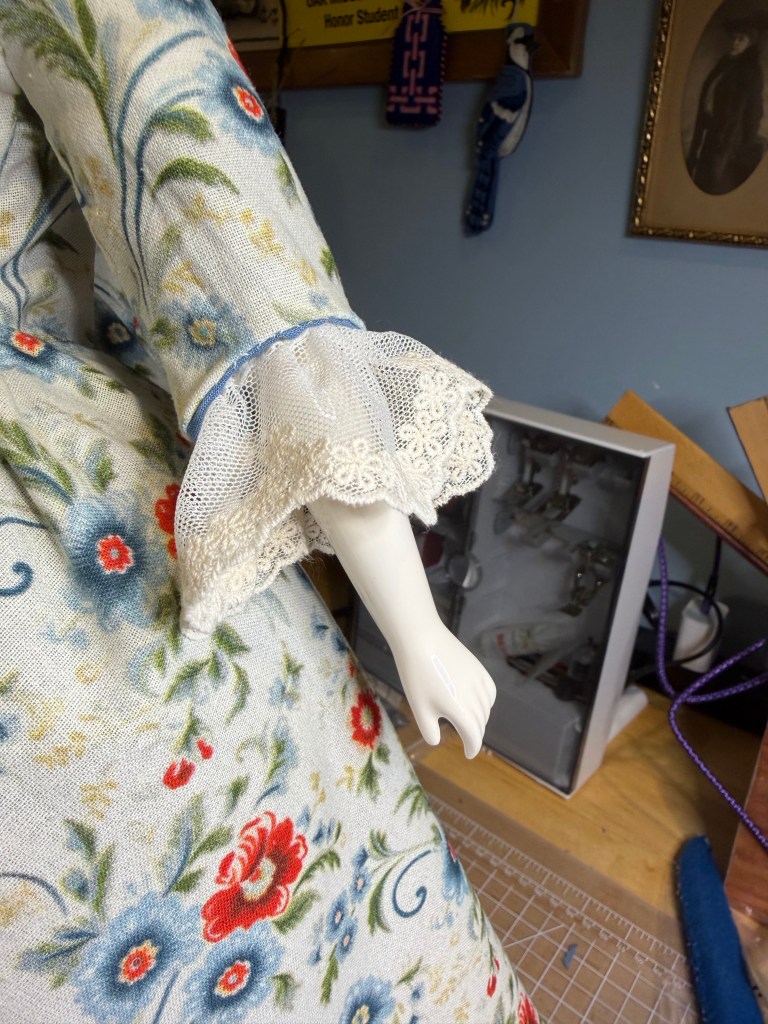
These are the 3/4 sleeves with French lace. This was a popular style of sleeve in the 18th century apparently.
Modesty dictated a fichu be placed in the neck opening of a gown, like this. This piece is batiste and I hand rolled & whipped the edges. It took forever but it’s perfect for such delicate fabric. The fichu here also hides all the repairs where Martha’s chest plate had been broken. The green beaded necklace came with her.
I also made the mobcap. I measured the distance from ear to ear over the top of her head and then added an inch. I used my compass (thank you high school geometry!) to draw the circle and also an outer circle for the brim. The mobcap is made from lawn, which is a little more still than batiste but still a fine and delicate fabric.
I painted on shoe buckles. My thinking here is that Martha Tudor is already broken and repaired, so changing her feet isn’t going to destroy some collector’s value. Unless it’s 100 years from now. In which case I won’t be around. :-)
I quite like the results! I’m not sure who is next in the project list – I have several to choose from. Stay tuned to find out!
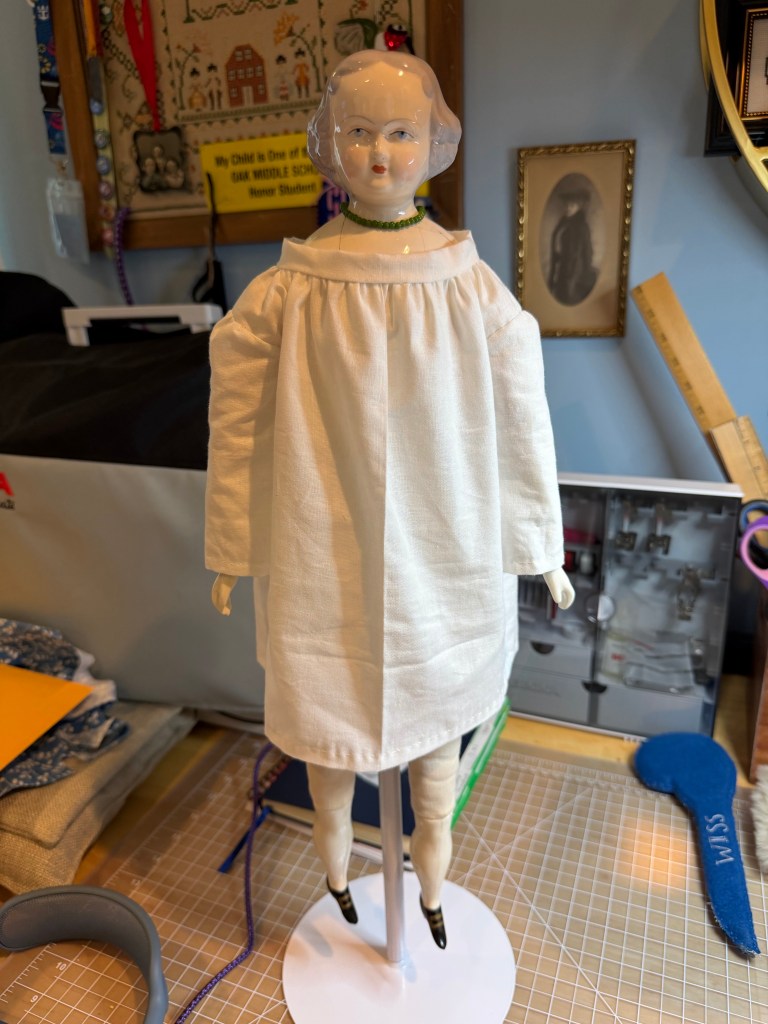
I completed the very first piece of her wardrobe: a basic linen shift.
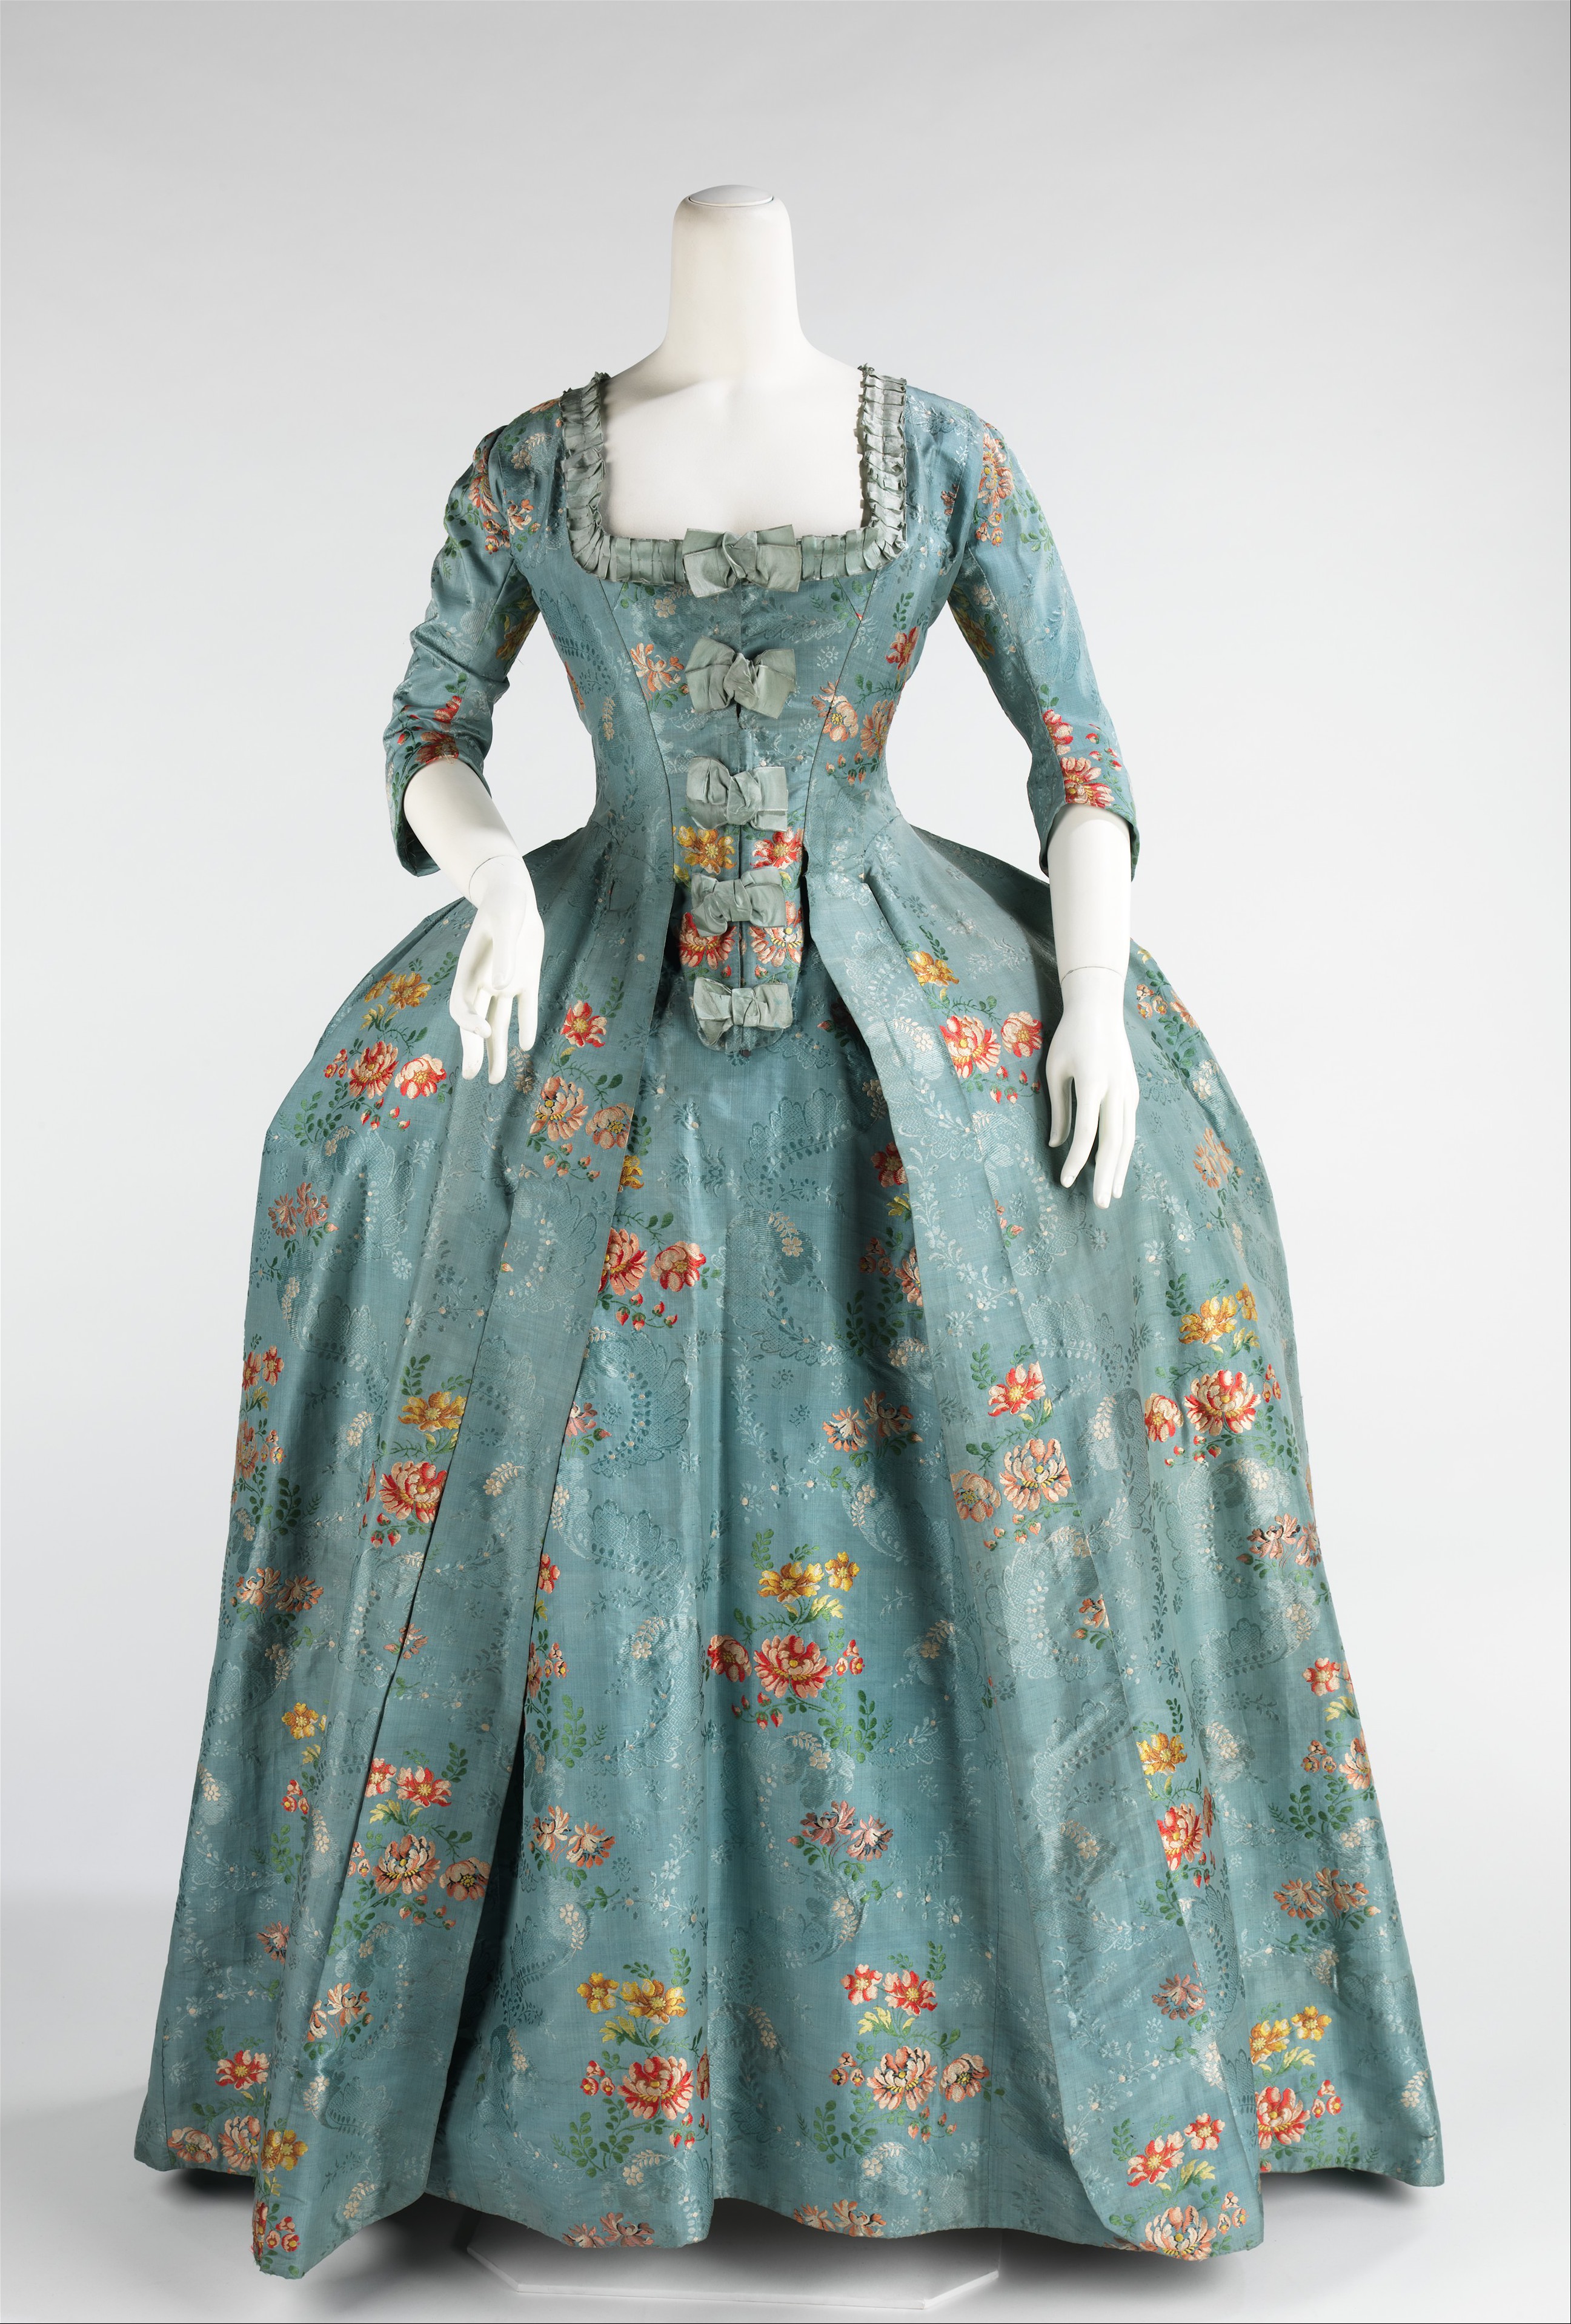
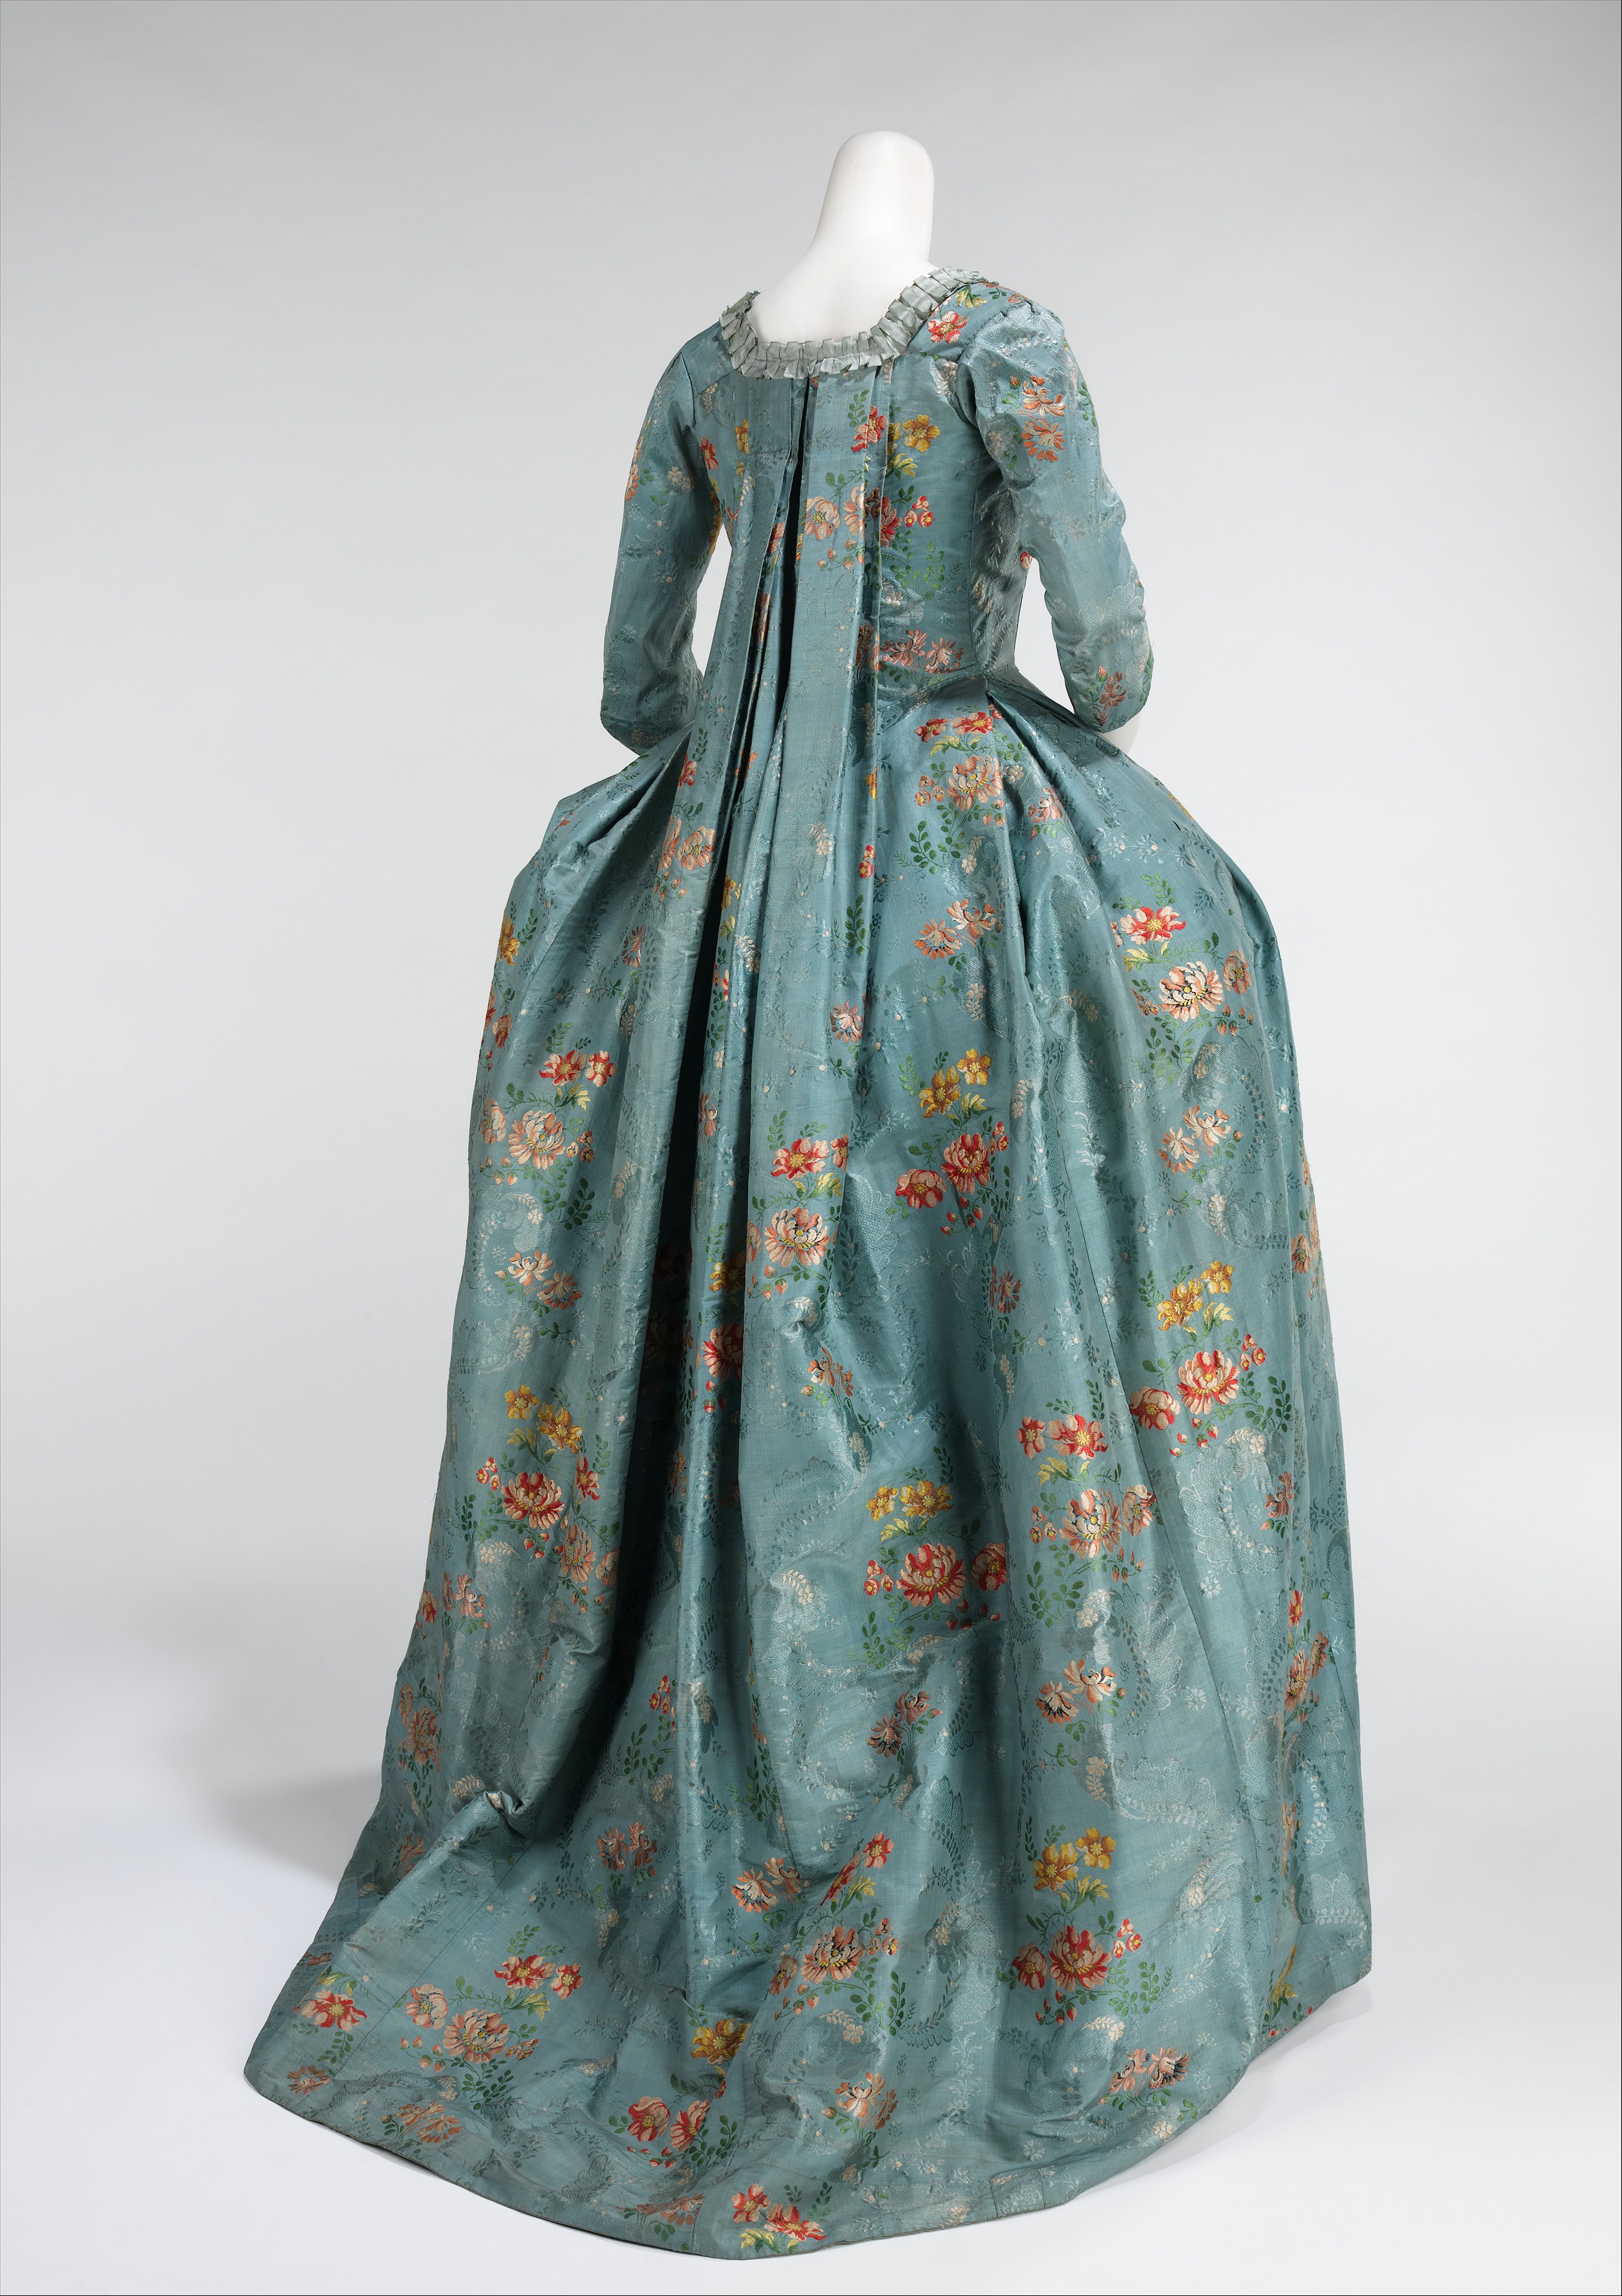
My intention with Martha is to dress her in a 1750s style. Probably I will make a robe à la francaise. This is the type of dress with a wide skirt to the sides.
Met Museum
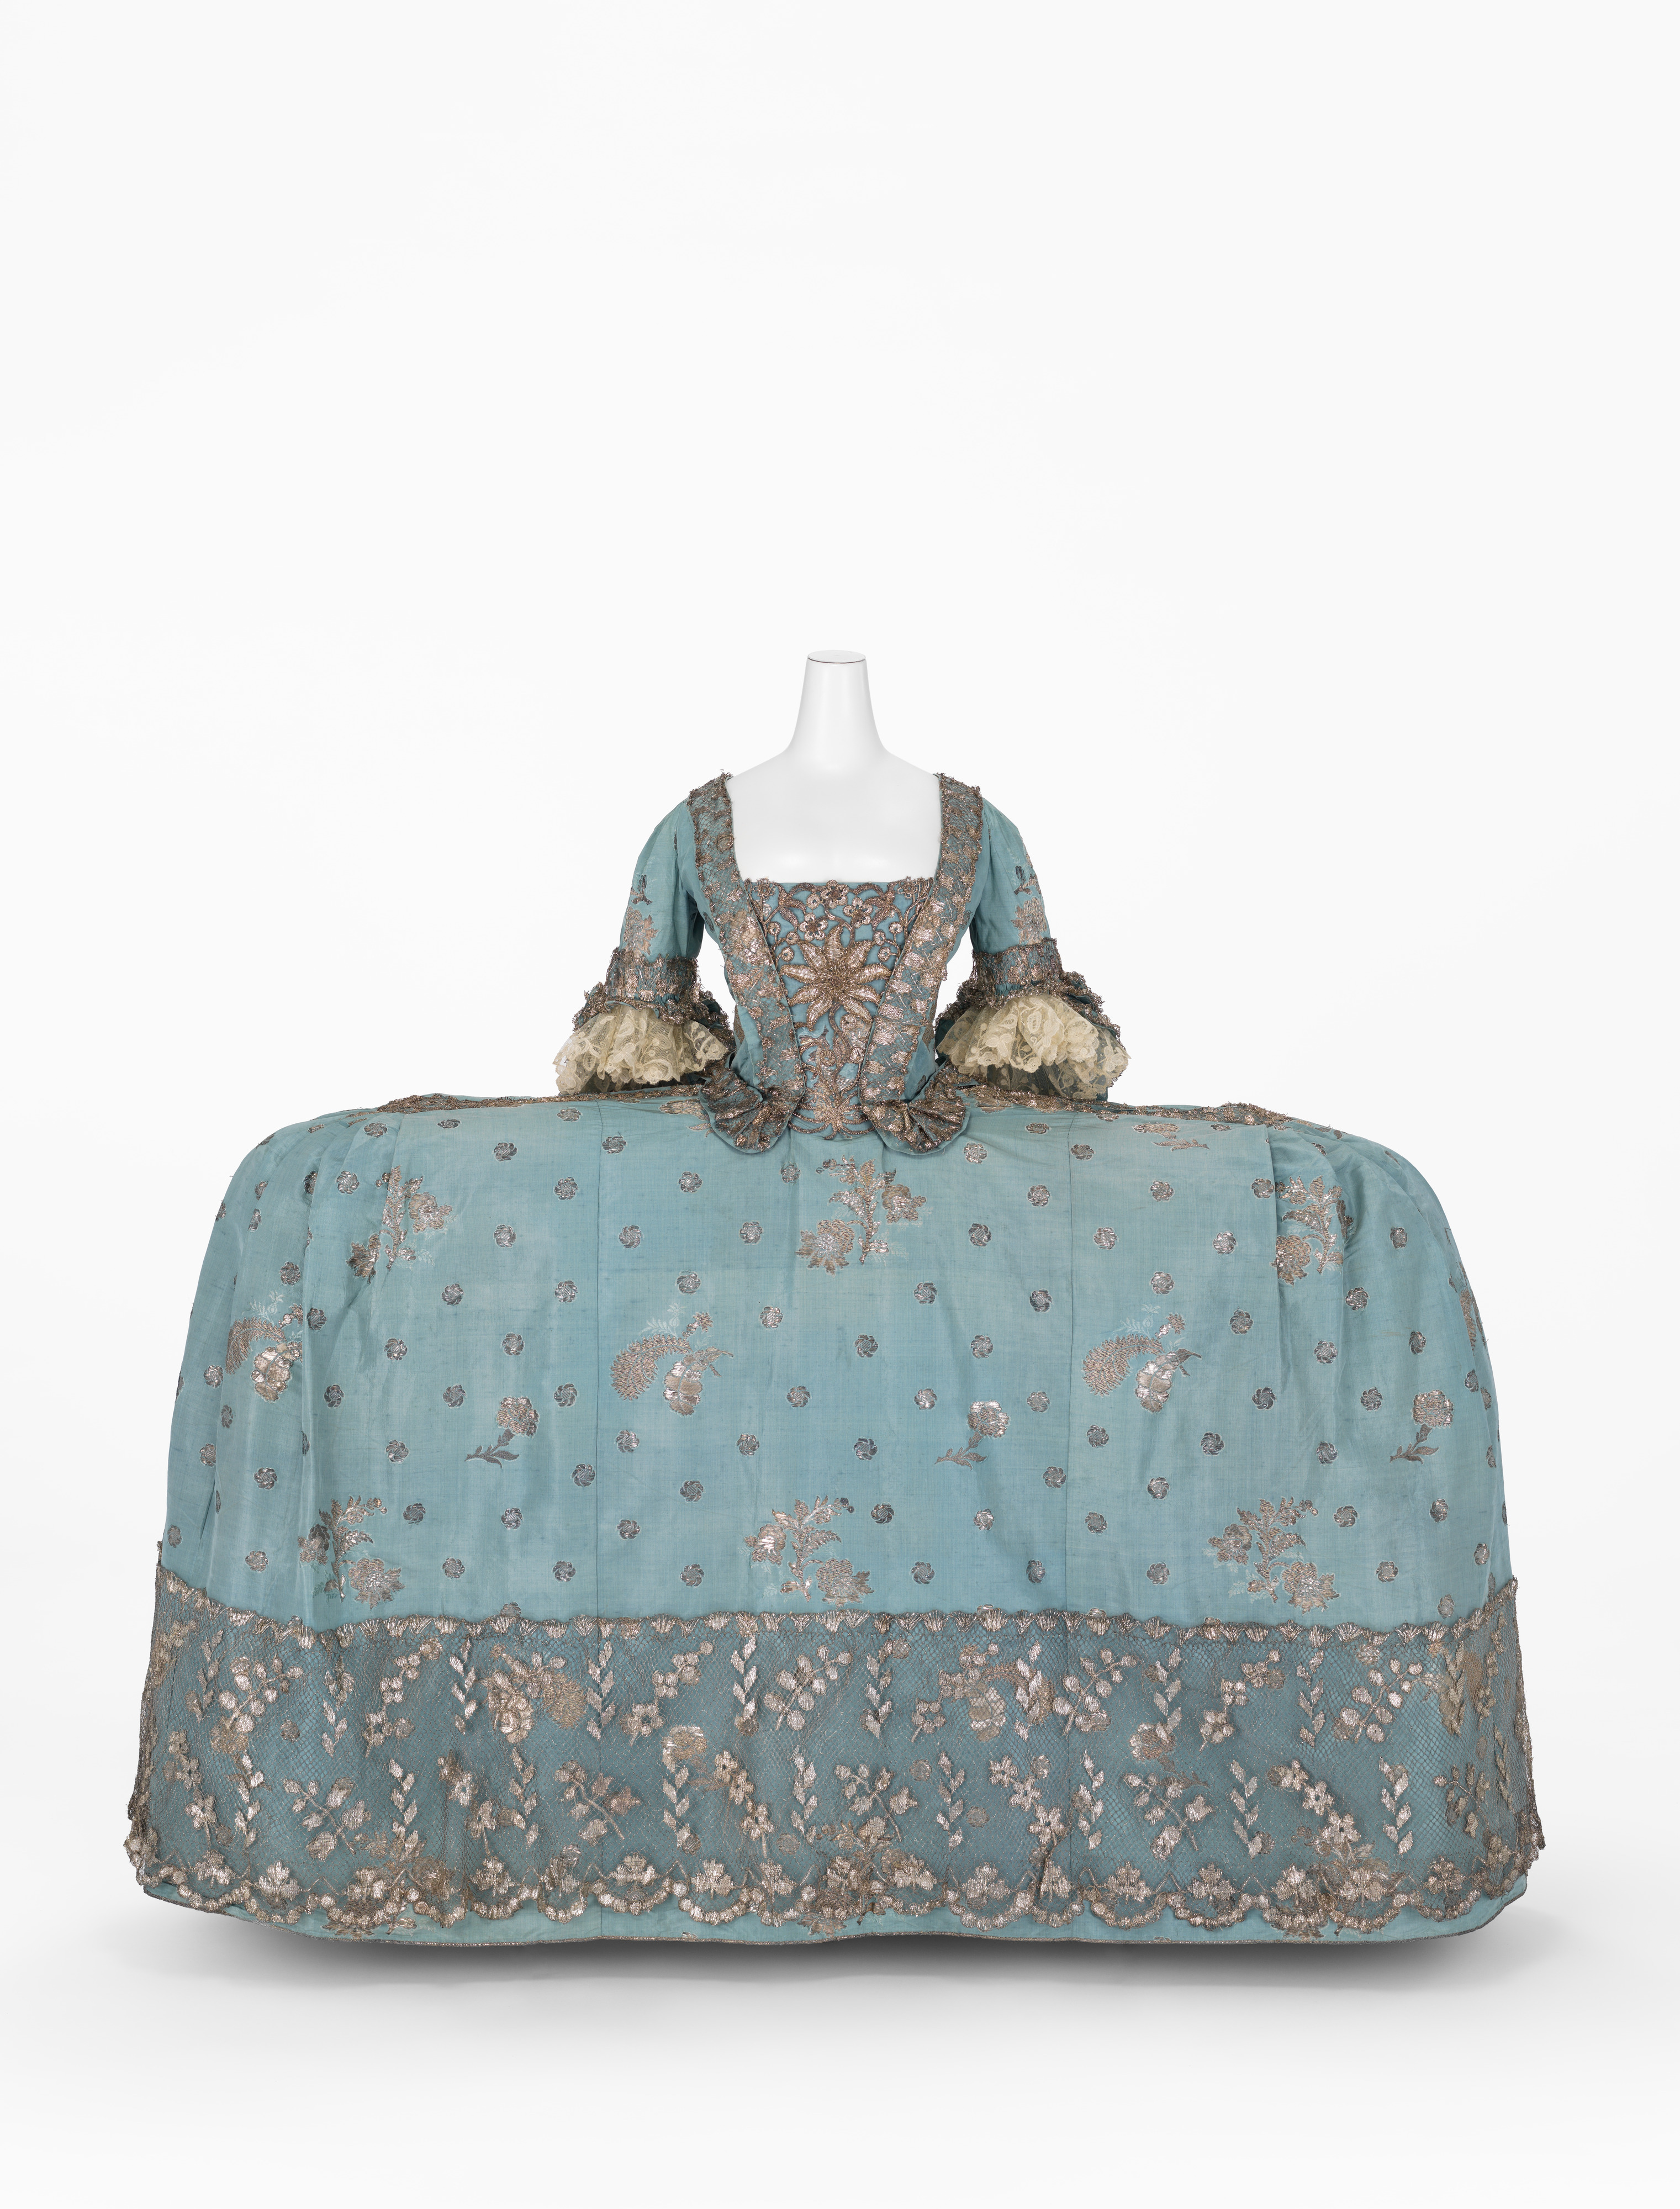
Now, since she is from the Colonies, she isn’t going to have the exaggerated width of a court gown.
British Court Gown – Met Museum
I’ll be making some small pannier pads to hold out the sides. The robe à la francaise is characterized by Watteaux pleats on the back of the gown. These back pleats were in fashion off and on through the 19th century!
Watteaux pleats
I do have lovely fabrics selected for this project. I do not have patterns. I’ll be drafting and/or upscaling pieces from a variety of sources. The shift I made, for instance is based on a 19th century style nightgown with some changes and I drafted the sleeve.
And since Martha is another 20” doll, I’m going to try using my sewing machine for parts of the clothing. Of course no setting in sleeves, they are just too small for my sanity, but much of the rest of the garments can be machine sewn. That should save my eye sight a little bit.
For historical costumers, a cage crinoline is a necessity, but you may ask yourself what exactly that is. Modern lingo for this garment is “hoop skirt” which describes a skirt with hoops in it, typically made with plastic bands and sometimes flounced. But for the original cast, a cage crinoline was a modernization of the crinoline petticoat. A crinoline petticoat was a starched cotton underskirt, often times many layers were worn to achieve the desired bell shape to a skirt. In 1856, however, the cage crinoline was patented and allowed women to achieve the shape without all the heavy skirts! They were made with steel bands – not heavy ones – that were strong enough to carry the weight of one or two petticoats on top, plus the skirt of the dress being worn.
And of course, where fashion for people goes, so goes fashion for dolls. There are remaining doll-sized cage crinolines in private collections, and they are of course on a smaller scale and not as robust as human sized garments. They can be used to fill out a skirt for a doll, or simply for the fun of putting a hoop skirt on your dolly.
Looking at how the originals were constructed, I realized this is a simple project I could make and share the instructions here. My doll is an 18″ Yield House Meg doll, but you can adjust these measurements to fit your dolls.
Supplies
I found this trim that is 5/8″ wide, 95% cotton and reminds me of Petersham. It’s a nice woven, flat trim that will do nicely. I’m also using some aluminum jewelry wire here but you can use what is available to you. You want something that is malleable enough to bend into your shape but strong enough to hold the round hoop shape once completed. All told, I spent less than $10 on the supplies.
First you need to do some thinking and measuring. For a Yield House doll, the skirt is made from a 36” length of fabric. This results in a nicely full skirt similar to those worn in the 1860s. Consider how tall your doll is and how full her skirt is. You want the bottom hoop to be less than the full circumference of the outer skirt. I chose to make the bottom hoop 30” around. The top hoop should be wide enough to fit over the hips of your doll. Meg here needed 15” for decent clearance. For the middle bone I split the difference and made it 23”
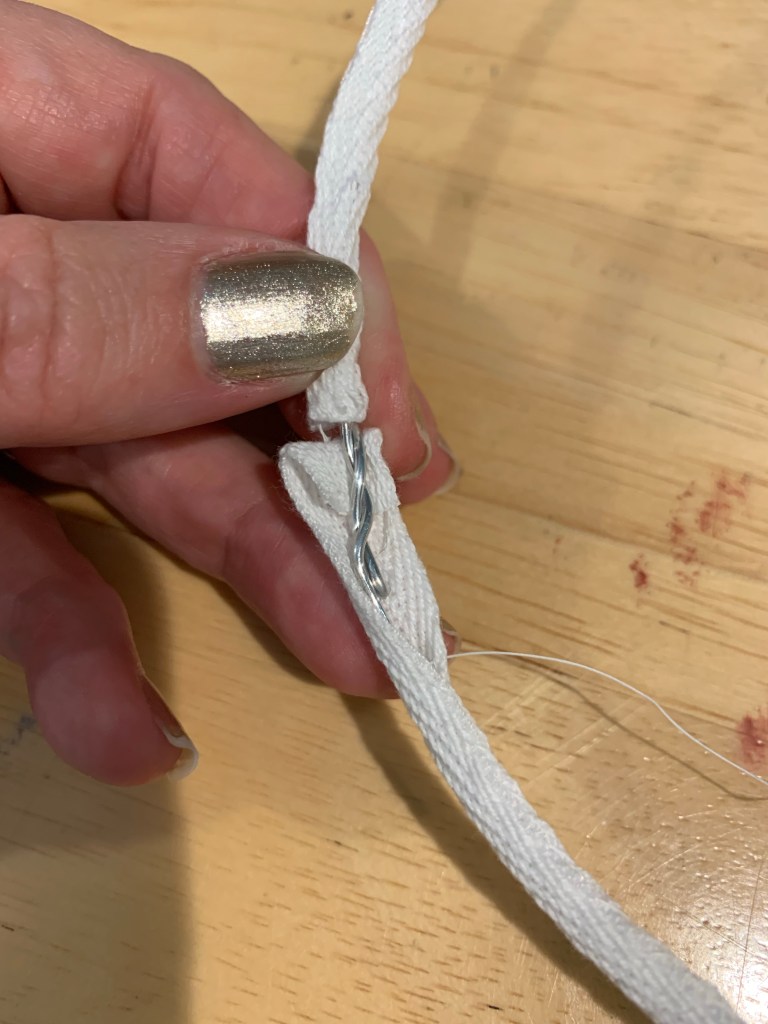
Once you have your hoop circumferences, measure your wire to that length plus 2-3” overlap. Cut the wires and then twist the ends together.
Twist the ends together
Make all three hoops, then you can measure the tape to cover them exactly. Allow at least 1/2” on either end to turn the raw edges under. Beginning at the joint, fold the tape around the wire to encase it and then whipstitch it closed.
I used quilting thread but any type will do
Once you get to the end, tuck the end under and whip all the way around the joint.
Bring the folds together and stitch
Repeat on the second and third hoop until all three are covered. The next step will be to find the quarters on each hoop and place a small mark. This will ensure the vertical tapes will hang straight. these marks will be covered, don’t worry.
Mark the quarters
Determine the drop of your hoop skirt next. This is the length from the waist to where you want the lowest bone. I chose a 9 1/2” drop so the lowest bone would be near the tops of the doll’s boots. This is about where my life size hoops hang as well. Consider you need 1/2” on either end to tuck under – so add this onto the drop measurement. This gave me a 10 1/2” vertical tapes. Cut 4 of these. Don’t forget to measure the waist of your doll and cut a waistband to that length plus 1”.
The hoops should be equally spaced on your vertical tapes. Don’t forget that you will attach them at the top and the bottom. I measured and pinned the placement for the first and second hoop. The hoops attach at 3”, 6 1/2”, and 10” (the bottom).
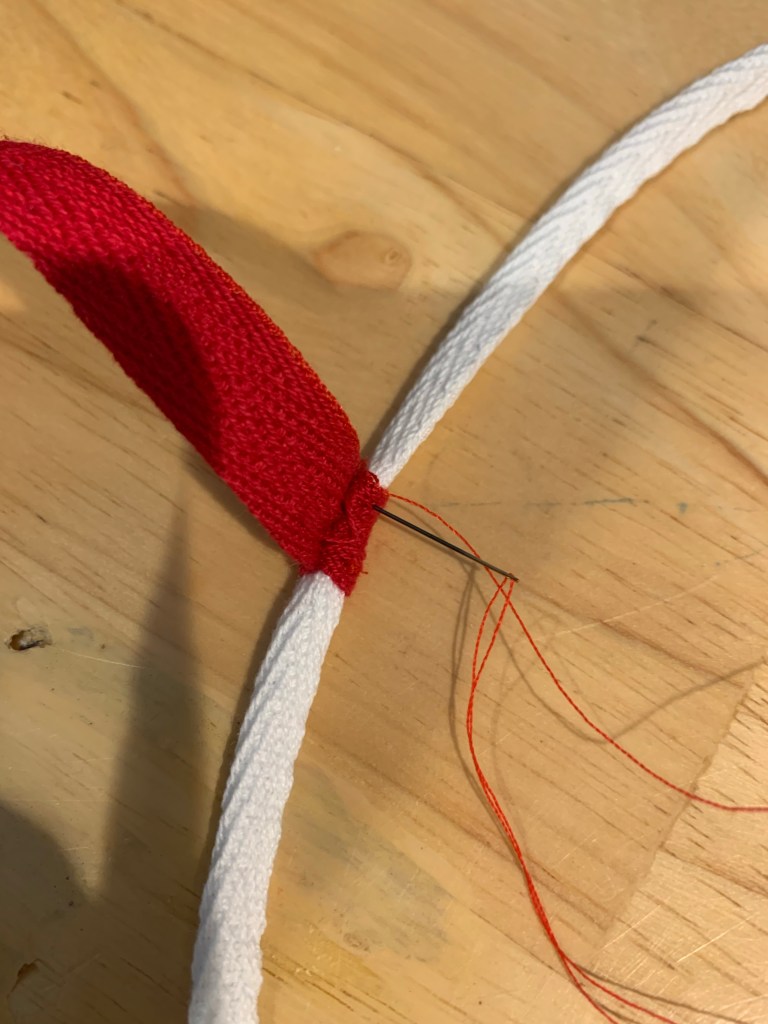
Beginning with the lowest hoop, wrap the tape around so the raw edge will be enclosed. Stitch that in place. Repeat at all four quarters.
Enclose the raw edge
Moving to the middle bone, fold the tape over the hoop so you can stitch through the vertical tape, through the hoop covering under that, then out the vertical tape. You aren’t stitching behind the hoop wire, just catching the tape wrapping it. Repeat on all quarters and then move on to the top hoop.
Pin it into place until you stitch it
Once all the hoops are attached to the vertical tapes you are ready to attach the waistband. Turn the ends of the waistband under and stitch so the raw edges are inside. Remember, the waistband is the measure of your doll’s waist plus 1”.
Finished edges
Find the quarters of the waistband, place a small mark, then pin the tapes in place.
Stitch these in a square that will secure the tape and keep the raw edge inside. Once that has been done you can add a hook and eye or thread bar. You are done!
Finished cage crinoline
My doll happens to have a modesty petticoat under her new cage crinoline and then a fine starched cotton petticoat over it. I’m making a silk skirt for her next and this should do nicely to help it hold it’s shape.
All told I used less than the full amount of wire I purchased and less than a full spool of the white tape. Had I made the vertical tapes in white I might have used close to the full spool. I hope you found this little article helpful in demystifying the cage crinoline and will feel confident in trying one for yourself!
Supply List
5/8” Petersham or similar woven cotton flat trim (don’t use twill tape as it will ravel)
2 1/2 yards white
1/2 yard red (to make in all white add this to the length above)
At Christmas my daughter thought her Auntie would like some coloring books, since as a six-year-old Melody likes coloring. Lucky her, Auntie likes coloring and always has. Well, I thought some coloring books for grown ups were in order, and since I liked them so much, I bought myself a set. Of course, since we love Victorian clothing, that’s the theme of the books. I finished a couple recently. My daughter was playing on her iPad and I was the one coloring. Hee hee!
Evening Attire ca. 1891
Walking Costumes ca. 1884
I hope you find yourself some good Dover Coloring books, a 100 color pencil set, and a little time to dream!
Speaking of Victorian clothing, we will be at the Southern California Civil War Association (SCCWA) reenactment at Prado Regional Park April 6-7. Visit my Victorian sister site Past Periods Press for more details.
This is a Valentine’s Day greeting card dated February 14, 1900. There’s even a message hidden behind one of the layers. Click the image to read my full post about it on Who Were They?
My mother has tons of secrets squirreled away in drawers and occasionally she takes them out to share and pass on. Last weekend after Melody’s birthday, she gave me this, and also a box full of 100+ year old baby clothing. Squeee! One of the items is a christening dress with gorgeous tiny pin tucks and lace and it is oh, so delicate. We were able to see where the dress had been altered to allow for a bigger baby to wear it. Also, tiny baby bibs, backed with flannel, each edged with tatted lace. And two insanely fragile and gorgeous baby bonnets, one so filmy it was surely just for the christening. It definitely shows that babies have gotten bigger in the last 100 or so years! The bonnets were so tiny they look like doll clothes. I will try to get some photos of these later on, but right now I’m trying to figure out my budget for preserving them. I plan to have them placed in shadow boxes so they can be seen but not touched.
If you have antique items such as these, the first and best way to preserve them is to not touch them. If you must touch them, wear cotton gloves. The oils and residue our fingers and hands leave behind on these age-worn items will damage them. Next, keep them away from bright light and sunlight. If you ever noticed that the curtains around your windows are faded, it’s due to the natural bleaching properties of sunlight. That’s why linens hung out to dry are crisp and bright white! Many of my mom’s treasures are indeed in drawers or closets, away from natural light and even lamp light. If you do display your item, make sure it is behind museum quality glass that blocks UV rays. This will help protect dyes from fading and paper from disintegrating.
Finally, if you must launder something because it is yellowed with age, look into laundry soap flakes. These are different from detergents and are more gentle on delicate antique fabrics. You can use Woolite for delicates, or if you are really into preservation you can research French laundry flakes. For some reason they are not really easy to find in America. There are a couple services that will clean your heirloom items for a fee, such as Allo Laverie, in New York. I haven’t worked with them, so not an endorsement. Also, OxyClean dissolved in the hottest water possible for you to tolerate will work for removing most stains. Gently swirl the fabric in the soapy water and let it sit. It could take hours. You don’t want too high of a concentration of OxyClean but you also don’t want too little. The more delicate the item, the less soap. Once you feel the stains have come out as much as they are going to, remove the item from the water, refill you basin with cold water and rinse carefully until all traces of the OxyClean are gone.
Melody asked me to make her a purple princess dress for her birthday, since we are having a princess themed birthday party for her upcoming 6th birthday. We looked at different pictures, I assessed just how crazy this might be, and went over to Joanne’s to buy fabric.
Princess dresses galore
Melody selected view A, which is the blue one shown above. The pattern calls for many yards of tulle and satin, plus some tissue lame for the inset and sleeve puffs, and a little trim. Right out of the gate I ran into difficulties, because Joanne’s had two completely different lavenders – one a pink lavender and one a blue lavender. After much deliberation (no joke, easily 30 minutes) I decided on the blue lavender. It just has a more of a true lavender look to me, besides the fact that Melody already has a Rapunzel dress that is in a more pink lavender. Next, I was thinking of using an embellished chiffon in the collection in place of the top layer of tulle, but Joanne’s had exactly 1/2 yard too little.
Once that obstacle was overcome, the cutter discovered that they had exactly 1/2 yard too little of the coordinating lining fabric.
Say what, Joanne?
Anyway, I’m flexible, made some adjustments then went home to get this project started. I had selected an iridescent sheer instead of the tissue lame because they didn’t have a silver lame, only gold and it didn’t look good with the lavender. Let me just say, I am pleased with the results but I really regret that fabric. It was very slippery. I backed it with white satin, flatlined them and treated them as one piece. The pattern has you apply this triangle shaped piece to the bodice front in the first step, fine. But upon reading through the pattern, they have you glue the trim on at the end. That didn’t work for me because I know my daughter. That trim would be ripped off within the first day. Here’s my second regret about this dress. I picked out a really pretty sequined trim that matched the fabric perfectly; it was sold by the spool so I couldn’t open it in the store. It was elasticized! And the sequins are made from something stronger than titanium because I broke three – yes three – needles stitching it on. Now I understand that Simplicity wanted the trim to lay on top of the seam because after sewing, turning and finishing the bodice I can see that part of the trim tucks inside and it’s not a “perfect” look. However, if you use something that doesn’t have sequins, why in the world would you not sew it on? A regular ribbon or floral trim is going to be just fine stitched inside the seam and it will be a much more finished look. So there.
The rest of the dress was so easy! The puffed sleeve is a two-part sleeve, meaning you cut a small piece out of the tissue lame (or slippery annoying iridescent stuff, in my case) and apply it to a regular sleeve piece. The gathering of the fabric gives you the puff and it is really very easy. The skirt is two layers of tulle plus an underskirt. My only thought is that you really want to use fine tulle here because a rougher one might be a bit scratchy on the inside. Also, the waist is finished by turning the seams toward the bodice and top stitching. With the horrid titanium sequins I had going on, I did not top stitch that section.
I found the directions for the back opening a tiny bit confusing. They have you extend and press back 1/2″ of the tulle on the center back, but it is unclear as to exactly where it is to be placed. Looking back, I can see now it was supposed to have been folded back and placed along the zipper placement line, not the raw edge. This would allow for there to be a gap in the tulle allowing the zipper to pass through nicely and the stitching to be neat and tidy. While you won’t be able to find it on this dress, I had to do some fancy zipper foot work to make that spot work.
With those two minor criticisms, however, I’d say this is a nice pattern. It’s not a beginner pattern, but certainly not an expert level either.
But, what do you think? It fits well and I made it large so she can wear it for more than a minute. I haven’t made the hat.
Ta dah!
I’m considering going back and making one of cotton for a certain little girl who’s birthday is in July.
UPDATE: I went back and made the hat. It took about 30 minutes from start to finish, and darn if I didn’t find some regular purple ric-rac that I could have used on the dress instead of the sequins! Anyway, here are my thoughts on the hat. The instructions have you apply fusible interfacing to the inside of the hat, and the pattern requirements call for lightweight fusible interfacing. If you want the hat to flop over like one of those funny men’s nightcaps from 200 years ago, go ahead and use the lightweight. Otherwise, use a heavyweight fusible interfacing. Second, they have you hand stitch the tulle to the point of the hat after it’s finished. I don’t know about you, but my hands do not fit into that tiny diameter point. I suggest either catching the tulle in the seam when you stitch that, or attaching the tulle to the fabric before the seam is sewn. Finally, my daughter just didn’t want to wear the hat for more than a couple minutes at a time so I didn’t bother with the elastic band for under the chin, but you could easily replace that with ribbon ties stitched into the hat at the time you make the narrow hem. Way more secure, less hand sewing, and actually realistic historically speaking. :-)