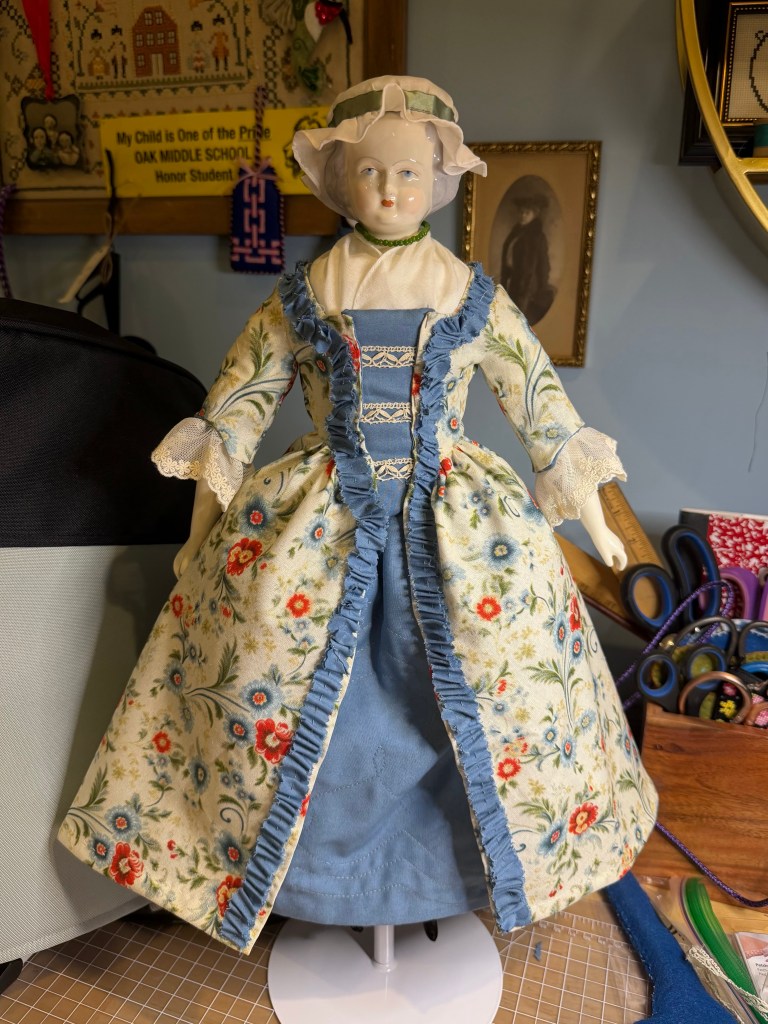
The last time I posted, Martha Tudor was in her undergarments. I’ve made tremendous progress and she now has a lovely robe à la francaise for the spring.
The fabrics are cotton, which was popular in the 18th century.
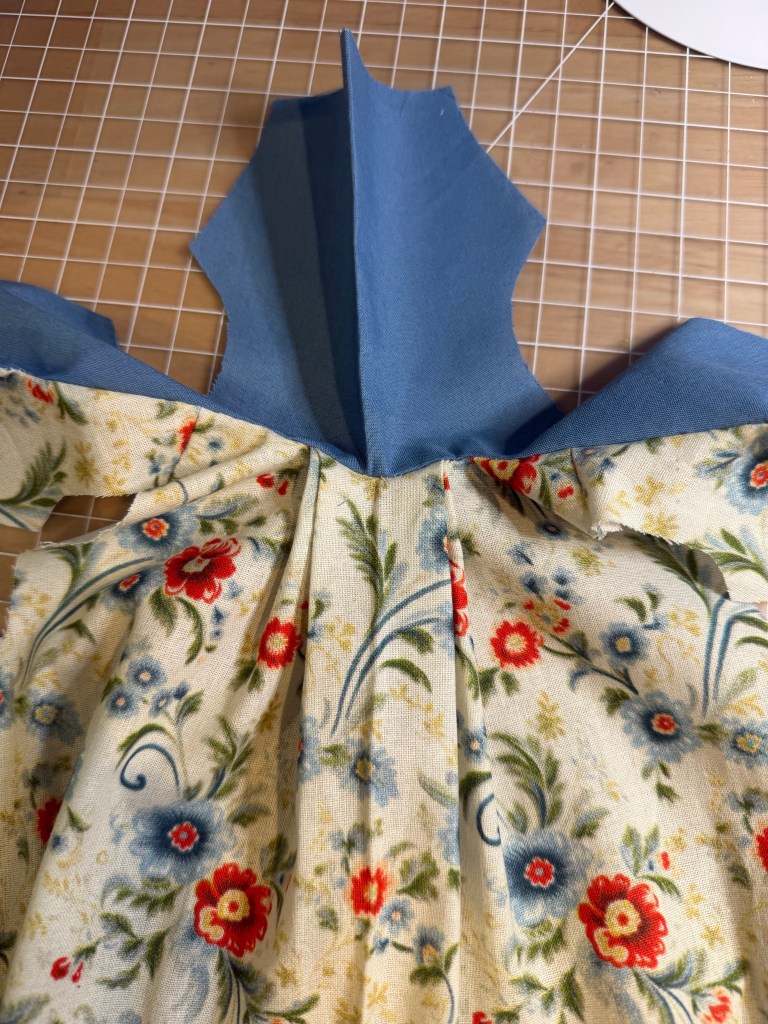
The robe à la francaise is characterized by pleats at the center back of the gown. I found the instructions from The Doll Book downright confusing so I drafted my own pleats.
The bodice also includes a lining that is separate from the outer fabric. I do not know if this is historically accurate but it did allow for lovely draping of the pleats in back.
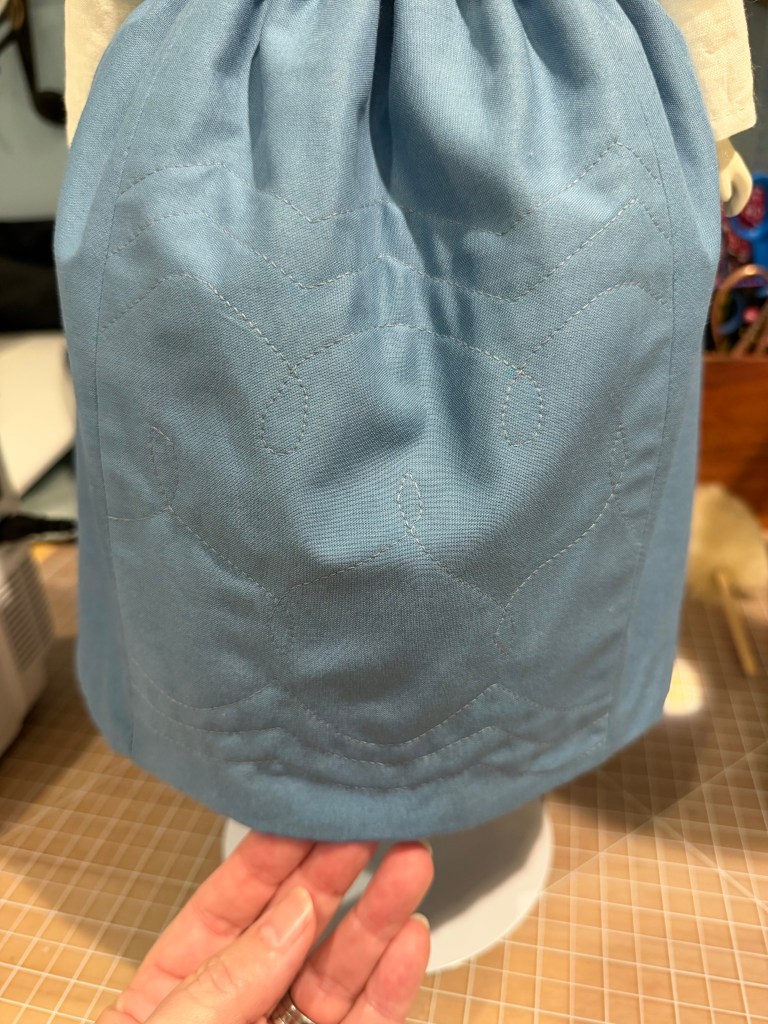
Here you can see the quilting on the front panel of her petticoat. This was sewn by machine and is backed by a piece of plush flannel to give dimension.
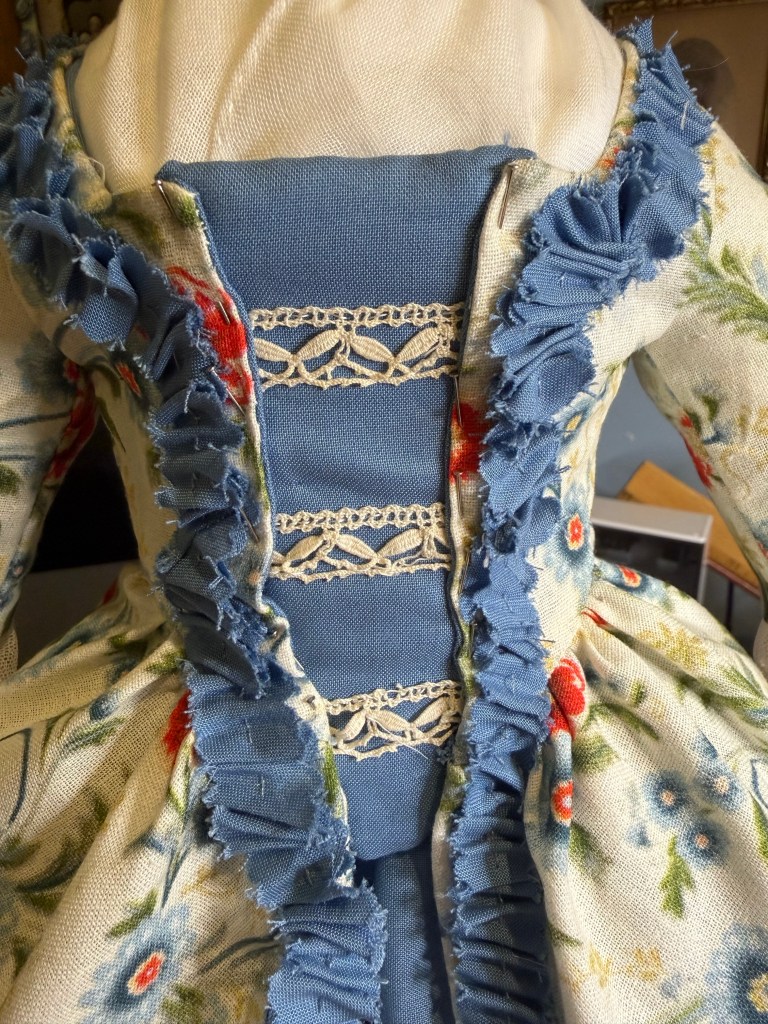
This center piece of the bodice is called a stomacher. It is a firmer piece that is pinned in between the two sides of the bodice. In this case, I cut the base from the back of a notepad, then made a “pocket of the blue and also added a piece of the flannel to soften the front. The lace decoration is vintage tatting I had in my stash.
Yes I hand gathered all the trim. It was more of a pain to stitch it down than it was to make it, honestly!
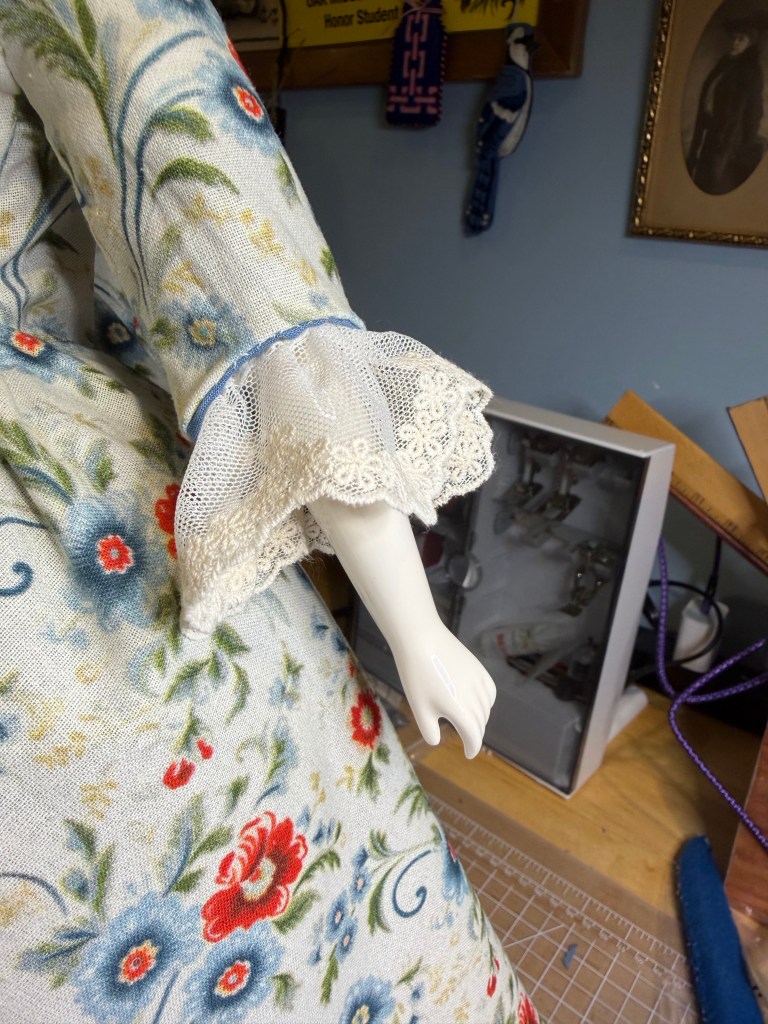
These are the 3/4 sleeves with French lace. This was a popular style of sleeve in the 18th century apparently.
Modesty dictated a fichu be placed in the neck opening of a gown, like this. This piece is batiste and I hand rolled & whipped the edges. It took forever but it’s perfect for such delicate fabric. The fichu here also hides all the repairs where Martha’s chest plate had been broken. The green beaded necklace came with her.
I also made the mobcap. I measured the distance from ear to ear over the top of her head and then added an inch. I used my compass (thank you high school geometry!) to draw the circle and also an outer circle for the brim. The mobcap is made from lawn, which is a little more still than batiste but still a fine and delicate fabric.
I painted on shoe buckles. My thinking here is that Martha Tudor is already broken and repaired, so changing her feet isn’t going to destroy some collector’s value. Unless it’s 100 years from now. In which case I won’t be around. :-)
I quite like the results! I’m not sure who is next in the project list – I have several to choose from. Stay tuned to find out!
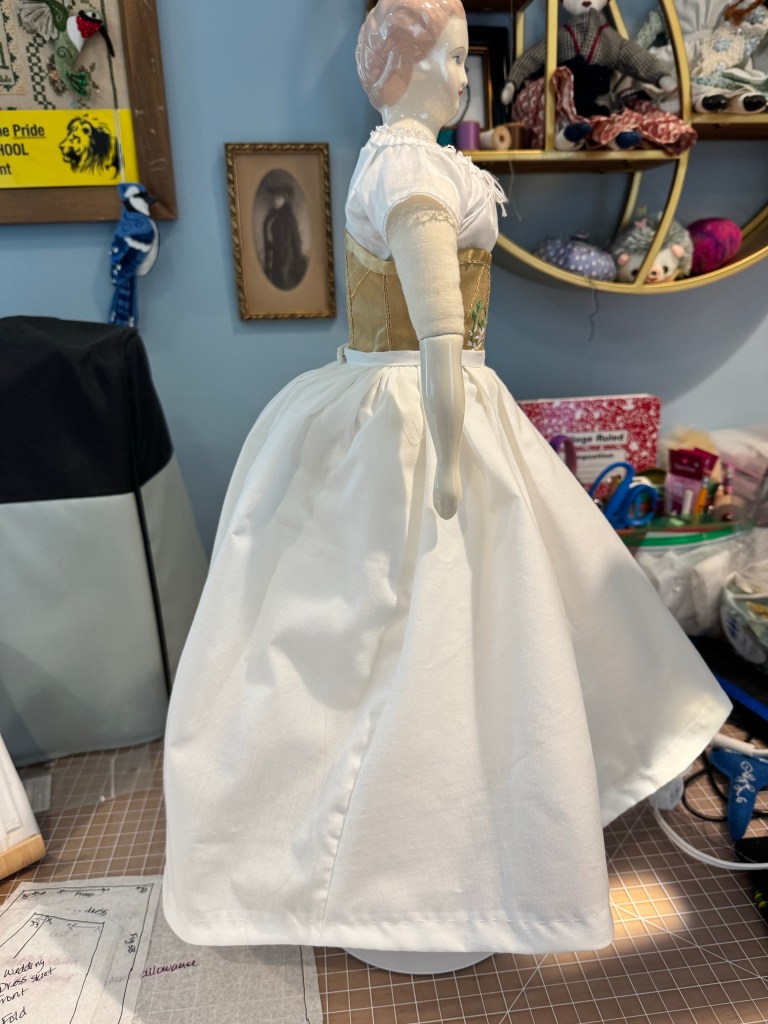
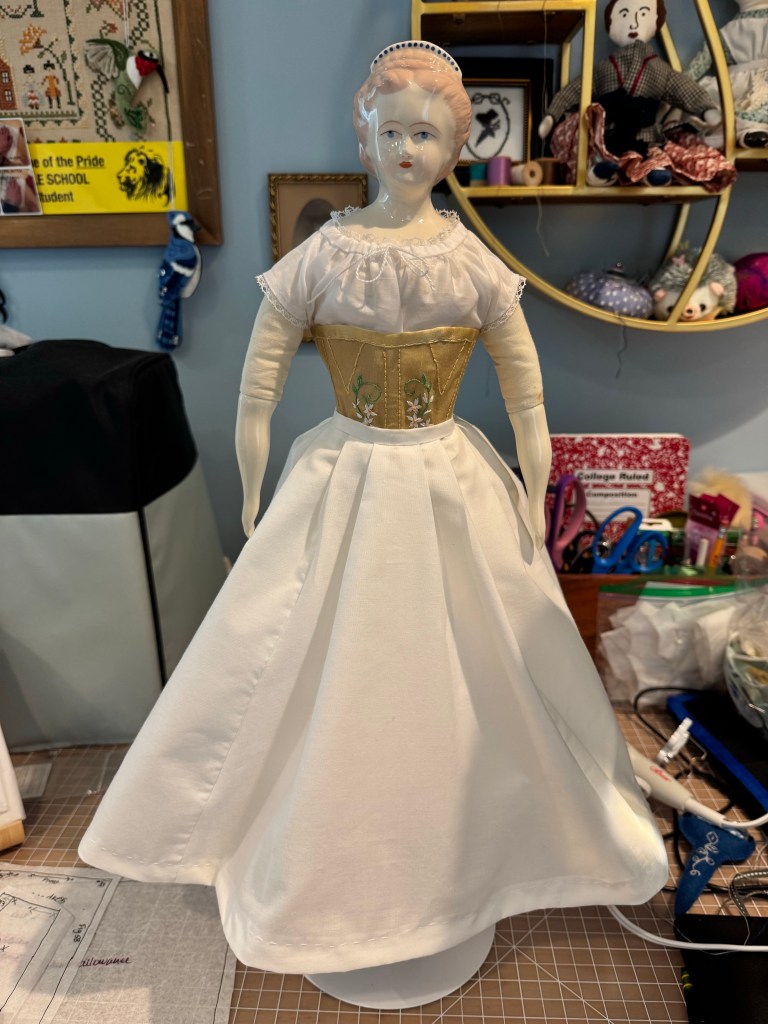
I talked myself off the ledge and I’m not making a wired bustle or cage for Julia. I really just don’t have the time and as I always remind myself, she is a doll. A beautiful doll, but a doll nonetheless.
Instead, I am using the small bum roll I previously made, the petticoat I didn’t love, a second petticoat I made a bit longer than the first, and finally a petticoat made from the skirt pattern.
I think this gives the posterior enough fullness to achieve the look of 1872, while also giving me experience with the skirt pattern.
One thing I discovered from this exercise is that the pattern does not tell you what to do with the side-to-back fullness at the waist. And, the pleats in the front do not take up enough fabric to evenly distribute the front between the two sides.
Now, luckily, I have made human sized clothes with these same design elements but better instructions!
I added two pleats on either side of center front. This serves to take up enough fabric that the side panels of the skirt are actually on her sides. They were previously more to her back.
Second, I used 1/4” pleats on the back and then pressed them toward the center back. These are similar to cartridge pleating except the pleats are pressed toward the back, where cartridge pleats would hang from the waistband. Anyway, that’s what I did.
I used bias tape to create the hem because it is curved. You can see the nice train the finished wedding dress will have. I suppose I will start on the bodice mockup next but probably with paper towels.
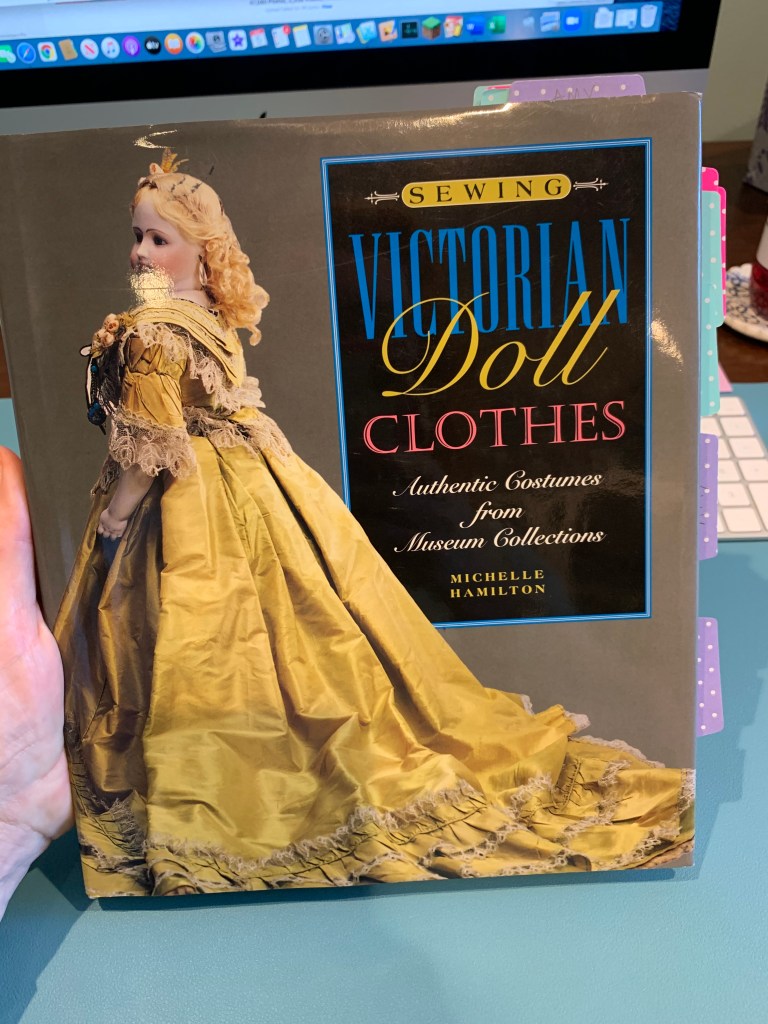
I don’t think you need a picture of Hannah in her underclothes – at this point, dolls in chemises, underbodices, or drawers is just redundant, don’t you think? Suffice to say I used the underbodice & drawers patterns from the 1875 La Mode Illustree that I mentioned in my last post about Emma, and the underbodice fits Hannah much better than Emma’s does. A while back, I picked up a copy of Sewing Victorian Doll Clothes by Michelle Hamilton. This lovely book covers 1840 through 1910, and includes not only a study of the various doll styles available during that timespan, but also some well designed and detailed patterns. The tricky thing is that to make the patterns fit in the book, they have to be printed quite small, and then the user was intended to enlarge the pattern on a copy machine. Since I don’t have a copy machine handy, but I do have a scanner, I went with that method, heh. You can see in the picture all the tabs I have added to this resource – I have a lot of plans for my dolls!
It was really tricky to decide what to make for my latest doll, Hannah. I created her from another Tasha Tudor doll kit, and technically she is named Meg. But she doesn’t look like a “Meg” to me, hence the name change. She is quite short, only about 11 1/2″ tall, which creates some issues based on her diminutive size. The patterns in the book were intended for dolls closer to 20″. But, I’m clever and capable, so off we went.
Inspiration photos
The photo on the left is an original doll made during the 1870s and featured in the book. She is truly lovely and I loved her bustle dress. The photo on the right is an extant dress from the same time period and was another inspiration for me. I had this French blue silk that I had bought years ago. Literally, I have been toting it around for three houses now, so it’s about time I used it. I also recently acquired some gorgeous gold silk taffeta from FarmhouseFabrics.com. They have a great selection of heirloom quality goods, plus they have doll “kits” of fabric and trims in coordinated colors. The gold silk taffeta came from one of those kits.
Hannah is so beautiful!
I think I really need to step up my photo game because I don’t think these are going to do her any justice.
The dress is made in three parts: bodice, skirt and apron. Oh, and there is a bustled petticoat underneath. Each piece is made exactly as clothing in the 1870s was made, so the bodice is lined, darted, and opens in front. If Hannah were bigger, I could have made functional buttons and buttonholes. As it was, she is just too small to even use 1/4″ buttons for decoration, so I used some hematite beads here. The original dress had tiny pleated trims, but Hannah is so small I had difficulty with my patience on the pleated skirt trim, so I decided to forego that. Besides, I loved the cuffs on the extant gown above and wanted to replicate that look. The thing about this era is that you could trim and trim and trim some more, and it would all be ok!
Close up of bodice & watch
I even made her little hat – something I had never done before! It was tricky, but I’m pleased with the result for the most part. I had wanted a feather, but not having one and not wanting to go shopping for one feather, I decided to fray out some silk instead. Her little watch came from Dollspart.com. I don’t know if you can tell, but the original doll had a little watch which is where I got this idea. I was literally obsessed with finding a doll sized watch for about 24 hours, searching jewelry supply websites for something I could make into a pendant for her, so it was a massive relief to find this website.
I quite like the results of this dress project. There are a few things I could have done better or differently, but all in all, I’m pleased. Again, I know where the mistakes are and I have to try to forget them. My sister would tell me they create the character and personality of the doll, so that’s my story and I’m sticking to it!
This project was the inspiration for a planning book. If you make doll clothes (or really any type of big project with a lot of parts or steps) I highly recommend doing this. I jot down different ideas for the various dolls I have on my project list. The list is getting long and really, I had forgotten about one doll, so I thought this would organize me better. I keep the book handy – since I work from home I can keep it right on my desk to grab when inspiration hits me. As I browse various photo galleries, I screen shot or save inspiration pictures and then paste them into the book with the doll I have in mind.
The book I am using is a Moleskin with the elastic band that keeps it closed – necessary since it is getting fat with all the added pictures – but any kind of blank book or journal would work.
This dress along with several others was also part of the impetus for me to redesign my office/sewing room and add a glass fronted cabinet. Now my dolls don’t have to stay in a drawer and I can look at them for inspiration or just satisfaction of my work.
Next time you visit, I will tell you all about Sunbonnet Sue, another interesting doll adopted off eBay with lots of issues that make her special. See you then!