For historical costumers, a cage crinoline is a necessity, but you may ask yourself what exactly that is. Modern lingo for this garment is “hoop skirt” which describes a skirt with hoops in it, typically made with plastic bands and sometimes flounced. But for the original cast, a cage crinoline was a modernization of the crinoline petticoat. A crinoline petticoat was a starched cotton underskirt, often times many layers were worn to achieve the desired bell shape to a skirt. In 1856, however, the cage crinoline was patented and allowed women to achieve the shape without all the heavy skirts! They were made with steel bands – not heavy ones – that were strong enough to carry the weight of one or two petticoats on top, plus the skirt of the dress being worn.
And of course, where fashion for people goes, so goes fashion for dolls. There are remaining doll-sized cage crinolines in private collections, and they are of course on a smaller scale and not as robust as human sized garments. They can be used to fill out a skirt for a doll, or simply for the fun of putting a hoop skirt on your dolly.
Looking at how the originals were constructed, I realized this is a simple project I could make and share the instructions here. My doll is an 18″ Yield House Meg doll, but you can adjust these measurements to fit your dolls.

I found this trim that is 5/8″ wide, 95% cotton and reminds me of Petersham. It’s a nice woven, flat trim that will do nicely. I’m also using some aluminum jewelry wire here but you can use what is available to you. You want something that is malleable enough to bend into your shape but strong enough to hold the round hoop shape once completed. All told, I spent less than $10 on the supplies.
First you need to do some thinking and measuring. For a Yield House doll, the skirt is made from a 36” length of fabric. This results in a nicely full skirt similar to those worn in the 1860s. Consider how tall your doll is and how full her skirt is. You want the bottom hoop to be less than the full circumference of the outer skirt. I chose to make the bottom hoop 30” around. The top hoop should be wide enough to fit over the hips of your doll. Meg here needed 15” for decent clearance. For the middle bone I split the difference and made it 23”
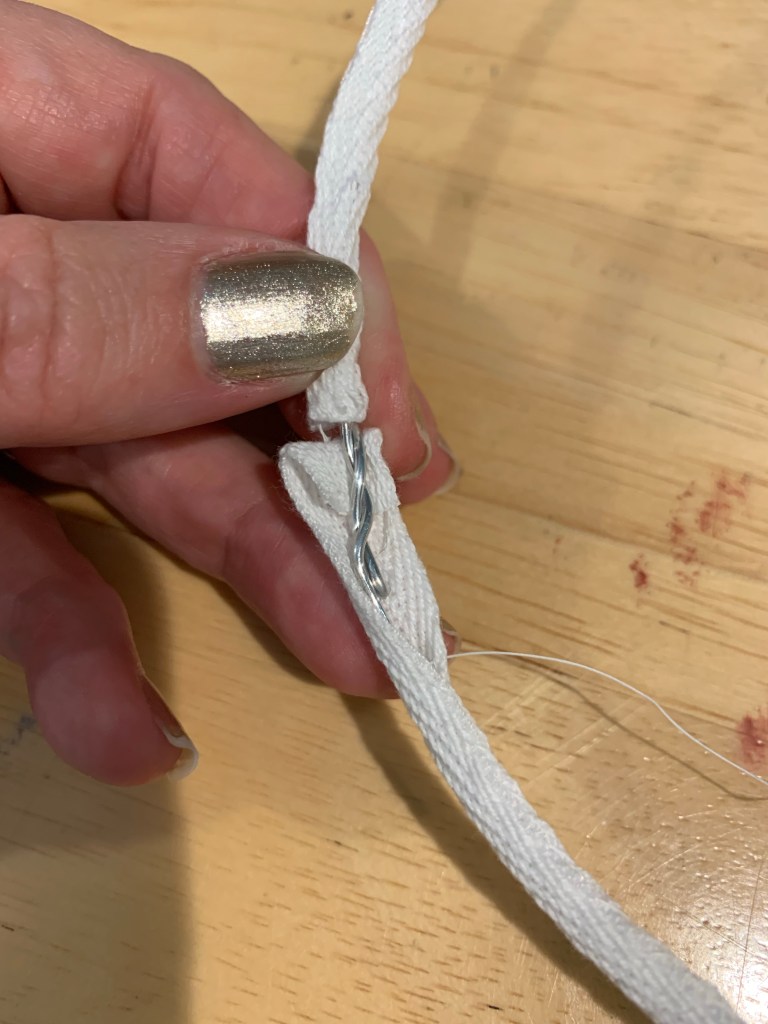
Once you have your hoop circumferences, measure your wire to that length plus 2-3” overlap. Cut the wires and then twist the ends together.

Make all three hoops, then you can measure the tape to cover them exactly. Allow at least 1/2” on either end to turn the raw edges under. Beginning at the joint, fold the tape around the wire to encase it and then whipstitch it closed.

Once you get to the end, tuck the end under and whip all the way around the joint.
Repeat on the second and third hoop until all three are covered. The next step will be to find the quarters on each hoop and place a small mark. This will ensure the vertical tapes will hang straight. these marks will be covered, don’t worry.

Determine the drop of your hoop skirt next. This is the length from the waist to where you want the lowest bone. I chose a 9 1/2” drop so the lowest bone would be near the tops of the doll’s boots. This is about where my life size hoops hang as well. Consider you need 1/2” on either end to tuck under – so add this onto the drop measurement. This gave me a 10 1/2” vertical tapes. Cut 4 of these. Don’t forget to measure the waist of your doll and cut a waistband to that length plus 1”.
The hoops should be equally spaced on your vertical tapes. Don’t forget that you will attach them at the top and the bottom. I measured and pinned the placement for the first and second hoop. The hoops attach at 3”, 6 1/2”, and 10” (the bottom).

Beginning with the lowest hoop, wrap the tape around so the raw edge will be enclosed. Stitch that in place. Repeat at all four quarters.
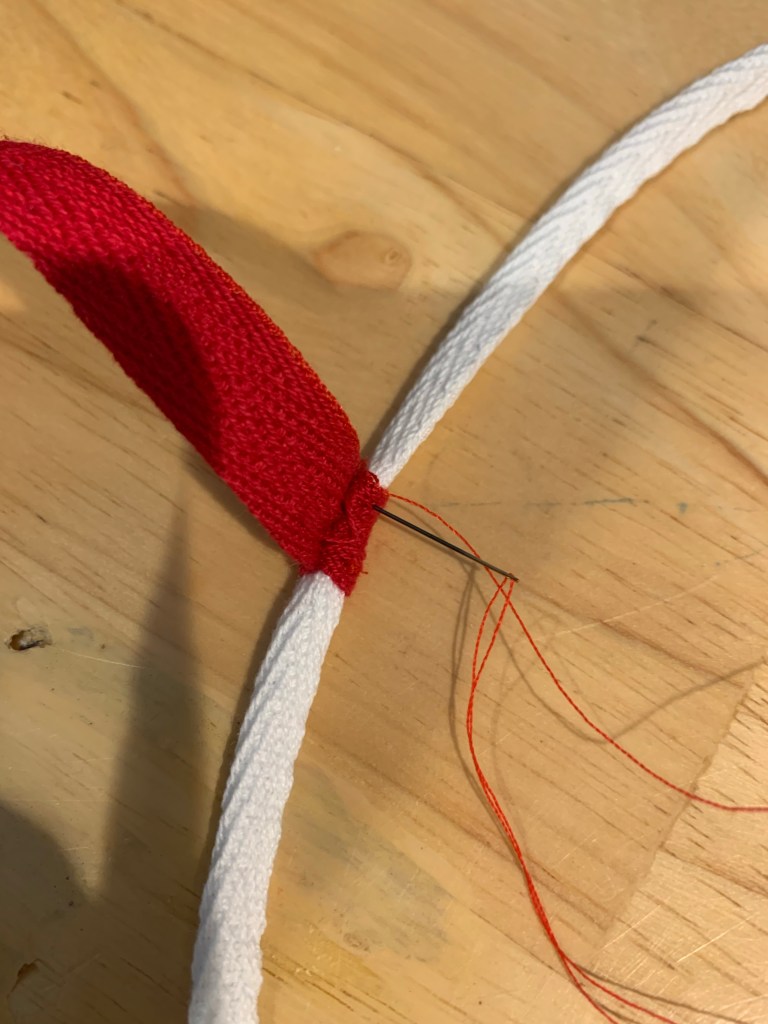
Moving to the middle bone, fold the tape over the hoop so you can stitch through the vertical tape, through the hoop covering under that, then out the vertical tape. You aren’t stitching behind the hoop wire, just catching the tape wrapping it. Repeat on all quarters and then move on to the top hoop.

Once all the hoops are attached to the vertical tapes you are ready to attach the waistband. Turn the ends of the waistband under and stitch so the raw edges are inside. Remember, the waistband is the measure of your doll’s waist plus 1”.

Find the quarters of the waistband, place a small mark, then pin the tapes in place.


Stitch these in a square that will secure the tape and keep the raw edge inside. Once that has been done you can add a hook and eye or thread bar. You are done!
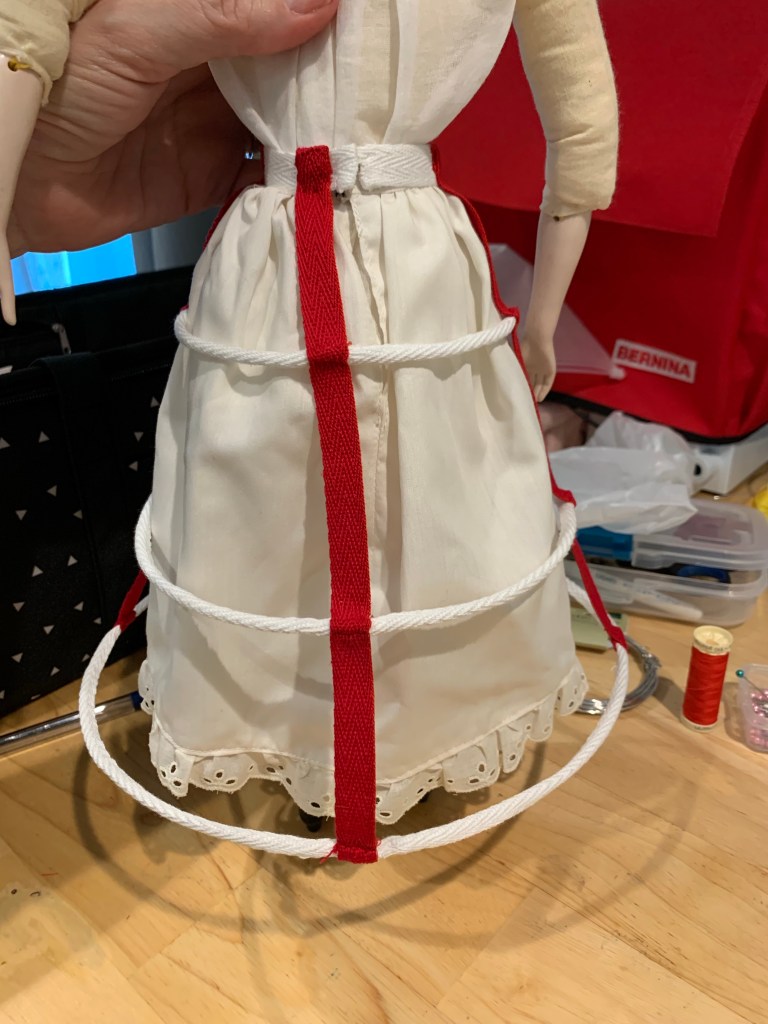

My doll happens to have a modesty petticoat under her new cage crinoline and then a fine starched cotton petticoat over it. I’m making a silk skirt for her next and this should do nicely to help it hold it’s shape.
All told I used less than the full amount of wire I purchased and less than a full spool of the white tape. Had I made the vertical tapes in white I might have used close to the full spool. I hope you found this little article helpful in demystifying the cage crinoline and will feel confident in trying one for yourself!
Supply List
5/8” Petersham or similar woven cotton flat trim (don’t use twill tape as it will ravel)
2 1/2 yards white
1/2 yard red (to make in all white add this to the length above)
Aluminum jewelry wire – 16 gauge – 72”
1 size 1 hook
Needle and thread to match
Ruler or tape measure


Leave a comment