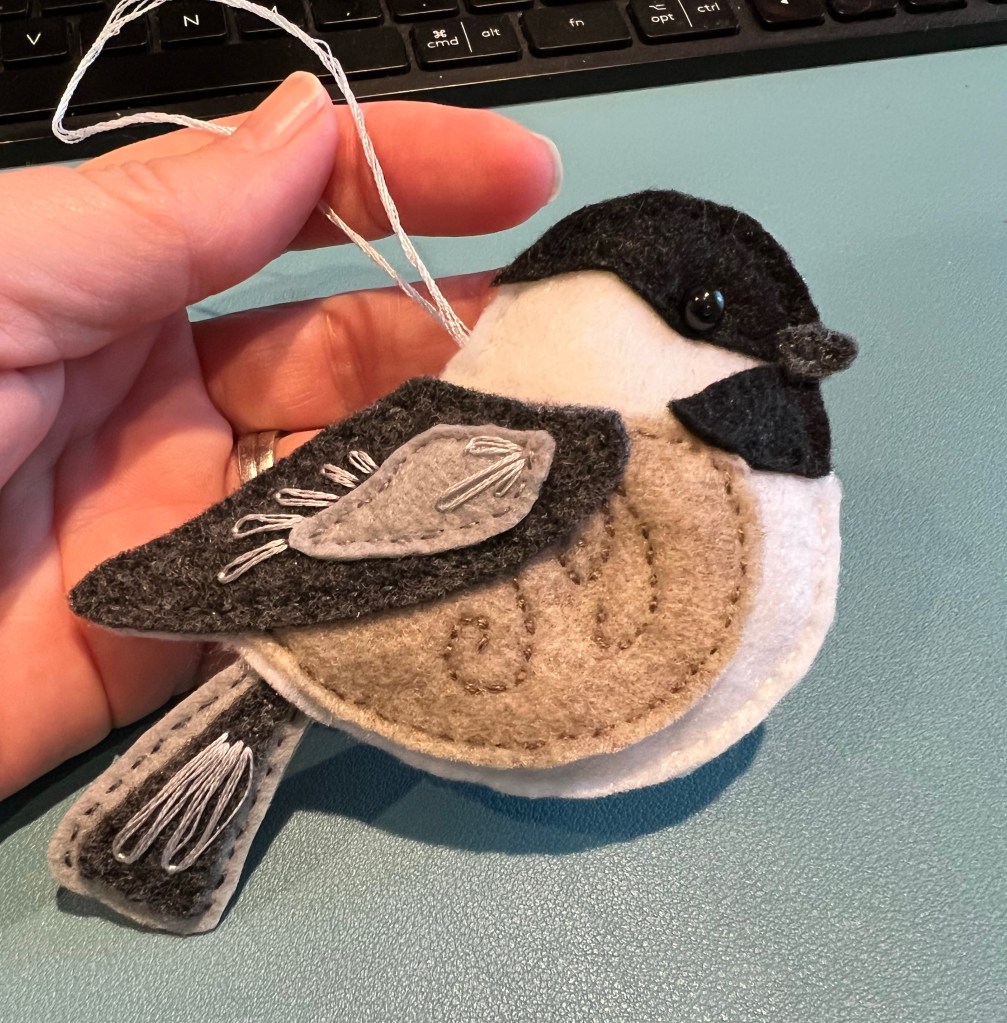
The next bird in the Squishy Cute line that I made recently is this beautiful hummingbird.
My mother really liked it and it was pretty simple to make, so double win. If you decide to try some of the Squishy Cute patterns, I recommend tracing the pieces onto the felt rather than pinning. For dark colored felt use chalk. This particular one calls for a black sequin and a seed bead but I didn’t have a black sequin. I used a black button.
Find them on Etsy here. They have more than birds, too.
I threatened you with a tutorial on how to make these cute $2 craft boxes into hat boxes for your dolls, and here it is!
Naked boxes
To make these specific hat boxes (also called band boxes) you will need 1 larger sized piece of fancy wrapping paper – 18×24 is plenty. The reason for this is the outside measurement is greater than 12” which is the standard large size you will find at your local big box store. Original Victorian hat boxes came in many different shapes and sizes, but the ones we are most familiar with today are the round variety. I found reference to an enterprising young woman who created beautiful boxes covered with wallpaper so I tried to find papers that looked a bit like doll-sized wallpaper. Unfortunately I lost track of the website where I read this and can’t give you more detail.
If you are looking for a source of large format paper, you might be interested in the site Mulberry Paper and More. It’s a bit overwhelming at first, but they have an amazing selection of papers that would be perfect for this use case. This tutorial is being shown with Japanese Chiyogami Yuzen paper. I’m visual so there will be a lot of pictures to illustrate this project.
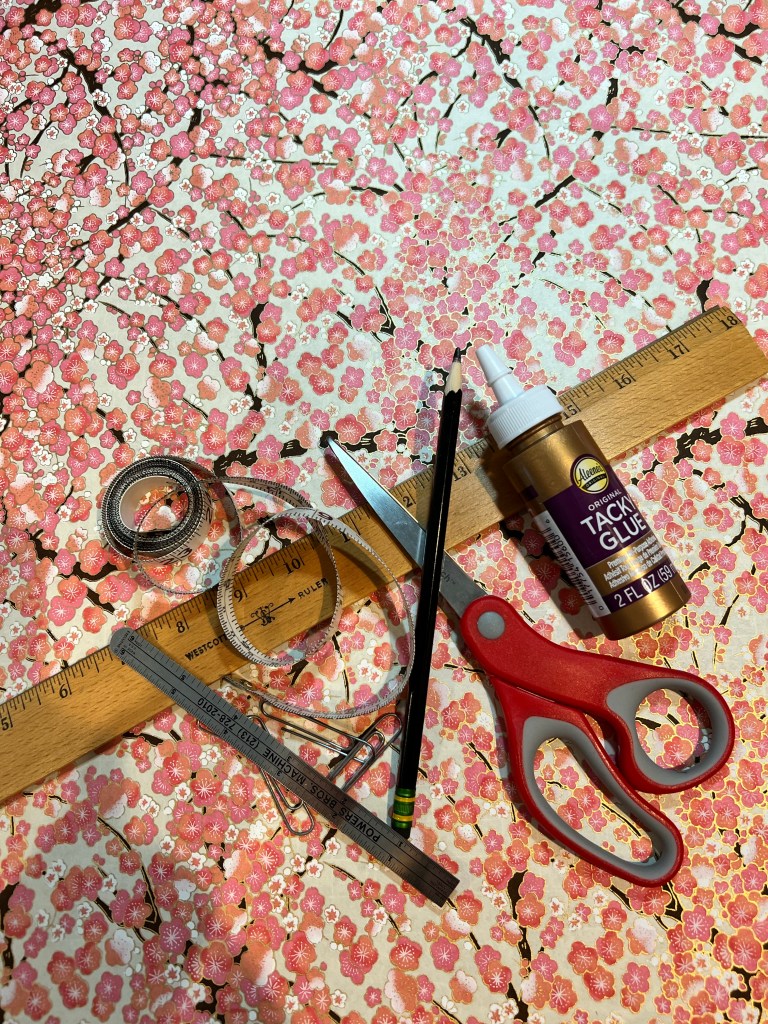
Supplies
You will need:
Tape measure
Pencil
Scissors or exacto knife
15” ruler
Sewing ruler for small, precision measurements
Craft glue
Paper towels
Craft paper
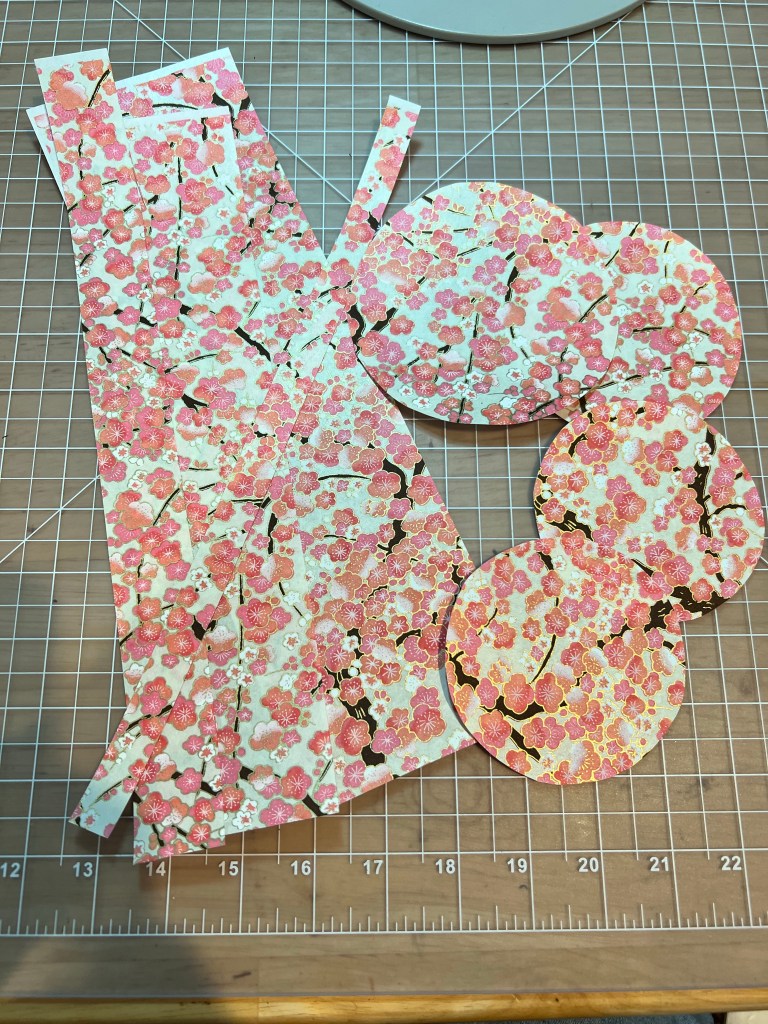
Measure your box carefully. Allow for overlaps and edges! These boxes from Dollar Tree are 3 5/8” diameter on the lower box portion and 3 7/8” diameter on the lid. The circumference is equally important. Use your tape measure to find the circumference (outside and inside) plus a 1/2” overlap. I wound up cutting the following pieces:
(1) 12 1/2” X 3 5/8” rectangle (box outside sidewall)
(1) 11 3/4” X 2 1/2” rectangle (box inside sidewall)
(1) 13” X 1 1/4” rectangle (lid outside sidewall)
(1) 12 1/2” X 5/8” rectangle (lid inside sidewall)
(2) 3 5/8” diameter circles (box inside bottom and underside)
(1) 4 1/2” diameter circle (lid outside)
(1) 3 3/4” diameter circle (lid inside)
Each piece was labeled so I would know where they went.
Pieces
Once you have everything cut the assembly goes quite quickly.
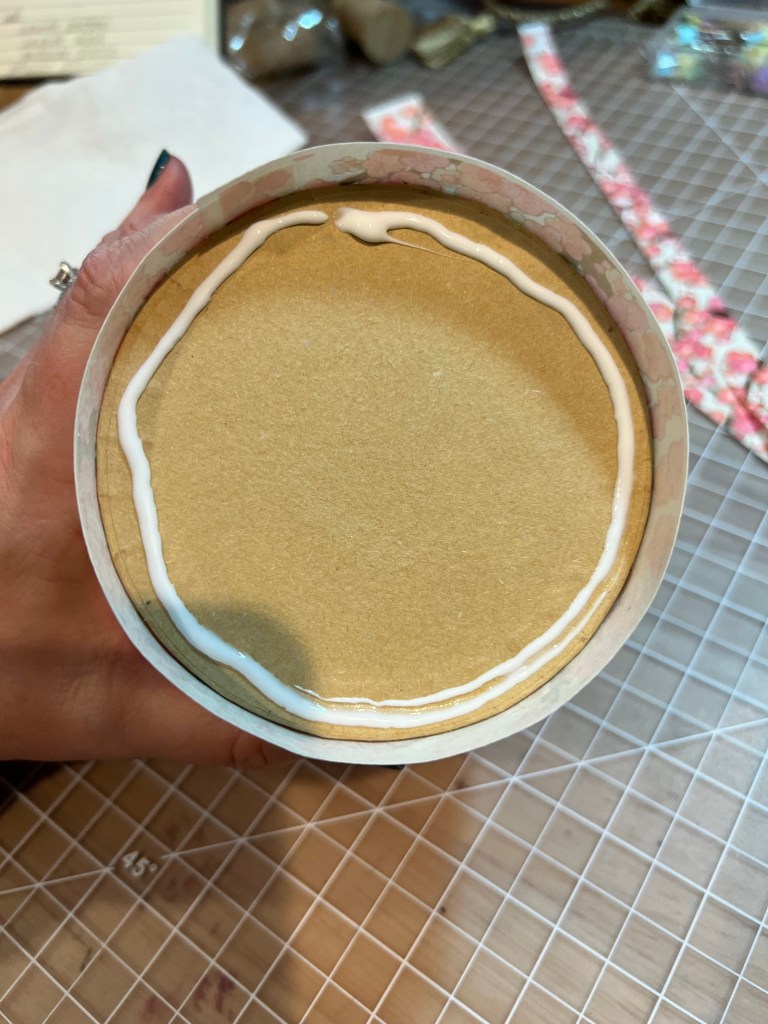
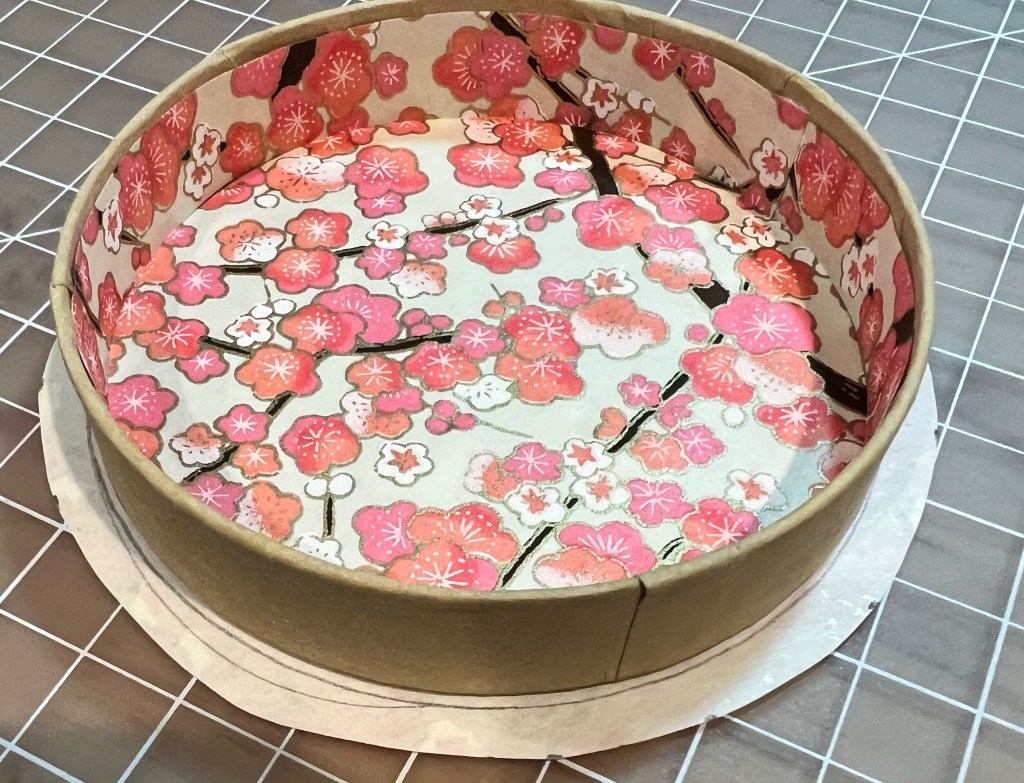
1. Glue in the box inside bottom circle (for fun you could make this piece from a newspaper print which was done in the past)
Inside bottom
2. Glue in the box inside sidewall. Be careful to overlap and press out any excess glue. I forgot to take a picture of this step, sorry!
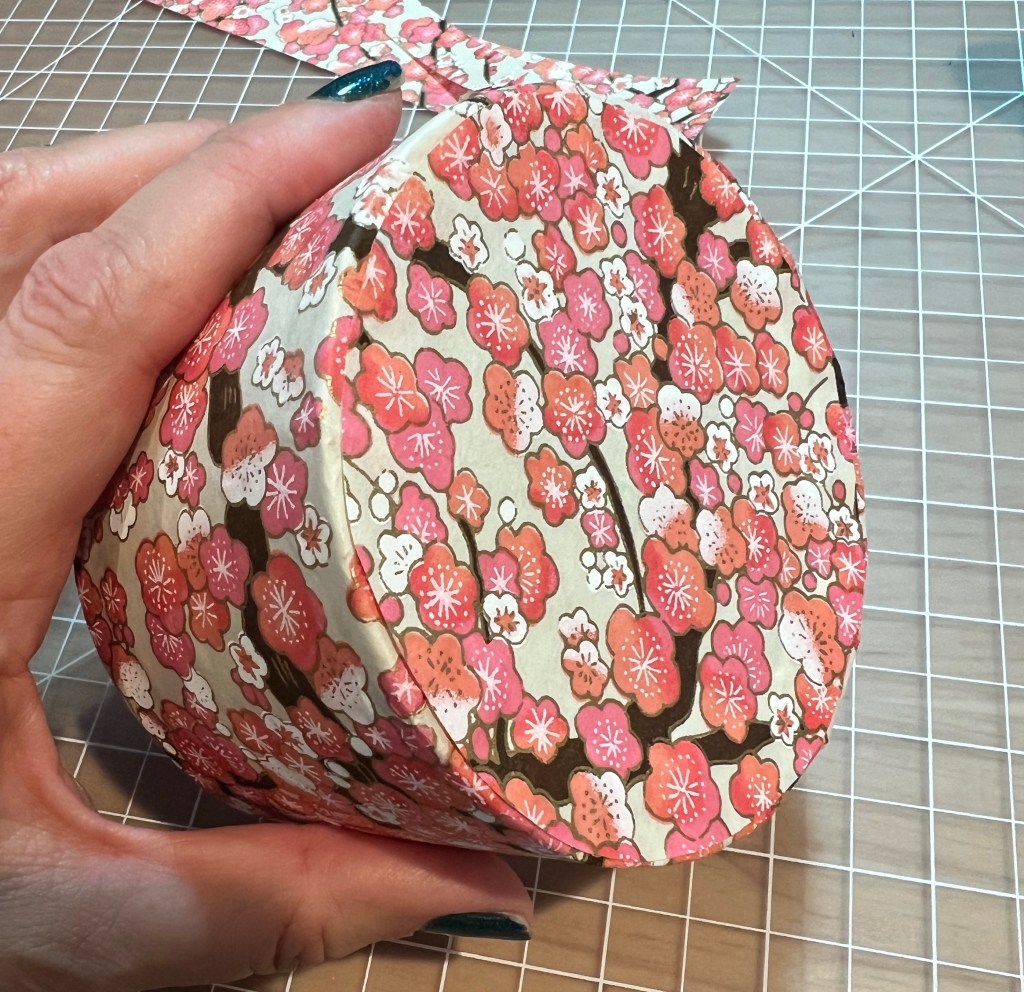
3. Glue the outside box sidewall. This piece should extend past the box edges on both top and bottom. These extended sections will be folded down.
Lower edge extension
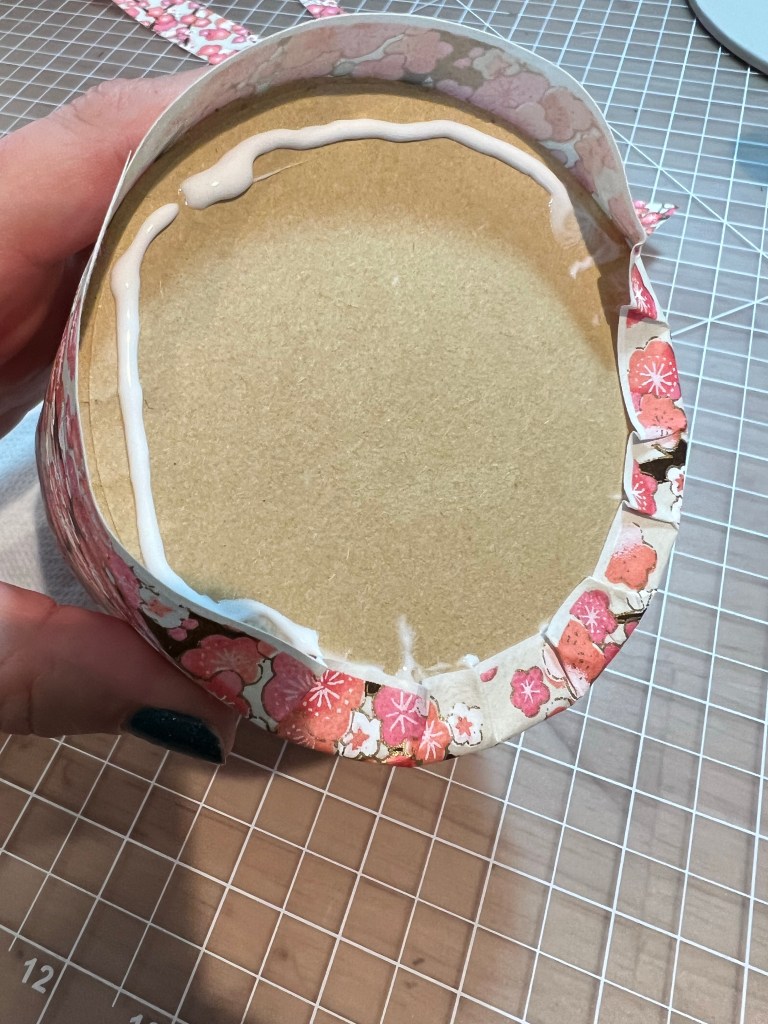
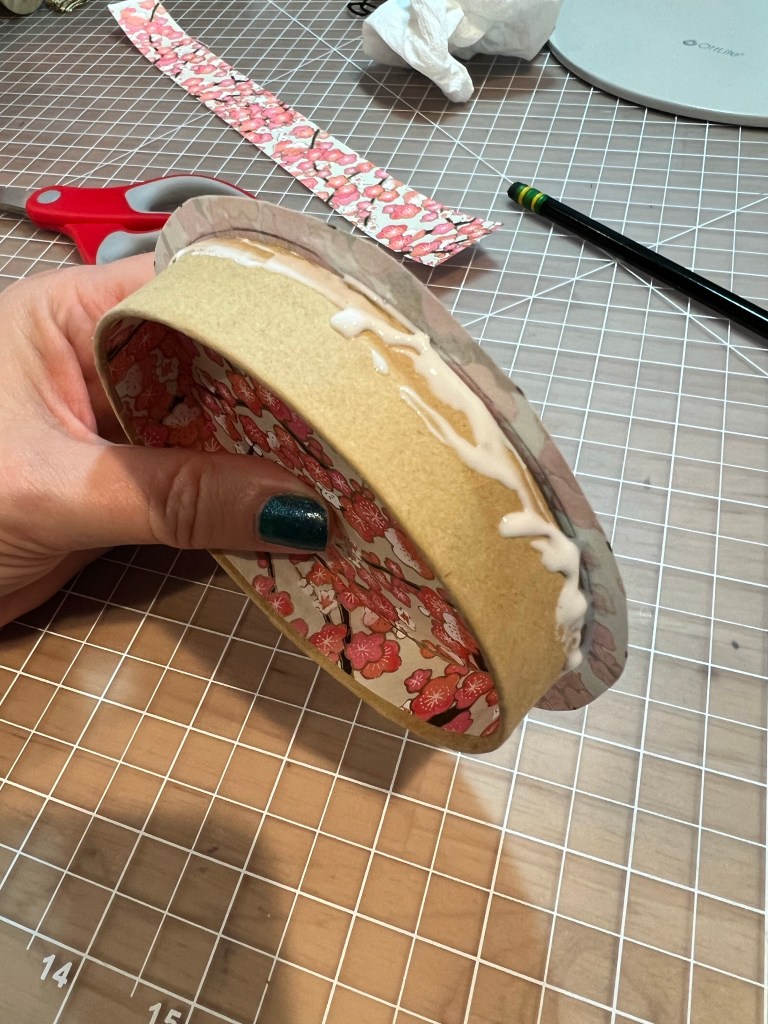
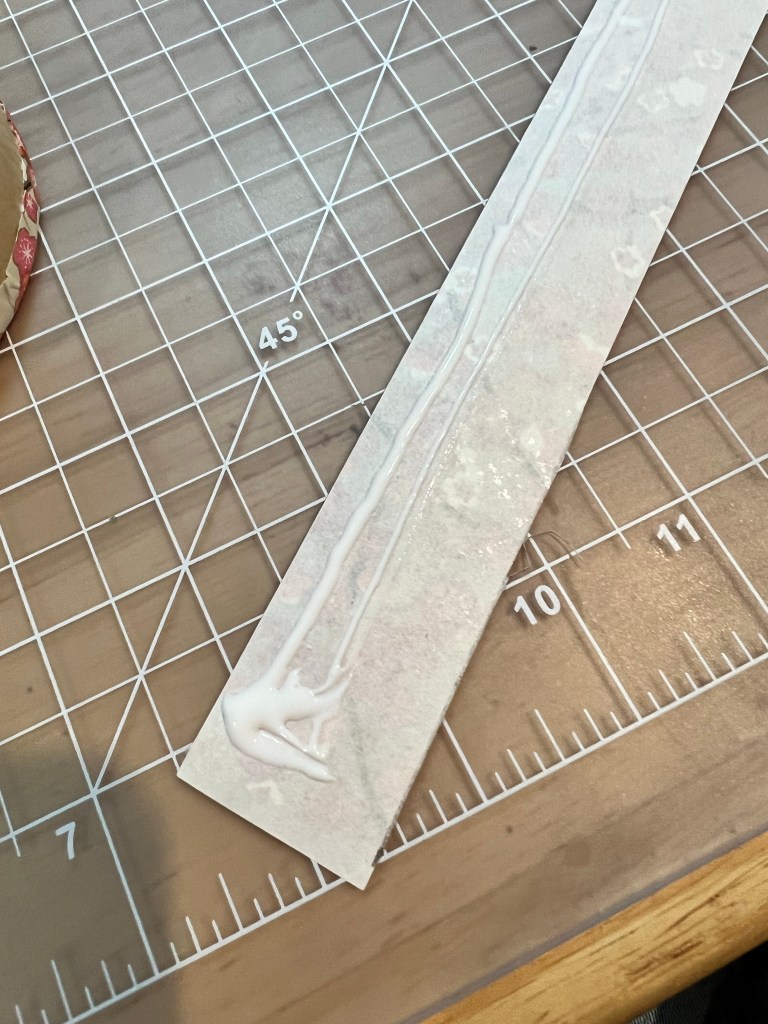
4. Run a bead of glue where you will fold down the extended section on the bottom of the box. Then press down the paper into the glue, making overlapping wedges so the paper confirms neatly to the round shape of the box.
Lower edge gluing & folding
When it is folded down, press the paper flat firmly so the glue squishes into all the places it needs to be, and then use a paper towel to wipe off any that oozes out from under the paper.
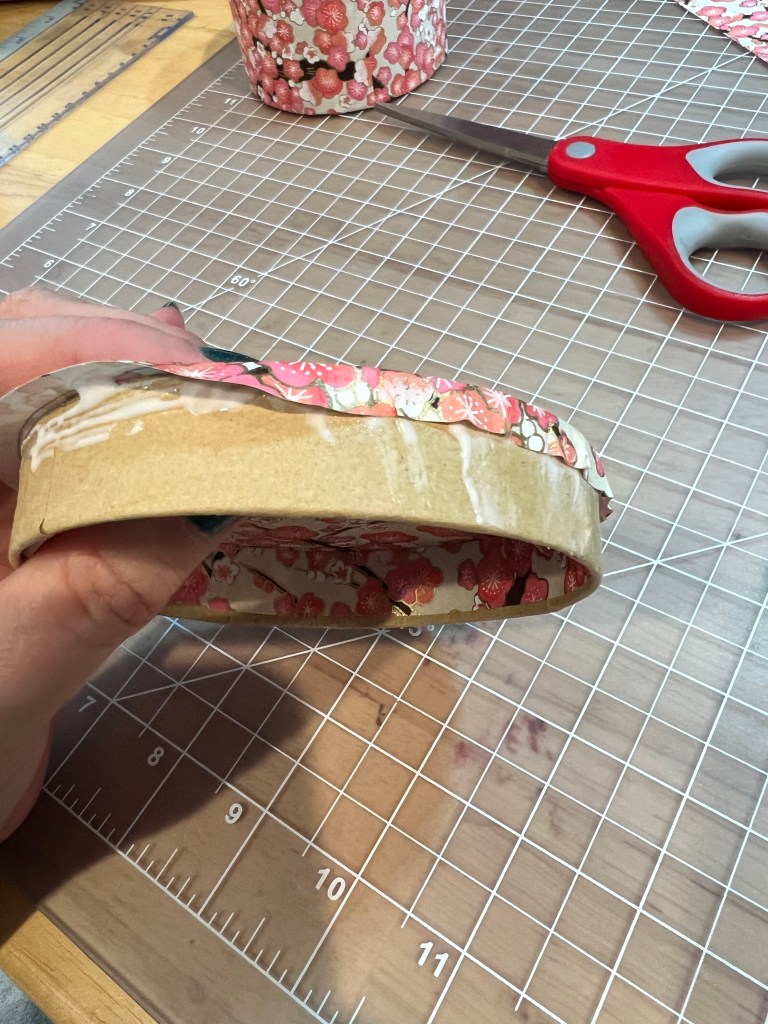
Upper edge extension
On the upper edge, run your glue onto the paper extension. This piece is going to be folded to the inside of the box. You may want to prefold it before putting the glue. Once you have run the glue, fold the paper inside the box and press, making sure it conforms to the shape and working the glue into place with your fingers. Wipe away any that oozes out.
5. Turn the box upside down and glue on the circle to the underside. All the folded edges should be covered by this circle. Set the box piece aside to dry.
Bottom of the box
The lid will follow a similar method, except in a slightly different order.
6. Glue in the inner circle to the lid.
7. Glue in the inner lid sidewall.
Lid inside
8. Glue the outside lid circle. It may be helpful to trace the lid onto the plain side of this circle so you place the lid right in the center.
Lid centered in the circle
Next, place the glue onto the box side and fold down the paper around the circle of the lid, again working the glue evenly and wiping off any excess.
Lid edges
9. Glue the outside lid sidewall. To do this, put glue on only half of the paper – the other half will be folded inside the lid.
Lid sidewall
Place the paper edge just a smidge under the top edge of the lid.
Lid side placement
As you did with the box sidewall, carefully fold the paper edge to the inside. Press firmly and wipe away any glue that oozes out.
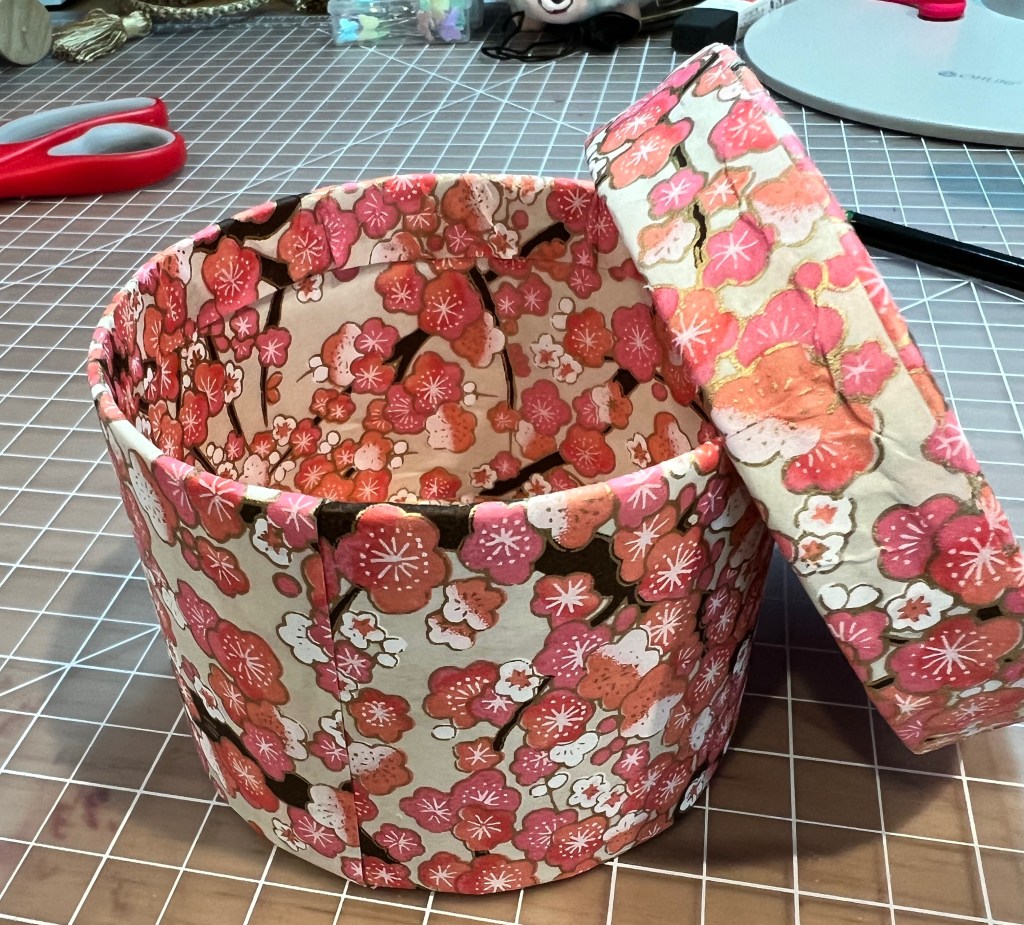
Set the pieces aside to dry thoroughly. The lid will be tight at first but as you use the box it will ease. Use the box for hats or any other storage.
Your finished fancy box!Filled with doll treasures
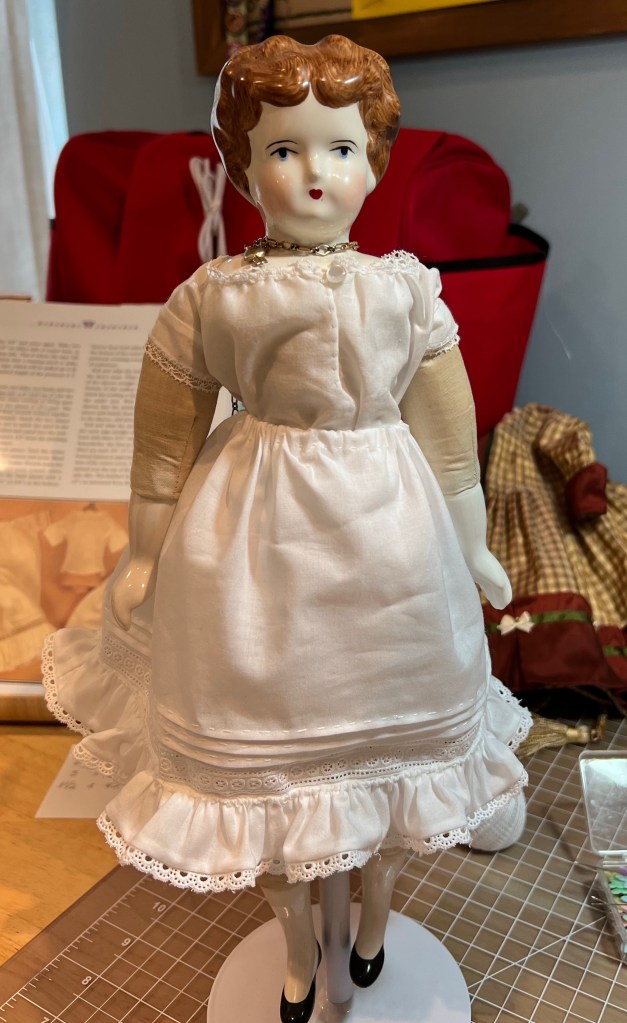
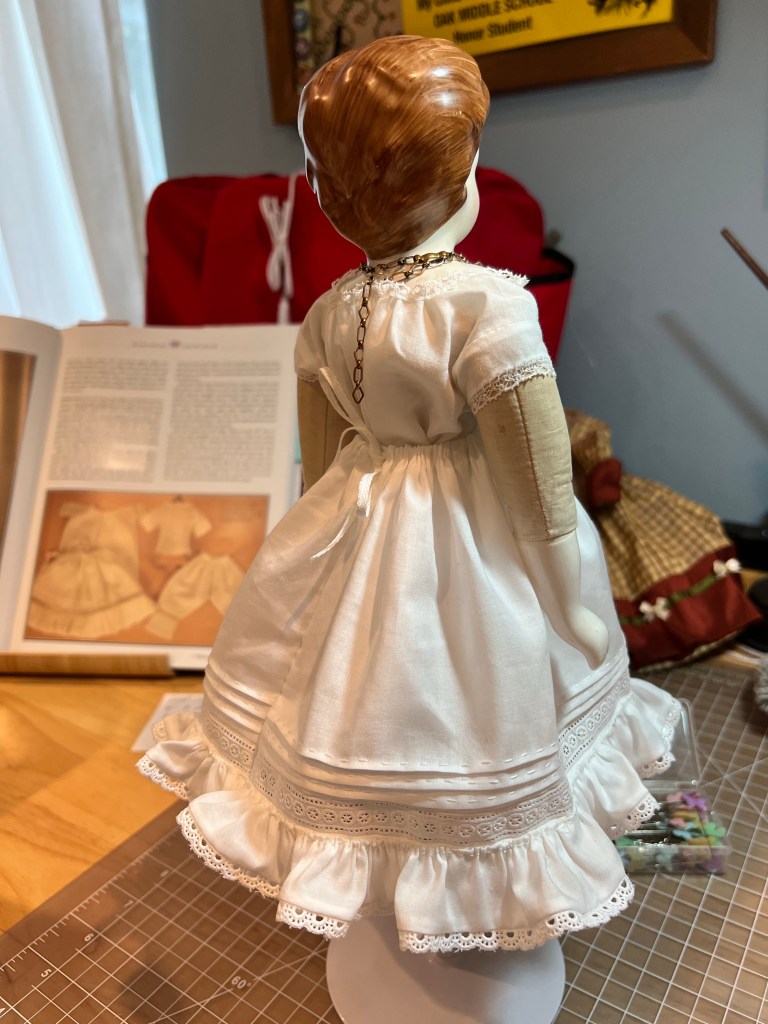
The third installment of Caroline’s undergarments is this ruffled petticoat.
You will see it mirrors the three tucks seen on the drawers and also the insertion lace. The lower edge of the petticoat is made of a doubled piece that sandwiches the lower edge of the insertion, making everything nice and clean on the inside.
The ruffle is made by gathering on a narrow cord. Depending on the size of your doll, you could use pearle cotton or even some embroidery floss if you don’t have a narrow enough cord. The gathered ruffle is then stitched onto the lower edge.
The waist is gathered with 1/8” twill tape inside a casing. It calls for worked buttonholes but for some reason I am better at eyelets so that’s what I did. The benefit of a gathered waist here is that the petticoat can change shape for different eras. Right now I have much of the petticoat to Caroline’s back since I’m making her a bustle dress, but I could easily reshape this to the nice round shape of the 1860s.
Up next will be a fun one – a boned hoop skirt and then her corset. See you again soon!
I was at Dollar Tree the other day. I always browse the craft section because sometimes they have fun stuff.
Little round boxes
They had these 3.5” diameter round paper boxes. I don’t know what you see, but I see doll sized hat boxes! Stay tuned for a paper crafting project. And then stay tuned for a doll hat project haha.
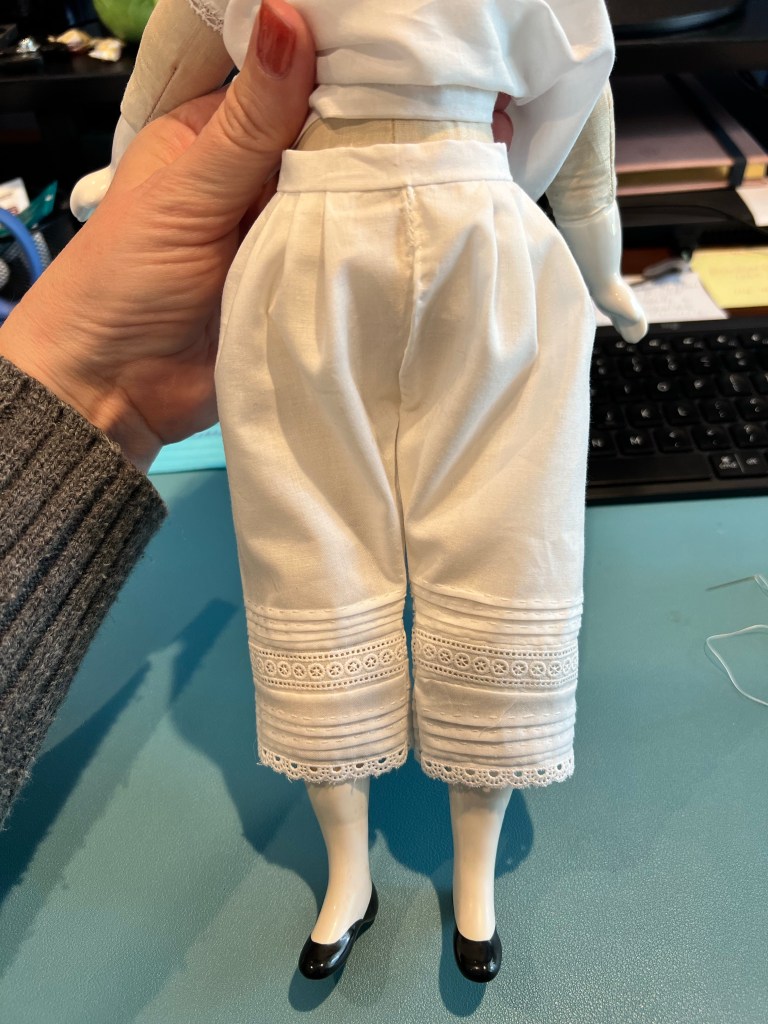
My Gram used to say “ah loverly loverly” sometimes when she saw something pretty or made her happy. Today I am saying loverly loverly about the latest finished item for Caroline.
A full set of drawers!
What with various demands on my weekends I finally got some “me” time Saturday and finished these drawers. I just love how they turned out! the front is pleated to the waistband for a tidy appearance.
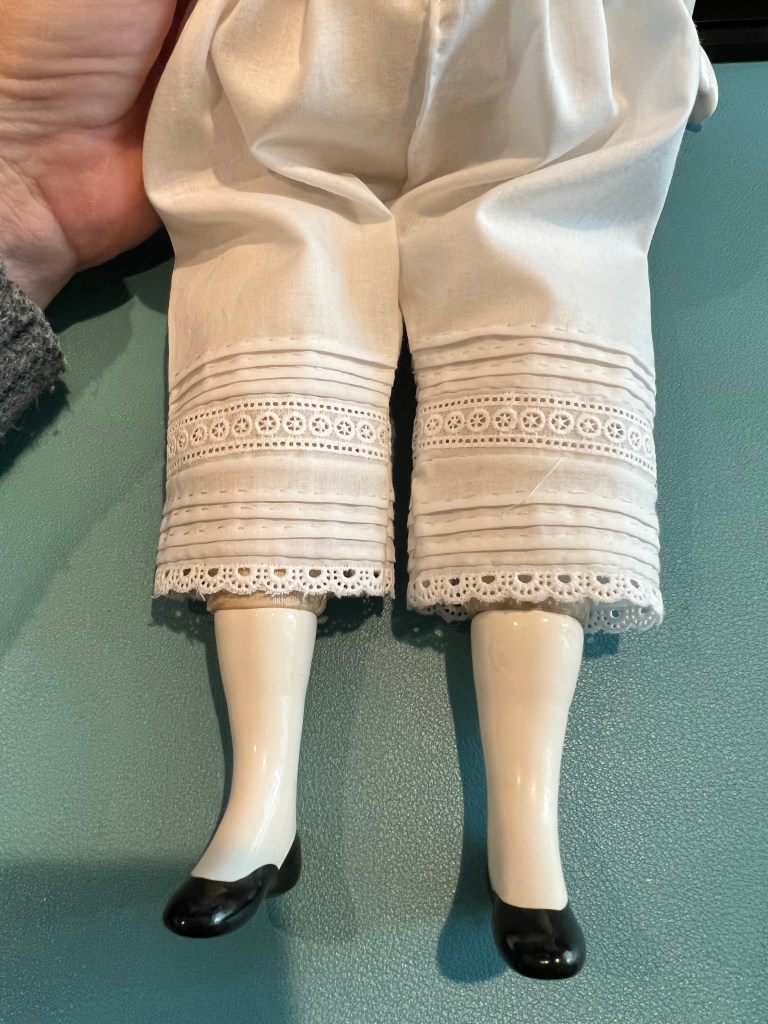
Lots of tiny tucks
As you can see here, I used Swiss cotton insertion and edging. I felt like they would give me a better result and I’m very pleased with how they look.
And here is the back where the fabric is gathered to the waistband. Also a worked buttonhole and antique mother of pearl button.
The next piece of the project will be the petticoat. See you again soon!
I was watching an eBay auction recently of a doll listed as a 19th century antique. I screenshotted all the posted images because she was lovely and I found inspiration in the clothes perhaps for Ruby.
The doll was only $9. How is that even possible? Poorly listed? Not photographed or described well?
I threw a bid in there and promptly forgot about it. Until I won it. Whoops! At least she wasn’t hundreds of dollars.
As yet unnamed
When she arrived I discovered she is the largest doll in my collection at 25”. She is lovely and I’ll have the ability to study her clothing at my leisure and close up. It looks to be silk and machine sewn. There’s a bustle and drape, putting it into the 1880s fashion wise. Her foot is broken but I really don’t care.
My accidental $9.00 treasure could use a name. Have a suggestion?
Do you make goals for your sewing projects? I shared at one point that I have been using a project book to keep track of the different dolls I have and what needs to be done for them. The current book is a 8.5×5.5 inch Moleskin type book and it’s getting filled with notes!
Some pages have pictures glued in, while others have my janky sketches of ideas. I say janky because I am NOT an artist but I took one life drawing class so I can at least draw a body or dress – don’t ask for realism or details, and definitely no hands haha.
My idea of drawing
On the front page of the project book I have jotted down some ideas for 2023 sewing projects.
Caroline: drawers, petti, hoop, corset
Dora: practice making new body, make corset as part of torso
Screen shot of a doll on eBay with a corset body
Ruby: make new body, repair what I can, full wardrobe, research Harpers Bazar images 1888
Doll Quilt
Hummingbirds – Mom and A Ruth
We shall see if I stay on task this year. This is a very ambitious project list! Rest assured, I will share my progress with you here and on Instagram. Stay tuned!
Sometimes, mistakes are needed to make you slow down, pay closer attention and really focus on details. When I made the lovely but too-small drawers recently I spent a lot of time thinking about how I’d do them differently. I realized I’d made some errors on the tucks. I didn’t like the way the insertion turned out. (My doll Mernie however, loves her new drawers lol.)
So after many side projects and time to consider things, I’ve started a second pair of drawers for Caroline. I tried on her the 1875 drawers I made for Emma a couple years ago and then adjusted the waistline per that pattern. No, the drawers aren’t exact to the book I’m working out of, but it’s not like there are Doll Drawers Police ™️ who will be checking them haha.
I decided to go with Swiss cotton insertion and edging. It’s more sturdy for this tiny project and I think it still gives a lovely result. Sadly this is only one half of the drawers and I’ve been terribly busy so not gotten a chance to make the other half. Soon, I promise! Check out Farmhouse Fabrics, the source of this lace, fabric and much more that I use for doll clothing.
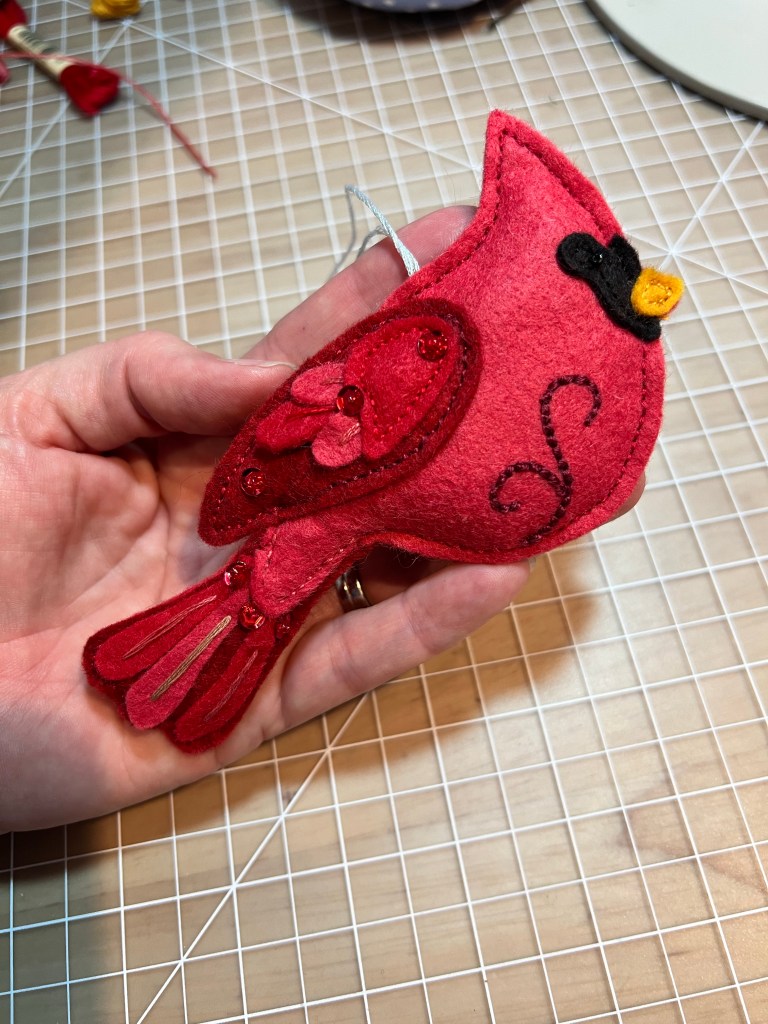
Here is bird number two in the flock, a gorgeous cardinal. I found the National Nonwovens felt over on Etsy.
Victorian pin cushion
This one is a pin cushion. I found the site Tag Sis, You’re It recently which features many lovely Victorian tutorials. This particular project is in their Historical Accessories section. I altered the design from the original magazine reprint to suit my taste. It’s made from wool felt and I think the next one will be silk. It came together in about 3 hours of stitching off and on. I freehanded the design but you can try transferring it with your preferred method.
I promise I will be getting back to the Follow Along of Caroline’s wardrobe. I just get sidetracked sometimes…oh look, sparkly!
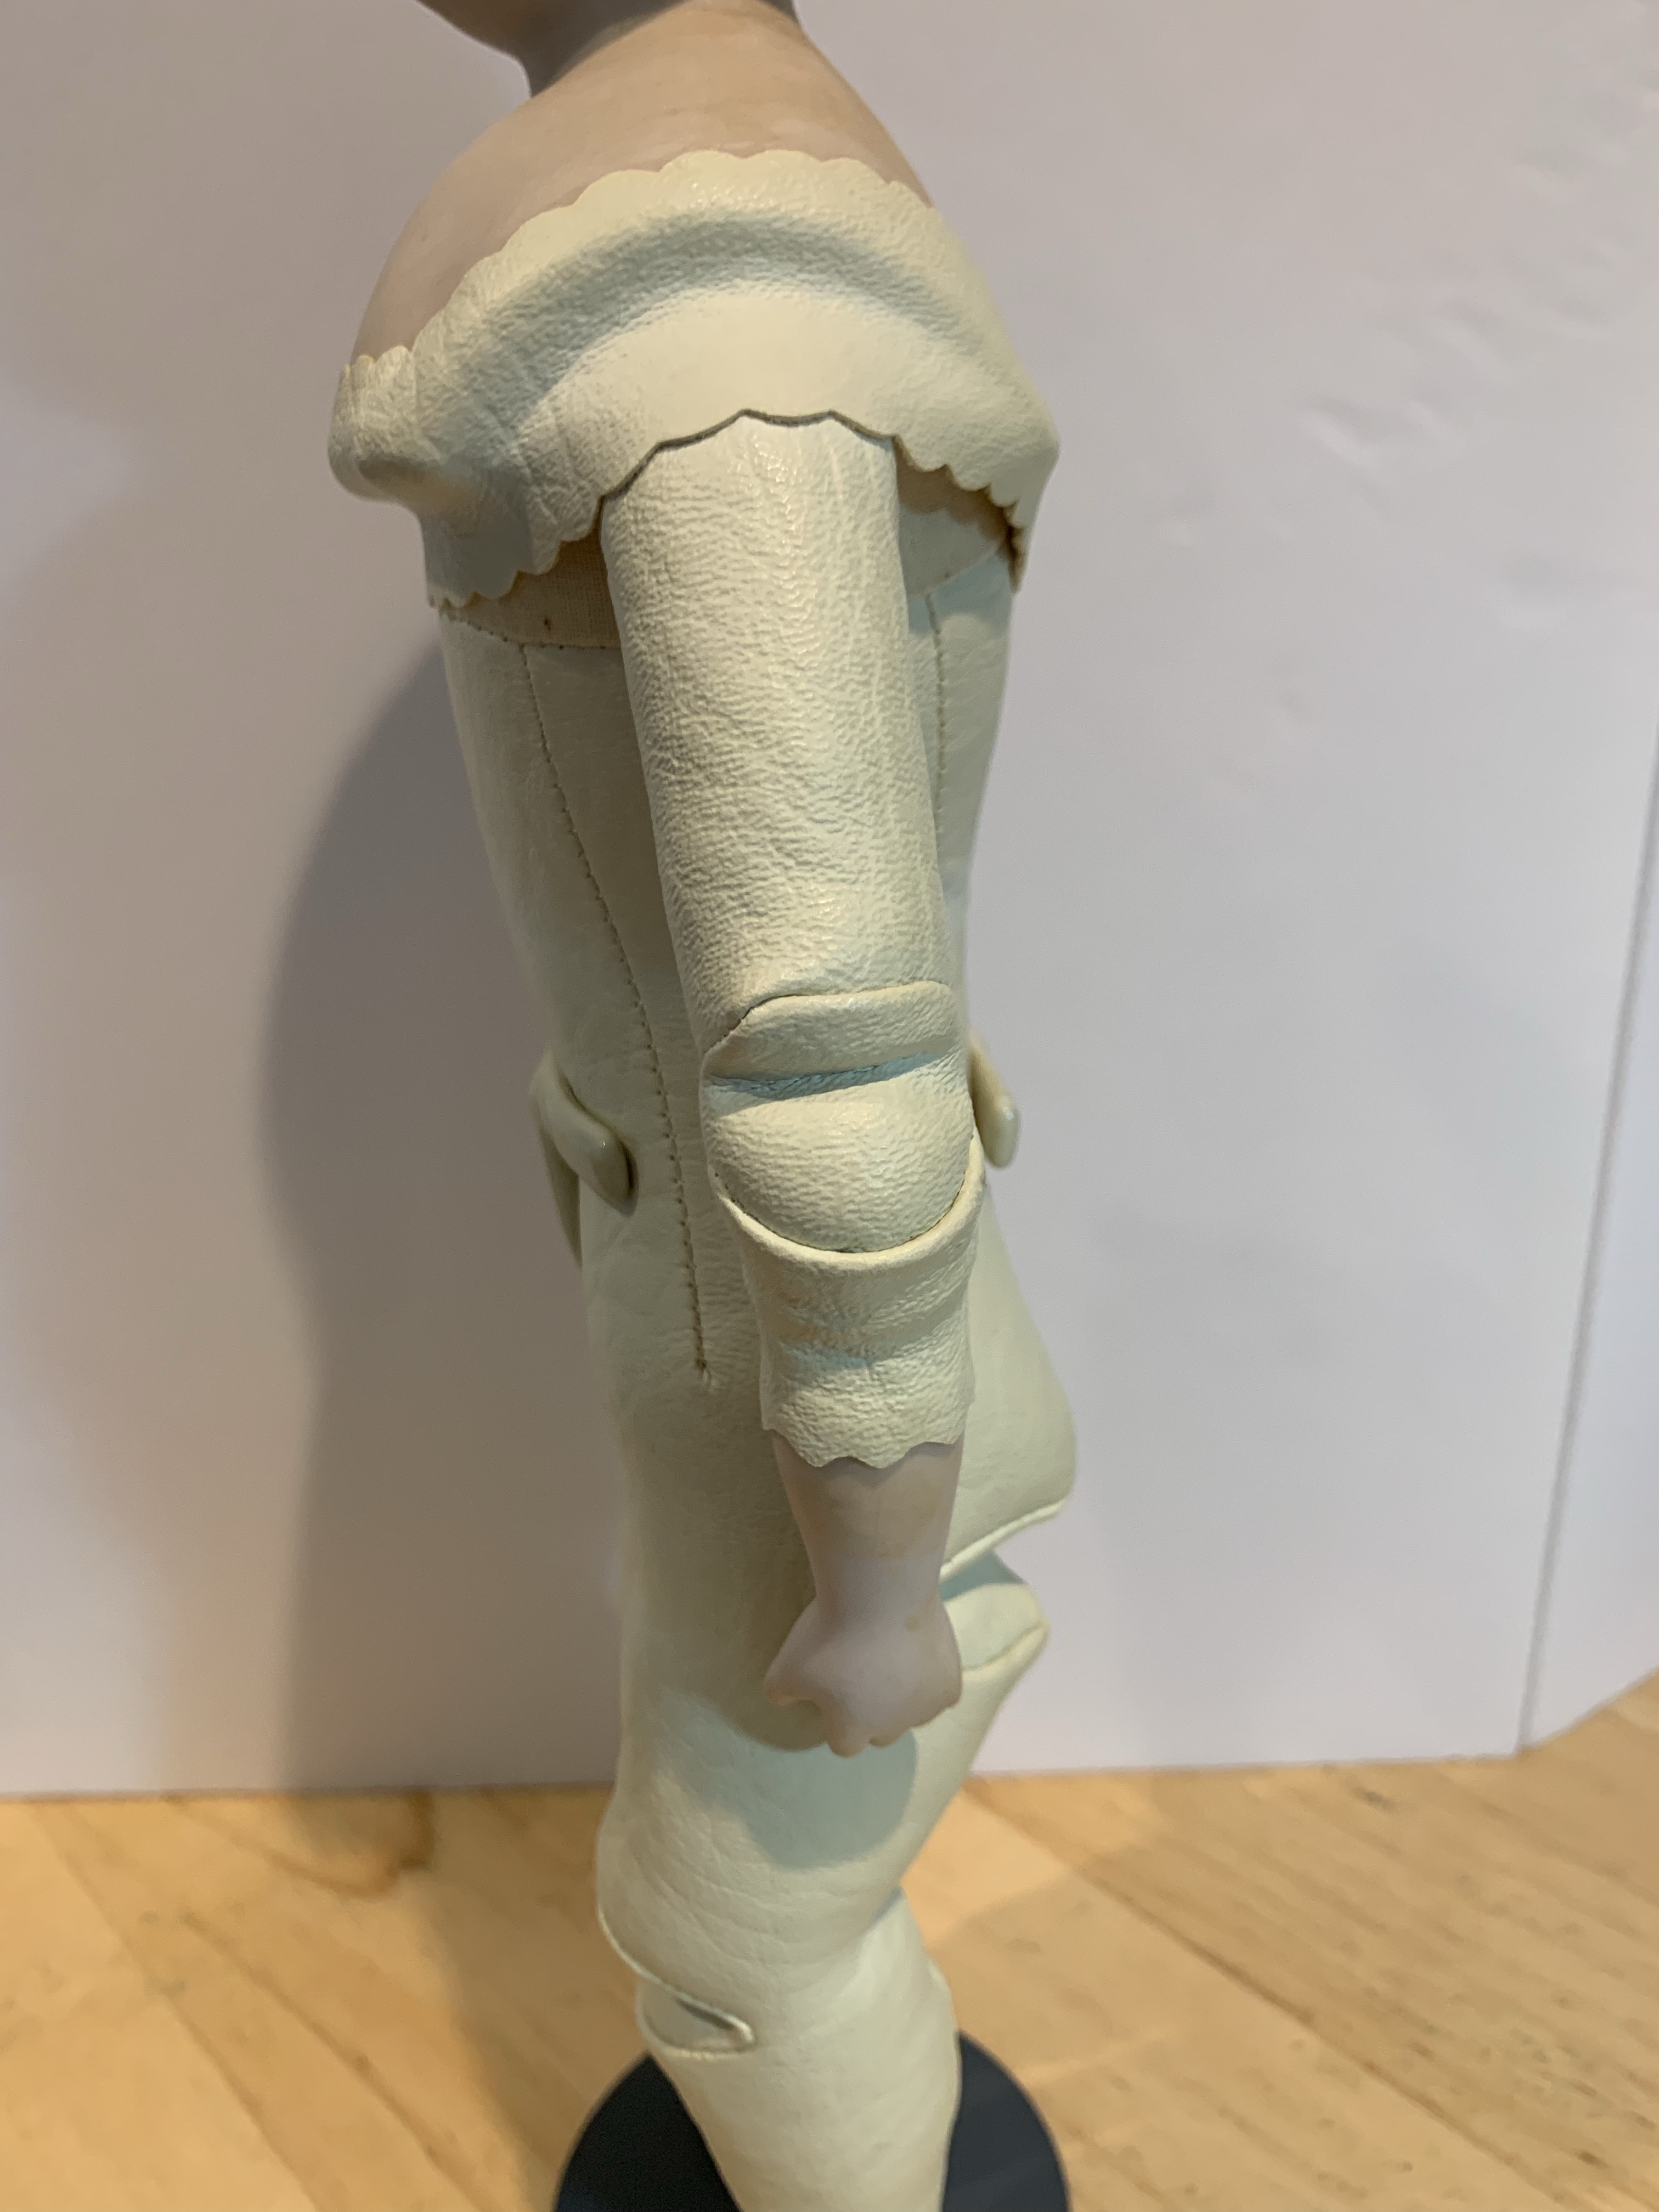
In my haunting eBay and learning about vintage dolls, I found many references to kid-bodied dolls. These doll bodies were made with kid leather instead of cloth. Then one day, I saw this artist’s reproduction made with a kid body, for the right price, and I had to have her.
Poor naked Lydia
She came with nothing, completely naked, poor love, and has been standing there in her altogether for quite some time now. You can see how her arms and legs were jointed which is fascinating. I can’t imagine the care and skill that went into making her. She is a bit stout around the thighs and her feet are rather chunky, but we can work with that.
Joints
As I was working on Inez, just for kicks I decided to try some of the undergarments on Lydia, fully intending to stop there. As it turns out, the Inez garments were a smidge tight…I made notes in my book and went back to Inez. But Lydia was right there, watching me with a look that said “I am naked as a jaybird, lady!”
Message received!
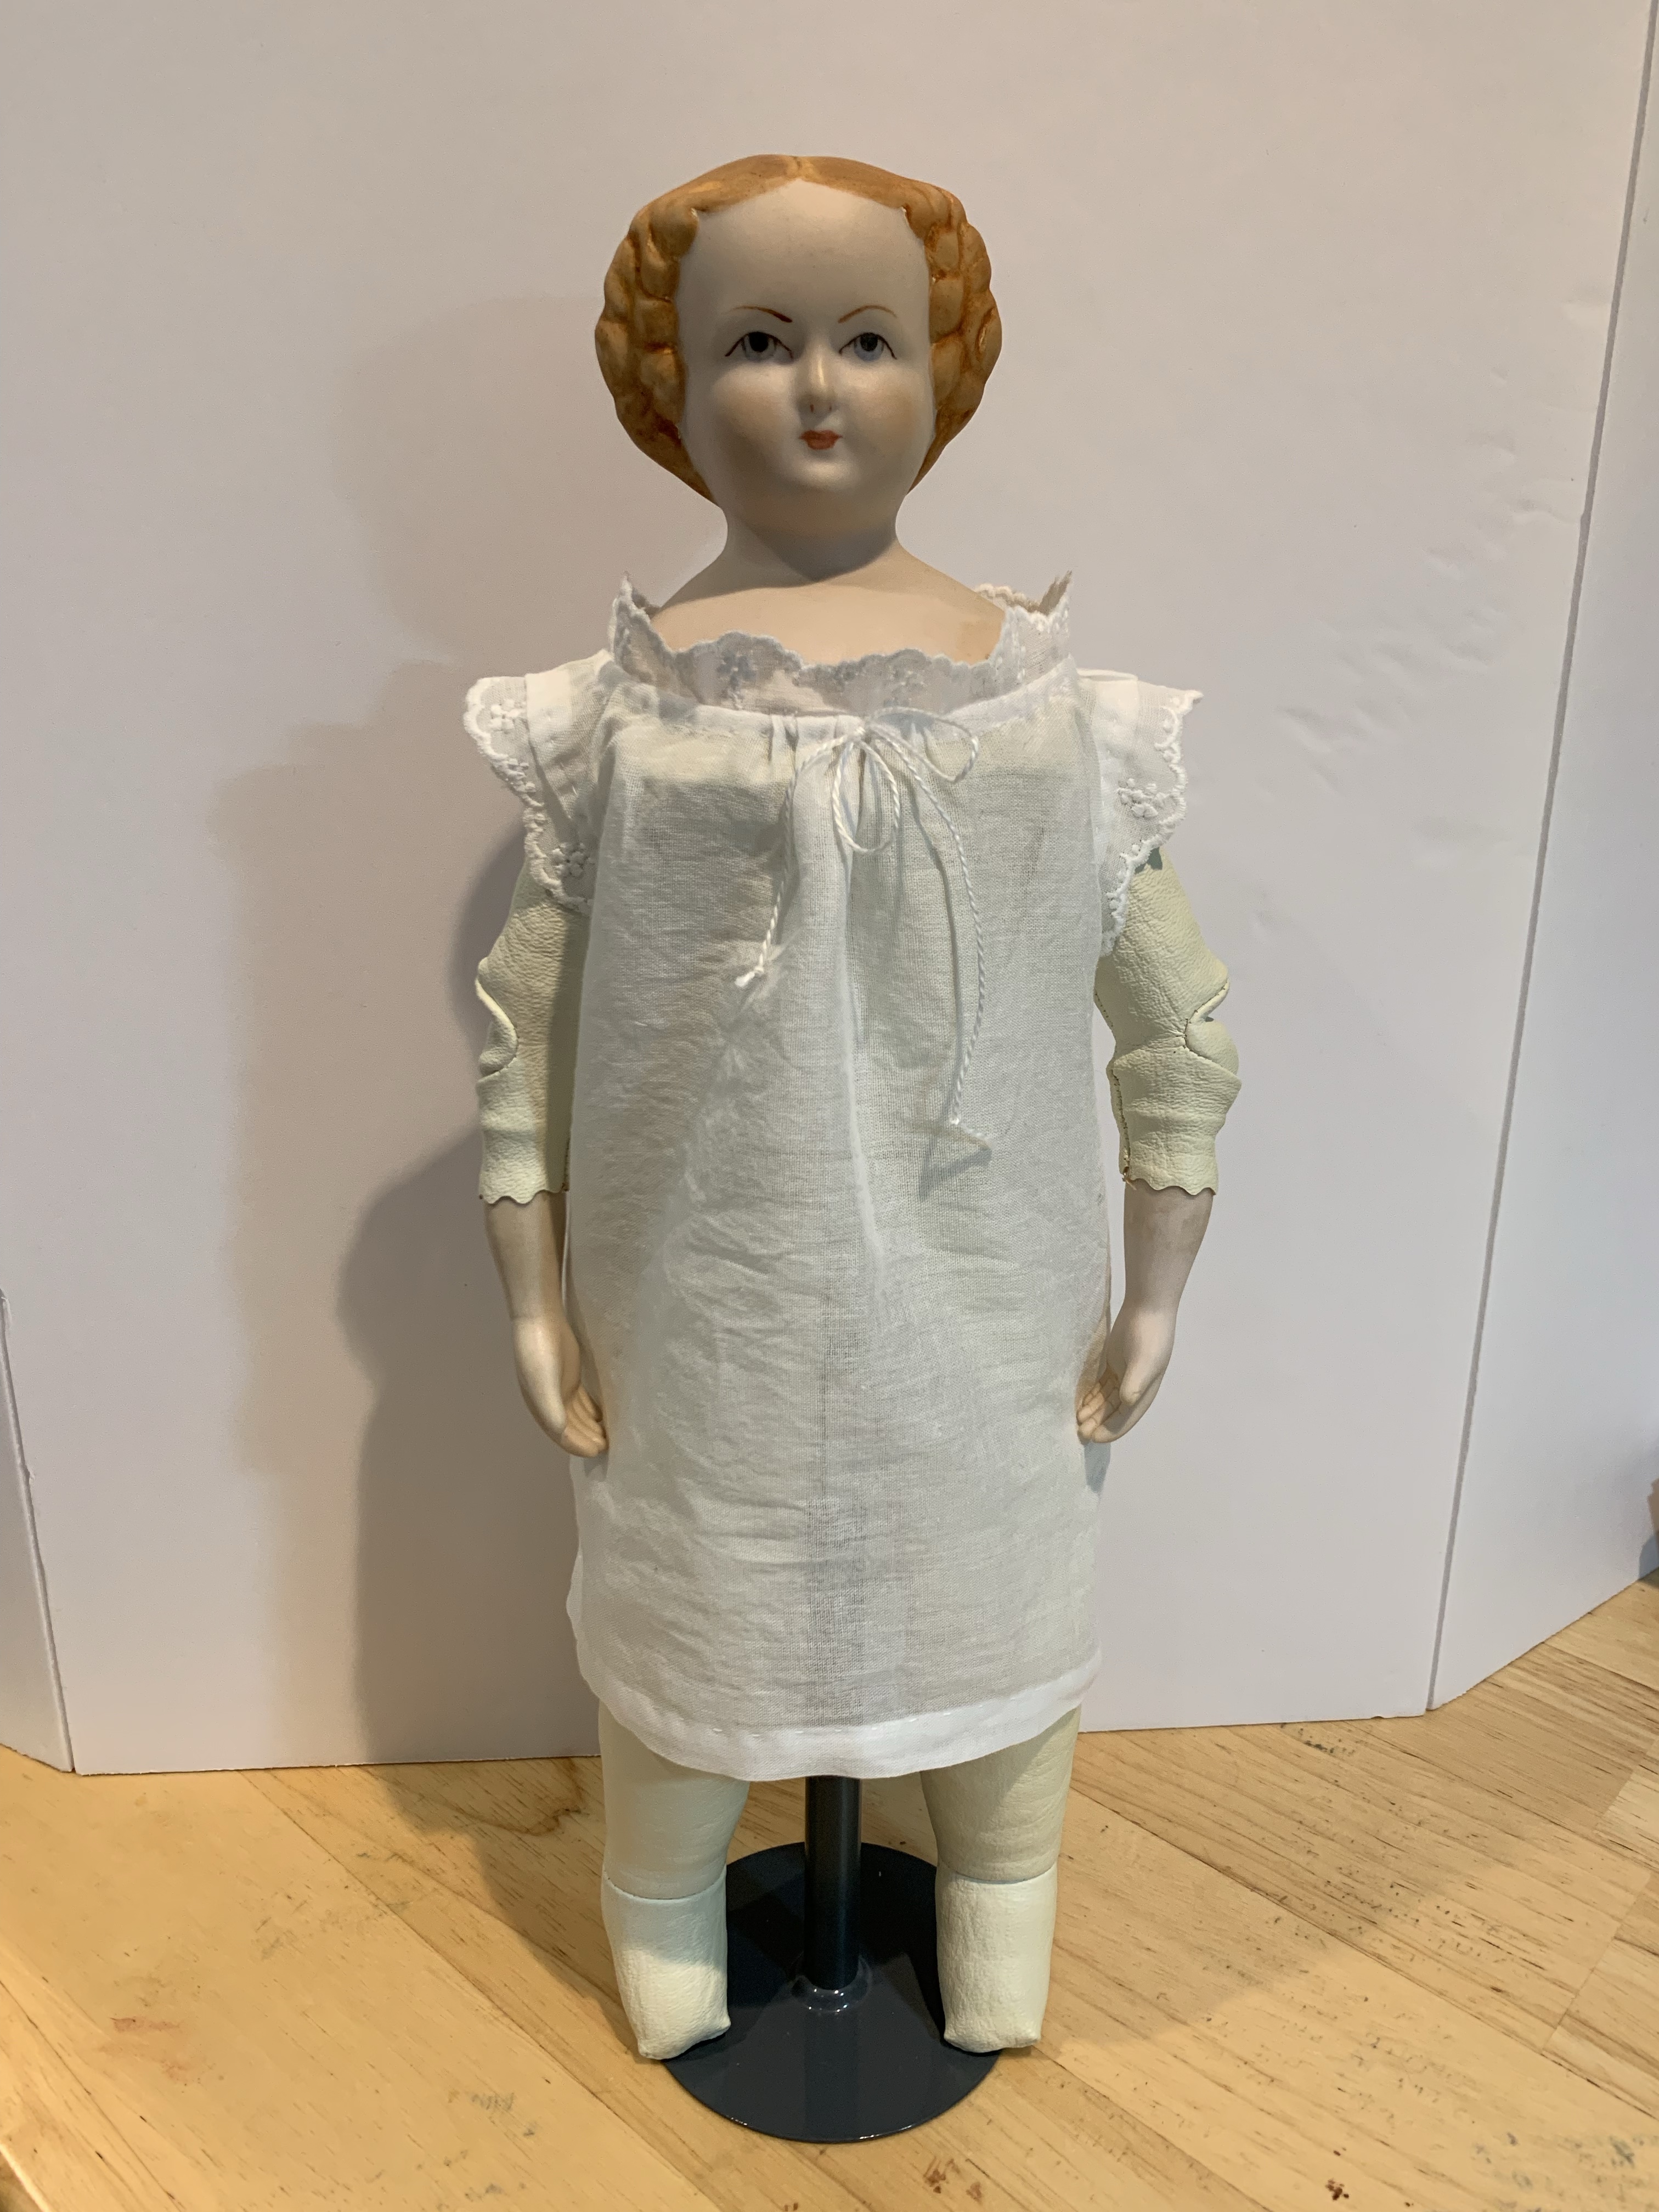
I resized the chemise pattern and whipped one together. This one has gathers and white work trim, btw. Back to Inez…!
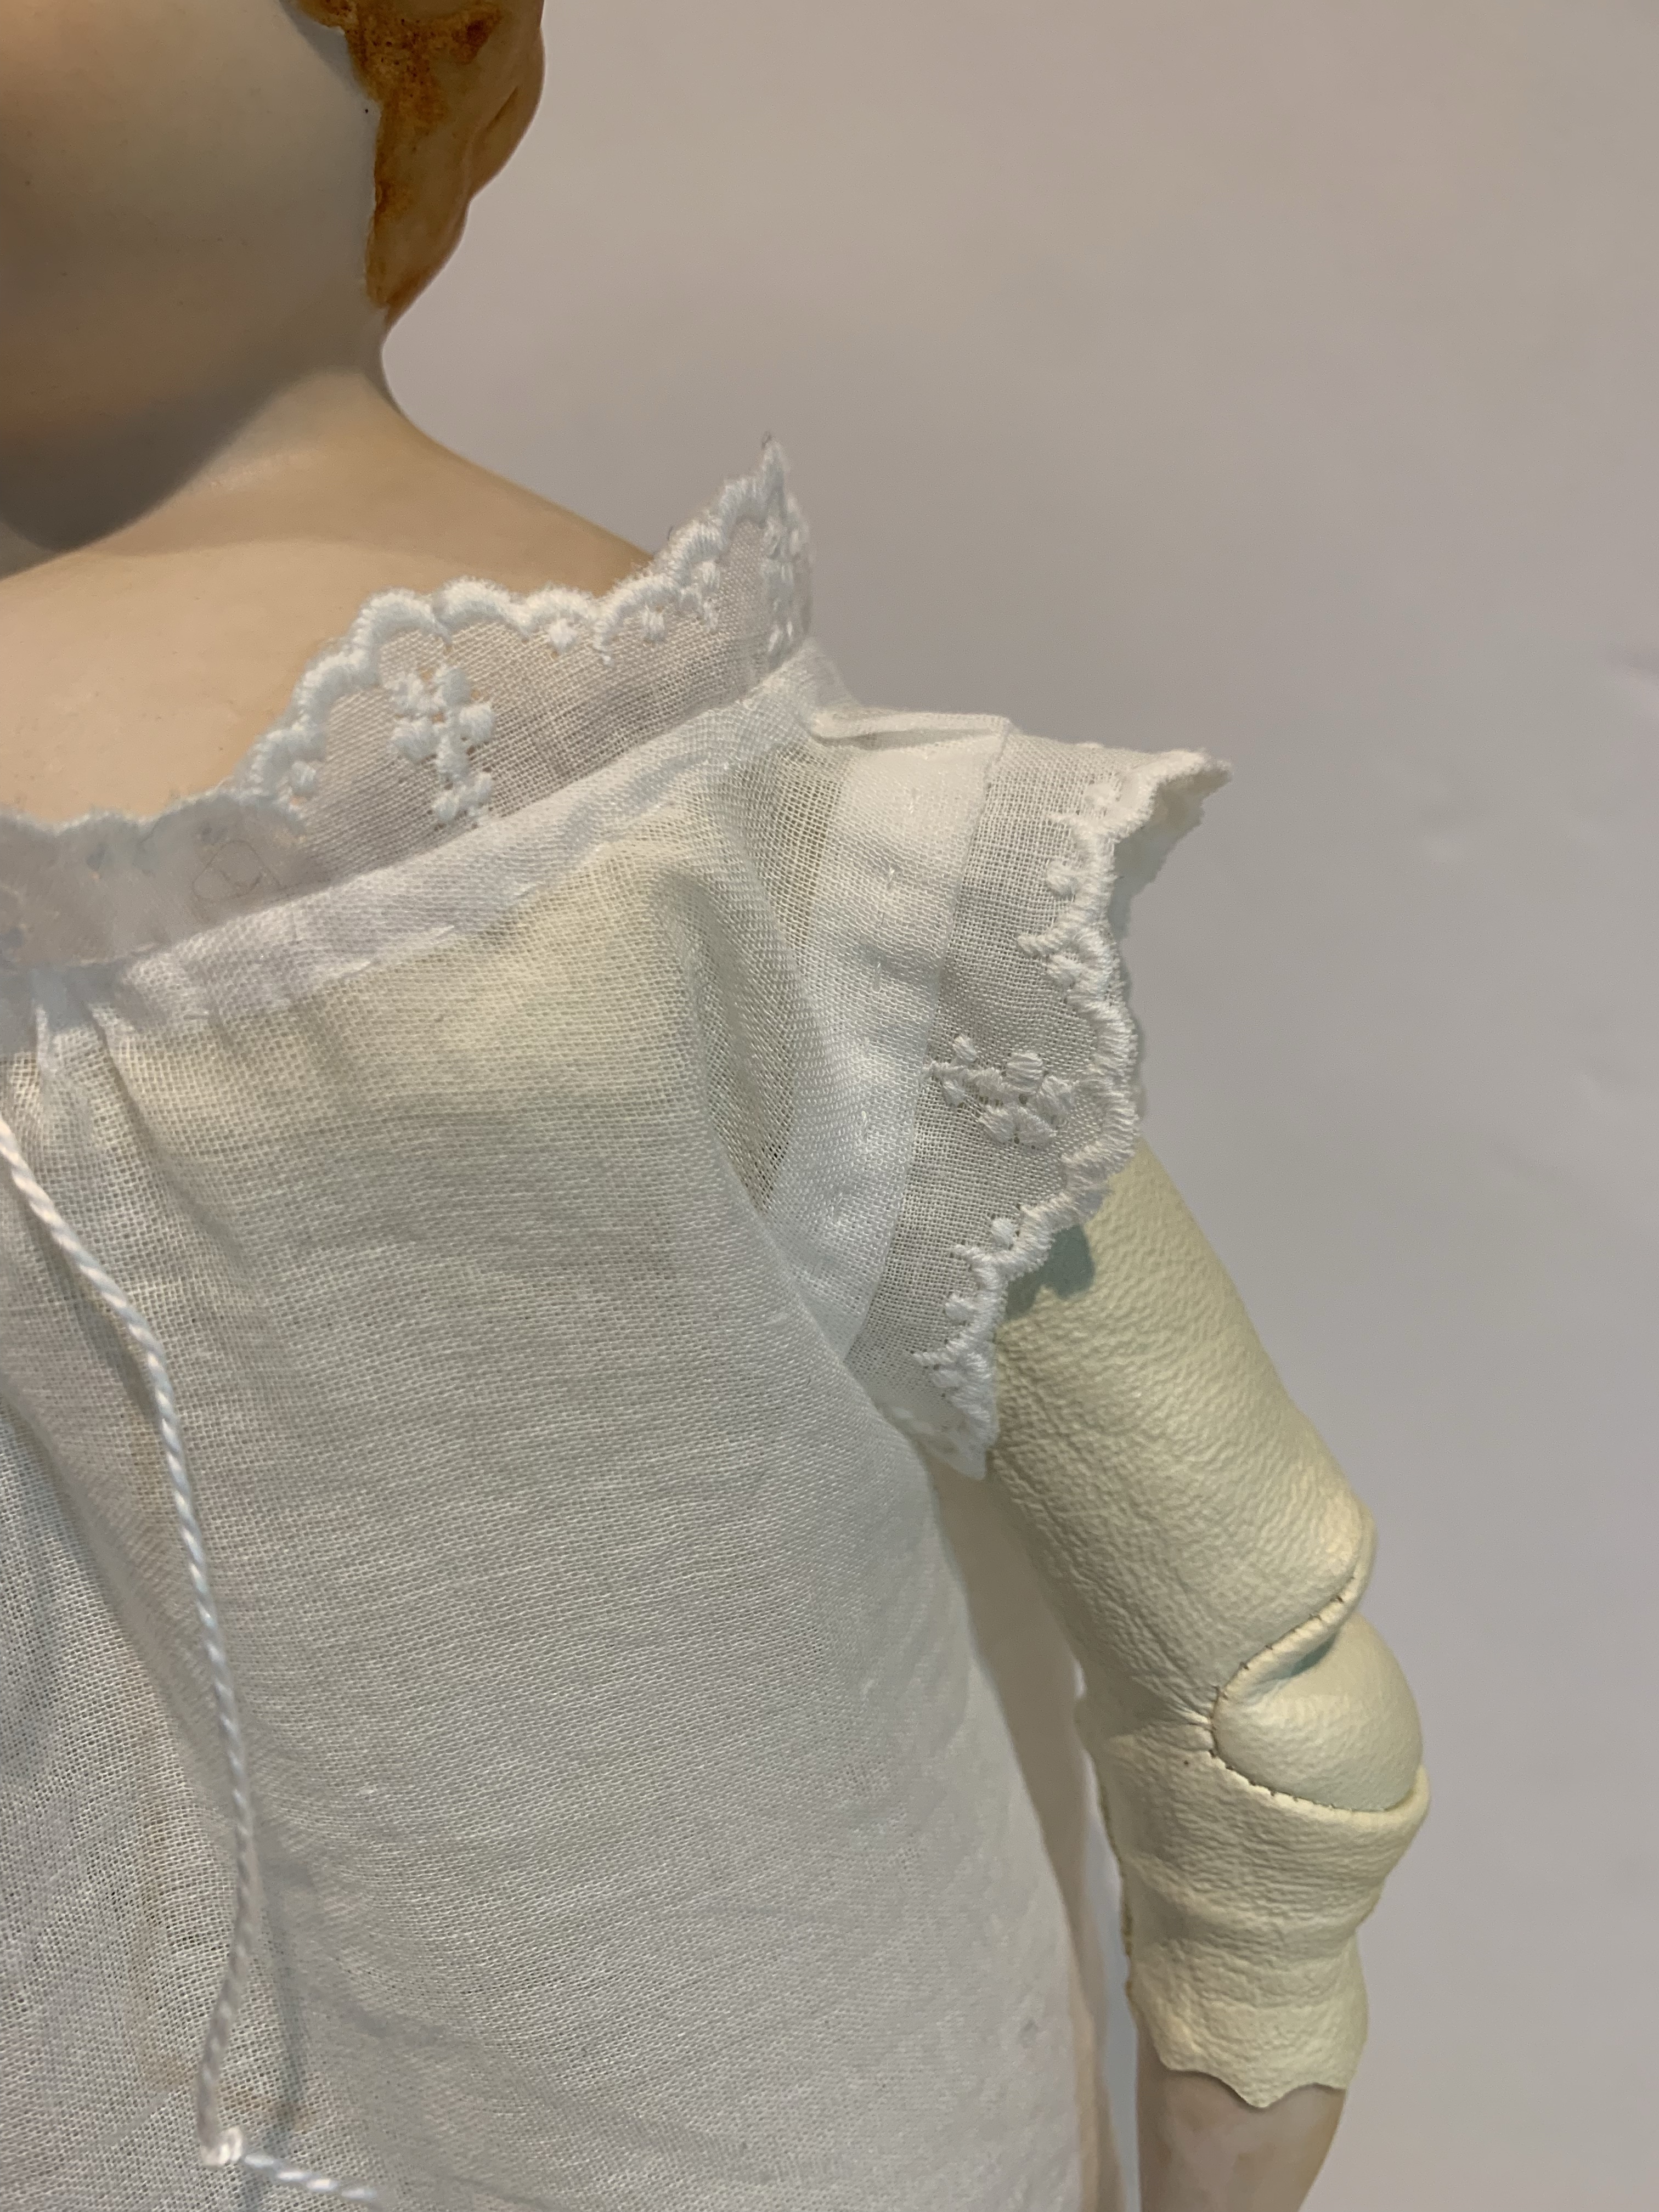
I made the chemisette and sheer low body dress for Inez, honest. I have a sheer dress made of this same fabric and plan to have Inez wear it the same day I do at our upcoming event. But in the meantime, Lydia is going to wear it. It fits her body better than it does Inez for some reason, but it’s too long for Lydia. You will note that Lydia’s petticoat is a fancy embroidered one. I used the edge of an old dust ruffle for it. It just barely shows through the sheer.
Sheer dress with chemisette
The sleeves are a two piece Bishop sleeve, similar to the sleeve on my sheer dress. Lydia is a bit more endowed in the bust than Inez, which fills out the dress differently. Perhaps I need to make some little “bust pads” for Inez. This was actually a thing back in the day!
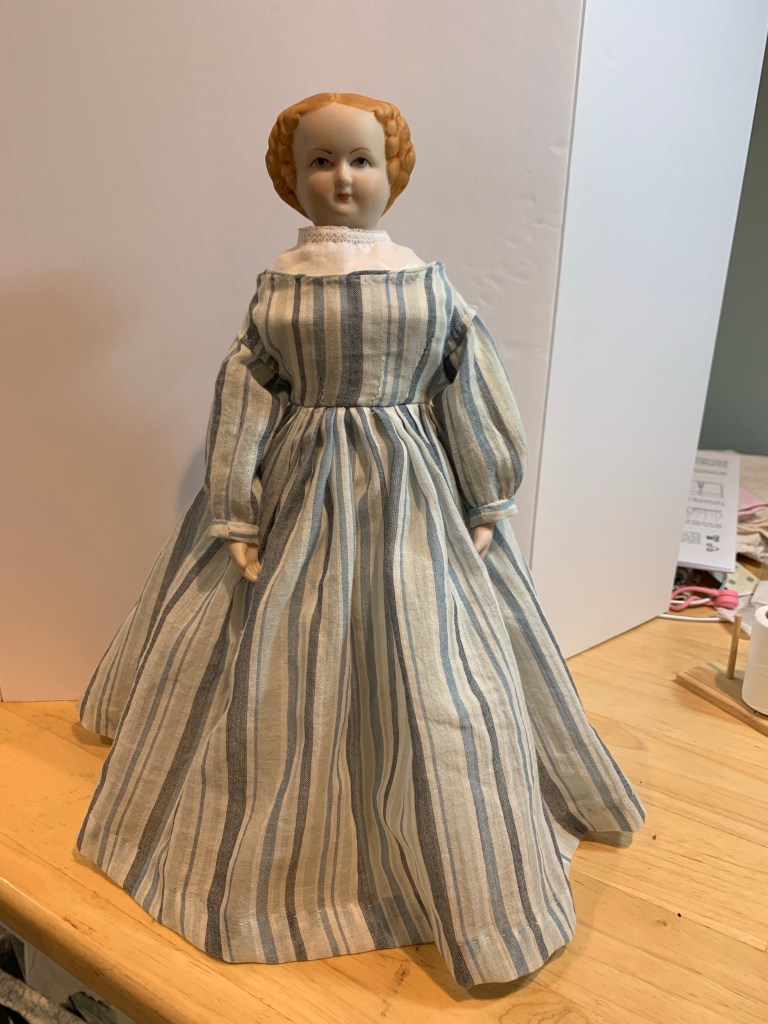
This is a temporary dress for Lydia – I always pictured her in light pink with roses. I have the fabric but I haven’t decided on the pattern yet. Come back again soon to find out if I’ve made it yet!