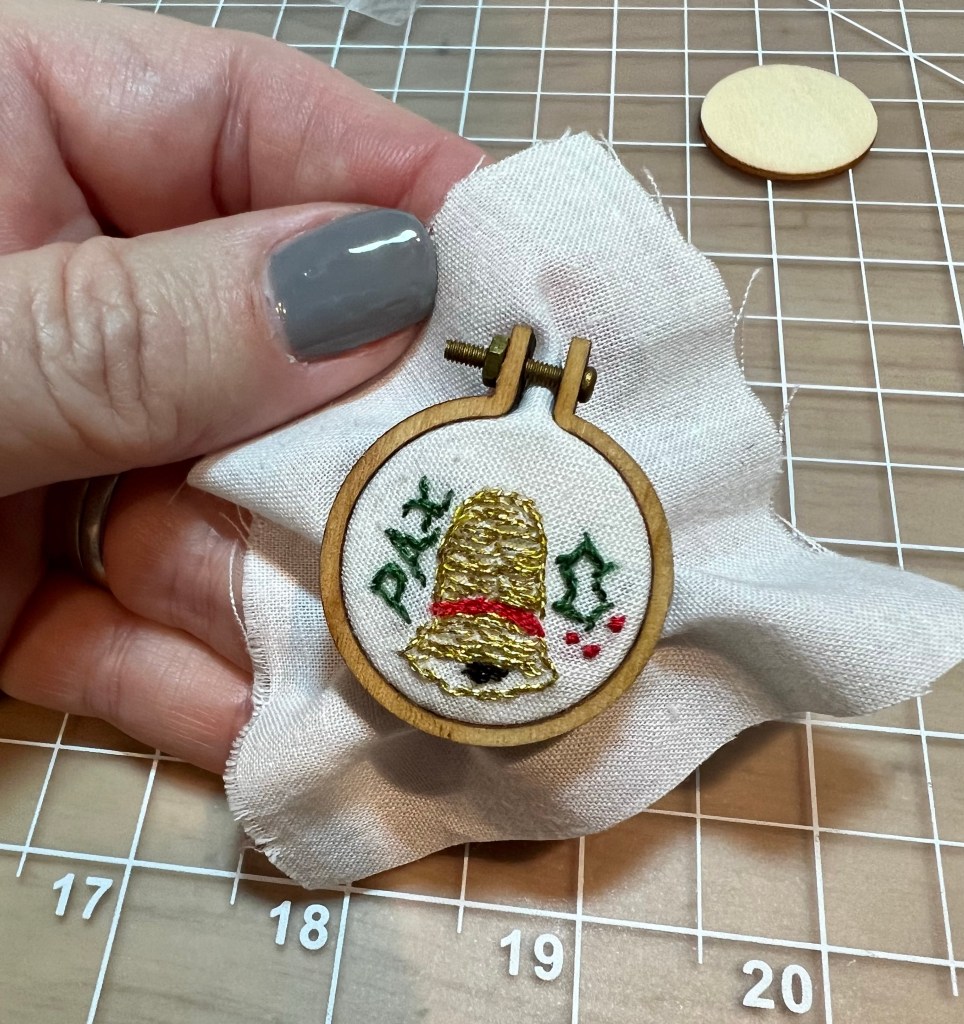
Today I will share a miniature bit of handwork I created. First, disclaimer, I am not the best at embroidery. However I liked the idea of giving my dolls an “activity” to work. Ok even more so I was inspired by the multitude of Victorian accessories for dolls and handwork was just one. This particular project is a gift but I will surely make one for my own dolls.
So to make this project, I found the miniature embroidery hoops on Amazon, but you can find them on Etsy as well. I bought a pack of assorted sizes & shapes with the idea I could make other interesting things.
Next challenge is the size of the work. It’s TINY! Yes I used the magnifying glass to make this work haha. First I sketched out the design on paper to work out how it would look. Many Victorian greeting cards include the word Pax (meaning peace) and because it’s a short word it became a shoe-in here. Christmas bells and holly are also very common images in Victorian greetings. I used a single strand of floss to work the design.
The work space is about 1 inch square. I tried to give the bell some dimension by taking the stitches from the edge to generally the center of the bell, then overlapping them. There’s probably a name for this method in needlework but I don’t know what it is. The stitches for the letters and the holly are about 2-3 threads long. The golden threads were unusual to work with as they don’t lay the same as a non-metallic thread would.
Because the hoop has a solid wooden back I padded the work with a piece of white cotton fabric to keep the wood color from showing through. I used tacky glue to hold down the backing, then again on the edge of the hoop.
Once the glue was in place I added the outer hoop, placed the screw and tightened gently. I don’t want it too tight. I read reviews that tightening too much will break the frame.
I hope you enjoy this little project and that it inspires you to create a little activity for your dolly friends, too.
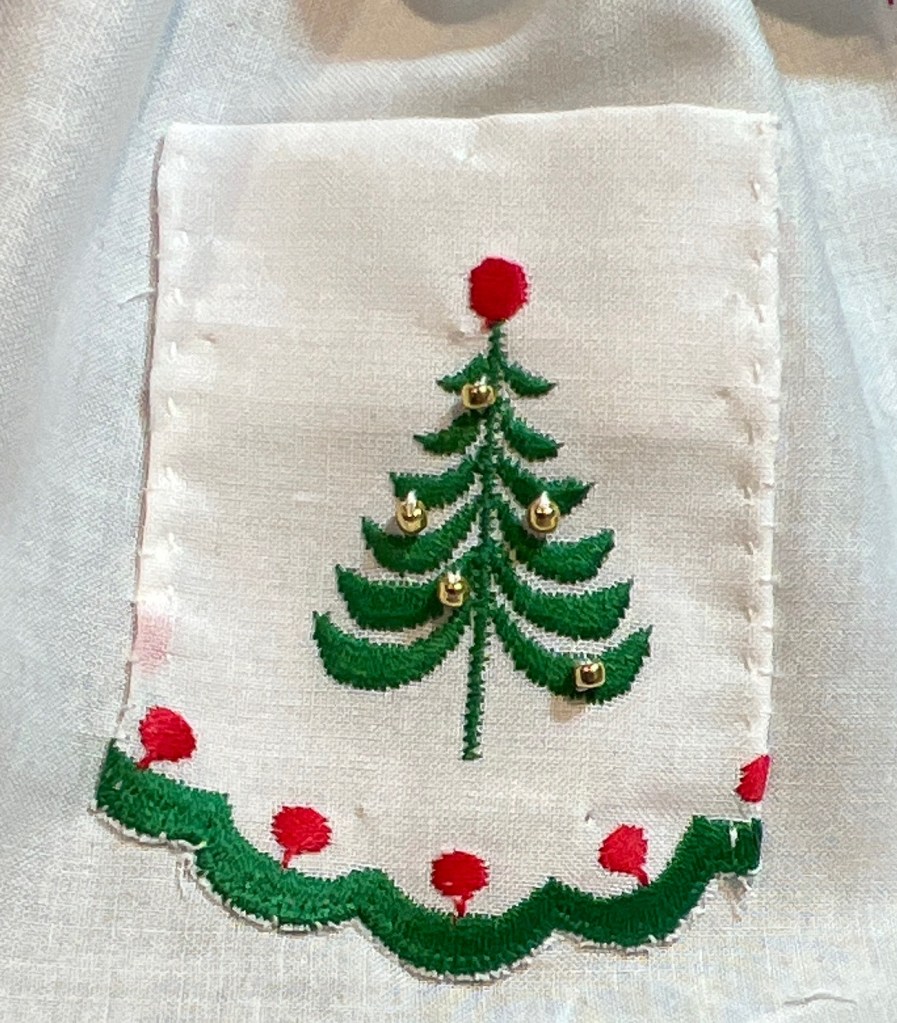
I had this lone 2” section of a Swiss embroidered edge left from another project and didn’t want to waste it. After considering many ideas, I decided to make it into a pocket on a fancy apron.
The very lonely Christmas tree
First, I trimmed the top edge so the shape was close to pocket sized. Next, I finished the sides with a rolled & whipped edge. I folded the top down 1/8” and then again at 1/2”. To pretty it up I added these gold beads as ornaments.
Golden baubles
To make the apron I used fine white cotton lawn cut 8” X 5” and also a grosgrain ribbon waistband 24” long. I decided to finish the three edges of the apron with red thread to make it more festive. Finally I then placed the pocket making sure the leave the top open. I did a very small whip stitch around the edges of the pocket.
Festive pocket
Attach the apron to the waistband, stitch and finish. For a really crisp look, starch the apron. I’m pleased with this little project. It took about two hours to complete and I expect one of my dolls to host a fancy dress party for the Yule season. Ok not really, but that’s a funny idea.
In my last post about Lydia Kidd, you saw the sheer dress she was wearing – which I actually made for Inez. It just happened to fit Lydia quite well and I hated her being naked. But, I have been busy lately and making all sorts of things!
The Liz Clark pattern Inez is made from includes all the necessary wardrobe items a mid-nineteenth century doll would need, and I’ve been sewing my fingers off. Here’s a small update on Inez’s clothing & accessories.
Pinner Apron
Here we have a nice pinner apron. This style was popular for women working in the home. The apron bib pins onto the dress bodice, hence the name “pinner.” While the pattern is actually for a half apron, it was relatively easy to make it into this style instead.
Next, I made her a nightgown. On this one, I used a fine cotton that is incredibly soft. The embroidery was freehand in a basic pattern I made up.
Fancy nightgownEmbroidery close up
And you can’t have a nightgown without a night cap.
Simple nightcap
Night caps were used to keep people warm in their unheated bedrooms. Try sleeping outside sometime – the addition of a nice cap will help you sleep comfortably all night long. I made it simple but there’s options to make it much more fancy if you like.
While on the subject of sleeping, I made a simple blanket for her.
Cozy Blanket
The blanket is cotton flannel on both sides. If Inez were to sleep in an unheated room, she would probably be pretty warm with this.
I have made a few more things for her, but I’ll save those for another post. Next time, I should have an embroidered cape and maybe even a soutache embellished paletot completed. This weekend we will be at our event and I’ll be making doll clothes as well as displaying Inez, Mernie and Emalie. If you find yourself at the Huntington Beach Central Park, come find us!
For historical costumers, a cage crinoline is a necessity, but you may ask yourself what exactly that is. Modern lingo for this garment is “hoop skirt” which describes a skirt with hoops in it, typically made with plastic bands and sometimes flounced. But for the original cast, a cage crinoline was a modernization of the crinoline petticoat. A crinoline petticoat was a starched cotton underskirt, often times many layers were worn to achieve the desired bell shape to a skirt. In 1856, however, the cage crinoline was patented and allowed women to achieve the shape without all the heavy skirts! They were made with steel bands – not heavy ones – that were strong enough to carry the weight of one or two petticoats on top, plus the skirt of the dress being worn.
And of course, where fashion for people goes, so goes fashion for dolls. There are remaining doll-sized cage crinolines in private collections, and they are of course on a smaller scale and not as robust as human sized garments. They can be used to fill out a skirt for a doll, or simply for the fun of putting a hoop skirt on your dolly.
Looking at how the originals were constructed, I realized this is a simple project I could make and share the instructions here. My doll is an 18″ Yield House Meg doll, but you can adjust these measurements to fit your dolls.
Supplies
I found this trim that is 5/8″ wide, 95% cotton and reminds me of Petersham. It’s a nice woven, flat trim that will do nicely. I’m also using some aluminum jewelry wire here but you can use what is available to you. You want something that is malleable enough to bend into your shape but strong enough to hold the round hoop shape once completed. All told, I spent less than $10 on the supplies.
First you need to do some thinking and measuring. For a Yield House doll, the skirt is made from a 36” length of fabric. This results in a nicely full skirt similar to those worn in the 1860s. Consider how tall your doll is and how full her skirt is. You want the bottom hoop to be less than the full circumference of the outer skirt. I chose to make the bottom hoop 30” around. The top hoop should be wide enough to fit over the hips of your doll. Meg here needed 15” for decent clearance. For the middle bone I split the difference and made it 23”
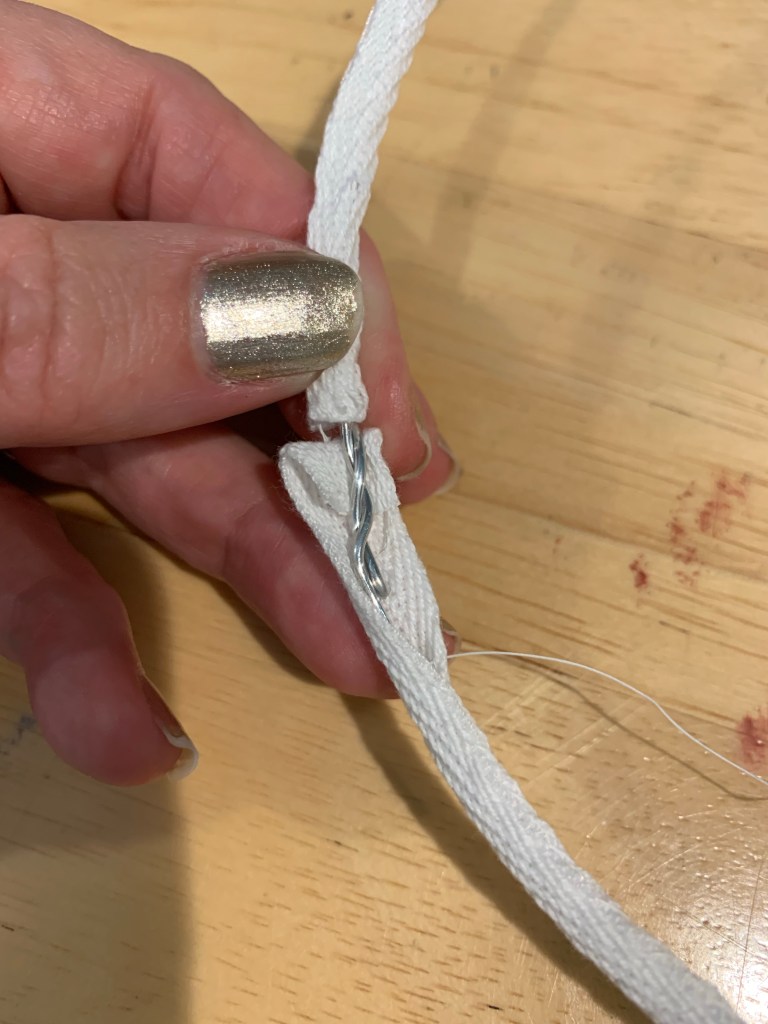
Once you have your hoop circumferences, measure your wire to that length plus 2-3” overlap. Cut the wires and then twist the ends together.
Twist the ends together
Make all three hoops, then you can measure the tape to cover them exactly. Allow at least 1/2” on either end to turn the raw edges under. Beginning at the joint, fold the tape around the wire to encase it and then whipstitch it closed.
I used quilting thread but any type will do
Once you get to the end, tuck the end under and whip all the way around the joint.
Bring the folds together and stitch
Repeat on the second and third hoop until all three are covered. The next step will be to find the quarters on each hoop and place a small mark. This will ensure the vertical tapes will hang straight. these marks will be covered, don’t worry.
Mark the quarters
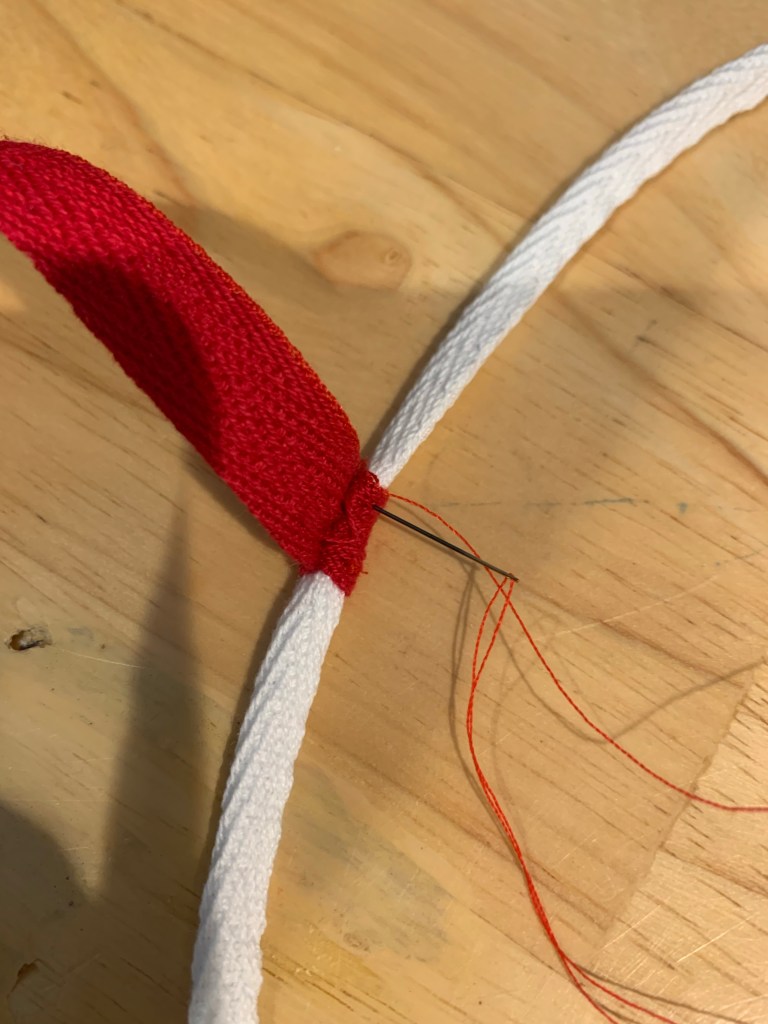
Determine the drop of your hoop skirt next. This is the length from the waist to where you want the lowest bone. I chose a 9 1/2” drop so the lowest bone would be near the tops of the doll’s boots. This is about where my life size hoops hang as well. Consider you need 1/2” on either end to tuck under – so add this onto the drop measurement. This gave me a 10 1/2” vertical tapes. Cut 4 of these. Don’t forget to measure the waist of your doll and cut a waistband to that length plus 1”.
The hoops should be equally spaced on your vertical tapes. Don’t forget that you will attach them at the top and the bottom. I measured and pinned the placement for the first and second hoop. The hoops attach at 3”, 6 1/2”, and 10” (the bottom).
Beginning with the lowest hoop, wrap the tape around so the raw edge will be enclosed. Stitch that in place. Repeat at all four quarters.
Enclose the raw edge
Moving to the middle bone, fold the tape over the hoop so you can stitch through the vertical tape, through the hoop covering under that, then out the vertical tape. You aren’t stitching behind the hoop wire, just catching the tape wrapping it. Repeat on all quarters and then move on to the top hoop.
Pin it into place until you stitch it
Once all the hoops are attached to the vertical tapes you are ready to attach the waistband. Turn the ends of the waistband under and stitch so the raw edges are inside. Remember, the waistband is the measure of your doll’s waist plus 1”.
Finished edges
Find the quarters of the waistband, place a small mark, then pin the tapes in place.
Stitch these in a square that will secure the tape and keep the raw edge inside. Once that has been done you can add a hook and eye or thread bar. You are done!
Finished cage crinoline
My doll happens to have a modesty petticoat under her new cage crinoline and then a fine starched cotton petticoat over it. I’m making a silk skirt for her next and this should do nicely to help it hold it’s shape.
All told I used less than the full amount of wire I purchased and less than a full spool of the white tape. Had I made the vertical tapes in white I might have used close to the full spool. I hope you found this little article helpful in demystifying the cage crinoline and will feel confident in trying one for yourself!
Supply List
5/8” Petersham or similar woven cotton flat trim (don’t use twill tape as it will ravel)
2 1/2 yards white
1/2 yard red (to make in all white add this to the length above)
When I was researching what to make for Nell, I came across a source for La Mode Illustree, a French fashion magazine popular through the 19th century. They frequently published doll costumes as a means for girls to learn dress making. While it took me some time to commit to one of the patterns, I have finally completed one.
Being as the magazine was written in French, I first had to translate the text. I’m not fluent but I have a very basic understanding of the language, and Google translate did the heavy lifting.
I decided to create a walking dress, or costume du promenade. It was described as being made from gray lindsay- a type of fine wool – with navy blue velvet trim. The original patterns were intended for a doll a bit larger than Nell, so I had to be careful to size it to her. I did not use wool because I don’t want to afford it for a doll, plus the majority of modern wool available at a big box retailer is a blend with a synthetic fiber to keep costs down and/or is heavier than I would need for a 12” doll. I substituted a nice cotton with a firm hand but fine weight.
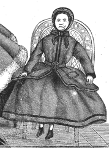
Doll Sitting in ArmchairDoll sitting in chair
The source material includes the pattern page which has every pattern piece in the magazine all on two pages. The lines of each pattern were unique so you would find the dotted, dashed or starred lines, trace them and then make your garment. I followed this process, next having to print them and size them. I then proceeded to make a couple mock-ups of scrap to make sure it would fit Nell. It was quite an intensive process as I’m not completely knowledgeable in dressmaking. However, I persevered and eventually came up with a fit I liked.
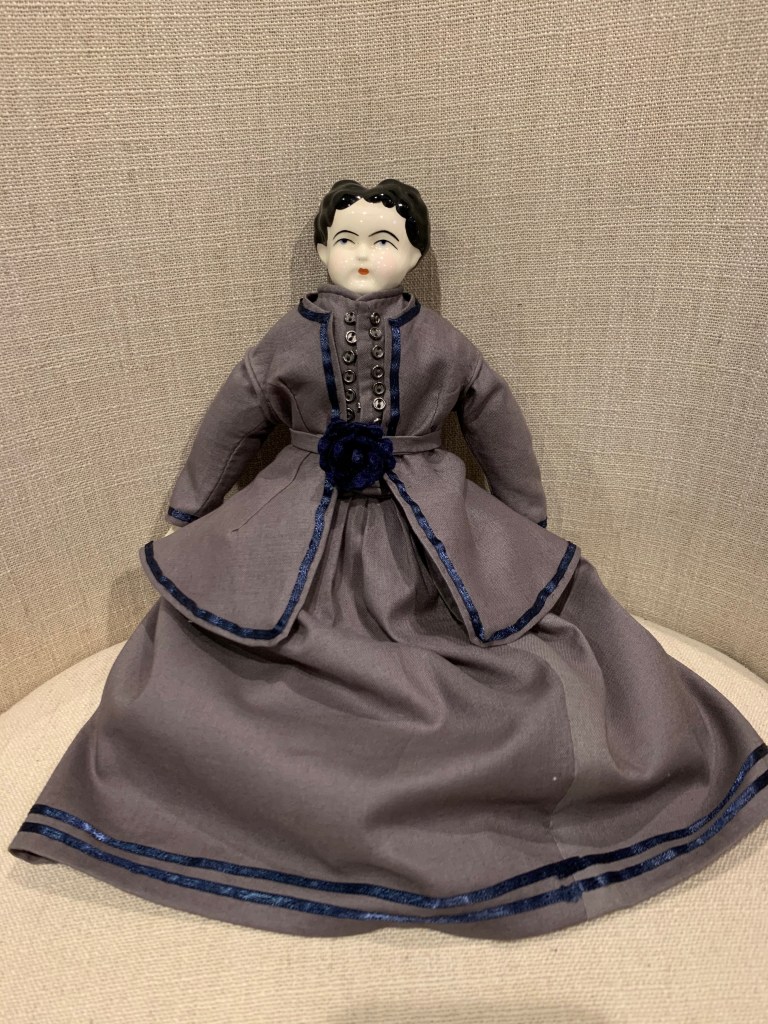
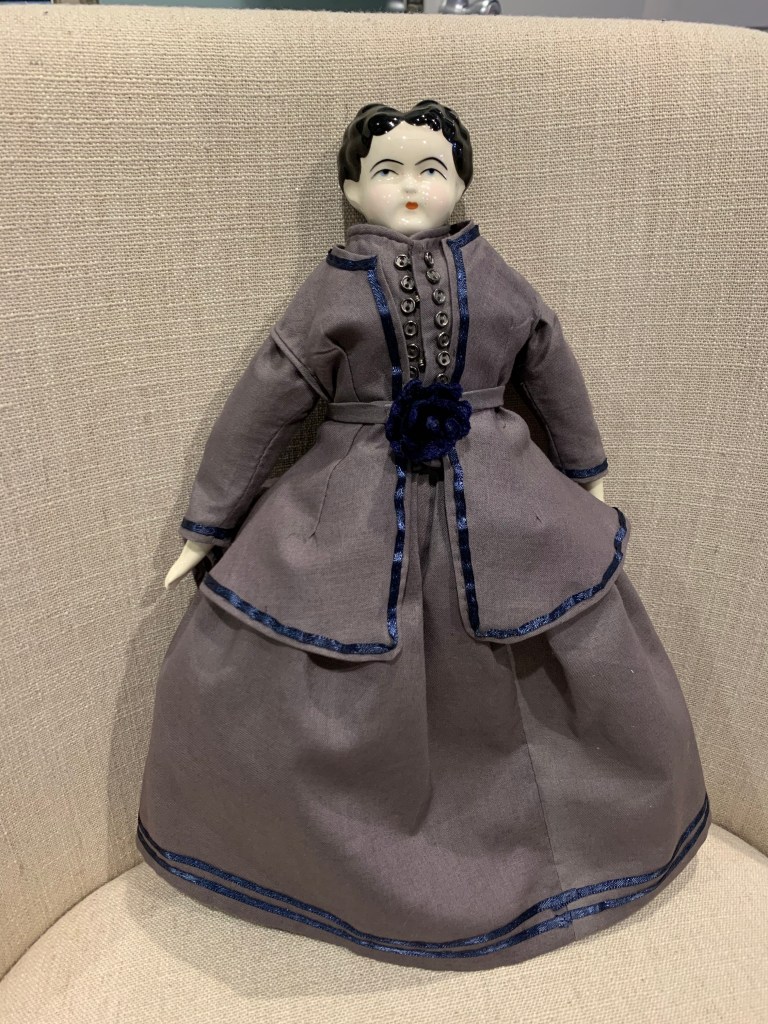
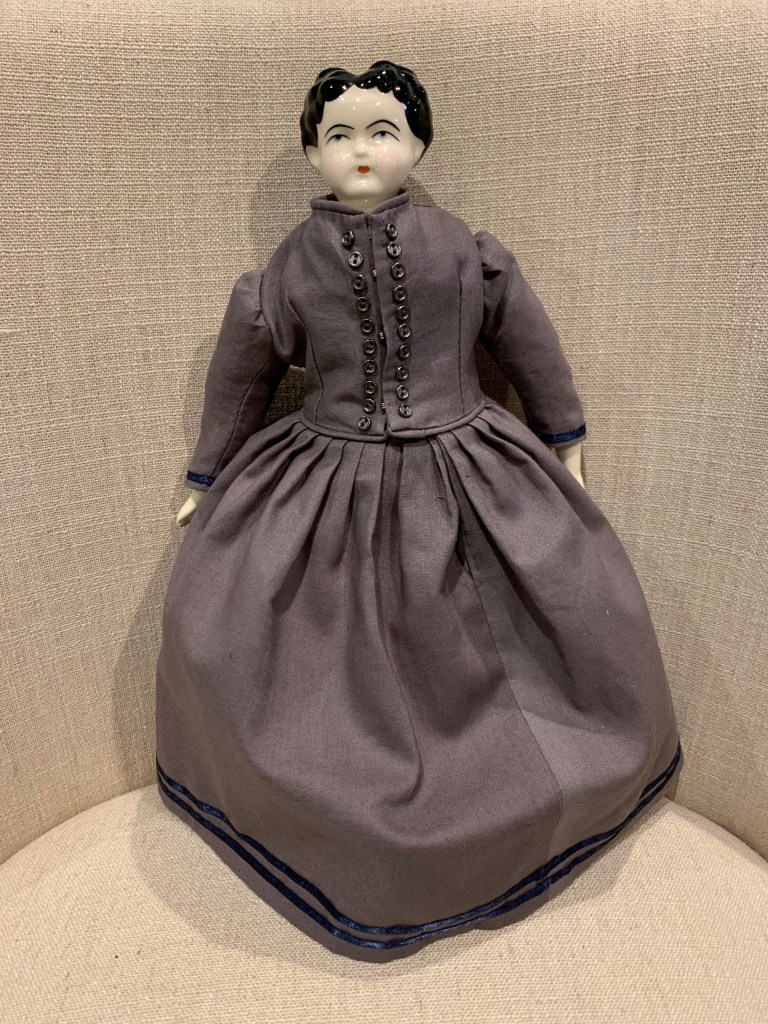
Full Outfit FrontBack ViewDress Front no Paletot
As it turns out, these doll clothes were literally miniature dresses, made exactly how full sized garments were made. They were intended to teach little girls how to sew their own clothing, which makes a lot of sense. Just, the construction methods of the nineteenth century don’t always make sense to our modern thinking. Usually doll clothes fasten in the back and the front just simulates the intended look. Fortunately I have experience at making 1860s dresses so I knew what to do with the pieces. Also, there aren’t actually any construction notes, just the pattern pieces. So, the description of this was:
The doll is 48 centimeters tall, head not included. Her dress consists of a dress and a coat in gray lindsay. The overcoat, sleeveless, is retained by a belt. The skirt is 32 centimentres in length, 1 meter 50 centimentres wide; it is bordered with two bands in blue cotton velvet. Same trim for the sleeves and the collar of the bodice, whose figures 46 to 50 represent half. The belt clasps under a rosette. The overcoat is made from Figures 51 to 53; we put small pockets in it. The blue taffeta hat is made of stiff gauze, according to Figs. 54 and 55, furnished with archal thread, covered with taffeta, adorned with hives underneath, black lace on top.
La Mode Illustree, January 1, 1866
So here she is in her completed 1866 Promenade Costume. The dress includes a dogleg opening in the front, which requires careful attention to detail to ensure it stays centered. The bodice is darted as was appropriate in the era. While it shows 20 (count them all!) tiny, 5 mm buttons, they are nonfunctional and only for looks. This wasn’t unheard of in the 19th century either. I sewed on the buttons, which were squirrely to say the least, didn’t like how they looked, took them off and sewed them on again. I wound up sewing under the magnifying glass because they are tiiiiny. For reference, Nell is around 12″ – the height of a Barbie doll.
I haven’t attempted to make the hat because I have never made a hat and don’t know what to expect. But, at some point I will try it with scrap fabric. I do have some blue silk here that I have been dying to use for years.
The pattern pieces include letters in the various corners, which the person making them was expected to know meant that the two pieces with letters L and M, for instance, were to be sewn together between those two points. As I was making the third mock-up of the bodice, I started writing down the instructions. Not that I expect to share these with anyone, but it’s kind of fun to make a pattern with the sense that someone might sit down to sew your creation one day.
Since the dress is constructed exactly as an adult sized dress would have been, the knowledge of vintage clothing construction came in very handy! Perhaps one day I will convert this Promenade Dress to a dolly version that closes in the back, which would make it soooo much easier to reproduce. In its current form, it is an advanced intermediate skill level, but a dolly version would be just as pretty and much easier for less skilled hobbyists.
In the next post, I’ll dive into the construction of a cloth bodied China doll.
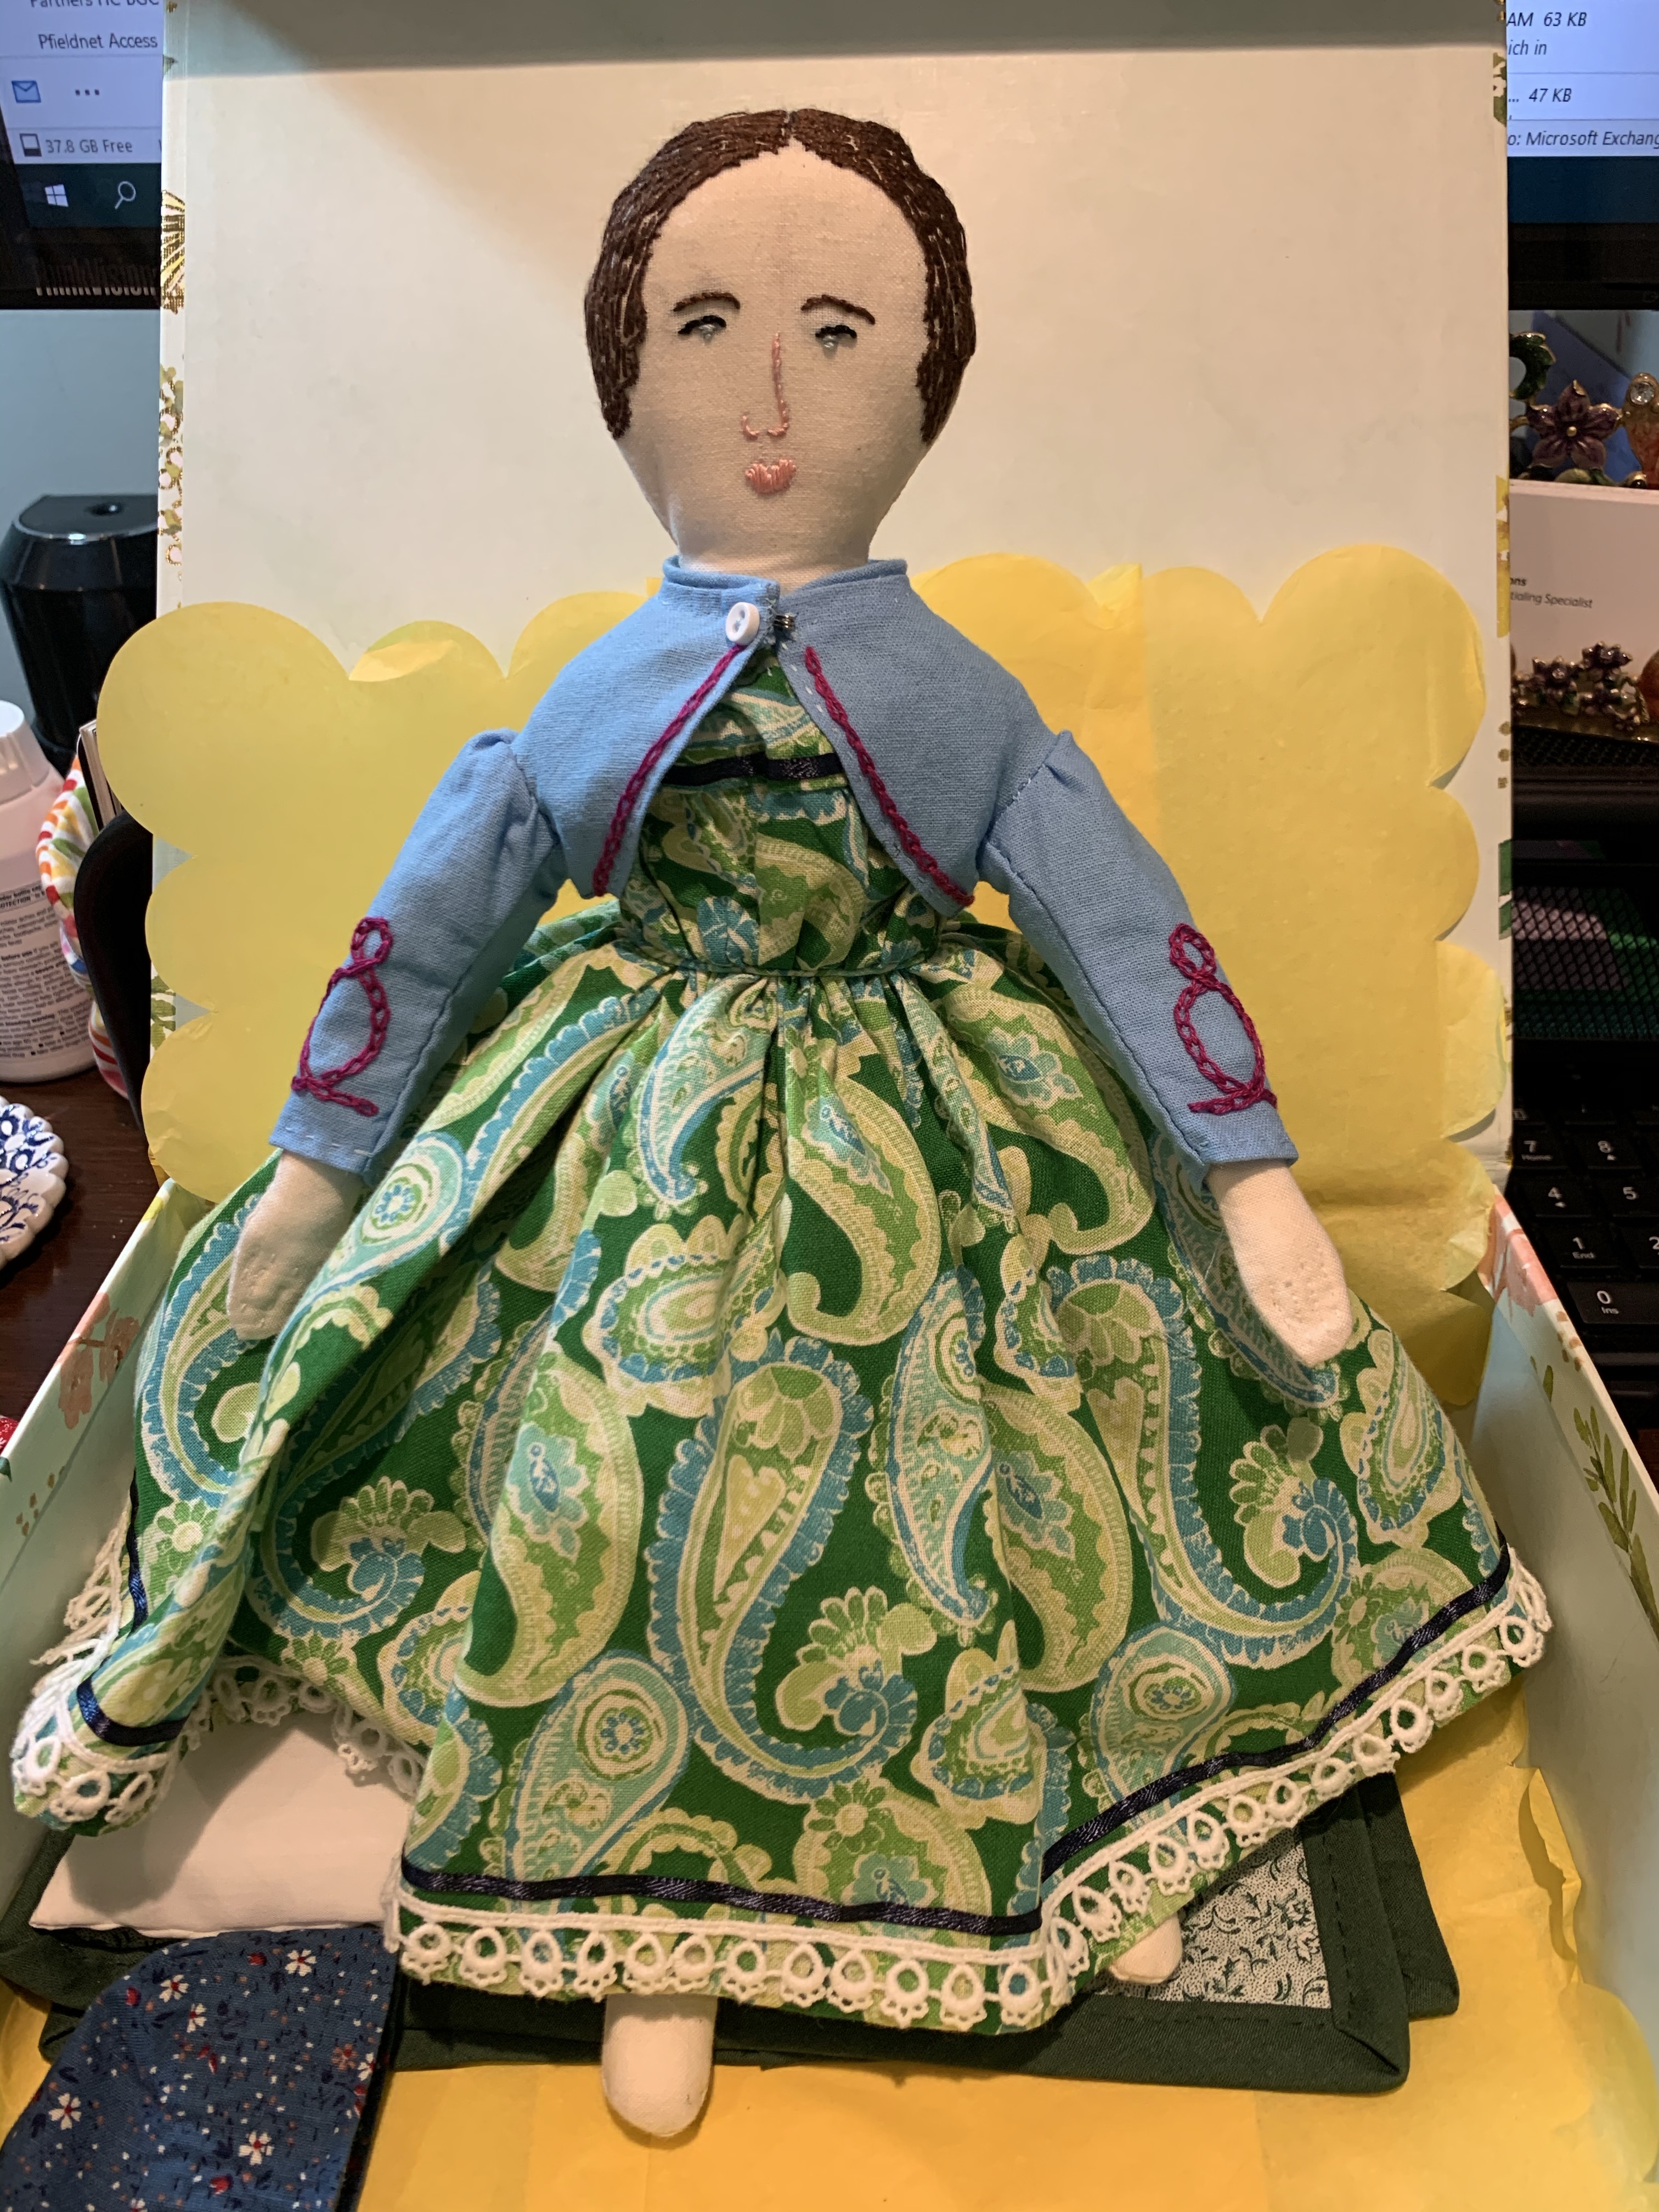
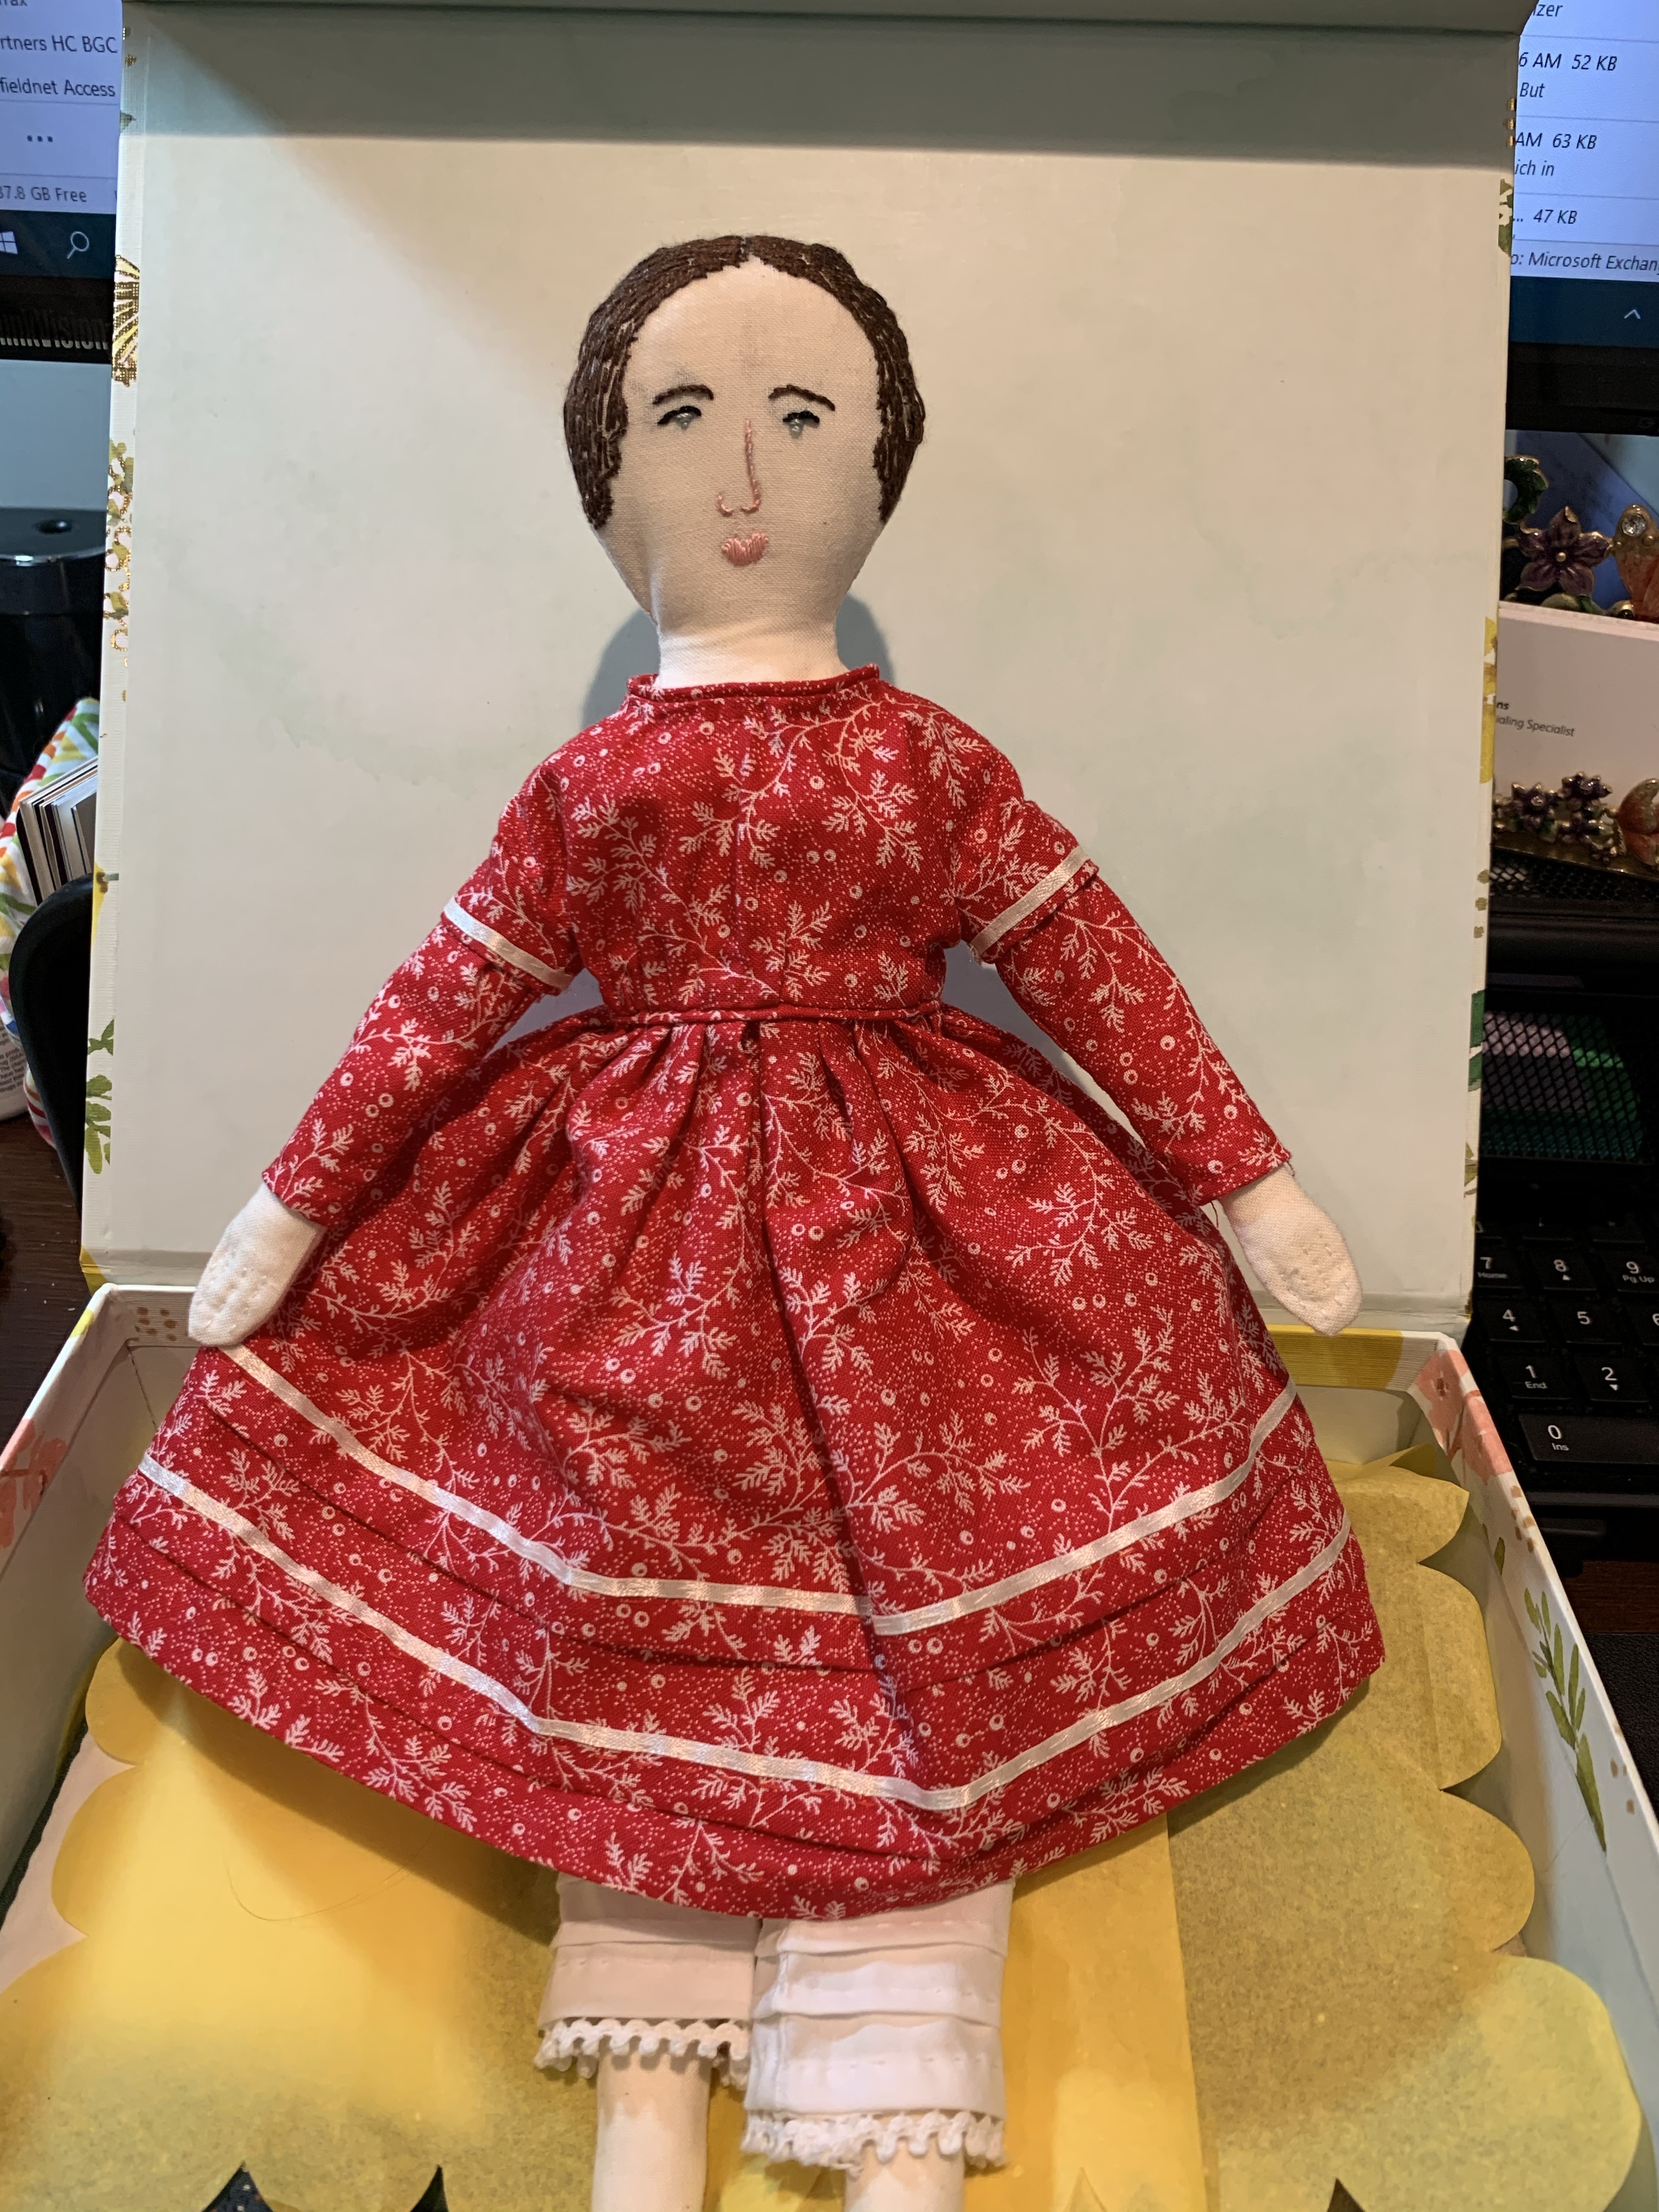
This doll named Dottie was made for my sister as a Christmas gift. It’s my third making of the Little Cloth Girl pattern from Elizabeth Stewart Clark. Needless to say, I love this pattern.
You will notice an immediate difference in Dottie’s appearance from Emalie and Mernie, and that is her face & hair are embroidered. I’m not the best at embroidery (that’s my sister’s specialty), so I had to be very careful. I actually remade her face since I didn’t like the first attempt. All the embroidery is silk and I think it came out nicely. I also stitched in her fingers – not an easy task, plus she has jointed elbows and knees.
She again has the undergarments appropriate for a girl in the mid 1860s. I decided on this go-round that I would make a full wardrobe since she was a gift.
My daughter picked out this red fabric – which I just love. The dress is a darted bodice with sleeve caps.
The second dress is made from fabric my sister has picked out to make herself a dress – probably a wrapper. I thought it would be fun to surprise her, so I just asked for a 1/4 yard of any fabric. Now, once she makes up her dress, she will have a friend in a matching dress. How sweet! This dress is a gathered front yoked bodice. I really like how it turned out.
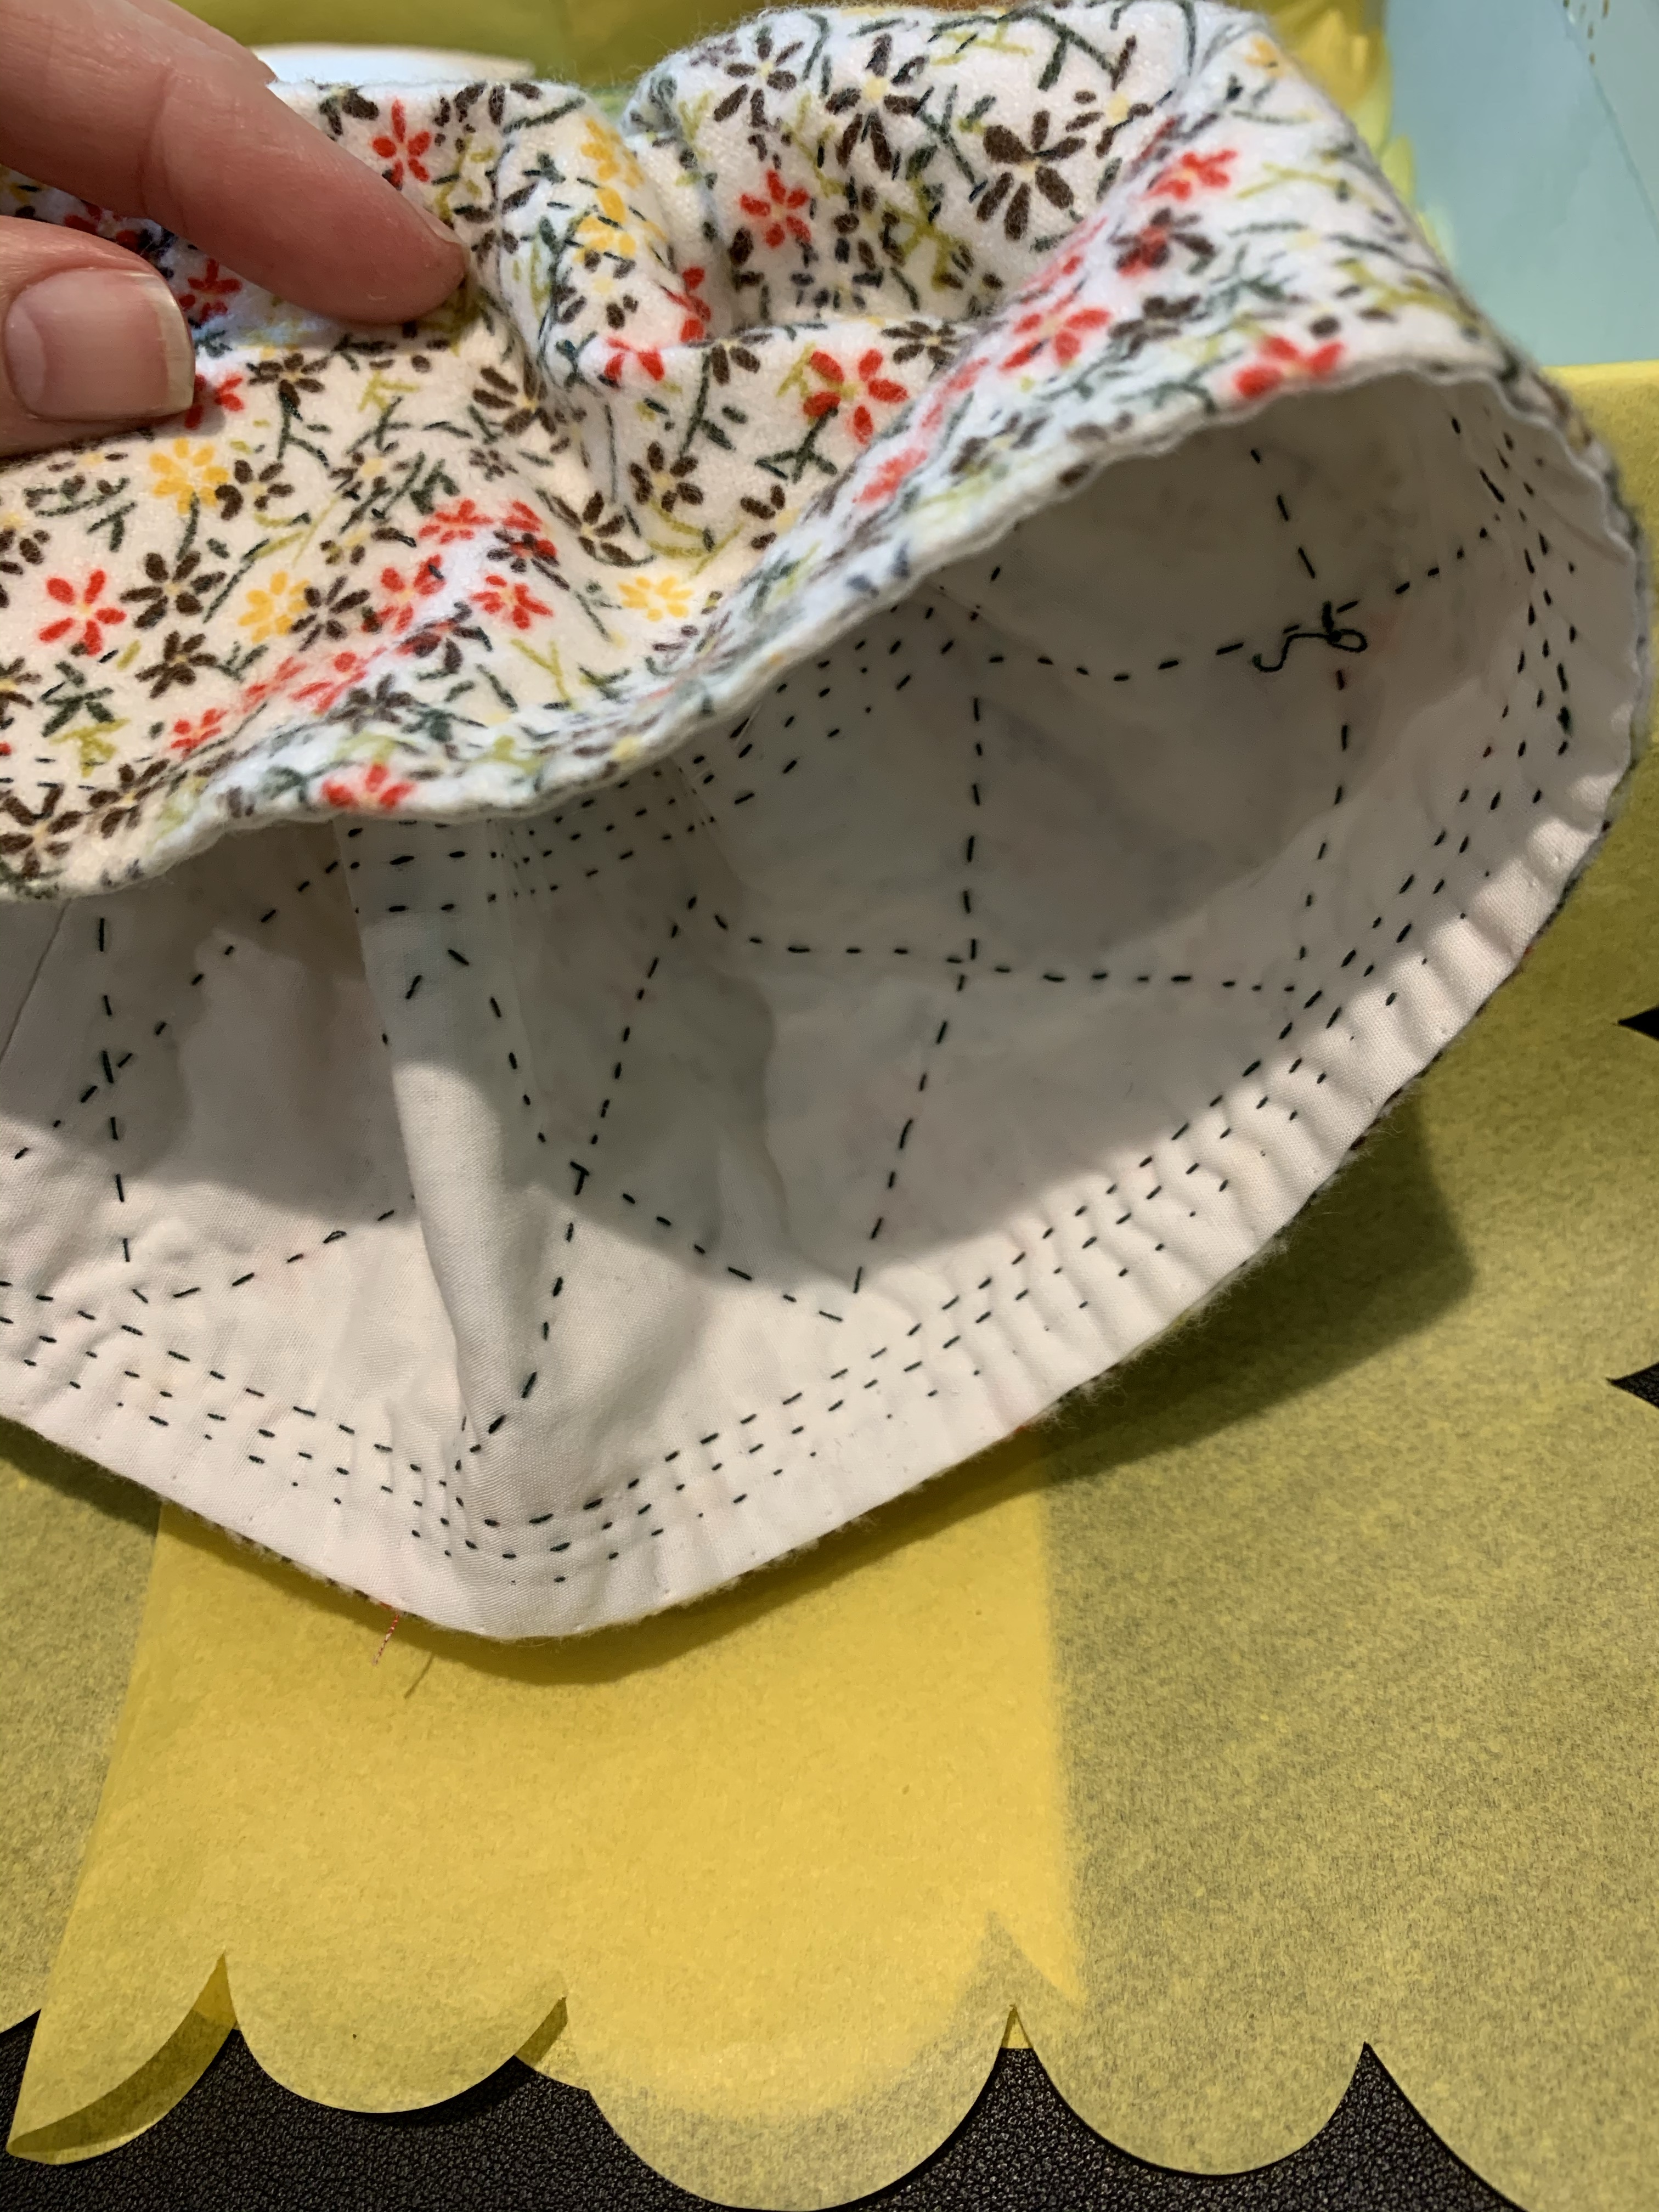
I made a quilted petticoat from flannel. While you can’t really see it, it has the same diamond pattern quilted in as Mernie’s.
The next piece I made was the basque coat. I used a sueded fabric to make it seem like wool or a heavier fabric. The trim is brown velvet and I love the nonfunctional buttons.
My favorite piece is the blue lightweight coat. Like I said earlier, I’m not much for embroidery, but I wanted this to look like it has braid, which was a common embellishment. The little button just finishes it off.
And just because I’m a glutton, I made a little handbag, a bonnet, a quilt that features all the fabrics used in the clothing, and a pillow. Oh, and inside that handbag are mini books I made. As an aside, I made another of these little bonnets for a Holiday Gift Exchange in the Historical Costuming For Dolls Facebook group. I’m not the only one obsessed with them!
I hope that you have enjoyed this tour of Dottie and her wardrobe. In the next post, I will showcase a costume made from a vintage fashion magazine.
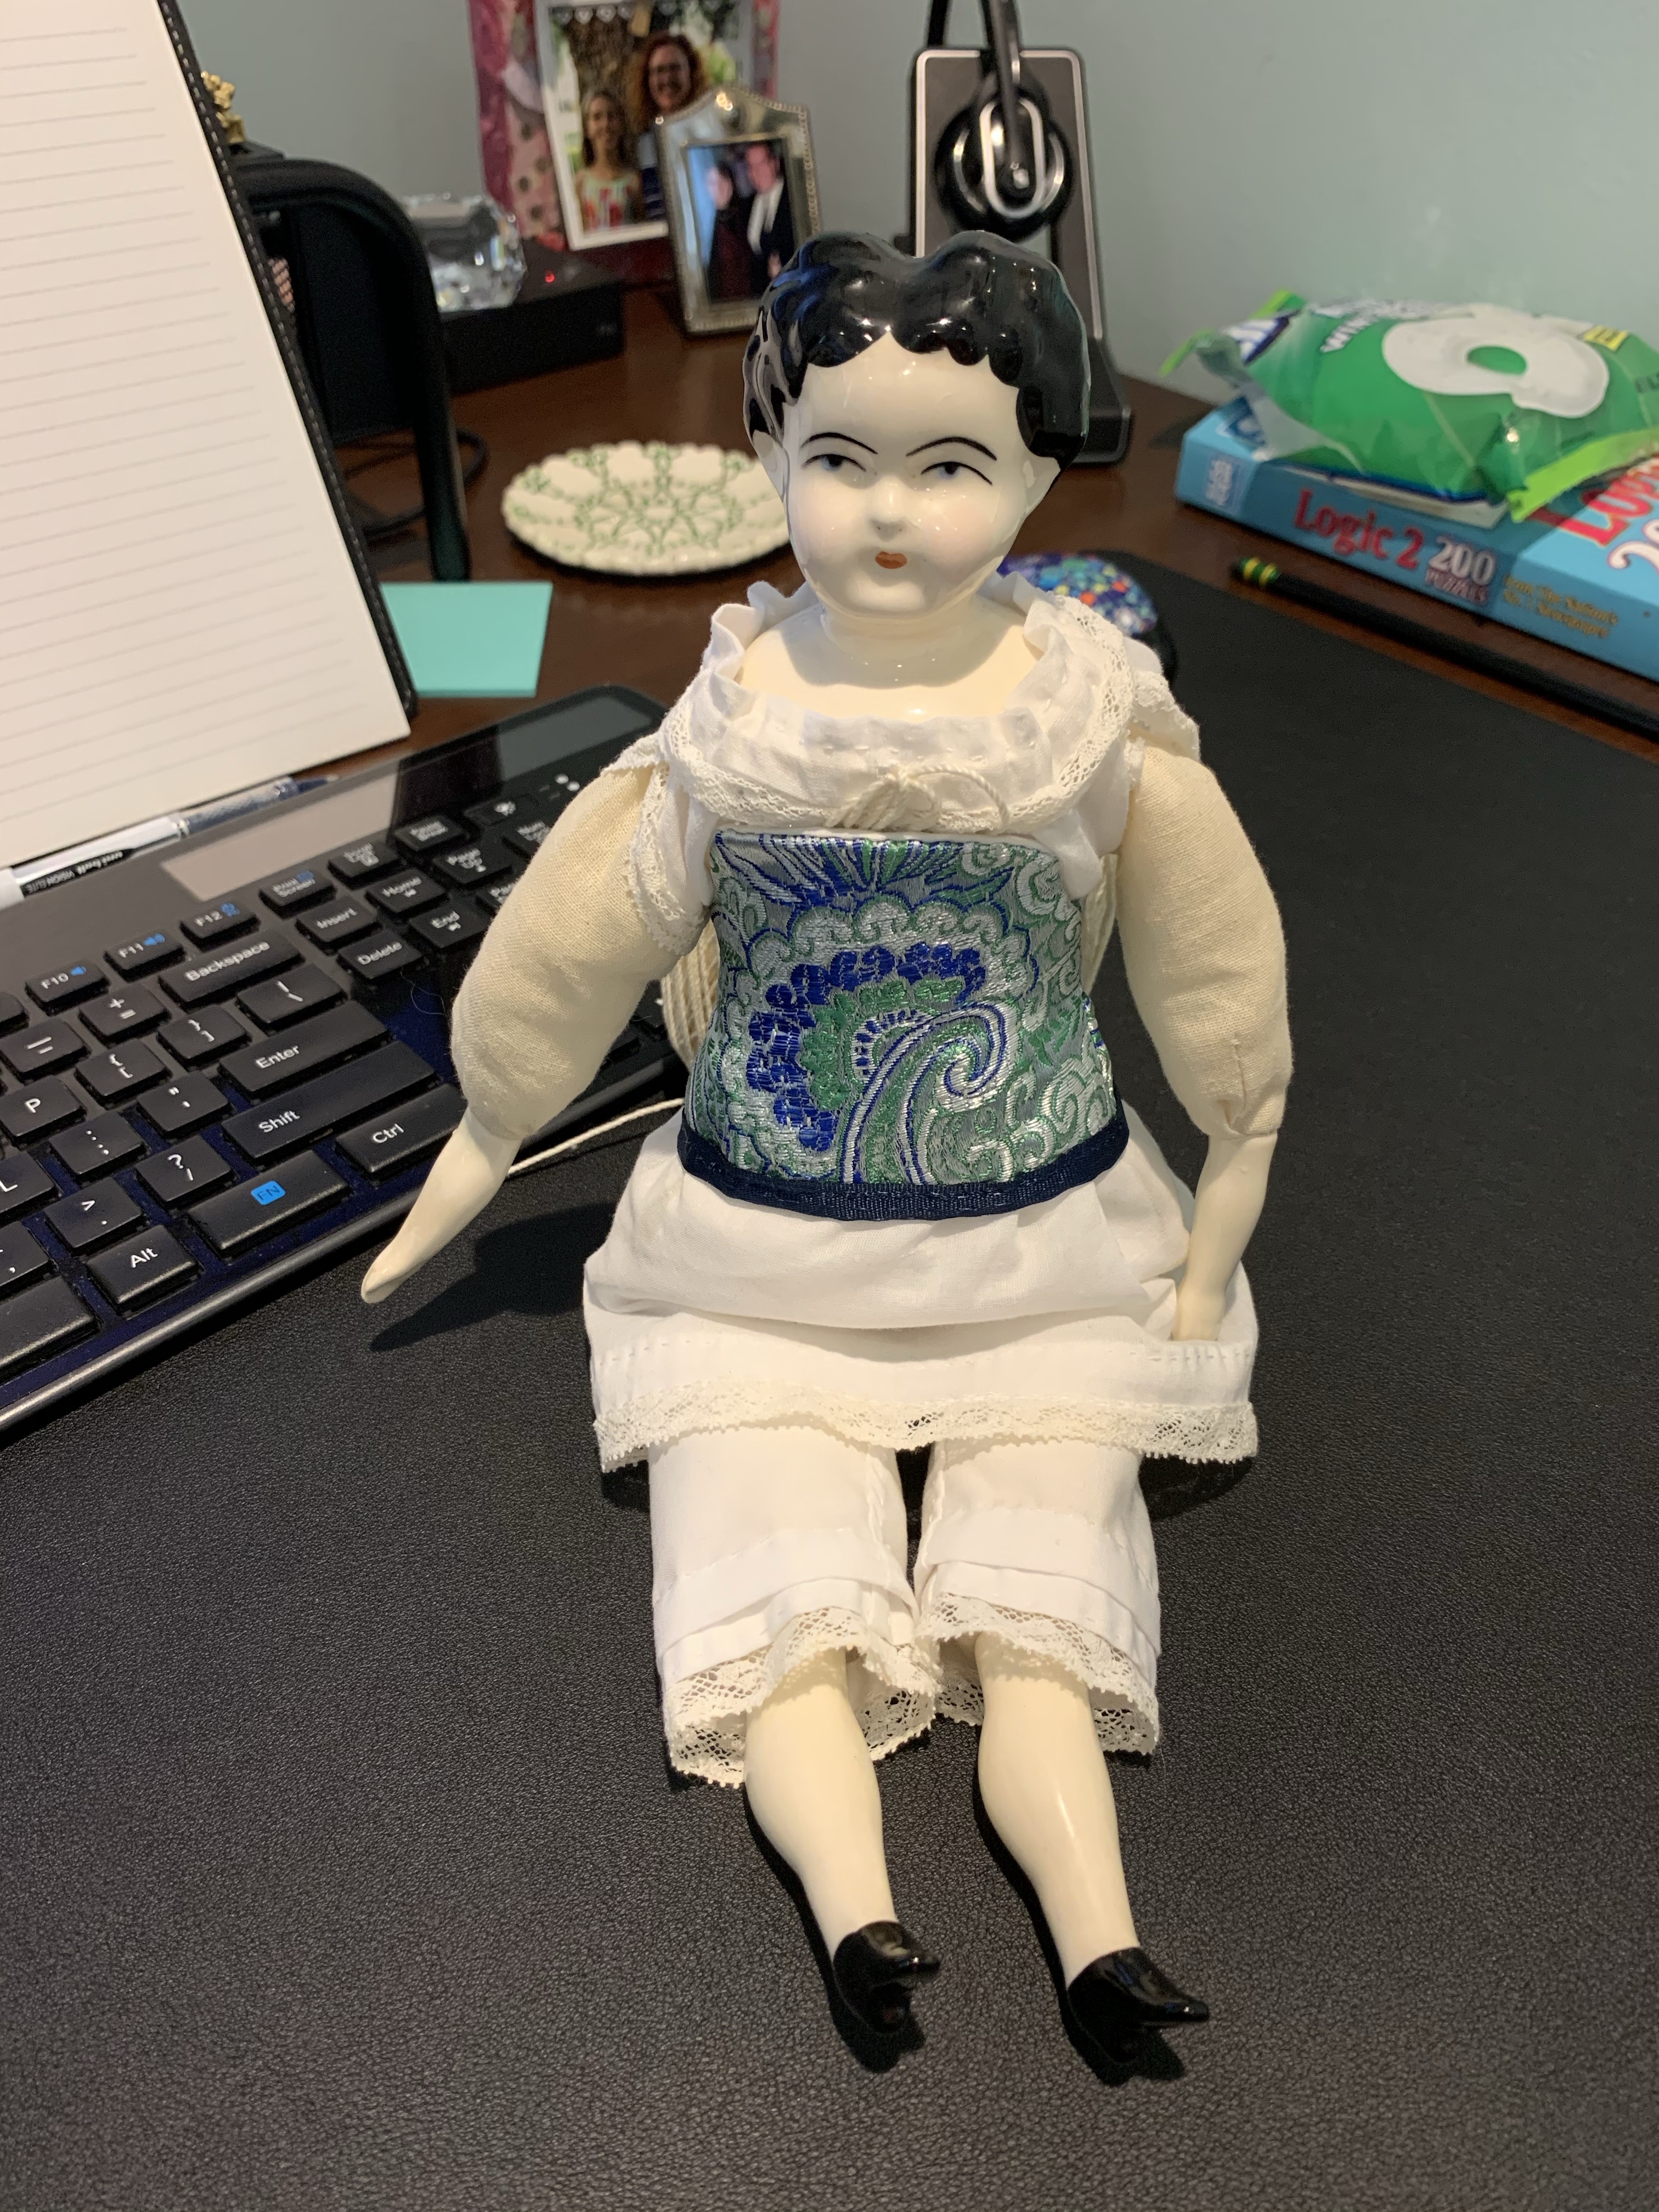
For someone who is a documented doll disliker, I have become fascinated by them. Not playing with dolls, or displaying them. And not all dolls; I like very specific styles of dolls designed in the mid-nineteenth century. Of course I can’t afford the real dolls – or, more accurately, I won’t afford them.
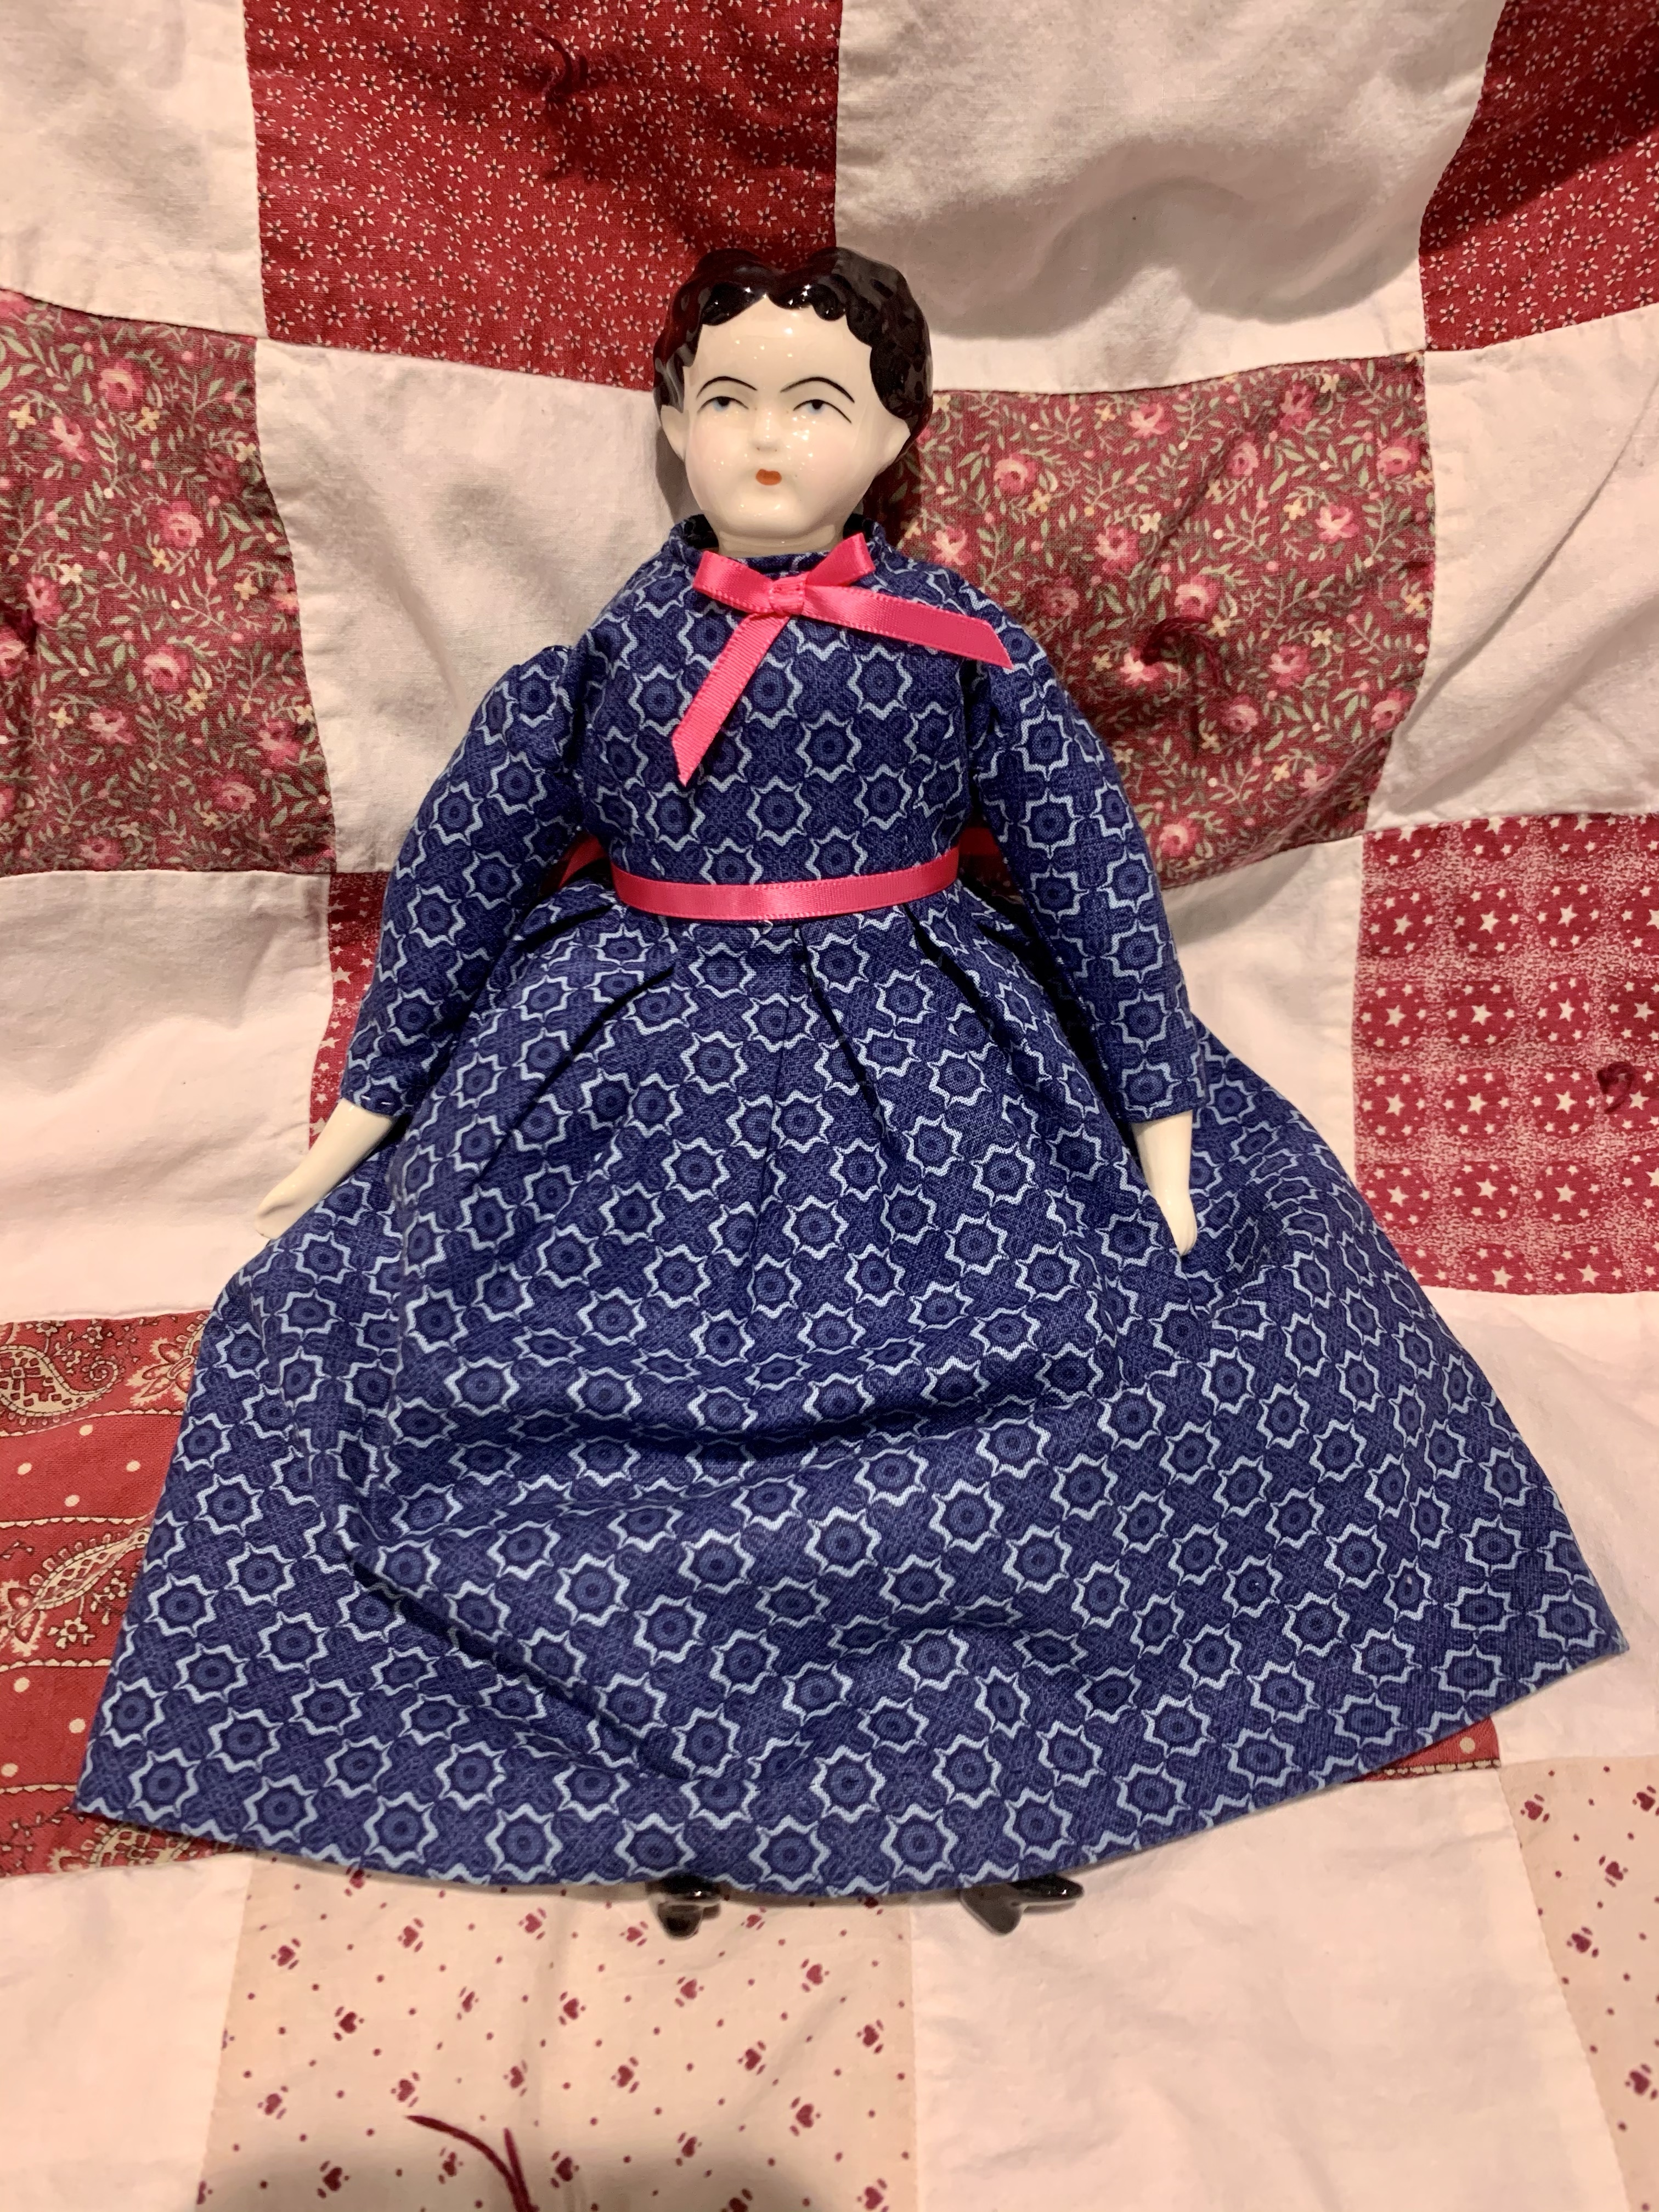
This doll, Nell, is a reproduction late 1860s-1870s cloth bodied doll. She has China head, hands and feet. I did not make her, but adopted her off eBay. She was designed by Tasha Tudor in 1977. I don’t know much about Tasha Tudor except to say she was an artist who loved dolls. In the 1970s there was a revival of these China head dolls sold as kits for home doll makers. Many brands offered the kits, and I don’t know how accurate they were.
Nell was poorly constructed – her legs are twisted and her arms are attached incorrectly as well as being rather fat. I could have remade her body, but I decided I love her as she is.
Sweet Nell came to me in a truly unattractive outfit. Remember she was made in the 70s. The dress was made from orange sprigged searsucker. Yikes.
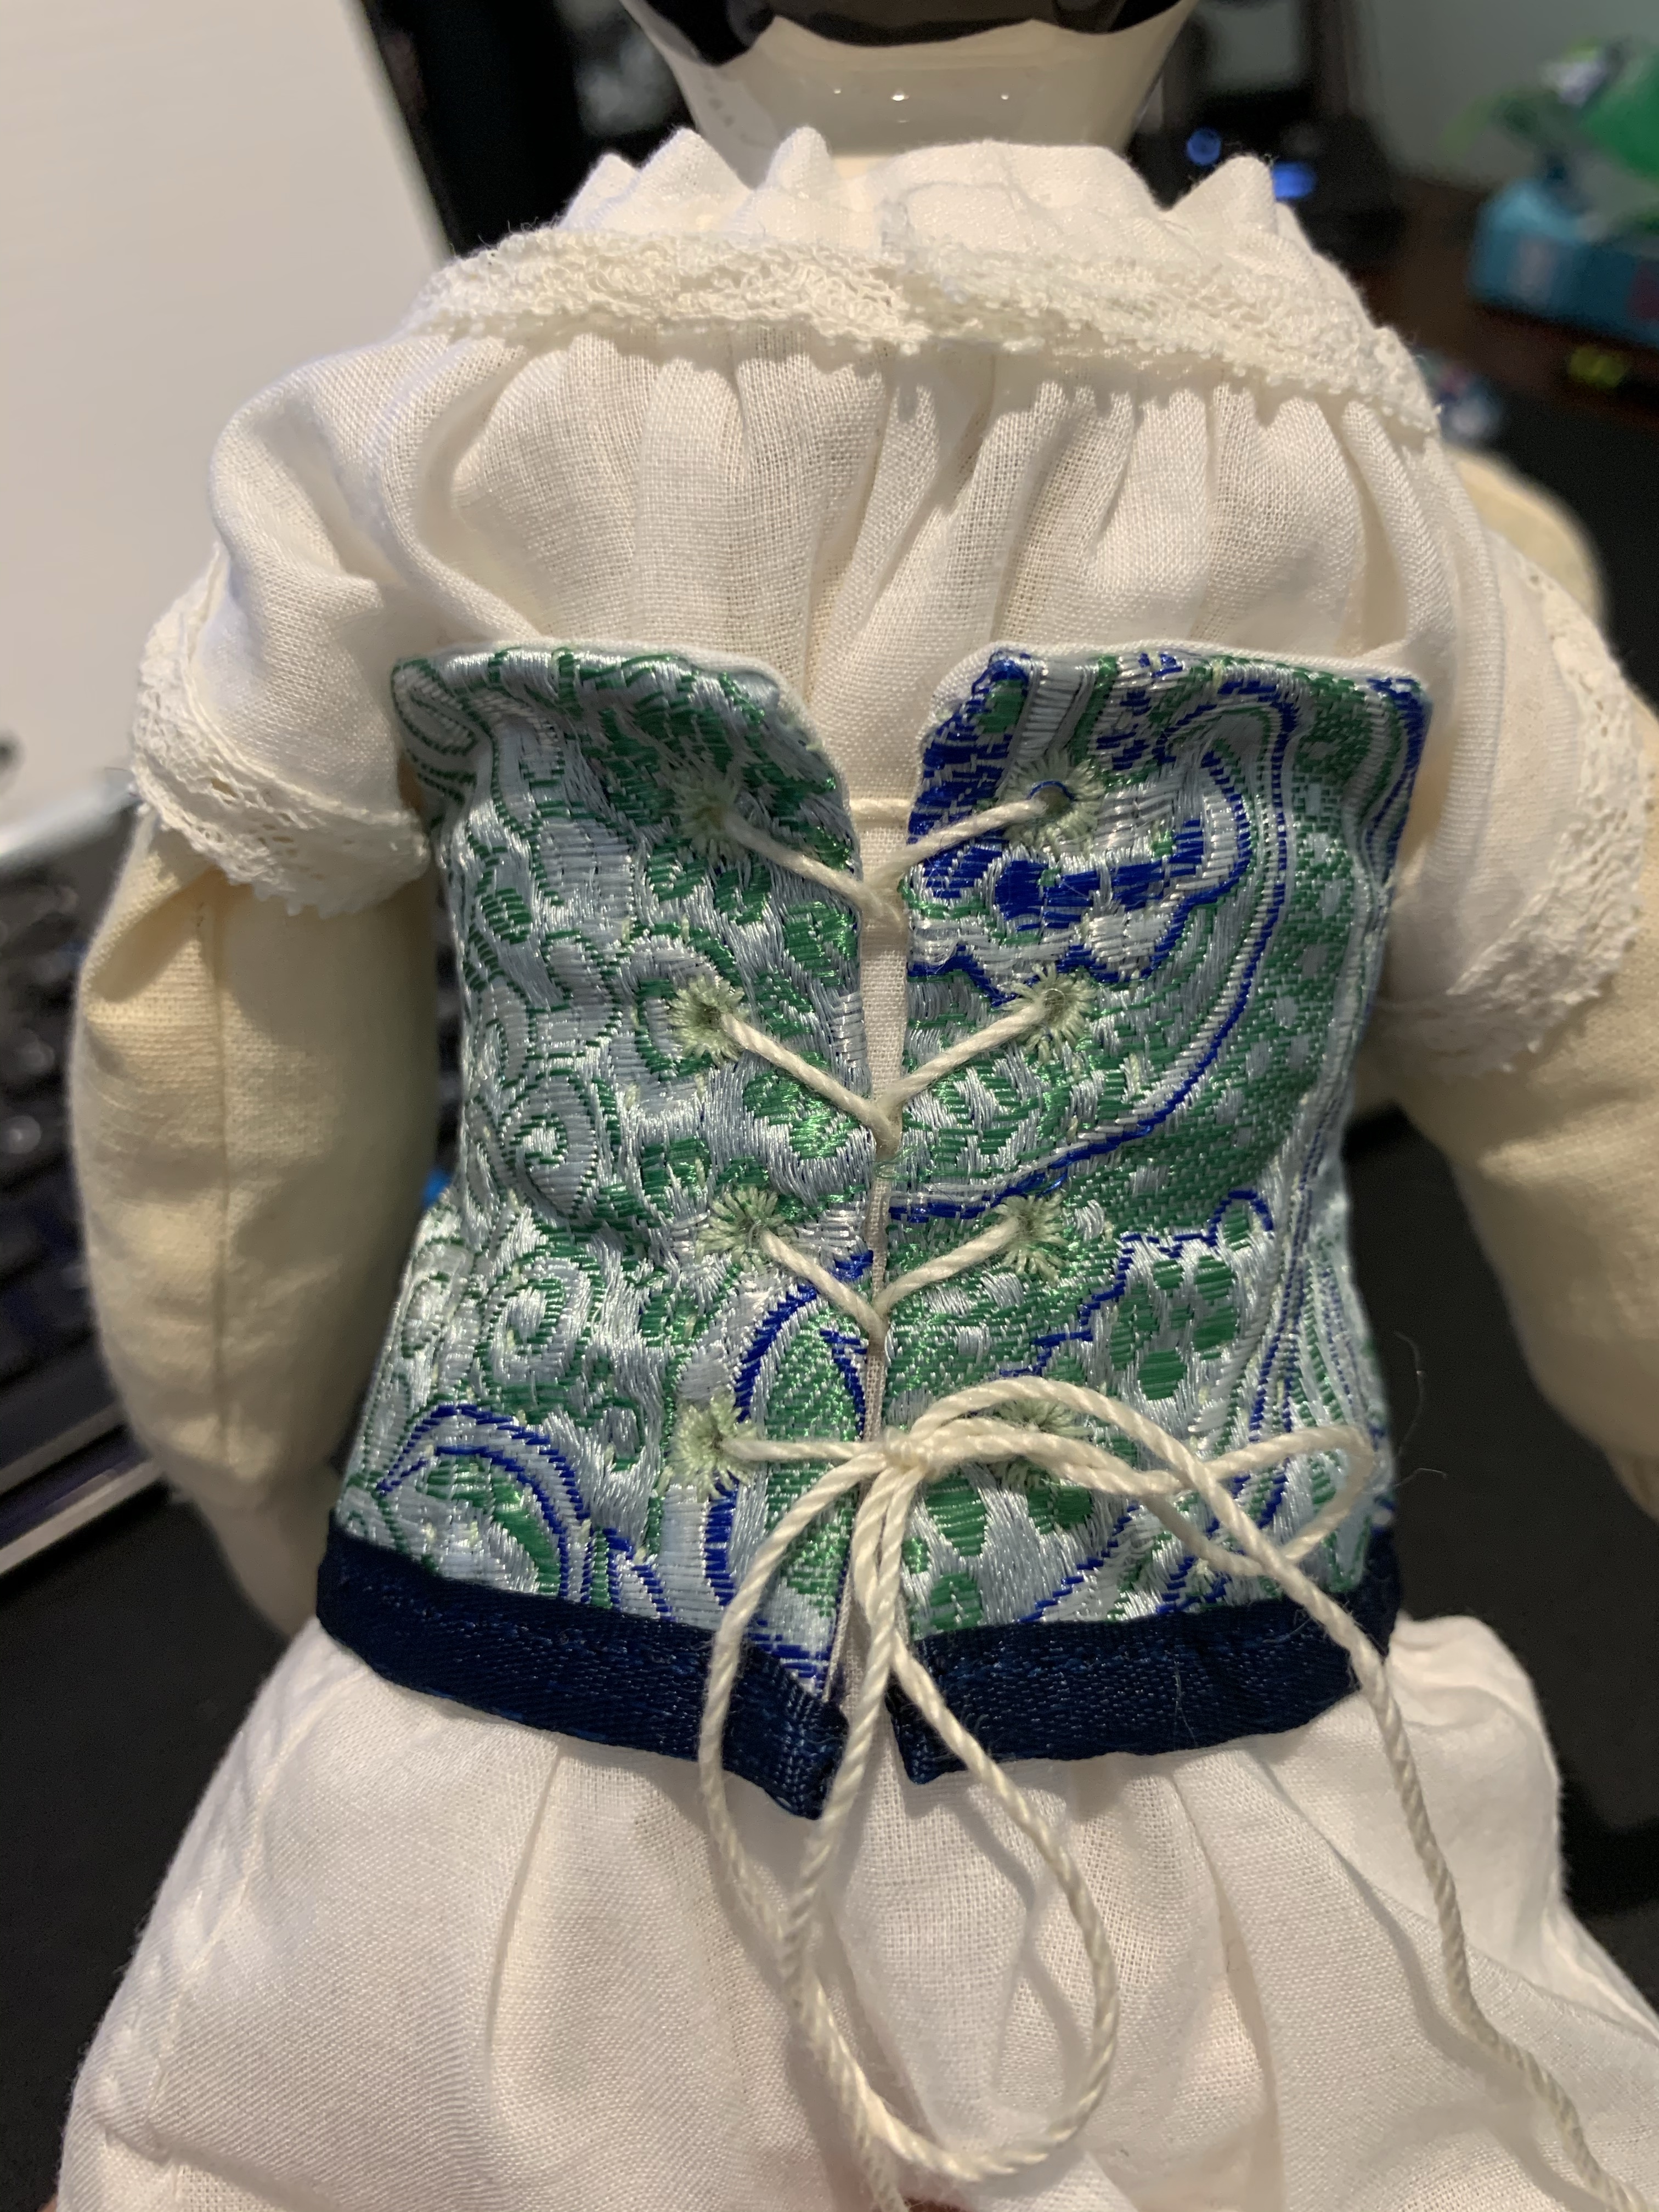
Since I want to eventually use my dolls for teaching and display at history events, I could not leave her in this crazy outfit. From the muslin out, I redressed her. First came a new chemise and drawers from white cotton. I figured for a nicer doll I could have some fun with her corset and made her a corded corset with this beautiful brocade I had. Add a nice tucked petticoat and we are ready to keep going.
At some point after the first photos I remade her chemise. I never did like the first run at it. The new one is tucked to the neckband and lays much more smoothly. Unfortunately for Nell, it took me another several months to make her dress. I took a break to decide exactly what to make for her. Since she is later 1860s, I wasn’t limited to typical hoop skirt styles. While the basic bodice didn’t change too much after 1864, skirts and embellishments did.
I spent some time researching exactly what to make, delving into French fashion magazines and dreaming of the garments I would make her. And then I made a basic, almost boring, dress.
The fabric is cotton meant to mimic a patterned wool, which would commonly have been used. I modeled the dress off the amazingly versatile patterns from Liz Clark, modifying them to fit Nell. The skirt has box pleats at the waist, which were a more stylish method of attaching a skirt. It was a bit boring on its own so I added the pink ribbon bow and belt.
Next episode, look for the gift I created for my sister.
In all my spare time, I have made some more dolls. I never thought I would become so enthralled with dolls or their clothes, but 2020 was a year of sucki-ness, and I guess I actually did have some spare time. Anyway, I made a second doll from the Elizabeth Stewart Clark pattern.
This is Mernie. She has similar undergarments to Emalie, except I tried making a quilted petticoat. Since I had never even quilted before, this was quite a challenge for me. The pattern says to follow any quilting pattern. Well, I don’t know any quilting patterns, let alone an 1860s era pattern. So I made one up.
The pattern is really designed to hold the layers of fabric in place, I measured out the diamond pattern I wanted, adjusted, remeasured, then marked it out in chalk. I thought it would take forever. What I discovered was that quilting is kind of zen. I get in the zone and felt remarkably relaxed when I finished.
Mernie has a gathered front bodice with bishop sleeves. I like the gathered front, but let me just say that the cuffs of the bishop sleeve are insanely tiny. It was a challenge to finish them nicely – but one I felt up to completing.
I quite like Mernie. I feel I made improvements on my first attempt with this pattern.
Remember that TV show Trading Spaces? The one where friends overhauled each other’s living rooms, sometimes with amazing success? My husband and I loved that show, and were inspired at the time to think that we could take on the task of repainting our kitchen cabinets. The home we lived in had these really dark brown circa 1972 kitchen cabinets that were just oppressive.
We learned the hard way that there are professionals for a reason. Although DIY projects are fun, and lots of people are capable of tackling these kinds of projects and having great results, we are not in that group of people. Our cabinet repainting project was not an amazing success. At all. At our next house, we worked with professionals, and we learned that home upgrades, when done by someone who knows what they are doing, are not all that bad. We enjoyed seeing the progress every day. The changes we made helped us sell that house and buy the home we live in now.
Our current home was effectively the same as it was in 1959, with updated appliances and flooring. We are now approaching the end of a significant remodel of this house, and we have stayed in the house through the entire process, except for three weeks we spent in a hotel when we had to leave due to health and safety concerns – you know, like asbestos removal. We started the project in August 2016 with the outdoor demo. It is now June 2017 and we still have a couple months to go.
Many people cannot afford to do their project if they have to move out and rent an apartment or second home, so staying in their home during the work is a popular solution. Living through a renovation is a serious decision that you and your family must commit to so you don’t run into too much family conflict. Had we fully known what to expect, we might have done a few things differently, so I wanted to share some of my learnings to hopefully help you make the plunge into happy home renovation.
Here are my tips on how to prepare for living in – and through – your renovation.
Plan to discuss every decision with your partner openly, and reach an agreement together before taking any action. If you don’t agree with each other, you have to find some way to come together in compromise so you can happily live in your home once the work is done. Communication is important in general so that you don’t harbor any resentments or negative feelings that may develop during the project. Your remodel is a huge step in home ownership and should be one of excitement, not lingering anger or annoyance.
Decide what your style will be. Once we realized we liked and wanted to embrace the mid-century modern style of our home, everything was easy. When you have no idea what you want things to look like at the end of the project, there can be confusion about floors, walls, door styles, baseboard styles, cabinets, etc. You don’t want styles to clash or not work with the flow of the home. You may choose to work with a designer, and that can be helpful if you are uncertain about what coordinates, but be sure to interview potential designers to make sure they “get” your style and you. We also spent literally hours researching on the internet. Any minor thing we were unsure of we looked for pictures. How should the baseboards meet the kerf jambs? Look on Houzz. Should we use light or dark grout on the kitchen tile? Google it. Another resource is YouTube. There are literally thousands of videos that just show snapshots of a theme – if you want to see French country kitchens, retro diner inspired interiors, or homes made out of Airstream trailers, well you can.
Pare down your belongings as much as possible. This one is a hard one for many people, but what is the point of doing a massive remodel or upgrade, just to fill it up with “stuff” once finished? I’m not saying you have to get rid of Grandma’s quilt or Uncle Fred’s baseball collection, but do have storage solutions for the things you are going to keep. I have a collection of family serving dishes so we built a china cabinet into the kitchen cabinets so it can all be displayed and used. Referring back to #2 above, if you are changing your style, there is no sense in keeping things that won’t mesh with it. You can get rid of your old dishes and buy all new once your home is finished if you like. More importantly, if you are planning to live in your home during your remodel, you don’t need your stuff 1.) in the way or 2.) getting damaged. Keep only what you absolutely need for day to day. If your project will last several months like ours, make sure you keep your winter clothes handy while you are packing in late summer, otherwise you will find yourself cold and shopping in December (not that I speak from personal experience, ahem.) Be prepared to continually pare down your stuff as the project progresses. Finally, if you are planning to store your stuff off site, carefully evaluate whether the cost of storing that single-use appliance or collection of soup ladles is worth keeping them. For us, the answer was frequently “no” and the people at Goodwill knew our car by the time we finished packing.
Work with professionals. Unless you are a general contractor, most people don’t have the contacts in the industry to hire all the necessary trades, schedule all the different jobs, arrange for city or county inspections, and manage the overall process. A licensed, insured and bonded general contractor is worth every penny. They will spell out everything in a contract so you shouldn’t have have any questions, and if you do they should answer them all. They also know lots of people and companies in the building industry, and can tell you who to talk to, and guide you to brands they have good experiences with. Any additional personnel you hire should also be professionals – architects, designers, landscapers – and should be able and willing to work with your general contractor to move the project along toward completion. When the trades work against each other it only creates delays and headaches. Finally, if there is an issue during the project your general contractor should be your advocate to ensure you get what you want.
Negotiate pricing wherever possible. We worked with a local appliance wholesaler who would price match. You bet we searched every item on sites like Amazon and Best Buy. When we were researching tile for the kitchen, we talked not only to the distributor our contractor likes, but several others, and we did shop them against each other. No shame here, this is a major investment. Get the best price you can without being cheap or rude. Remember that the people you talk to at the wholesale houses just work there. If the tile you like gets discontinued before you place your order, it’s not their fault so don’t scream at them. Don’t forget that you get what you pay for, so be educated on the differences between laminate, hardwood, vinyl, and tile, for instance. If you buy cheaper supplies, you may have to replace sooner than later.
It will be much more dusty, dirty and inconvenient than you could imagine. We were fortunate to have two bathrooms and the ability to split our project into two parts so we would have a full working bathroom throughout the project. However, sharing a small bathroom with your whole family involves coordination and patience. Try to keep routines whenever possible (for kids in school, work schedules, etc) but be flexible with one another. Keep the spaces you use as tidy as possible. Cramming your whole family into one bedroom can get crowded, and clutter will just make Mom and Dad irritated, leading to yelling and crying – no fun for anyone. There is very little privacy. Consign yourself to wearing slippers and/or shoes all the time – if you are like me and like bare feet, this is no fun at first but there will be nails, screws and splinters dropped on the floor. Drywall dust is pervasive and you will find it everywhere, even in the rooms you don’t touch. If your kitchen is being redone, consider setting up a place in your house for a toaster oven, microwave and coffee maker. This will be your kitchenette for the duration, and will help keep you more healthy than if you eat out every meal. Don’t forget that you will be washing dishes in your bathroom sink. If you enjoy wine, don’t be afraid to drink it.
Accept that there will be delays and things may take longer than you expect. There will inevitably be delays. Things happen and there will be situations that are out of your control. We had a window get delivered in CO instead of CA and the extra shipping broke it. Getting a new custom built window delayed us almost a month. This is no one’s fault. The installation of flooring is precision work and should be done with care and attention to detail. If your contractor budgets 2 days to tile a 2000 square foot house, something is not right there. Some days we could hear the workers hammering but had no idea what they had done all day. While demo, framing and drywall are very visual and seem to go really fast, the detail work is slow but just as important.
Draw a line in the sand on change orders. As you install wiring for a wall-mounted TV, you may be tempted to install wiring in every room in the house. If you did not include it in the original project, this is a change order, and change orders are what send well planned projects over budget. The new kitchen cabinets may make the unchanging bathrooms look shabby. If you paint the walls but keep the existing floors, the floors might start to look dingy. Prepare for changes during the project but agree upon a point where there will be no more changes. This will save you money and heartache in the long run.
Be prepared to cut things from your project. This can be necessary if there is hidden damage exposed when drywall comes down, or previous work on your house isn’t up to code. Having a set amount of money is a blessing and a curse at times. You only have so much, so you need to prioritize how you spend that money. When it came down to it, we chose to replace large plate glass windows with safer tempered glass and we cut into our A/V spending. Health and safety come over in-wall speakers.
Get to know your crew. We have developed a healthy respect for the various trades and the people who perform this work for us. Living and working here, we see them every day. Not too many people ever think about what goes into building or remodeling a home, but it is the largest purchase most of us will ever make. Know the people who are helping to make your house into your dream home. Not only will you appreciate their workmanship, they will want to do the very best job they can for you.
BONUS ITEM – Take tons of pictures. Of course, you will take pictures! Take more than you think you will need. We have saved ourselves some pain long after the fact because we took pictures during the framing, plumbing, electrical, and every other stage. Once that drywall is up, you might not remember where the sheer wall ends, where exactly those pipes were set, or where the electrical wires wind through a stud. A photo can give you and your team a better idea when they have to make adjustments. If your camera can do a panorama view, take a few of those from the same location throughout the project. It is fun to see how that space changes over the months. We used a time lapse camera for some parts of the project, such as framing, drywall installation and flooring. It really works best in a large space. We also did monthly video recordings updating what had happened in the previous month. These will be fun for us to review in the future.
I hope that these tips help you as you prepare for your remodel. Make it as enjoyable as you can so that once the project is concluded, you will have many happy memories of it coming together. For some fun, check out my Instagram feed for pictures of stucco going on, custom cabinets getting installed and more.
I haven’t run a Growing Up OC article in quite a while, but have had some brewing in the back of my mind. Today my daughter’s summer day camp went to Atlantis Play Center, and since that was one of the places I loved as a kid, I was delighted to discover it is still around.
As a kid in the 70s, Atlantis Play Center seemed like a magical wonderland. It’s most memorable feature for me was the dragon slide. How could you not love that thing? It seemed like it went on for miles and miles, through bushes and under trees.
Danny the Dragon
As I remember it, there were shrubs all along the sides of the slide and the “big kids” would run through and behind the bushes from the bottom back to the top. There were little “trails” from where the gardeners walked, raked and cleaned the falling leaves, and these always made me want to sneak around in the bushes. We would play games of hide and seek, or just hide and surprise our friends. When I was younger, I envied the big kids who would go play on those trails. When I became a big kid – maybe a whole year later? – I was so excited to do exactly that.
During construction
Here’s a great image of the dragon slide during construction of the park 51 years ago. That’s right, Atlantis Play Center is 51 years old! All I knew was that it seemed like we drove forever to get there (we didn’t) and that the park was gigantic (it wasn’t). However, it is no slouch in the space department, being placed on 4 acres in central Garden Grove, CA. We often went with the neighbor’s, Leslie & Karen, Robbie & Timmy, other kids I can’t remember. I do recall we once had a picnic next to the Viking Ship.
Land, ho!
In this image, you can see in the background right the bushes that used to cover the dragon slide. This is the Atlantis of my childhood memory. These days, there are splash pads available for fun and play. The entrance fee is only $2 per person with kids under 2 free. I’m sure for kids today, as for kids of days gone by, it still inspires the imagination and generates hours of fun!
See the City of Garden Grove for more details on Atlantis Play Center, including directions & FAQs.
As a funny side note, when I was in high school I played basketball and our team played in a scrimmage up at Bolsa Grande High School, which is right across the street from Atlantis Play Center. I ended up catching a ride from this one girl who I idolized. She had a junker old car, and as we made the left turn from the school onto Westminster Blvd, she accidentally drove on top of the narrow center divider – driver’s side wheels on one side of it, passenger side wheels on the other! We laughed so hard we cried! After that, she talked to me at school and made me feel like she “saw” me, even though I was pretty much a basketball dork, lol. I’ll never forget that aspect of growing up OC either…great memories of fun times with old friends.