Follow Along: Empire Hoop

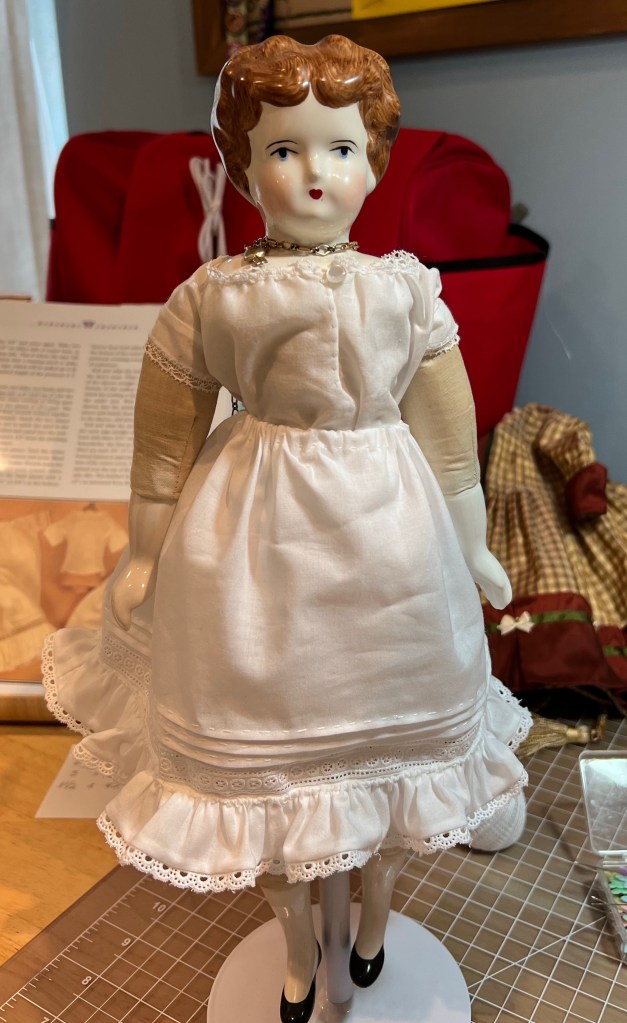
This is another piece of Caroline’s wardrobe that came together fairly quickly. Unfortunately this is the first piece I don’t completely love.

Front view

I made this piece from lightweight linen and the three basic pieces are fast to construct. Frankly, the casings for the inside of the garment also came together easily and quickly. It’s not a difficult item to construct.

Side view

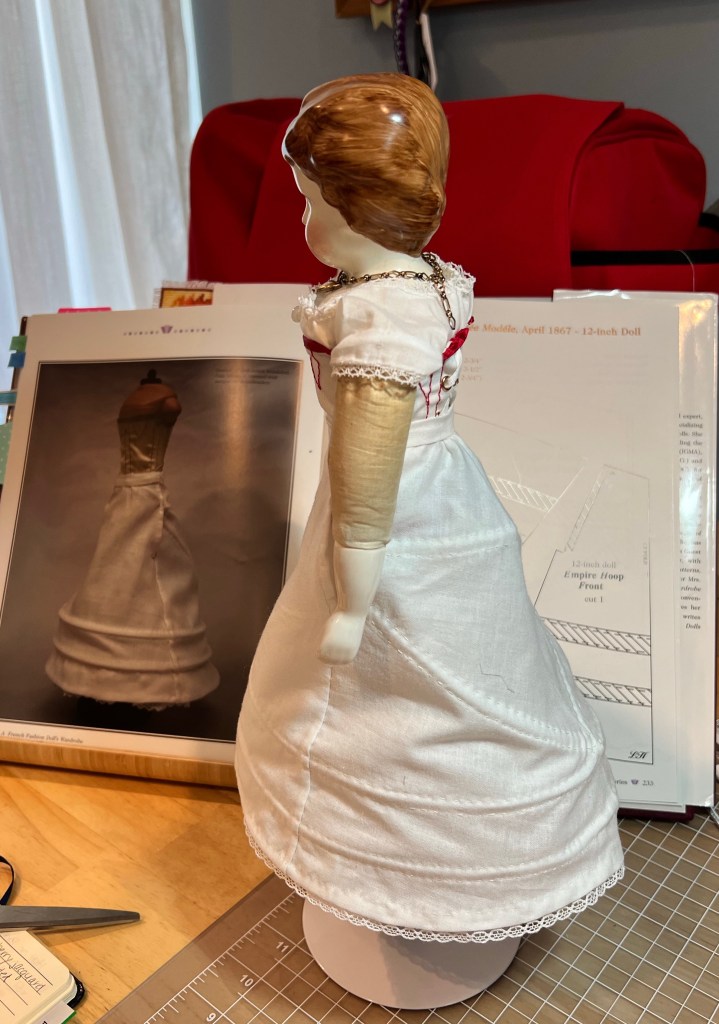
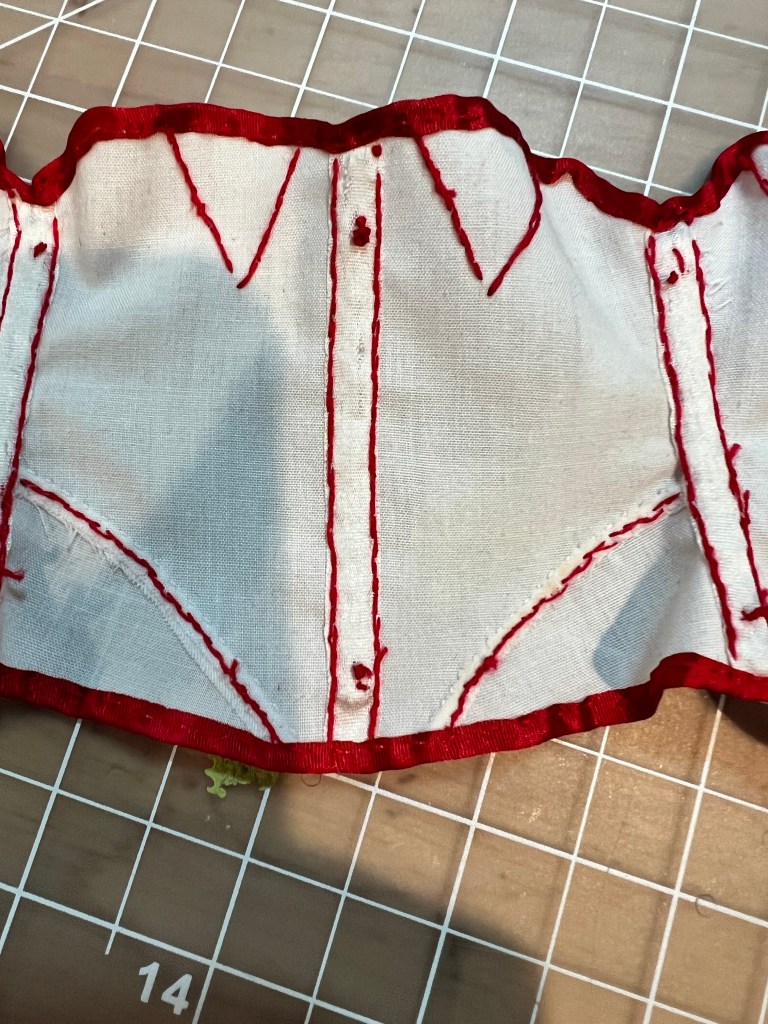
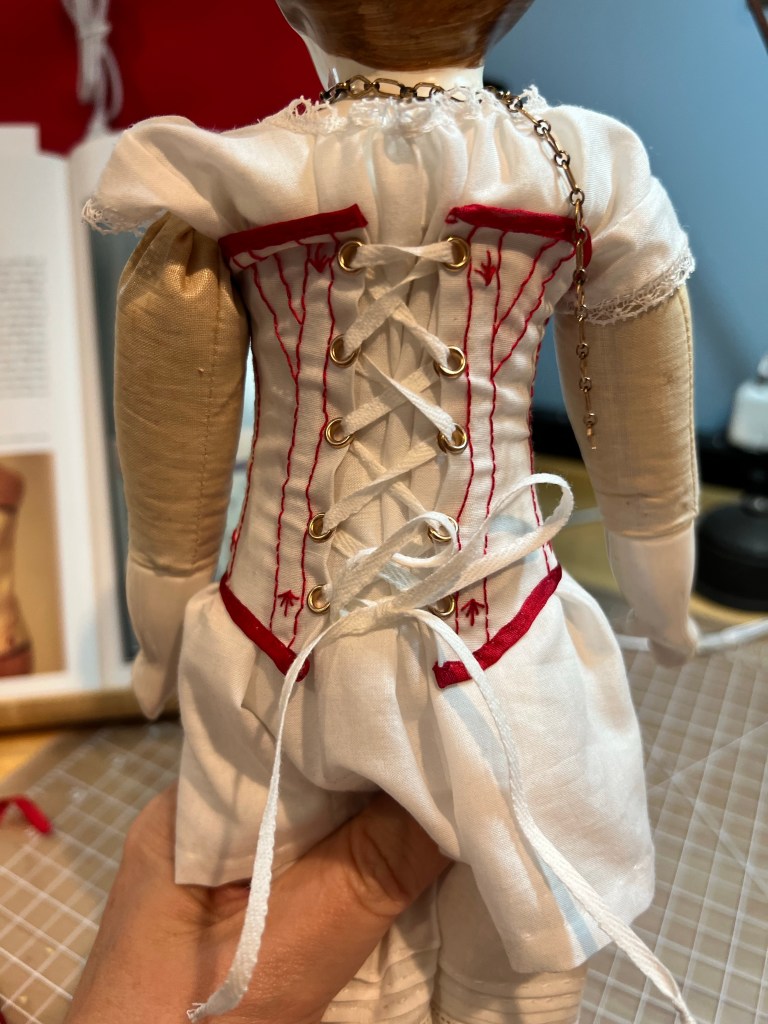
The frustration began with the overlapping of the wires at center back. This was sooo fidly. The instructions say to overlap by 1/4” and bind the two pieces together with thread. I found this to be tricky at best. Because the gauge of hat wire used, it is not very flexible and so quite difficult to manipulate into place, then get it to hold still while tying it together and not accidentally stitching the piece to the body of the garment. All this machination mangled the raw edges of the casings. Since the instructions are a bit sparse here, should you want to make this item I recommend leaving some length at the ends of the casings, shaping the wire as desired, and then sewing the casings closed. These are doll clothes and it’s not like Caroline is going to be walking around causing the wires to shift. I wish I had thought about that before I spent so much time at this juncture of the project.

Back view

The second area of frustration was the binding of the side openings. I believe this pattern is based on recreating an original and honestly, maybe this bit should have been updated. Rather than four individual pieces of binding, it might be easier to use one longer piece that would also encase the lowest point of the opening. This raw edge is left exposed by following this pattern and I would prefer it to be encased.

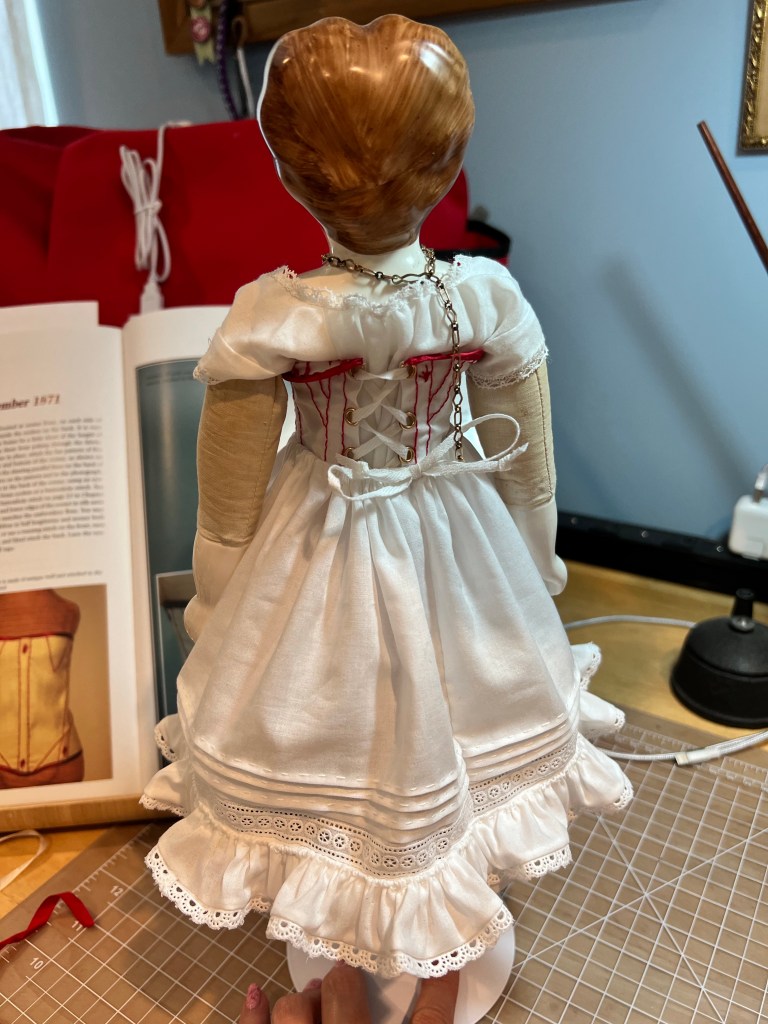
Final critique, no where in the instructions do they tell you to hem the garment. I recommend doing this before you add the boning. And maybe even add the lace trim at the same time. Once the boning is in, the skirt behaves very differently from an unstructured garment. Just my two cents.

I don’t super love the outcome based on these issues and I can’t seem to get the wires shaped the way I want them. Maybe I’m overthinking it.

Yes I put the petticoat over it

Follow Along: Doll Corsetry

Hello again, doll loving friends! A variety of side projects and real life stuff has kept me from this particular project, but I’m so thrilled to have completed it!

Caroline’s new corset

This little project felt intimidating at first, but once I did up a mock up and made a couple adjustments, it came together in a few hours.

If you have ever made an IRL corset, this one will feel a bit incomplete because it is made with only one layer of fabric. IRL corsets are made with several layers and no thread tails will be visible. Since this is not in fact a real corset, there are some differences. :-)

The five pieces come together very easily. Boning channels are added to the inside with colored thread, which has the added benefit of the decor color. The flossing is added after the boning and since the instructions didn’t give any detail, I used the flossing to secure the boning in place inside the boning channel.

The book included no photos of the inside of the garment, so I’ve taken some for your viewing pleasure.

It is necessary to make the inside very tidy.

The brass eyelets were quite easy to add. I think if I were to make another of these, I’d extend the center back by about 1/8”. The boning channel is supposed to stitch down the raw edge of the fabric, but with only 1/4” folded under and the need to allow for the 1/8” eyelets, it’s a little more crowded than I’d like.

But ooh la la, it’s so sweetly pretty! This garment is particularly useful for Caroline since her body is sagging a bit from age & settling inside (sounds a bit like me, too haha). You will want to bind the ends of the twill tape ties in a faux aiglet to they will thread through the eyelets and not fray. To do that, bind them in thread several times and knot it once or twice very neatly & tightly.

Next for Caroline will be either her hoop skirt or a corset cover. See you again soon!

A pretty side project

The next bird in the Squishy Cute line that I made recently is this beautiful hummingbird.

My mother really liked it and it was pretty simple to make, so double win. If you decide to try some of the Squishy Cute patterns, I recommend tracing the pieces onto the felt rather than pinning. For dark colored felt use chalk. This particular one calls for a black sequin and a seed bead but I didn’t have a black sequin. I used a black button.

Find them on Etsy here. They have more than birds, too.

Follow Along: petticoat

The third installment of Caroline’s undergarments is this ruffled petticoat.

You will see it mirrors the three tucks seen on the drawers and also the insertion lace. The lower edge of the petticoat is made of a doubled piece that sandwiches the lower edge of the insertion, making everything nice and clean on the inside.

The ruffle is made by gathering on a narrow cord. Depending on the size of your doll, you could use pearle cotton or even some embroidery floss if you don’t have a narrow enough cord. The gathered ruffle is then stitched onto the lower edge.

The waist is gathered with 1/8” twill tape inside a casing. It calls for worked buttonholes but for some reason I am better at eyelets so that’s what I did. The benefit of a gathered waist here is that the petticoat can change shape for different eras. Right now I have much of the petticoat to Caroline’s back since I’m making her a bustle dress, but I could easily reshape this to the nice round shape of the 1860s.

Up next will be a fun one – a boned hoop skirt and then her corset. See you again soon!

Follow Along: Loverly loverly

My Gram used to say “ah loverly loverly” sometimes when she saw something pretty or made her happy. Today I am saying loverly loverly about the latest finished item for Caroline.

A full set of drawers!

What with various demands on my weekends I finally got some “me” time Saturday and finished these drawers. I just love how they turned out! the front is pleated to the waistband for a tidy appearance.

Lots of tiny tucks

As you can see here, I used Swiss cotton insertion and edging. I felt like they would give me a better result and I’m very pleased with how they look.

And here is the back where the fabric is gathered to the waistband. Also a worked buttonhole and antique mother of pearl button.

The next piece of the project will be the petticoat. See you again soon!

Sewing Goals

Do you make goals for your sewing projects? I shared at one point that I have been using a project book to keep track of the different dolls I have and what needs to be done for them. The current book is a 8.5×5.5 inch Moleskin type book and it’s getting filled with notes!

Some pages have pictures glued in, while others have my janky sketches of ideas. I say janky because I am NOT an artist but I took one life drawing class so I can at least draw a body or dress – don’t ask for realism or details, and definitely no hands haha.

My idea of drawing

On the front page of the project book I have jotted down some ideas for 2023 sewing projects.

Caroline: drawers, petti, hoop, corset

Dora: practice making new body, make corset as part of torso

Screen shot of a doll on eBay with a corset body

Ruby: make new body, repair what I can, full wardrobe, research Harpers Bazar images 1888

Doll Quilt

Hummingbirds – Mom and A Ruth

We shall see if I stay on task this year. This is a very ambitious project list! Rest assured, I will share my progress with you here and on Instagram. Stay tuned!

Follow Along: Pretty, pretty

A teaser

Sometimes, mistakes are needed to make you slow down, pay closer attention and really focus on details. When I made the lovely but too-small drawers recently I spent a lot of time thinking about how I’d do them differently. I realized I’d made some errors on the tucks. I didn’t like the way the insertion turned out. (My doll Mernie however, loves her new drawers lol.)

So after many side projects and time to consider things, I’ve started a second pair of drawers for Caroline. I tried on her the 1875 drawers I made for Emma a couple years ago and then adjusted the waistline per that pattern. No, the drawers aren’t exact to the book I’m working out of, but it’s not like there are Doll Drawers Police ™️ who will be checking them haha.

I decided to go with Swiss cotton insertion and edging. It’s more sturdy for this tiny project and I think it still gives a lovely result. Sadly this is only one half of the drawers and I’ve been terribly busy so not gotten a chance to make the other half. Soon, I promise! Check out Farmhouse Fabrics, the source of this lace, fabric and much more that I use for doll clothing.

Recent Projects

I’ve been working on a few non-doll related projects recently that I thought I would share.

Cute chickadee

This is the first bird in a flock I am undertaking. I have made two of these so far and will probably make two more. They come together very quickly!

Find the pattern on eBay from Squishy Cute

Pretty cardinal

Here is bird number two in the flock, a gorgeous cardinal. I found the National Nonwovens felt over on Etsy.

Victorian pin cushion

This one is a pin cushion. I found the site Tag Sis, You’re It recently which features many lovely Victorian tutorials. This particular project is in their Historical Accessories section. I altered the design from the original magazine reprint to suit my taste. It’s made from wool felt and I think the next one will be silk. It came together in about 3 hours of stitching off and on. I freehanded the design but you can try transferring it with your preferred method.

I promise I will be getting back to the Follow Along of Caroline’s wardrobe. I just get sidetracked sometimes…oh look, sparkly!

A quick corded petticoat

My girl Emalie has been a bit envious of her cousin Dottie and all of Dottie’s new clothes. So I made her a new dress, and decided to make her a corded petticoat based on an actual child’s corded petticoat my daughter wore when very young. Corded petticoats were handy and didn’t take the place of a cage crinoline. Children could wear them because there were more forgiving, withstood wear and tear, and they could be laundered more easily.

A new dress

Anyway, if you would like your dolly to have a corded petticoat, here are some simple instructions. Keep in mind that Emalie is about 10” tall and her waist is 6” around. You may need to customize measurements for your doll.

Supplies

Medium weight white cotton fabric – 22” x 10.5”

Waistband – 1” x 6.5”

White crochet cotton (I think it’s called Sugar & Cream, I’ve lost the wrapper)

Needle & thread

Start by cutting your skirt and waistband. Set the waistband aside. Next cut 5 22” lengths of crochet cotton.

Lay the skirt fabric flat and measure 2” in from one long edge. Fold the fabric so the other long edge stops at that point. The doubled portion is where the cording will be placed and the single layer will be gathered to the waistband. The longer side of the fold is the outside, the shorter side will be on the inside of the petticoat.

Beginning in the fold, place one of the lengths of crochet cotton all the way into the fold. Stitch through both fabric layers very close to the cord.

Create your next channel by stitching 1/2” from the first stitch line. Then place your cord, and stitch again through both layers, encasing the cord. Repeat this process with the next three cords until you have 5 cords.

Fold under the raw edge of the shorter side of the skirt fabric – the inside piece. You will fold this edge so that the raw edge is enclosed. Stitch with a small running stitch.

I chose to make the back seam a French seam so the edges would be clean. To do this, trim all ends off the cords and tidy up the edges. Match the edges wrong sides together, making sure the cords line up. Stitch, leaving about 2” for the opening.

Turn the fabric right sides together and stitch close to the raw edges inside of the seam. Once completed all the raw edges will be encased in the seam. Finish the back opening in the way you prefer. In this case I whipped it.

Run a gathering stitch along the top edge, then place the waistband. Close with hook & thread bar.

I forgot to take pictures of some of the steps so I hope this is clear enough to proceed! If you have a better way to do one of the steps, please do what makes sense to you. ❤️

A Utility Satchel

Here’s another gift I made this year for Dottie – and she is an adventurer. She has visited many place and enjoys her travels. And every adventurer needs a good utility satchel.

Lots of goodies in her bag

The satchel was inspired by the contents. I found these a while ago and they are just so cute. There is a compass, a map, a passport and binoculars.

The satchel is lined and also has a functional button. Victorian doll accessories often were true miniatures of full sized items. A satchel is a very handy item for ladies who travel & adventure, read and sew, or like to shop and collect interesting objects during their day.

Ready for adventure!

It is lined with a pretty cotton and has a grosgrain ribbon strap. I’m sure Dottie and her person will have a lot of fun exploring the world with these new useful tools.

To make your own handy satchel, you will need:

Exterior fabric – firm twill up to light upholstery in weight

Lining fabric – a pretty cotton

Grosgrain ribbon – 4-6” of 5/8” wide

A shanked button – 1/4”

Needle & matching thread

Cut both fabrics in a rectangle 3” wide and 6 1/2” long. Fold each piece right sides together to form a square 2 1/2” by 2 1/2”. There should be a 1 1/4” flap. Edit: I wrote this rather quickly, so I apologize it is confusing. Starting with the outer fabric, fold one end right sides together, leaving a 1 1/4” flap. Stitch 1/4” side seams. This should leave you with a 2 1/2” by 2 1/2” square pouch. Repeat with the lining fabric.

Stitch the side seams on both pieces. Turn the exterior piece right side out.

Arrange the lining and exterior right sides together, aligning the open edges of the bag. Beginning at the edge of the flap, stitch down the flap side, across the bag, then back up the other side. Leave the end open for turning.

Turn the lining and then tuck it into the bag. Tuck in the raw edges at the open end of the flap and slip stitch it closed.

Add a buttonhole and button. Stitch the ribbon strap onto the back of the bag. Fill with whatever your dolly needs for her adventures or collects along her way!