In my last post about Lydia Kidd, you saw the sheer dress she was wearing – which I actually made for Inez. It just happened to fit Lydia quite well and I hated her being naked. But, I have been busy lately and making all sorts of things!
The Liz Clark pattern Inez is made from includes all the necessary wardrobe items a mid-nineteenth century doll would need, and I’ve been sewing my fingers off. Here’s a small update on Inez’s clothing & accessories.
Pinner Apron
Here we have a nice pinner apron. This style was popular for women working in the home. The apron bib pins onto the dress bodice, hence the name “pinner.” While the pattern is actually for a half apron, it was relatively easy to make it into this style instead.
Next, I made her a nightgown. On this one, I used a fine cotton that is incredibly soft. The embroidery was freehand in a basic pattern I made up.
Fancy nightgownEmbroidery close up
And you can’t have a nightgown without a night cap.
Simple nightcap
Night caps were used to keep people warm in their unheated bedrooms. Try sleeping outside sometime – the addition of a nice cap will help you sleep comfortably all night long. I made it simple but there’s options to make it much more fancy if you like.
While on the subject of sleeping, I made a simple blanket for her.
Cozy Blanket
The blanket is cotton flannel on both sides. If Inez were to sleep in an unheated room, she would probably be pretty warm with this.
I have made a few more things for her, but I’ll save those for another post. Next time, I should have an embroidered cape and maybe even a soutache embellished paletot completed. This weekend we will be at our event and I’ll be making doll clothes as well as displaying Inez, Mernie and Emalie. If you find yourself at the Huntington Beach Central Park, come find us!
In my haunting eBay and learning about vintage dolls, I found many references to kid-bodied dolls. These doll bodies were made with kid leather instead of cloth. Then one day, I saw this artist’s reproduction made with a kid body, for the right price, and I had to have her.
Poor naked Lydia
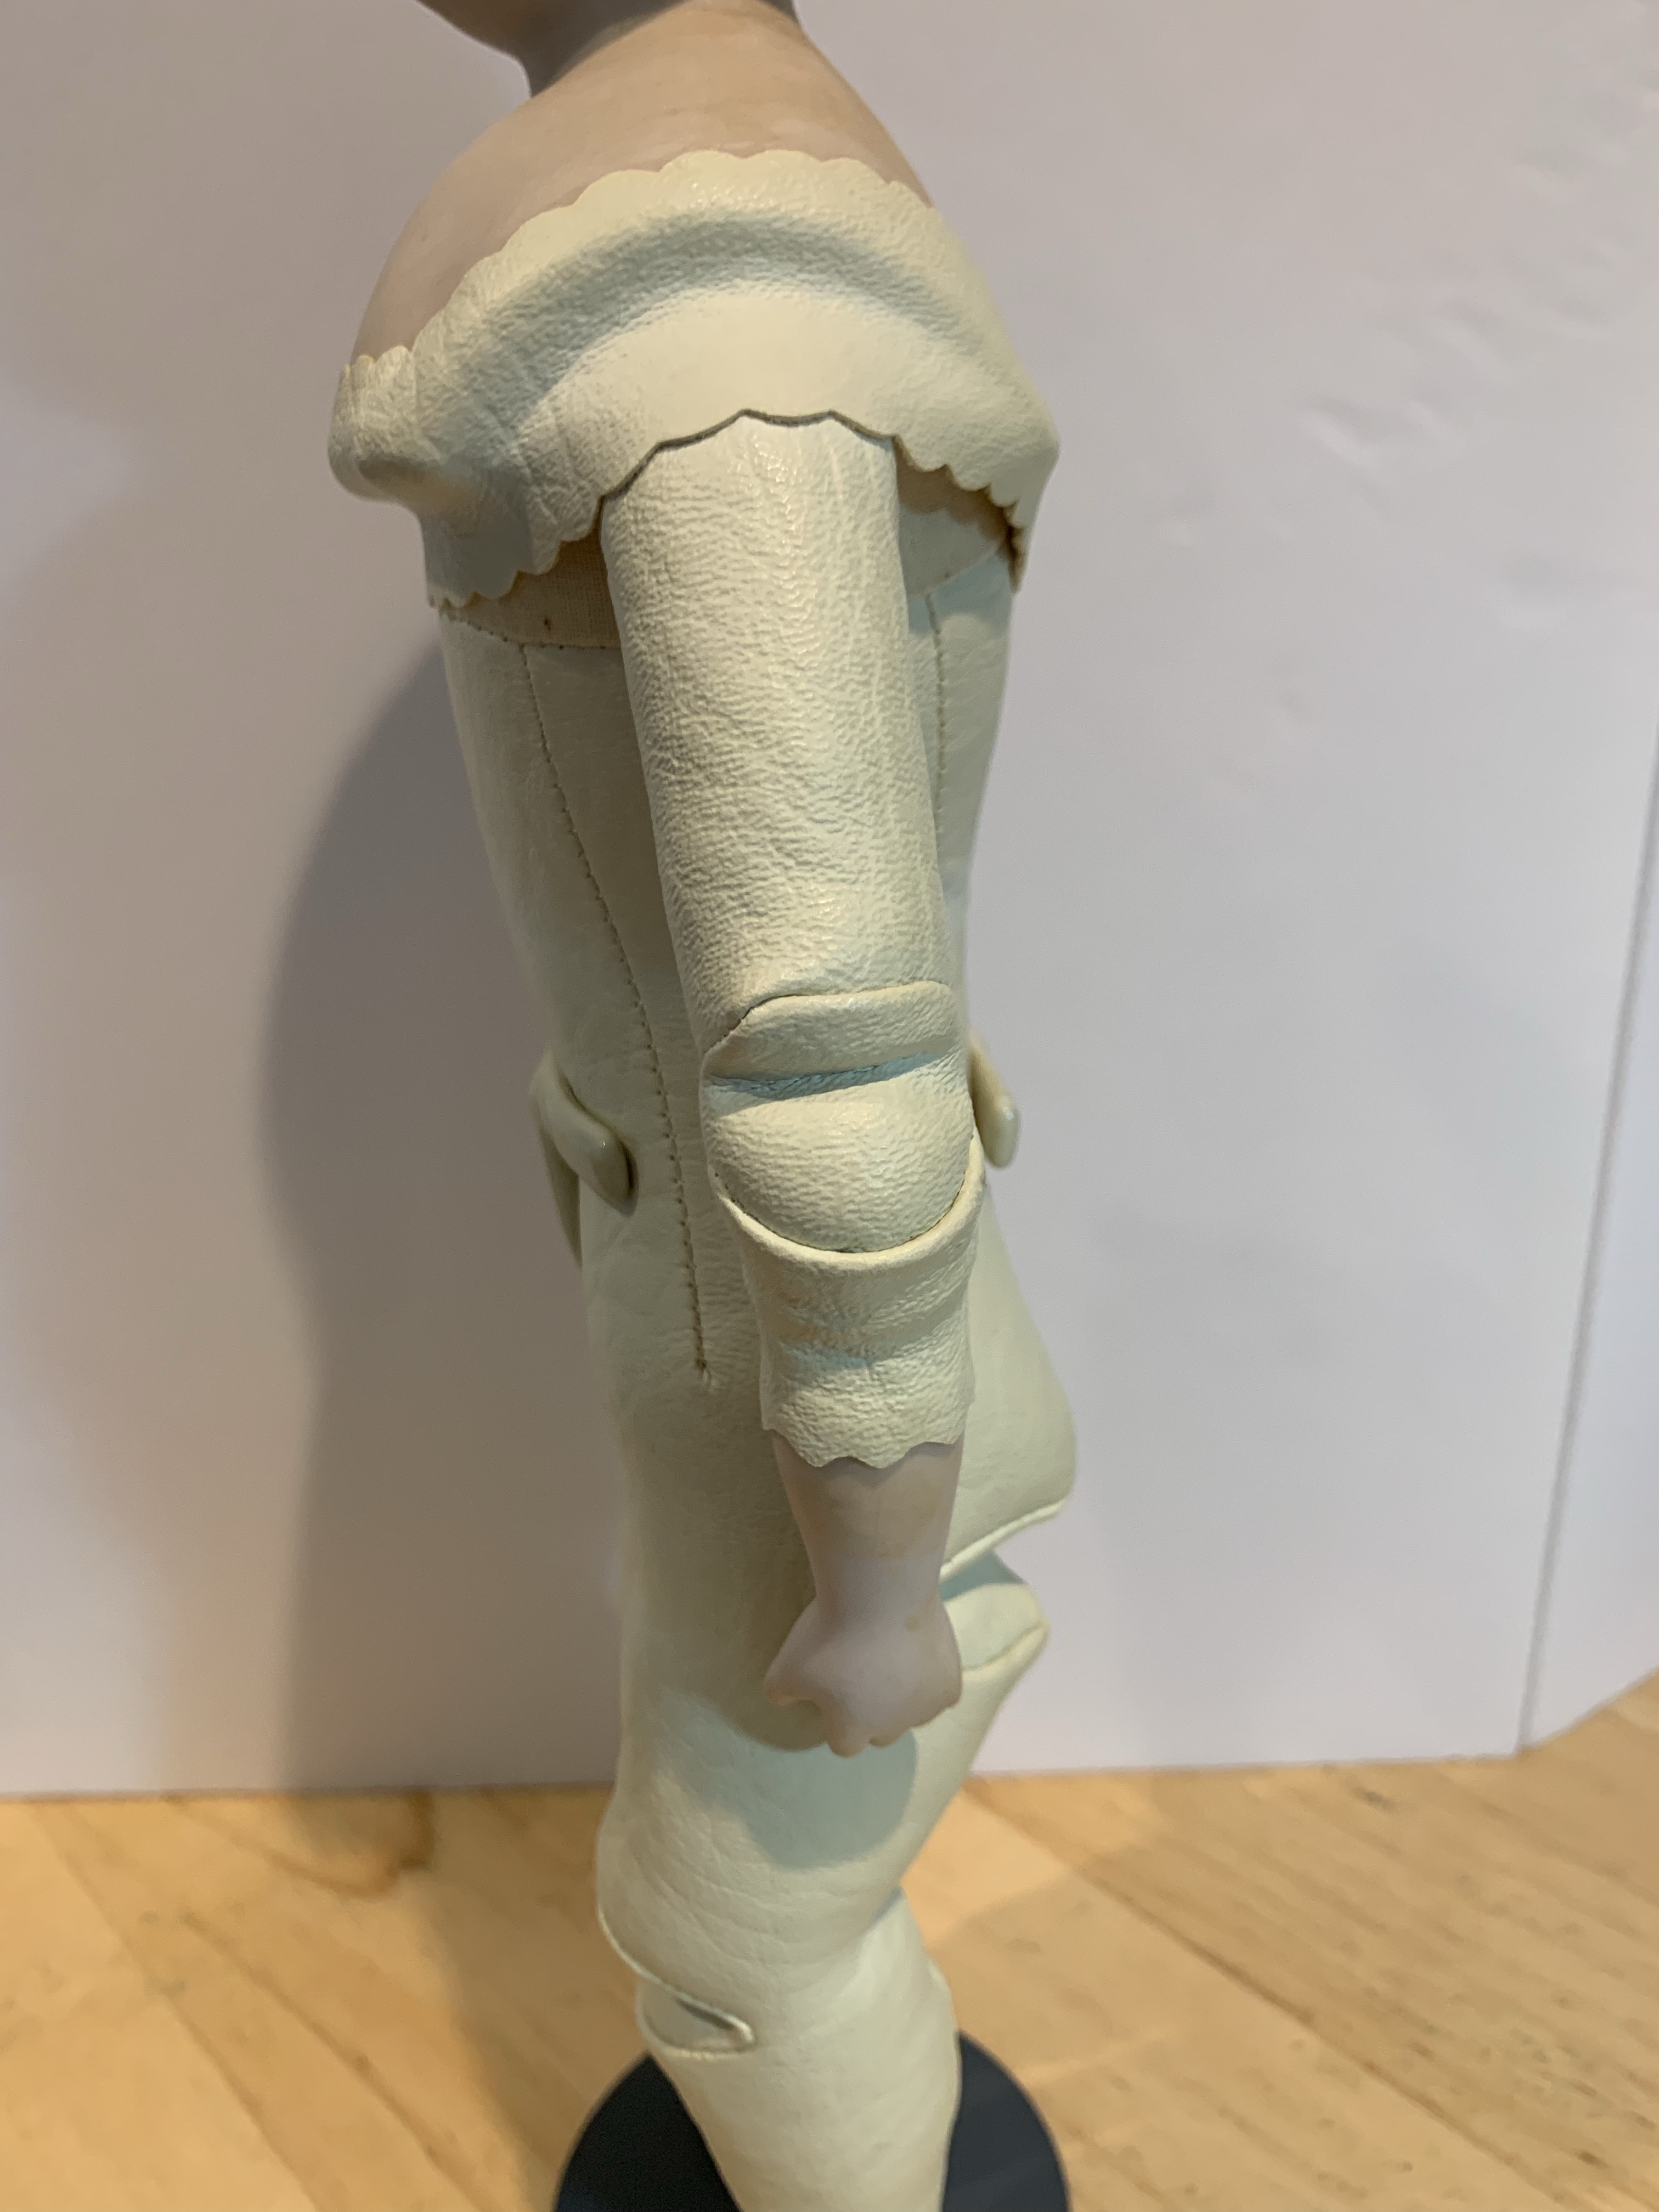
She came with nothing, completely naked, poor love, and has been standing there in her altogether for quite some time now. You can see how her arms and legs were jointed which is fascinating. I can’t imagine the care and skill that went into making her. She is a bit stout around the thighs and her feet are rather chunky, but we can work with that.
Joints
As I was working on Inez, just for kicks I decided to try some of the undergarments on Lydia, fully intending to stop there. As it turns out, the Inez garments were a smidge tight…I made notes in my book and went back to Inez. But Lydia was right there, watching me with a look that said “I am naked as a jaybird, lady!”
Message received!
I resized the chemise pattern and whipped one together. This one has gathers and white work trim, btw. Back to Inez…!
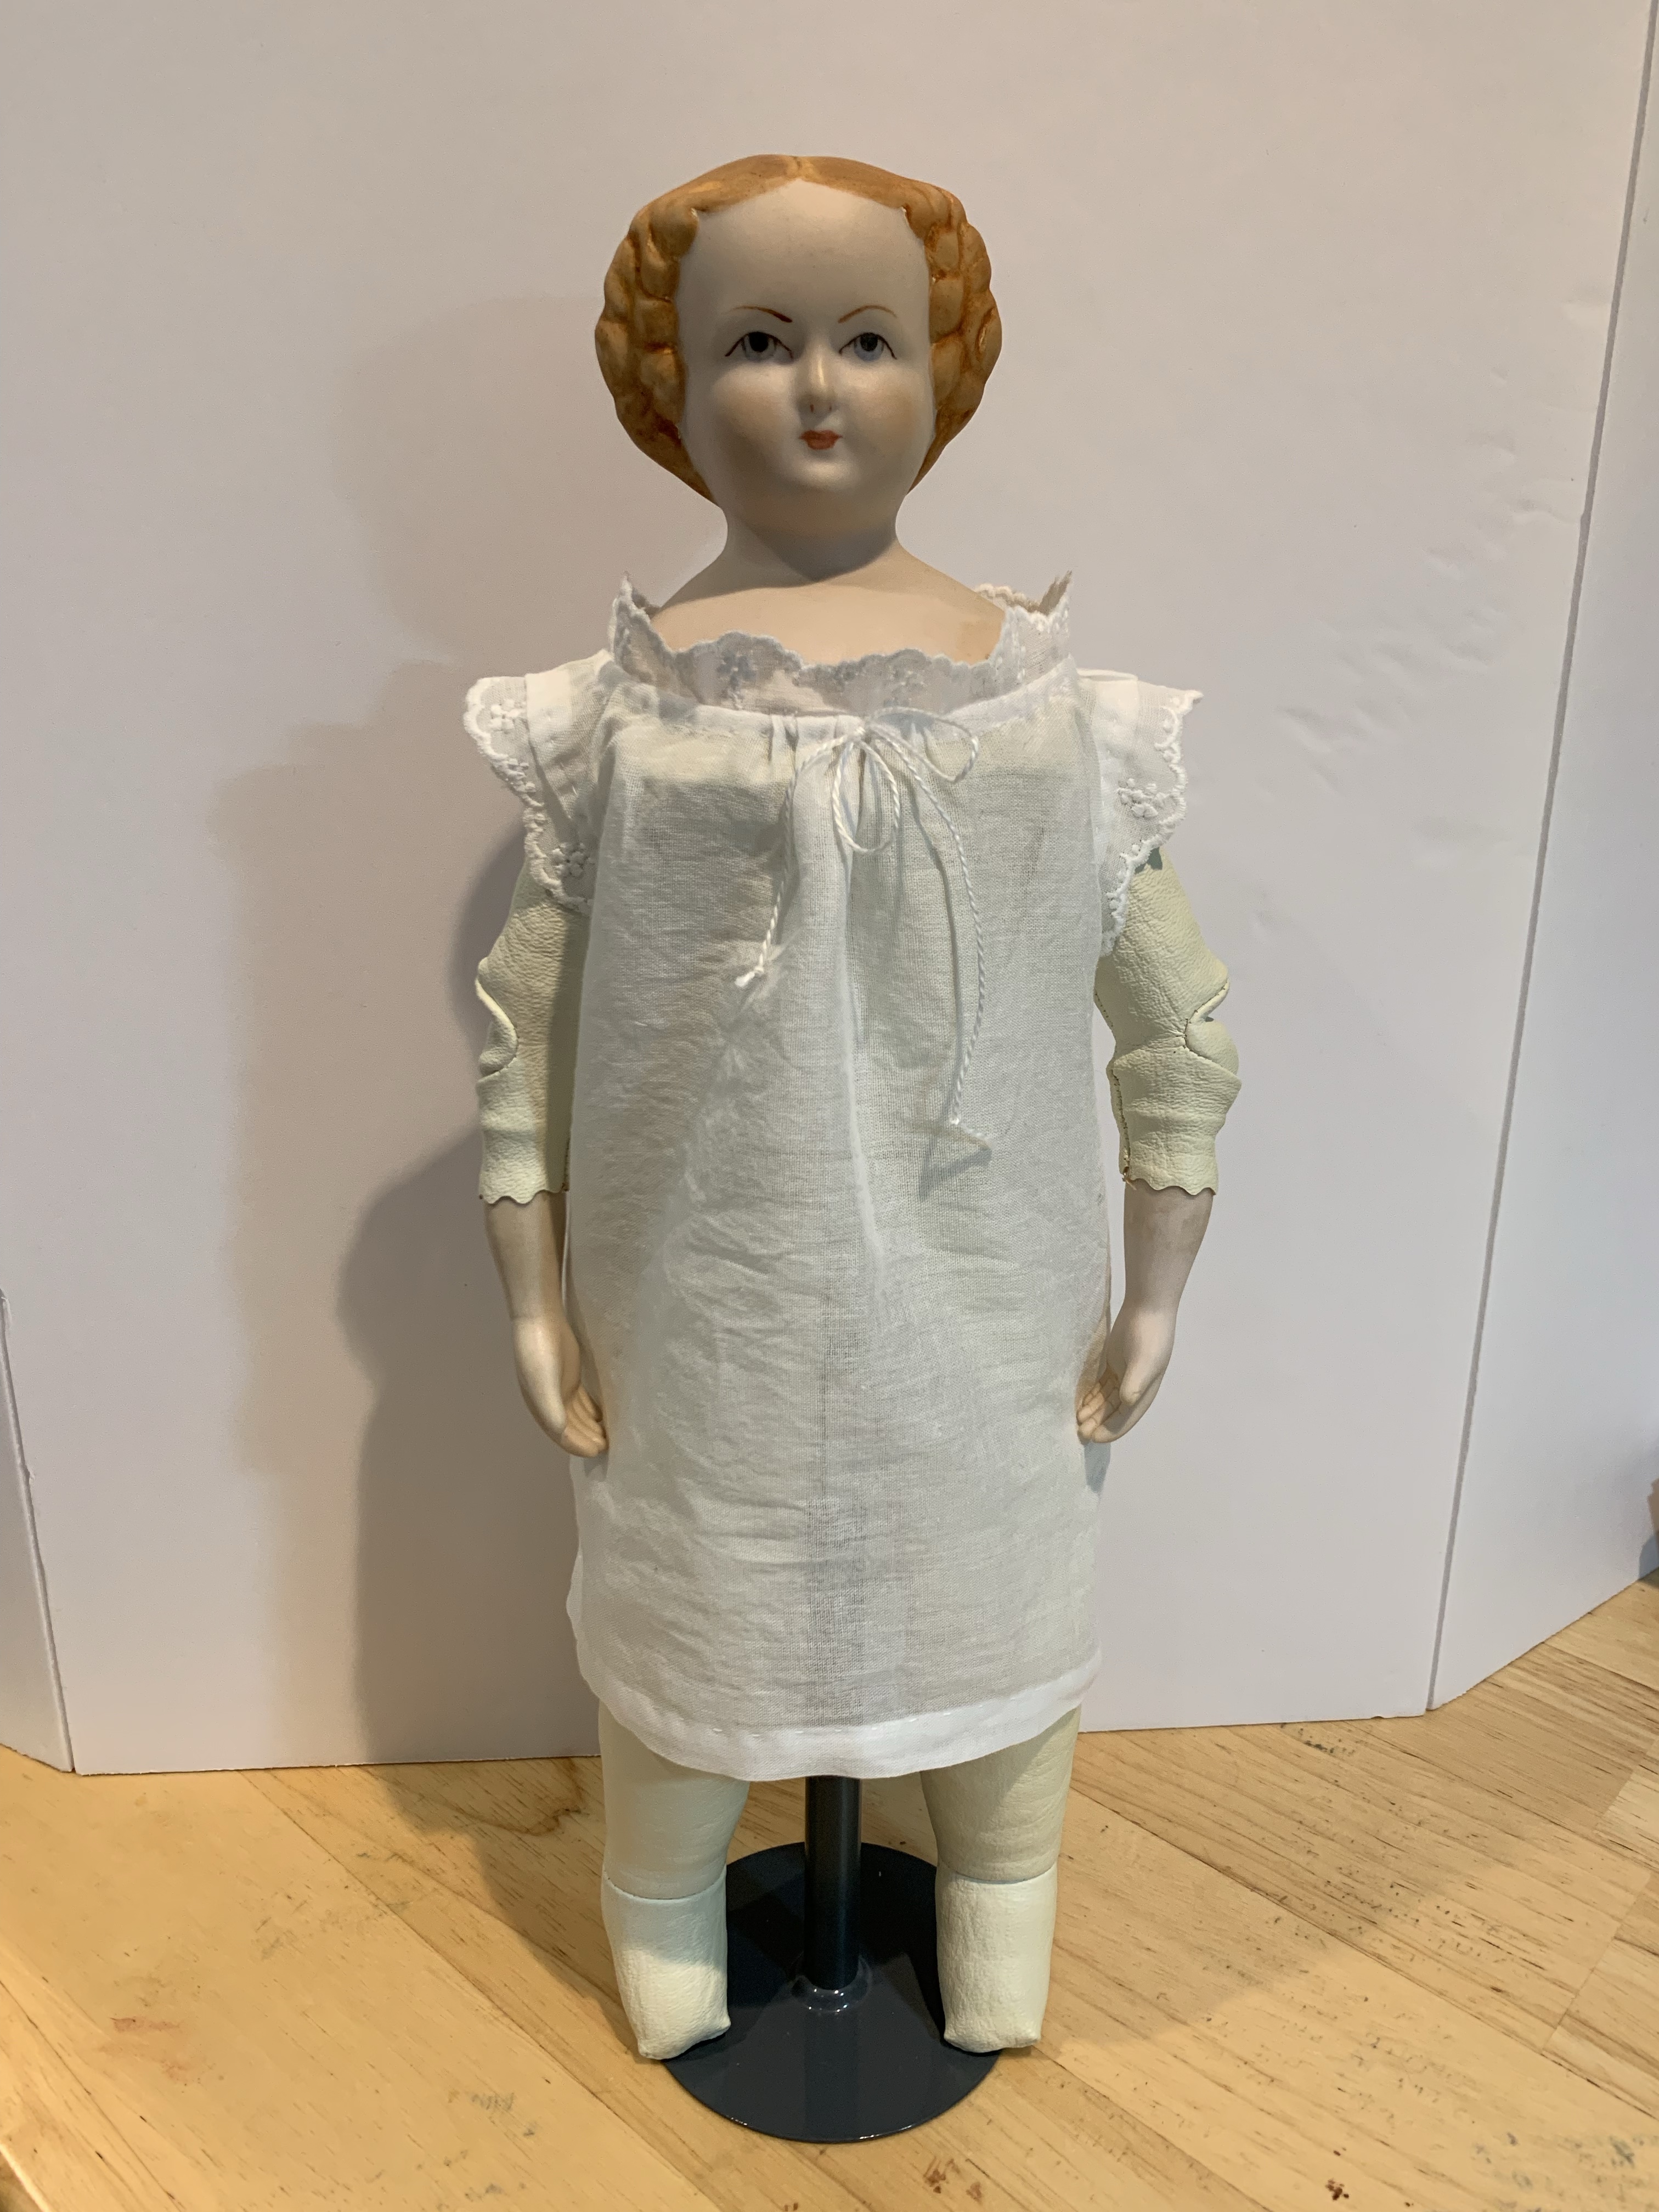
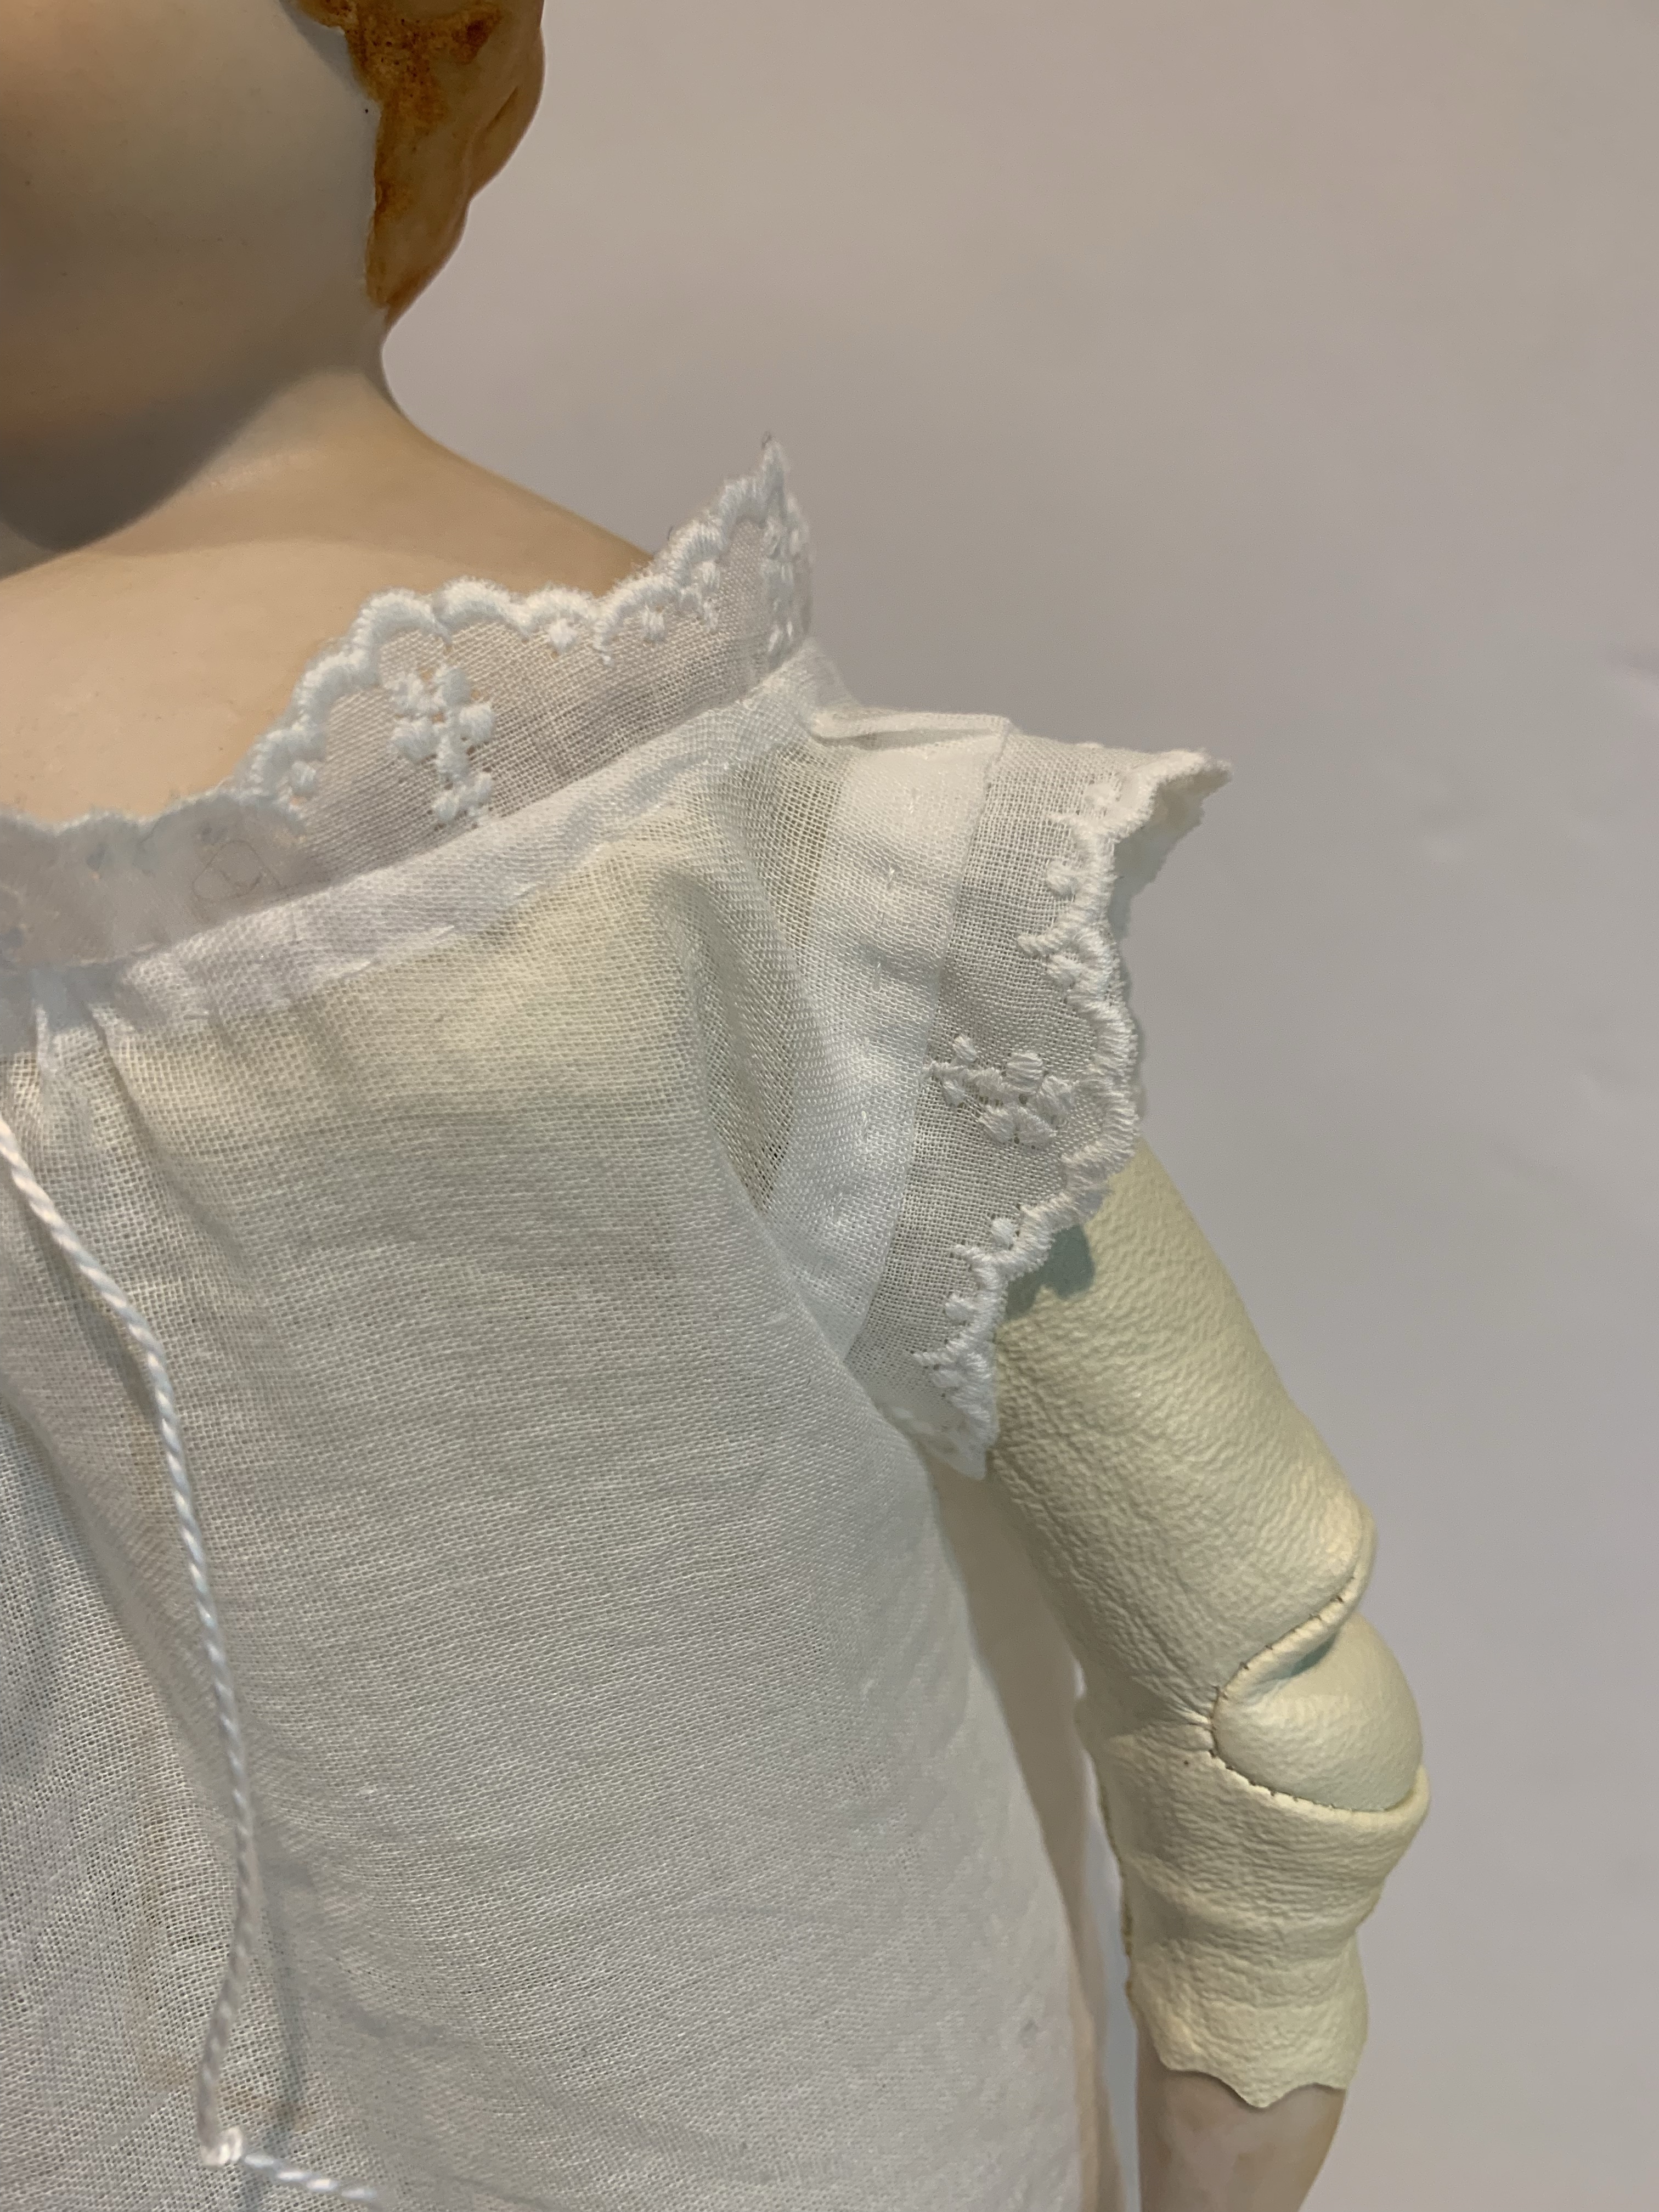
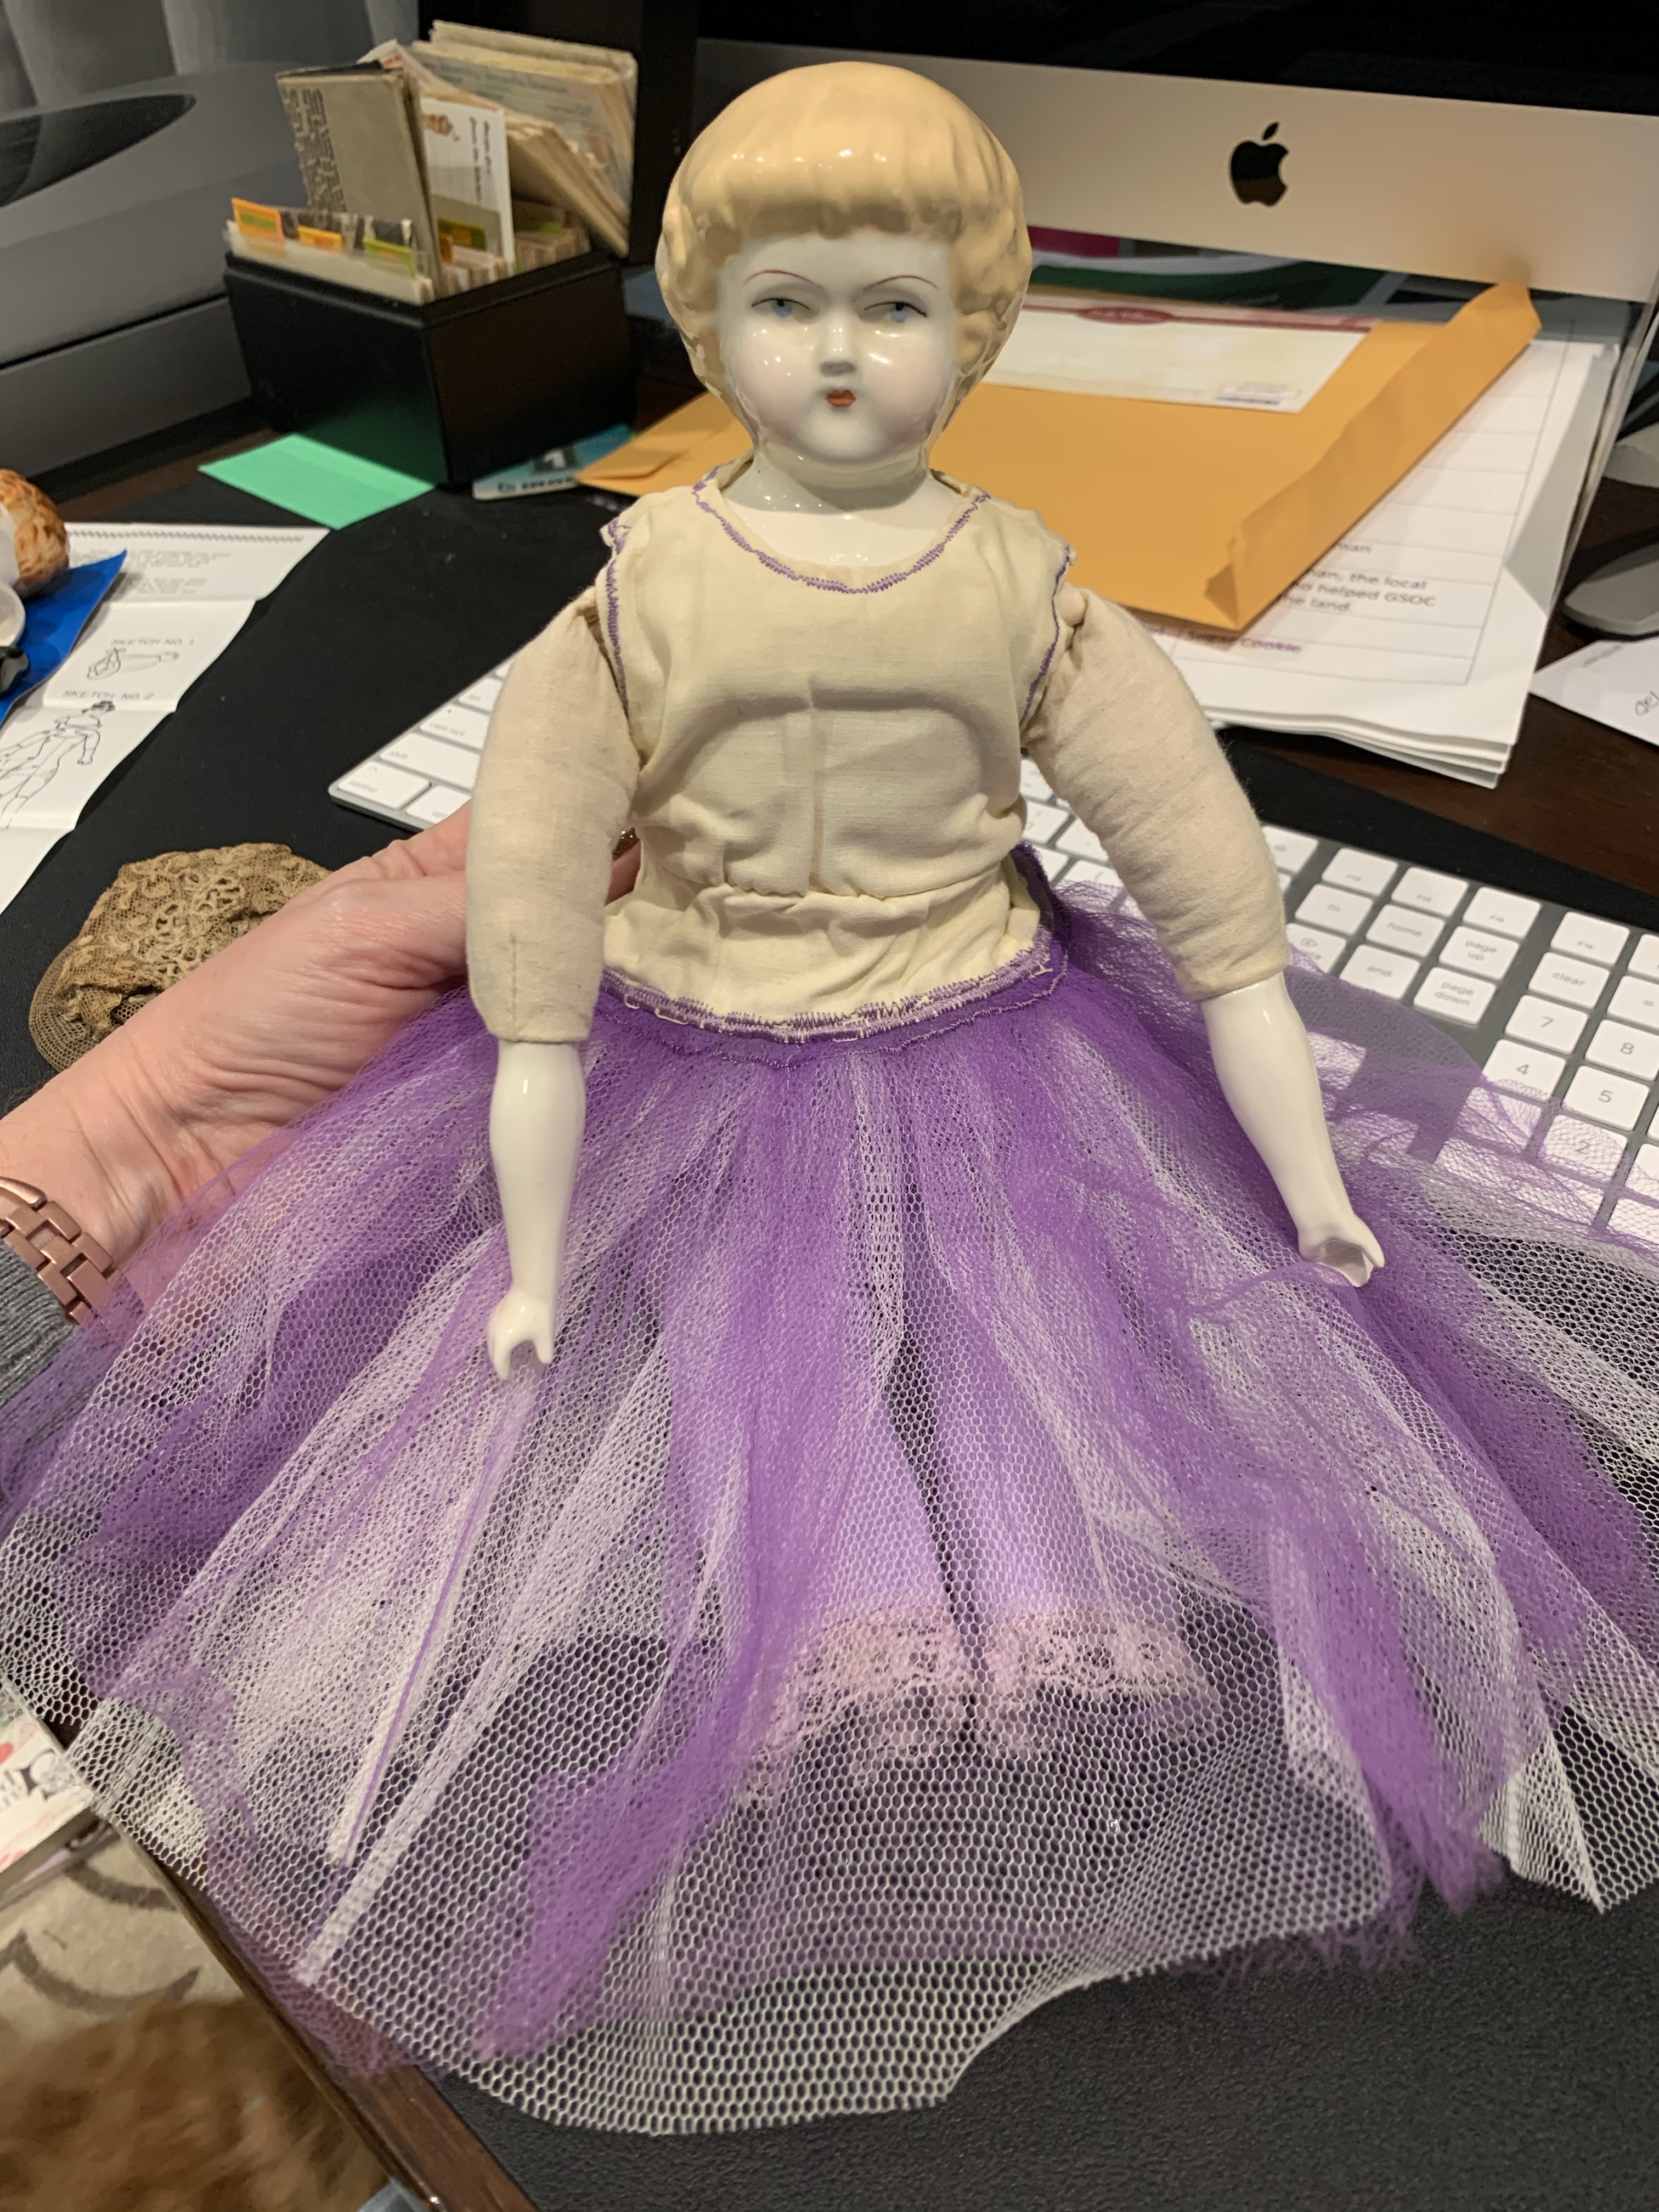
I made the chemisette and sheer low body dress for Inez, honest. I have a sheer dress made of this same fabric and plan to have Inez wear it the same day I do at our upcoming event. But in the meantime, Lydia is going to wear it. It fits her body better than it does Inez for some reason, but it’s too long for Lydia. You will note that Lydia’s petticoat is a fancy embroidered one. I used the edge of an old dust ruffle for it. It just barely shows through the sheer.
Sheer dress with chemisette
The sleeves are a two piece Bishop sleeve, similar to the sleeve on my sheer dress. Lydia is a bit more endowed in the bust than Inez, which fills out the dress differently. Perhaps I need to make some little “bust pads” for Inez. This was actually a thing back in the day!
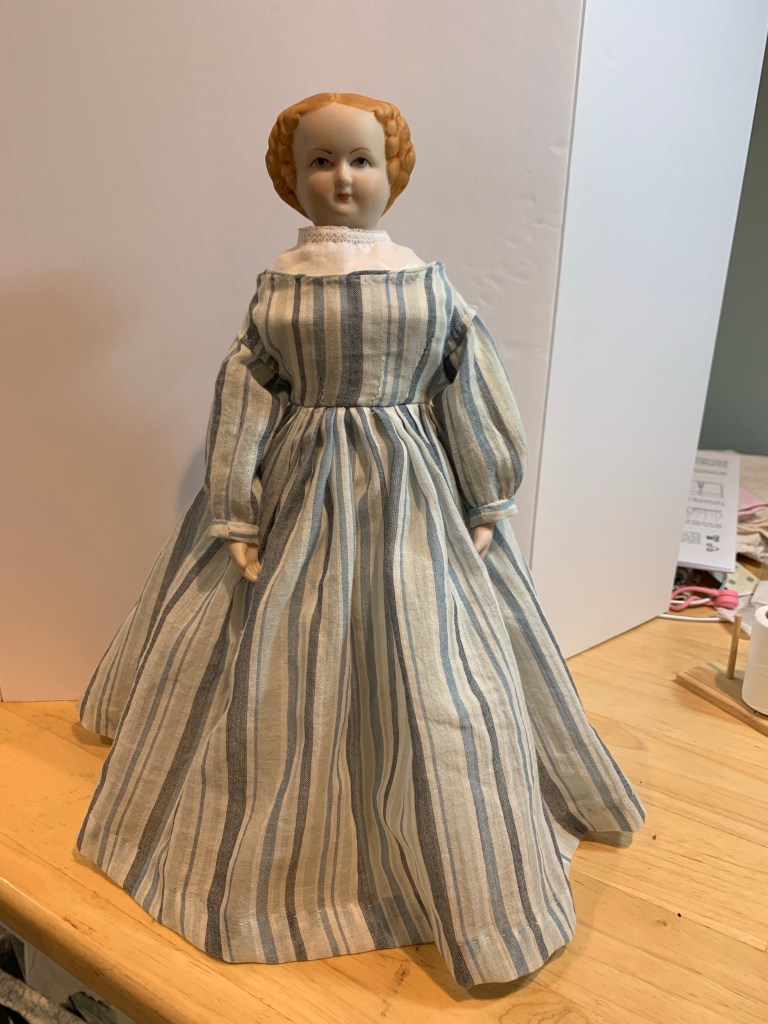
This is a temporary dress for Lydia – I always pictured her in light pink with roses. I have the fabric but I haven’t decided on the pattern yet. Come back again soon to find out if I’ve made it yet!
It’s as though by saying I wasn’t sure in my last post, I issued myself a challenge. As soon as I clicked the save button, I started thinking about how I would like Inez to look & what fabrics I would use.
Challenge accepted, I guess. 😀
I’m using the Cloth Lady pattern from Elizabeth Stewart Clark. I can’t say enough about the quality of her patterns. The quality of instruction and the breadth of options truly makes each person’s creation a one-of-a-kind customized for them.
An excellent pattern!
While the instructions advise to paint the face and hair, inspired by Dottie, I decided to embroider her face and hair. The more I embroider, the better I get – even though my skill is still limited to chain stitching and simple things. I also recently purchased a McCall’s pattern for a cloth doll inspired by patterns in vintage ladies magazines, and they advise making the back of the hair in long straight stitches. I decided to put in a bun – since that’s a very common hair treatments for ladies – and also the long straight stitches. It was a ton of work but it looks lovely. I also could have made a bun from floss wrapped into a coil and tacked onto her head but I didn’t think about that until she was completed.
Embroider first, then assemble
Putting her together is fairly quick once the face and hair is completed. I used natural cotton that came by the pound this time instead of the roughed up cotton balls and it’s much nicer to work with. To reach the top of her head I used a long chopstick. I stitched in her fingers, elbows and knees as well.
Once she was completed, Inez needed clothing! First came undergarments of course. I just love the chemise pattern in this book. It’s made on a double fold, so there’s no shoulder seam and is incredibly easy to complete. I pleated the centers on this one but you also have the option to gather the centers. I had two bits of trim that were exactly the right length for the sleeves. Perfect!
All the undergarments!
I have seen some fancy corsets with flossing on the front which is why I put these two red V-shapes on the front of the stays. I’m not sure if they serve any practical function IRL but here they designate which edge is the lower one.
Fully dressed
And then I made this adorable wrapper. I have a wrapper made from this same fabric and yes, I do plan to take a picture with her when we are dressed the same. I forgot to take a picture of her petticoat – it’s crisp white cotton with two pleats and I starched it for fullness.
The pattern book includes multiple bodice and sleeve options, undergarments, outer wear, and more. I also made a low bodice dress in a sheer fabric with a chemisette, but I will show you that in the next post. I need to keep making things to fill up her trunk before the event in September! Come back again soon to see what I’ve completed next.
A couple years ago I discovered the beautiful doll creations of Tasha Tudor. I have written about them in other posts, and one consistency is that there is little information to be found so far about the dolls she designed, how many she designed, or any descriptions such as what inspired her designs. I am aware that Tasha Tudor loved dolls and is famous for her books and drawings.
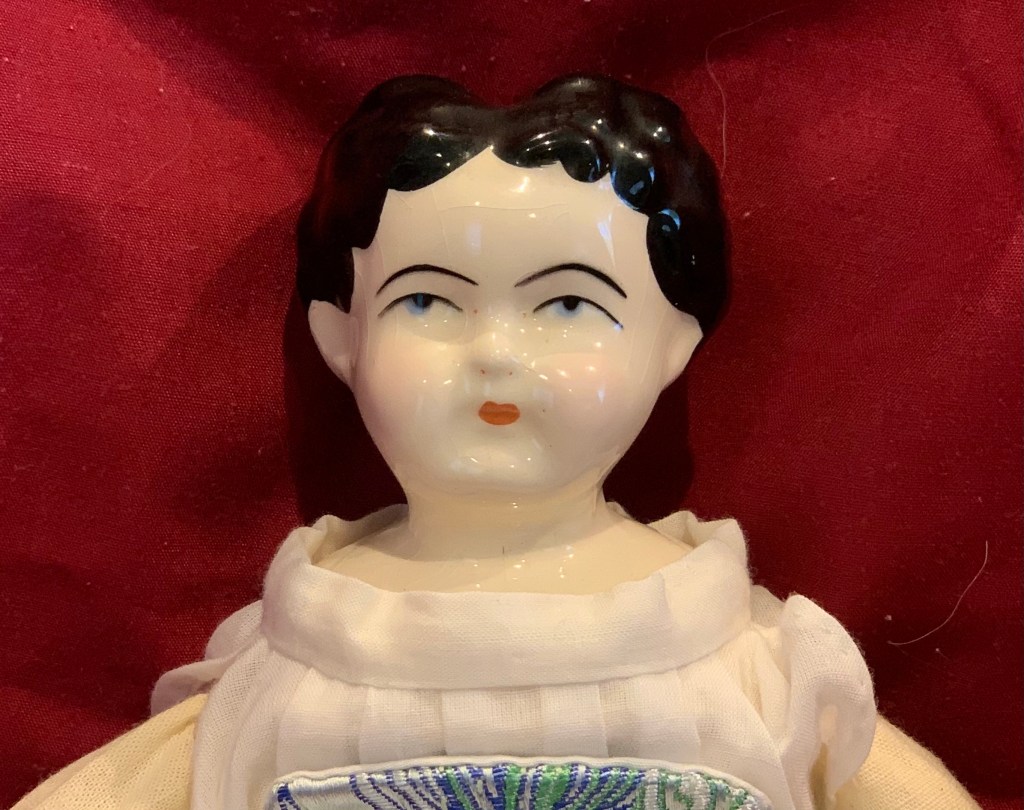
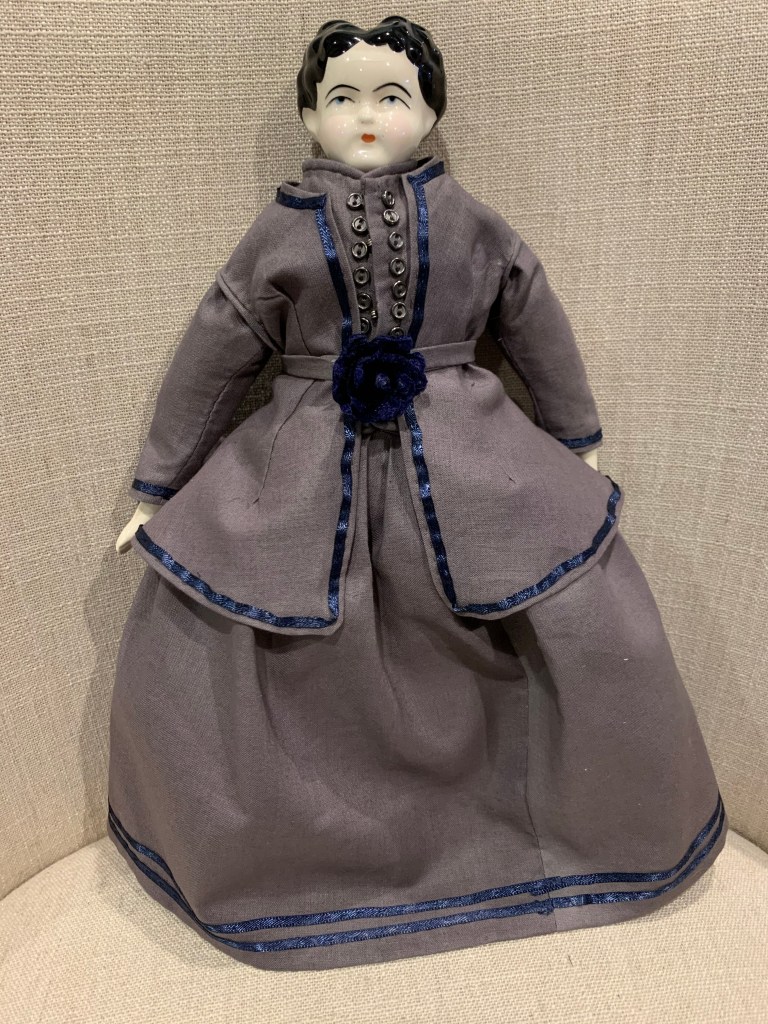
For me, it started with Nell. This lovely doll was my first china doll and my first Tudor doll. She has quite a lovely face, black hair, red lips and a slight pink on her cheeks. Nell was produced in 1977 and stands about 12″ tall. I liked working with her so much I made her two dresses, a corset, multiple chemises. She currently wears the gray 1866 promenade dress that I detailed in this post.
Pretty Nell Tudor
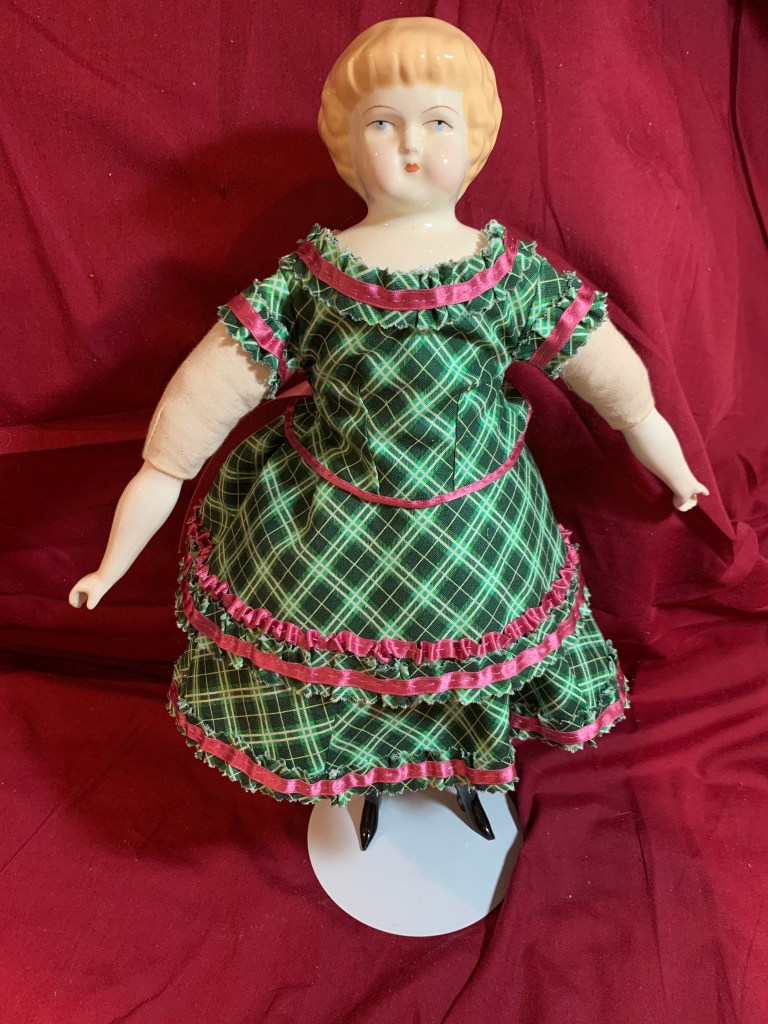
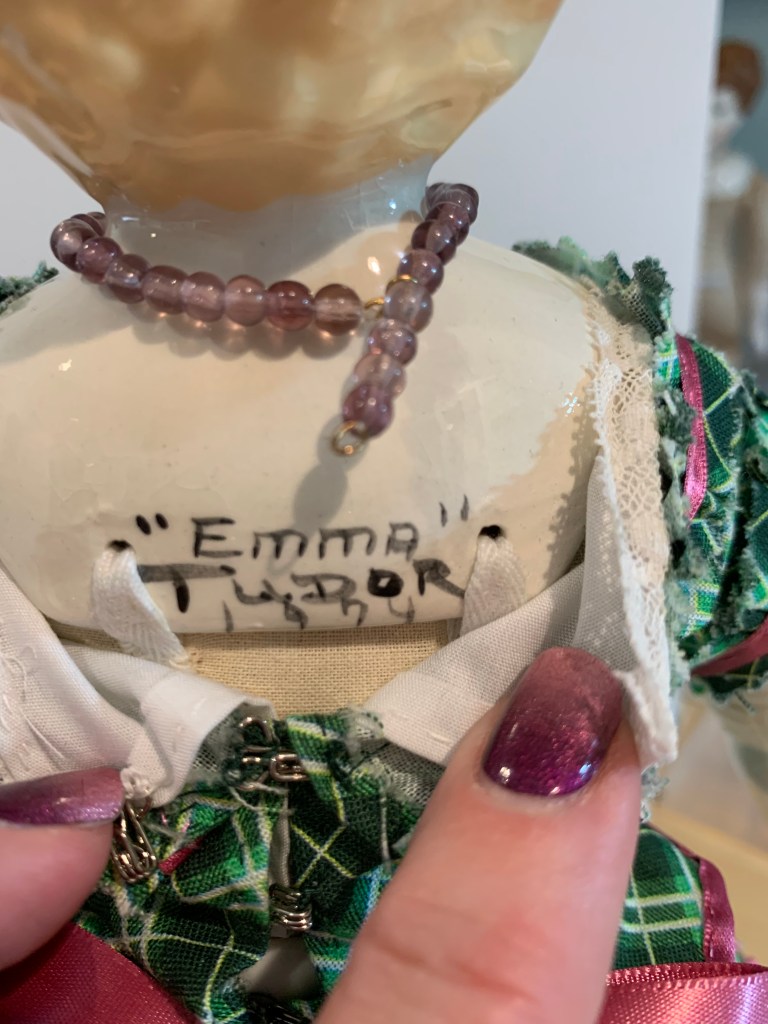
The next Tudor doll to come my way was Emma. Emma Tudor was produced in 1974 and came to me wearing a very purple polyester dress. I chose to redress her in an 1876 child’s dress detailed in this post. I don’t particularly love the fact that her cloth arms show, but I love the work that went into her dress and that it is drafted from an original French magazine. It was a tremendous amount of work, so I doubt I’ll change her clothes any time soon. Frankly I’m considering how to make her a hat. Emma is 14 1/2″ tall and has a decidedly child-like look.
Emma Blue Eyes
The next Tudor doll I worked on was one I built completely. Styled as a Meg Tudor, I changed her name to Hannah. This doll was produced in 1976 but others are dated up to 1983. Here, Meg/Hannah is styled in an 1870s bustle dress. She is tiny, only 11 1/2″ tall! I detailed the creation of her costume in this post.
Ooh, la la!
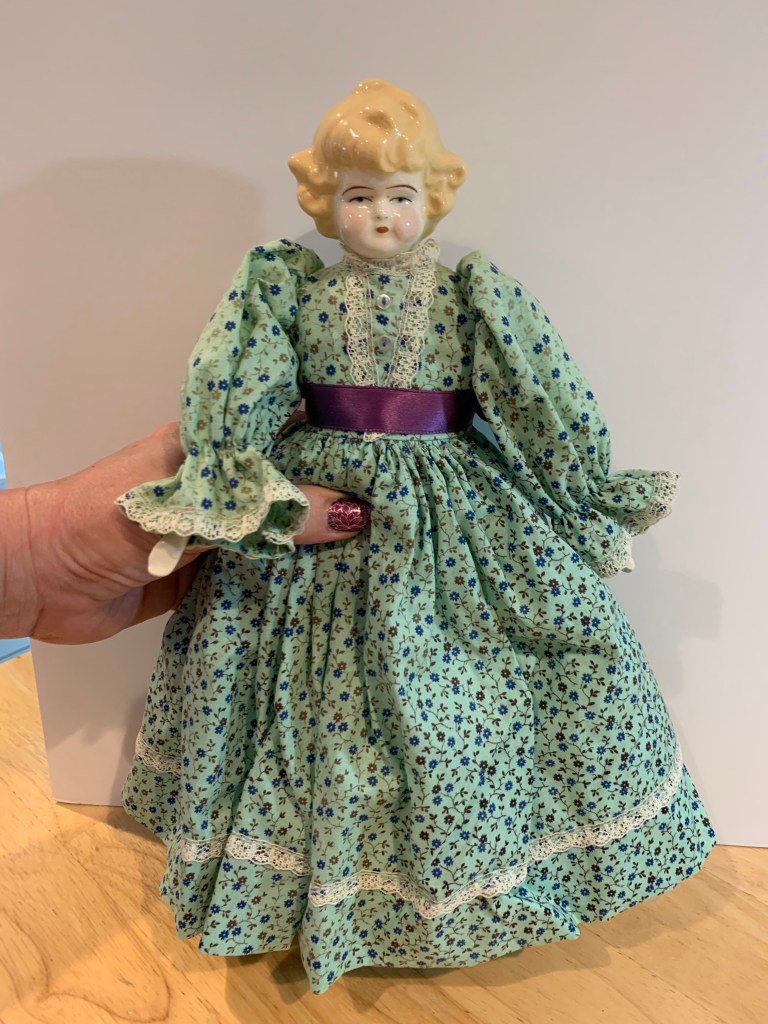
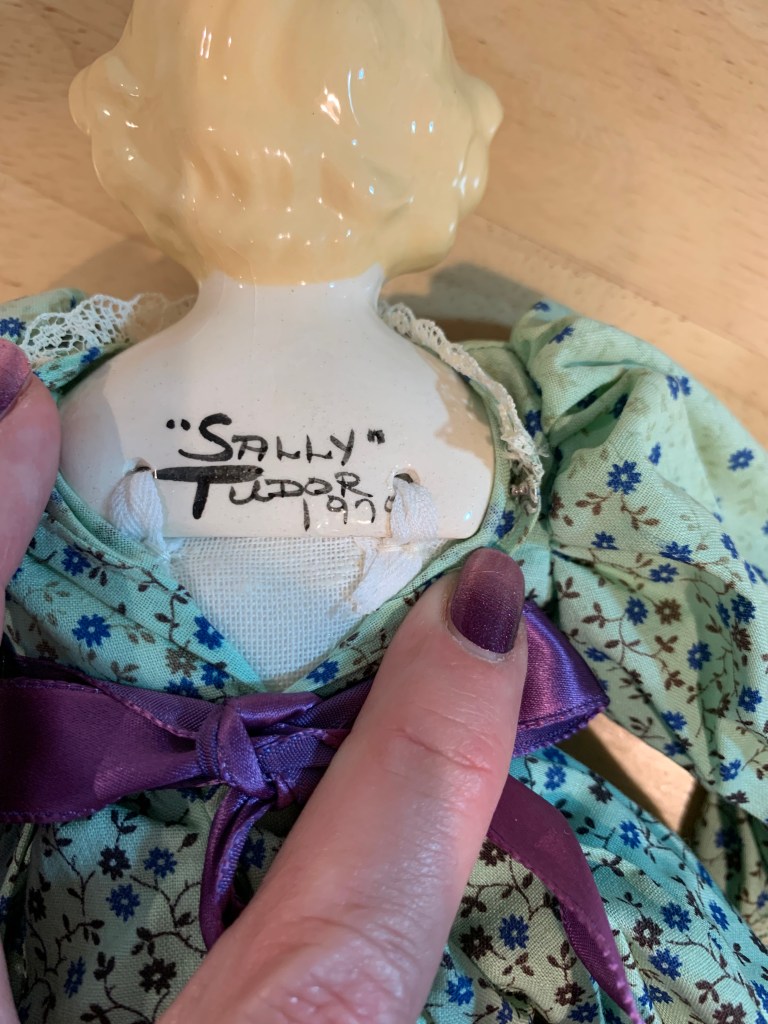
I had frequently seen Sally Tudor dolls, and wasn’t completely captivated by them until I saw this one. I didn’t want to build another doll, so the fact that Sally appeared to be well made and dressed nicely was a plus for me. Sally was produced in 1979 and is another diminutive doll standing around 11″. She is also rather child-like to me with her short haircut, and even feels a little bit 20th century. She has blue eyes and her dress is well made but a bit too long. I won’t change it any time soon.
Sweet youth Sally
After Sally, I thought maybe those were all the dolls Tasha Tudor designed. Four dolls from 1974-1979 doesn’t seem like too much or too little, and these were the dolls I would see on Ebay all the time. Then one day, just for kicks, I searched for Tudor Doll, and found two more!
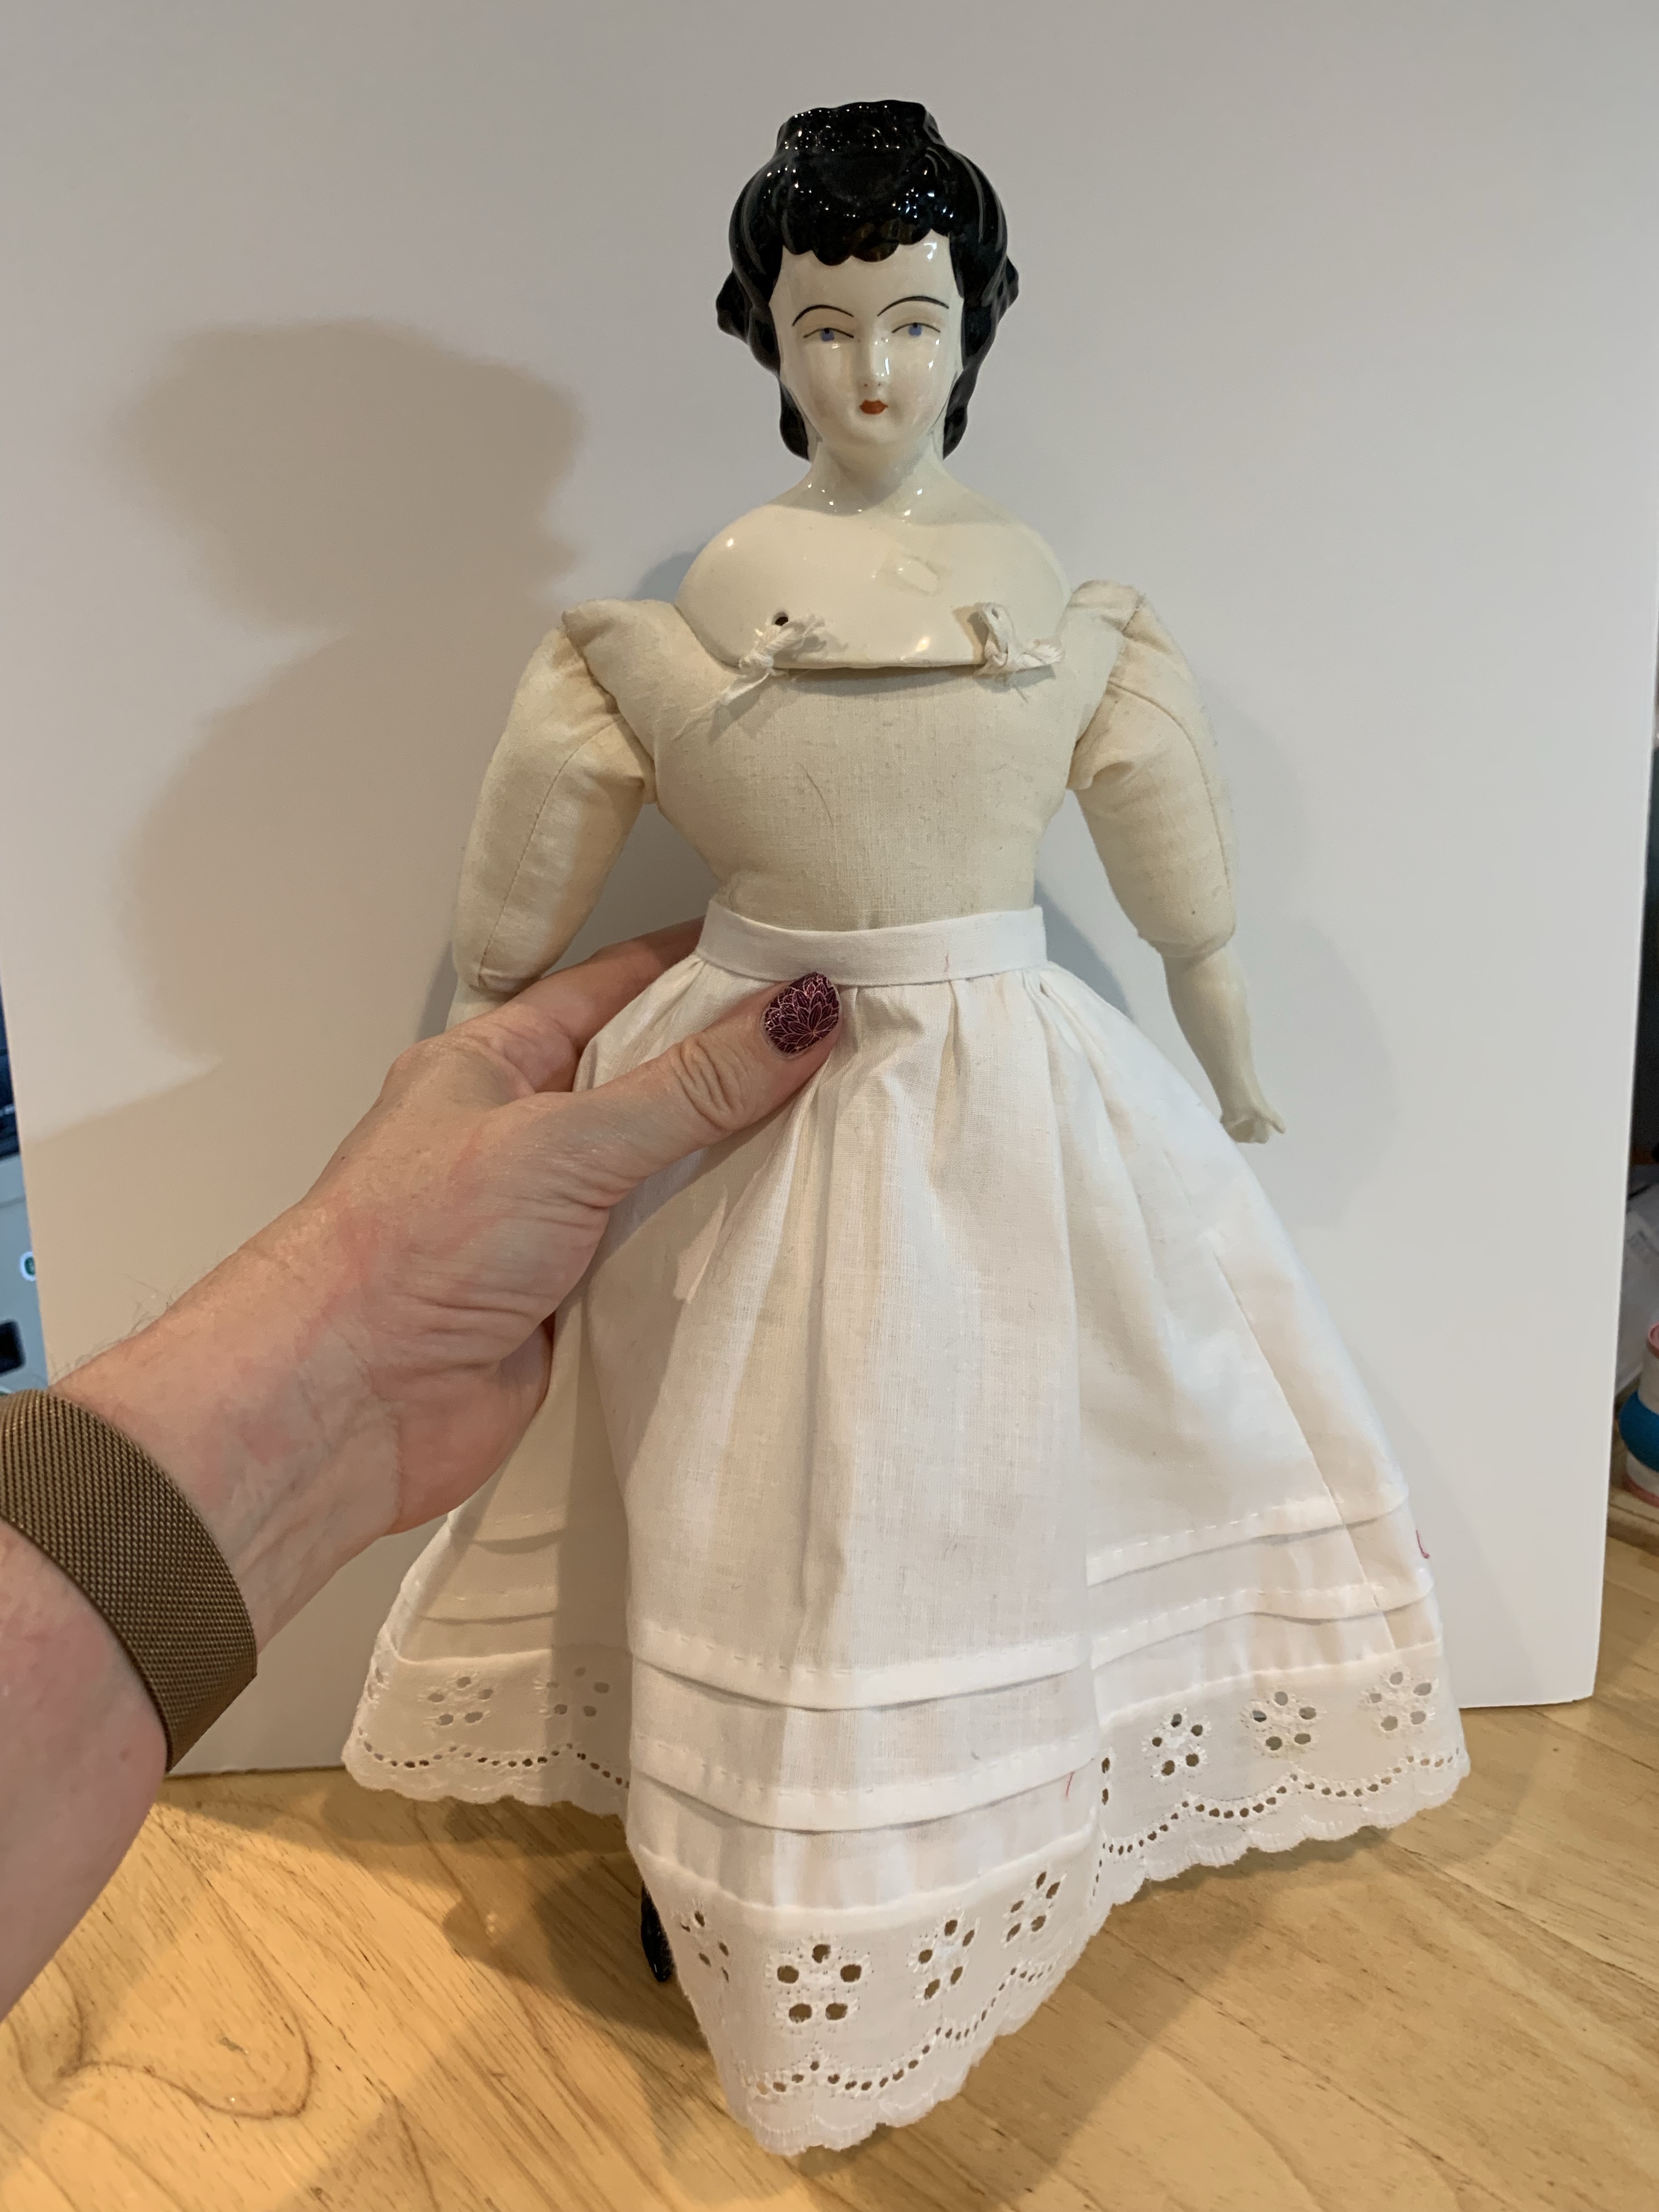
First was Julia, produced in 1973. I don’t know much about her except to say that she is quite tall! She stands about 20″ in height. Also note her hair is styled with a crown and braid, perhaps for a ball. Her clothing was pinned on her, and features an open neckline which made me think of the ball. At some point I’ll make her a new dress as this one is cotton and I’d like to make her a ball gown in satin. I think.
Get ready to dance, Julia
Next is Lady Patricia. There were actually two of these on ebay and I had never seen her at all in the past several years. Poor Patricia was completely naked and I had this petticoat that I had originally made for Emma. It fits her perfectly. Patricia Tudor was produced in 1973 and stands about 12” tall. I’ll have to make her some clothes of course and her hairstyle of a pretty up-do will inform her style.
Nearly naked but soon to be dressed
So there you have all of my Tasha Tudor dolls! If there are more out there I am not aware of them but would love to know about them. There is just something about the glossy finishes and the fine features that I really like. If you know of additional Tasha Tudor dolls please let me know!
I admit it has been decades since I last watched a Little Women film so I had to refer to the crib notes for a bit of background on Meg. She is the oldest of the 4 sisters and what I read described her as fun loving with a penchant for luxury.
I purchased this Yield House Meg doll completed with the intention of remaking her clothing. As a young woman she would have wanted to wear the latest fashions and not the frumpy frock she arrived in. Since I have been wanting to explore this category for a while it seemed the perfect opportunity.
Red and black with obvious box pleats
Looking at Victorian fashion plates and photos from the mid 1860s I was consistently drawn to the Garibaldi shirtwaist and skirt combination. This was a high fashion look and was sometimes paired with a bolero jacket. On a small scale I decided just the shirtwaist and blouse would be sufficient.
Inspiration drawing
In a previous post I detailed how I made Meg a cage crinoline. She arrived with a decent set of drawers and one petticoat I reused. Additionally I made her a chemise and petticoat of fine lawn.
New chemise & petticoat Cage crinoline and underpetticoat
I found a lovely red silk charmuse at a local yardage store and originally thought to make her skirt in black velvet. It might have been made that way originally but I realized working the waist would be complicated and it would likely turn out bulky. Taking to eBay I found a remnant on Japanese kimono silk.
I’m getting better at drafting patterns for dolls but I feel I could have done better on this shirtwaist. It’s not my best output. I like the skirt – it’s made with double box pleats and I loved the hand of the silk. So nice to work with! But honestly I like her undergarments better.
For historical costumers, a cage crinoline is a necessity, but you may ask yourself what exactly that is. Modern lingo for this garment is “hoop skirt” which describes a skirt with hoops in it, typically made with plastic bands and sometimes flounced. But for the original cast, a cage crinoline was a modernization of the crinoline petticoat. A crinoline petticoat was a starched cotton underskirt, often times many layers were worn to achieve the desired bell shape to a skirt. In 1856, however, the cage crinoline was patented and allowed women to achieve the shape without all the heavy skirts! They were made with steel bands – not heavy ones – that were strong enough to carry the weight of one or two petticoats on top, plus the skirt of the dress being worn.
And of course, where fashion for people goes, so goes fashion for dolls. There are remaining doll-sized cage crinolines in private collections, and they are of course on a smaller scale and not as robust as human sized garments. They can be used to fill out a skirt for a doll, or simply for the fun of putting a hoop skirt on your dolly.
Looking at how the originals were constructed, I realized this is a simple project I could make and share the instructions here. My doll is an 18″ Yield House Meg doll, but you can adjust these measurements to fit your dolls.
Supplies
I found this trim that is 5/8″ wide, 95% cotton and reminds me of Petersham. It’s a nice woven, flat trim that will do nicely. I’m also using some aluminum jewelry wire here but you can use what is available to you. You want something that is malleable enough to bend into your shape but strong enough to hold the round hoop shape once completed. All told, I spent less than $10 on the supplies.
First you need to do some thinking and measuring. For a Yield House doll, the skirt is made from a 36” length of fabric. This results in a nicely full skirt similar to those worn in the 1860s. Consider how tall your doll is and how full her skirt is. You want the bottom hoop to be less than the full circumference of the outer skirt. I chose to make the bottom hoop 30” around. The top hoop should be wide enough to fit over the hips of your doll. Meg here needed 15” for decent clearance. For the middle bone I split the difference and made it 23”
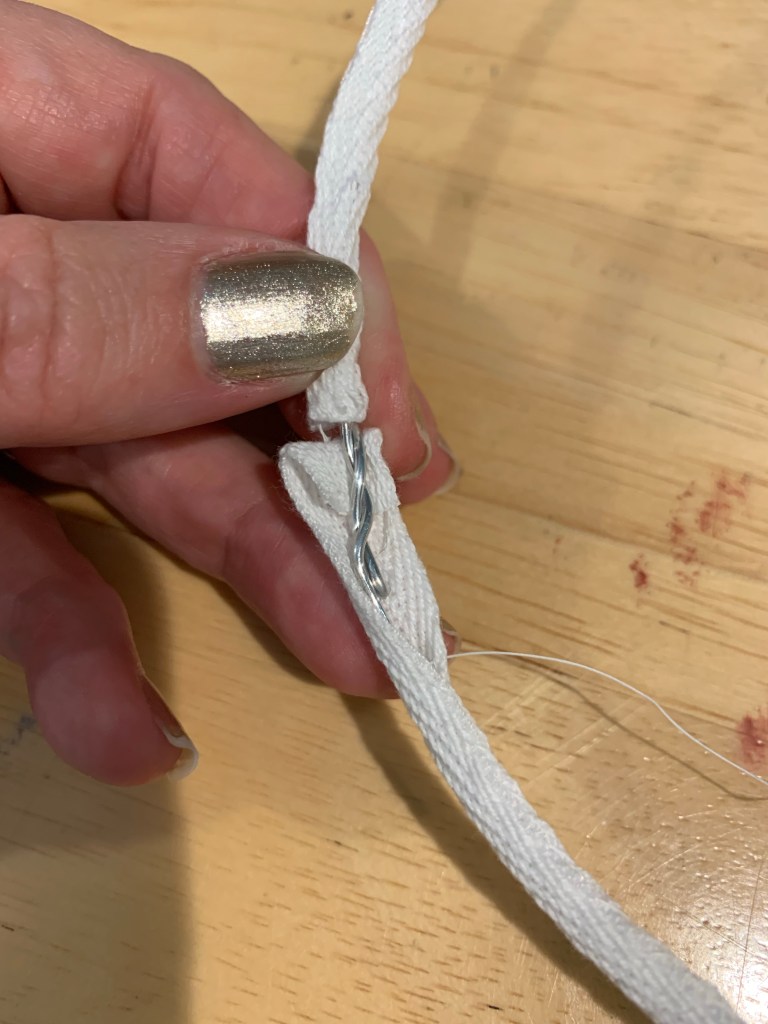
Once you have your hoop circumferences, measure your wire to that length plus 2-3” overlap. Cut the wires and then twist the ends together.
Twist the ends together
Make all three hoops, then you can measure the tape to cover them exactly. Allow at least 1/2” on either end to turn the raw edges under. Beginning at the joint, fold the tape around the wire to encase it and then whipstitch it closed.
I used quilting thread but any type will do
Once you get to the end, tuck the end under and whip all the way around the joint.
Bring the folds together and stitch
Repeat on the second and third hoop until all three are covered. The next step will be to find the quarters on each hoop and place a small mark. This will ensure the vertical tapes will hang straight. these marks will be covered, don’t worry.
Mark the quarters
Determine the drop of your hoop skirt next. This is the length from the waist to where you want the lowest bone. I chose a 9 1/2” drop so the lowest bone would be near the tops of the doll’s boots. This is about where my life size hoops hang as well. Consider you need 1/2” on either end to tuck under – so add this onto the drop measurement. This gave me a 10 1/2” vertical tapes. Cut 4 of these. Don’t forget to measure the waist of your doll and cut a waistband to that length plus 1”.
The hoops should be equally spaced on your vertical tapes. Don’t forget that you will attach them at the top and the bottom. I measured and pinned the placement for the first and second hoop. The hoops attach at 3”, 6 1/2”, and 10” (the bottom).
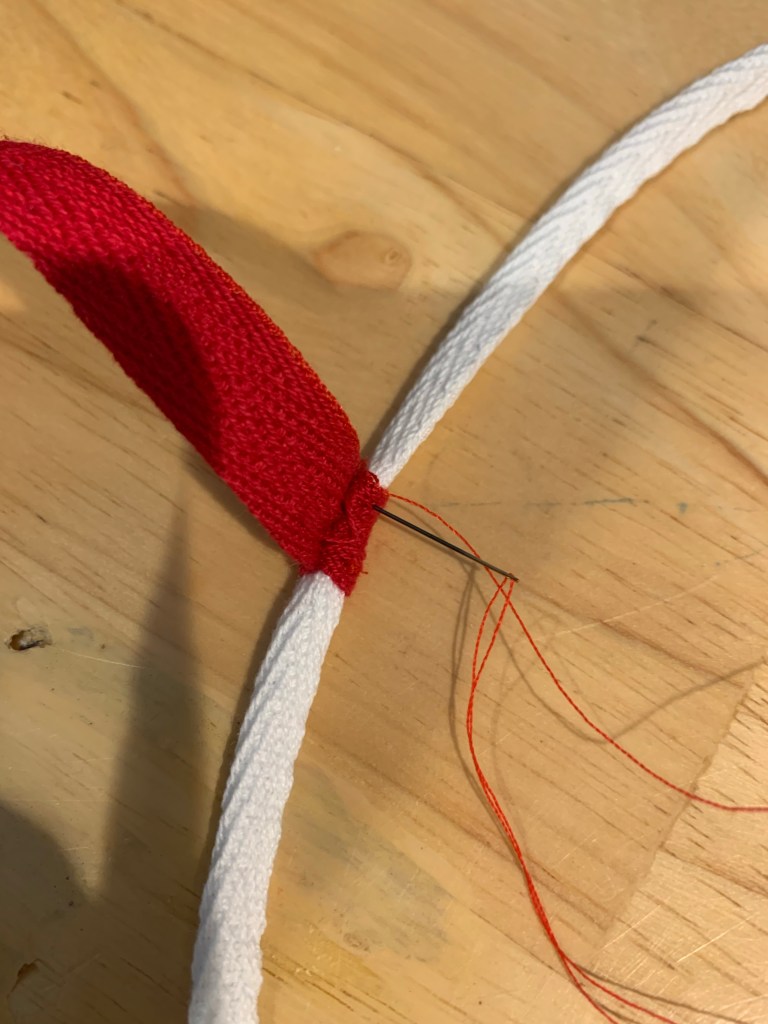
Beginning with the lowest hoop, wrap the tape around so the raw edge will be enclosed. Stitch that in place. Repeat at all four quarters.
Enclose the raw edge
Moving to the middle bone, fold the tape over the hoop so you can stitch through the vertical tape, through the hoop covering under that, then out the vertical tape. You aren’t stitching behind the hoop wire, just catching the tape wrapping it. Repeat on all quarters and then move on to the top hoop.
Pin it into place until you stitch it
Once all the hoops are attached to the vertical tapes you are ready to attach the waistband. Turn the ends of the waistband under and stitch so the raw edges are inside. Remember, the waistband is the measure of your doll’s waist plus 1”.
Finished edges
Find the quarters of the waistband, place a small mark, then pin the tapes in place.
Stitch these in a square that will secure the tape and keep the raw edge inside. Once that has been done you can add a hook and eye or thread bar. You are done!
Finished cage crinoline
My doll happens to have a modesty petticoat under her new cage crinoline and then a fine starched cotton petticoat over it. I’m making a silk skirt for her next and this should do nicely to help it hold it’s shape.
All told I used less than the full amount of wire I purchased and less than a full spool of the white tape. Had I made the vertical tapes in white I might have used close to the full spool. I hope you found this little article helpful in demystifying the cage crinoline and will feel confident in trying one for yourself!
Supply List
5/8” Petersham or similar woven cotton flat trim (don’t use twill tape as it will ravel)
2 1/2 yards white
1/2 yard red (to make in all white add this to the length above)
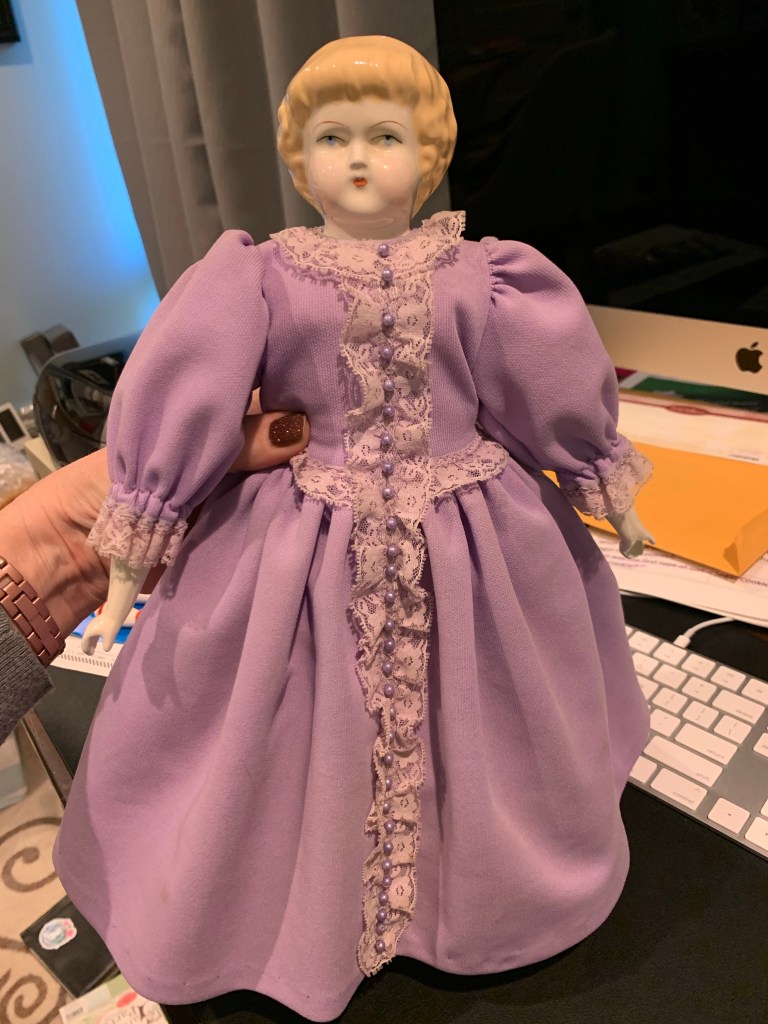
Today’s doll is one I don’t have to redress. She is quite beautiful and I don’t plan to change a thing about her.
Paula in soft dimity
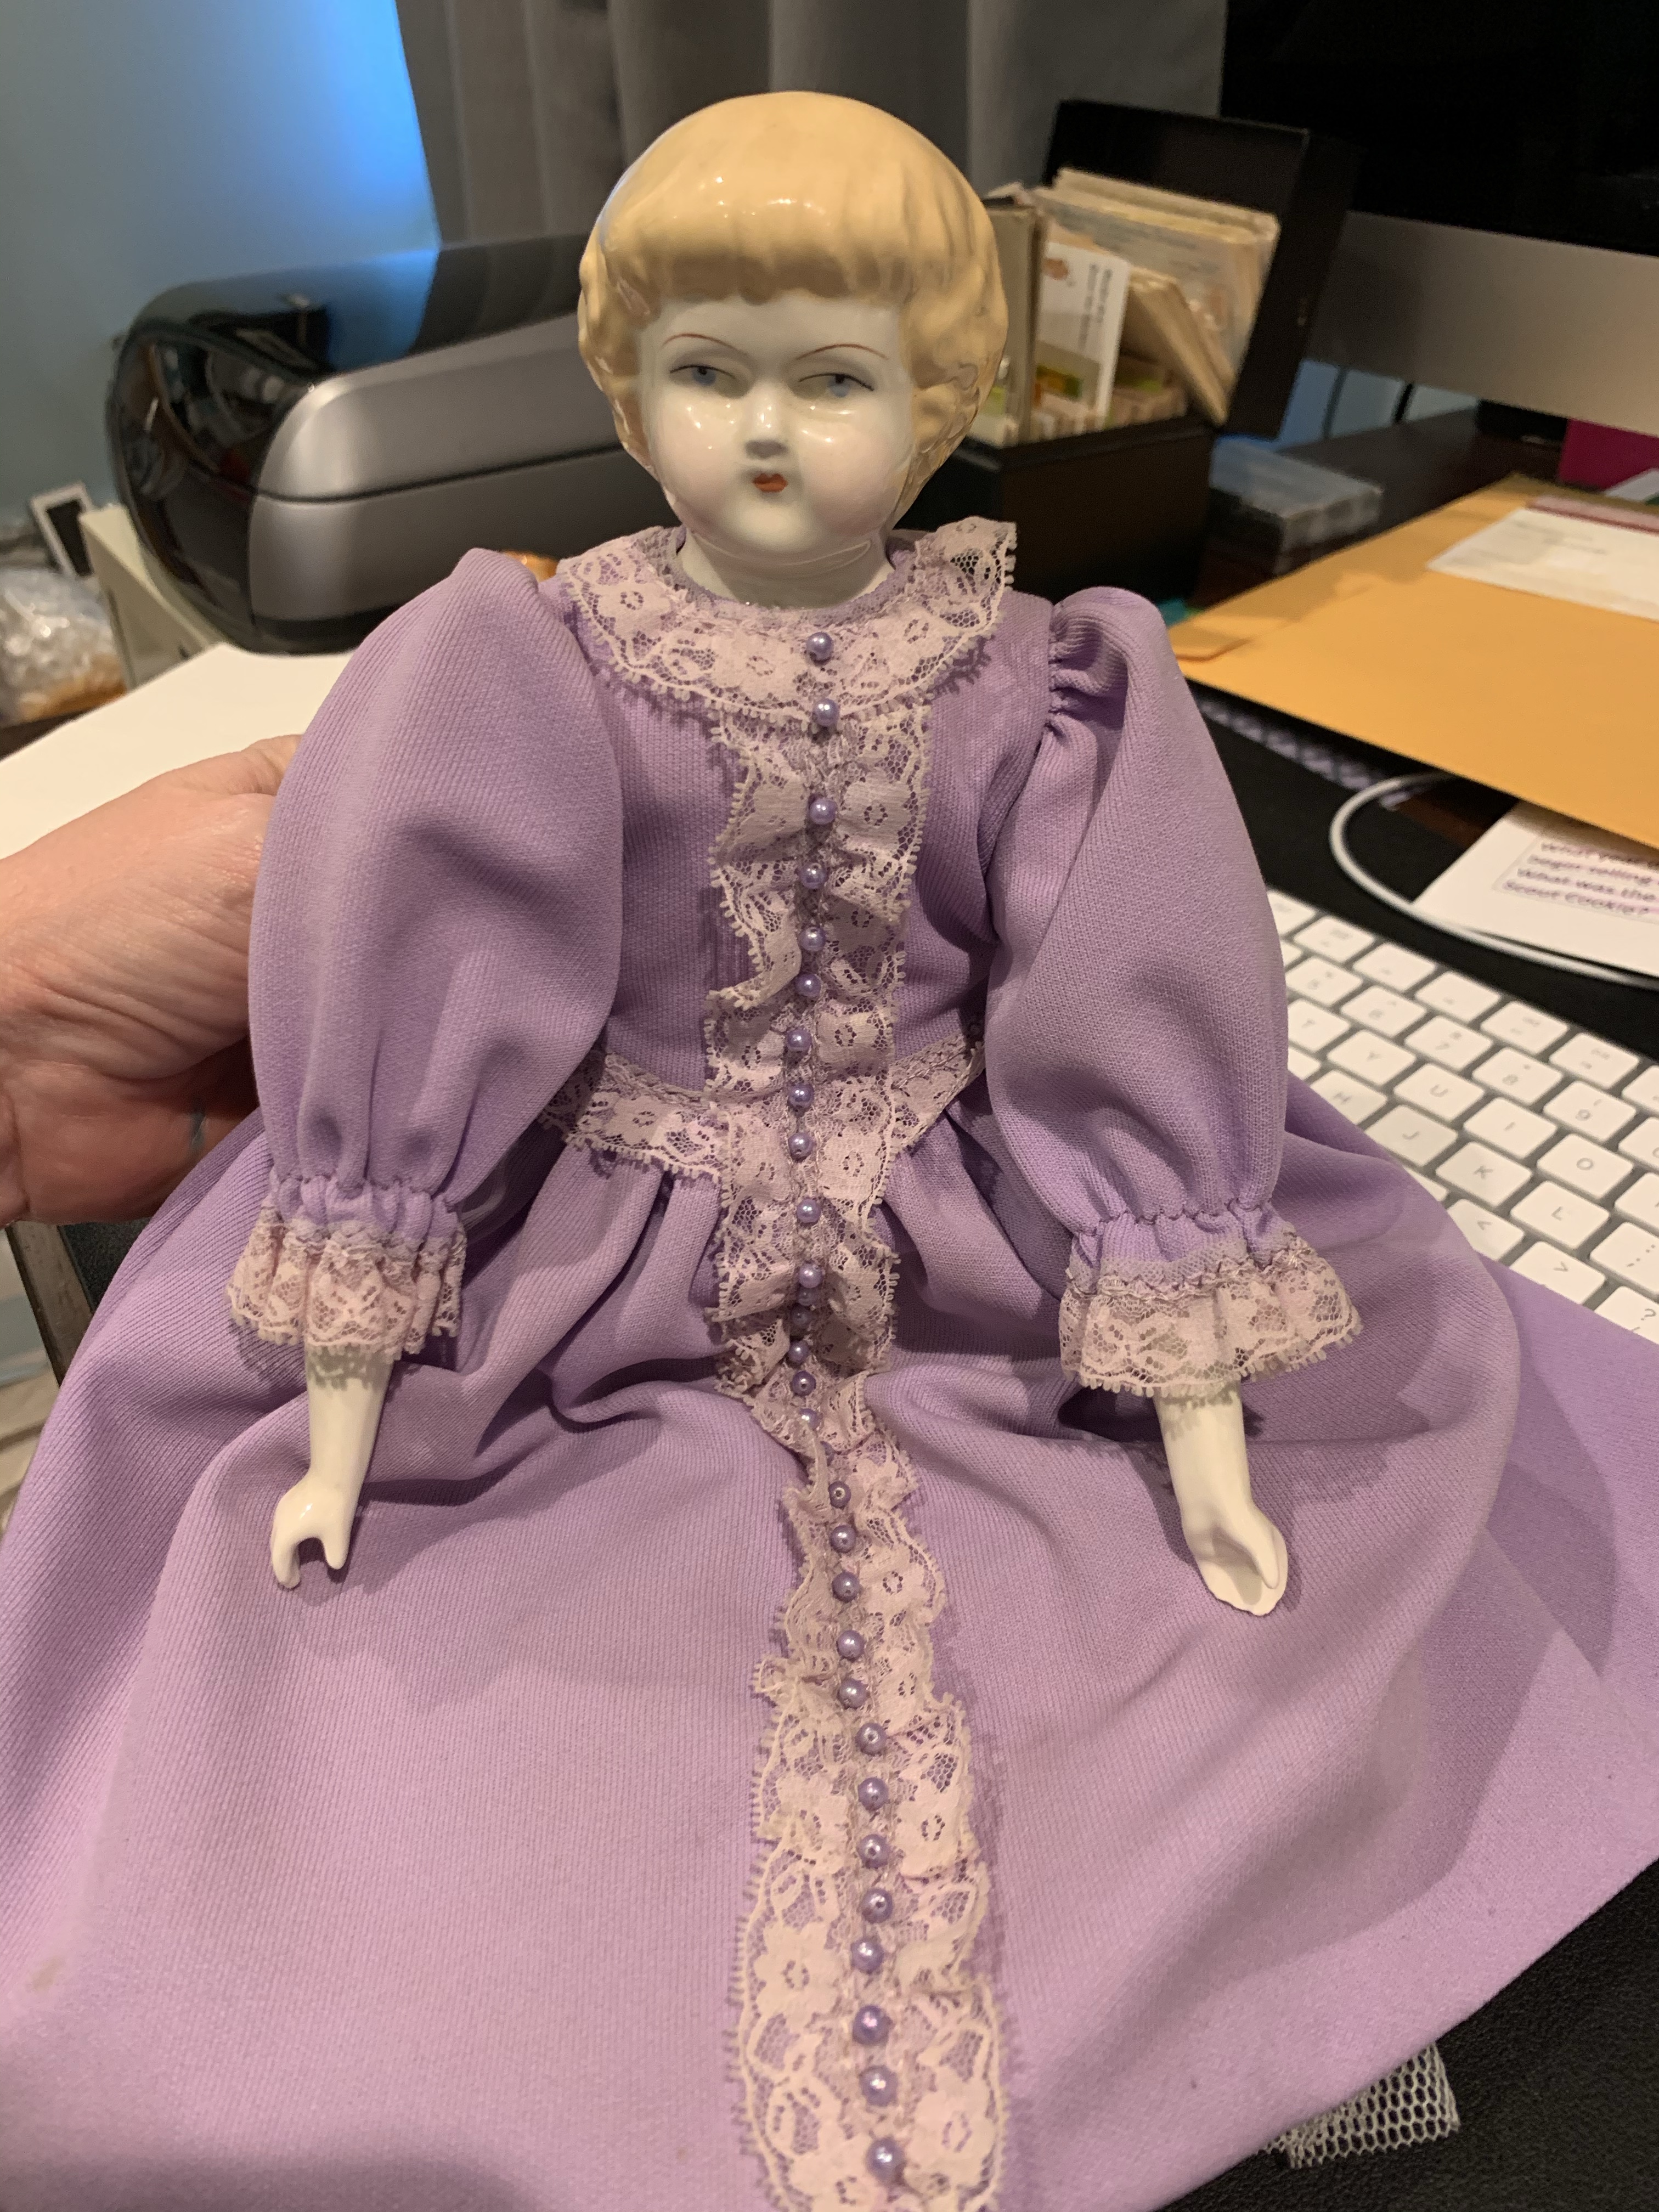
The dress she wears was described as dimity. I had to look up what that is, because while I have heard of it I don’t think I have ever seen it. According to JoAnnMorgan.com, dimity’s trademark feature is a line in the weave, and a windowpane dimity looks like it has boxes. This pretty dress appears to be of windowpane dimity as you can see the boxes in the weave.
Sheer windowpane and ruffles
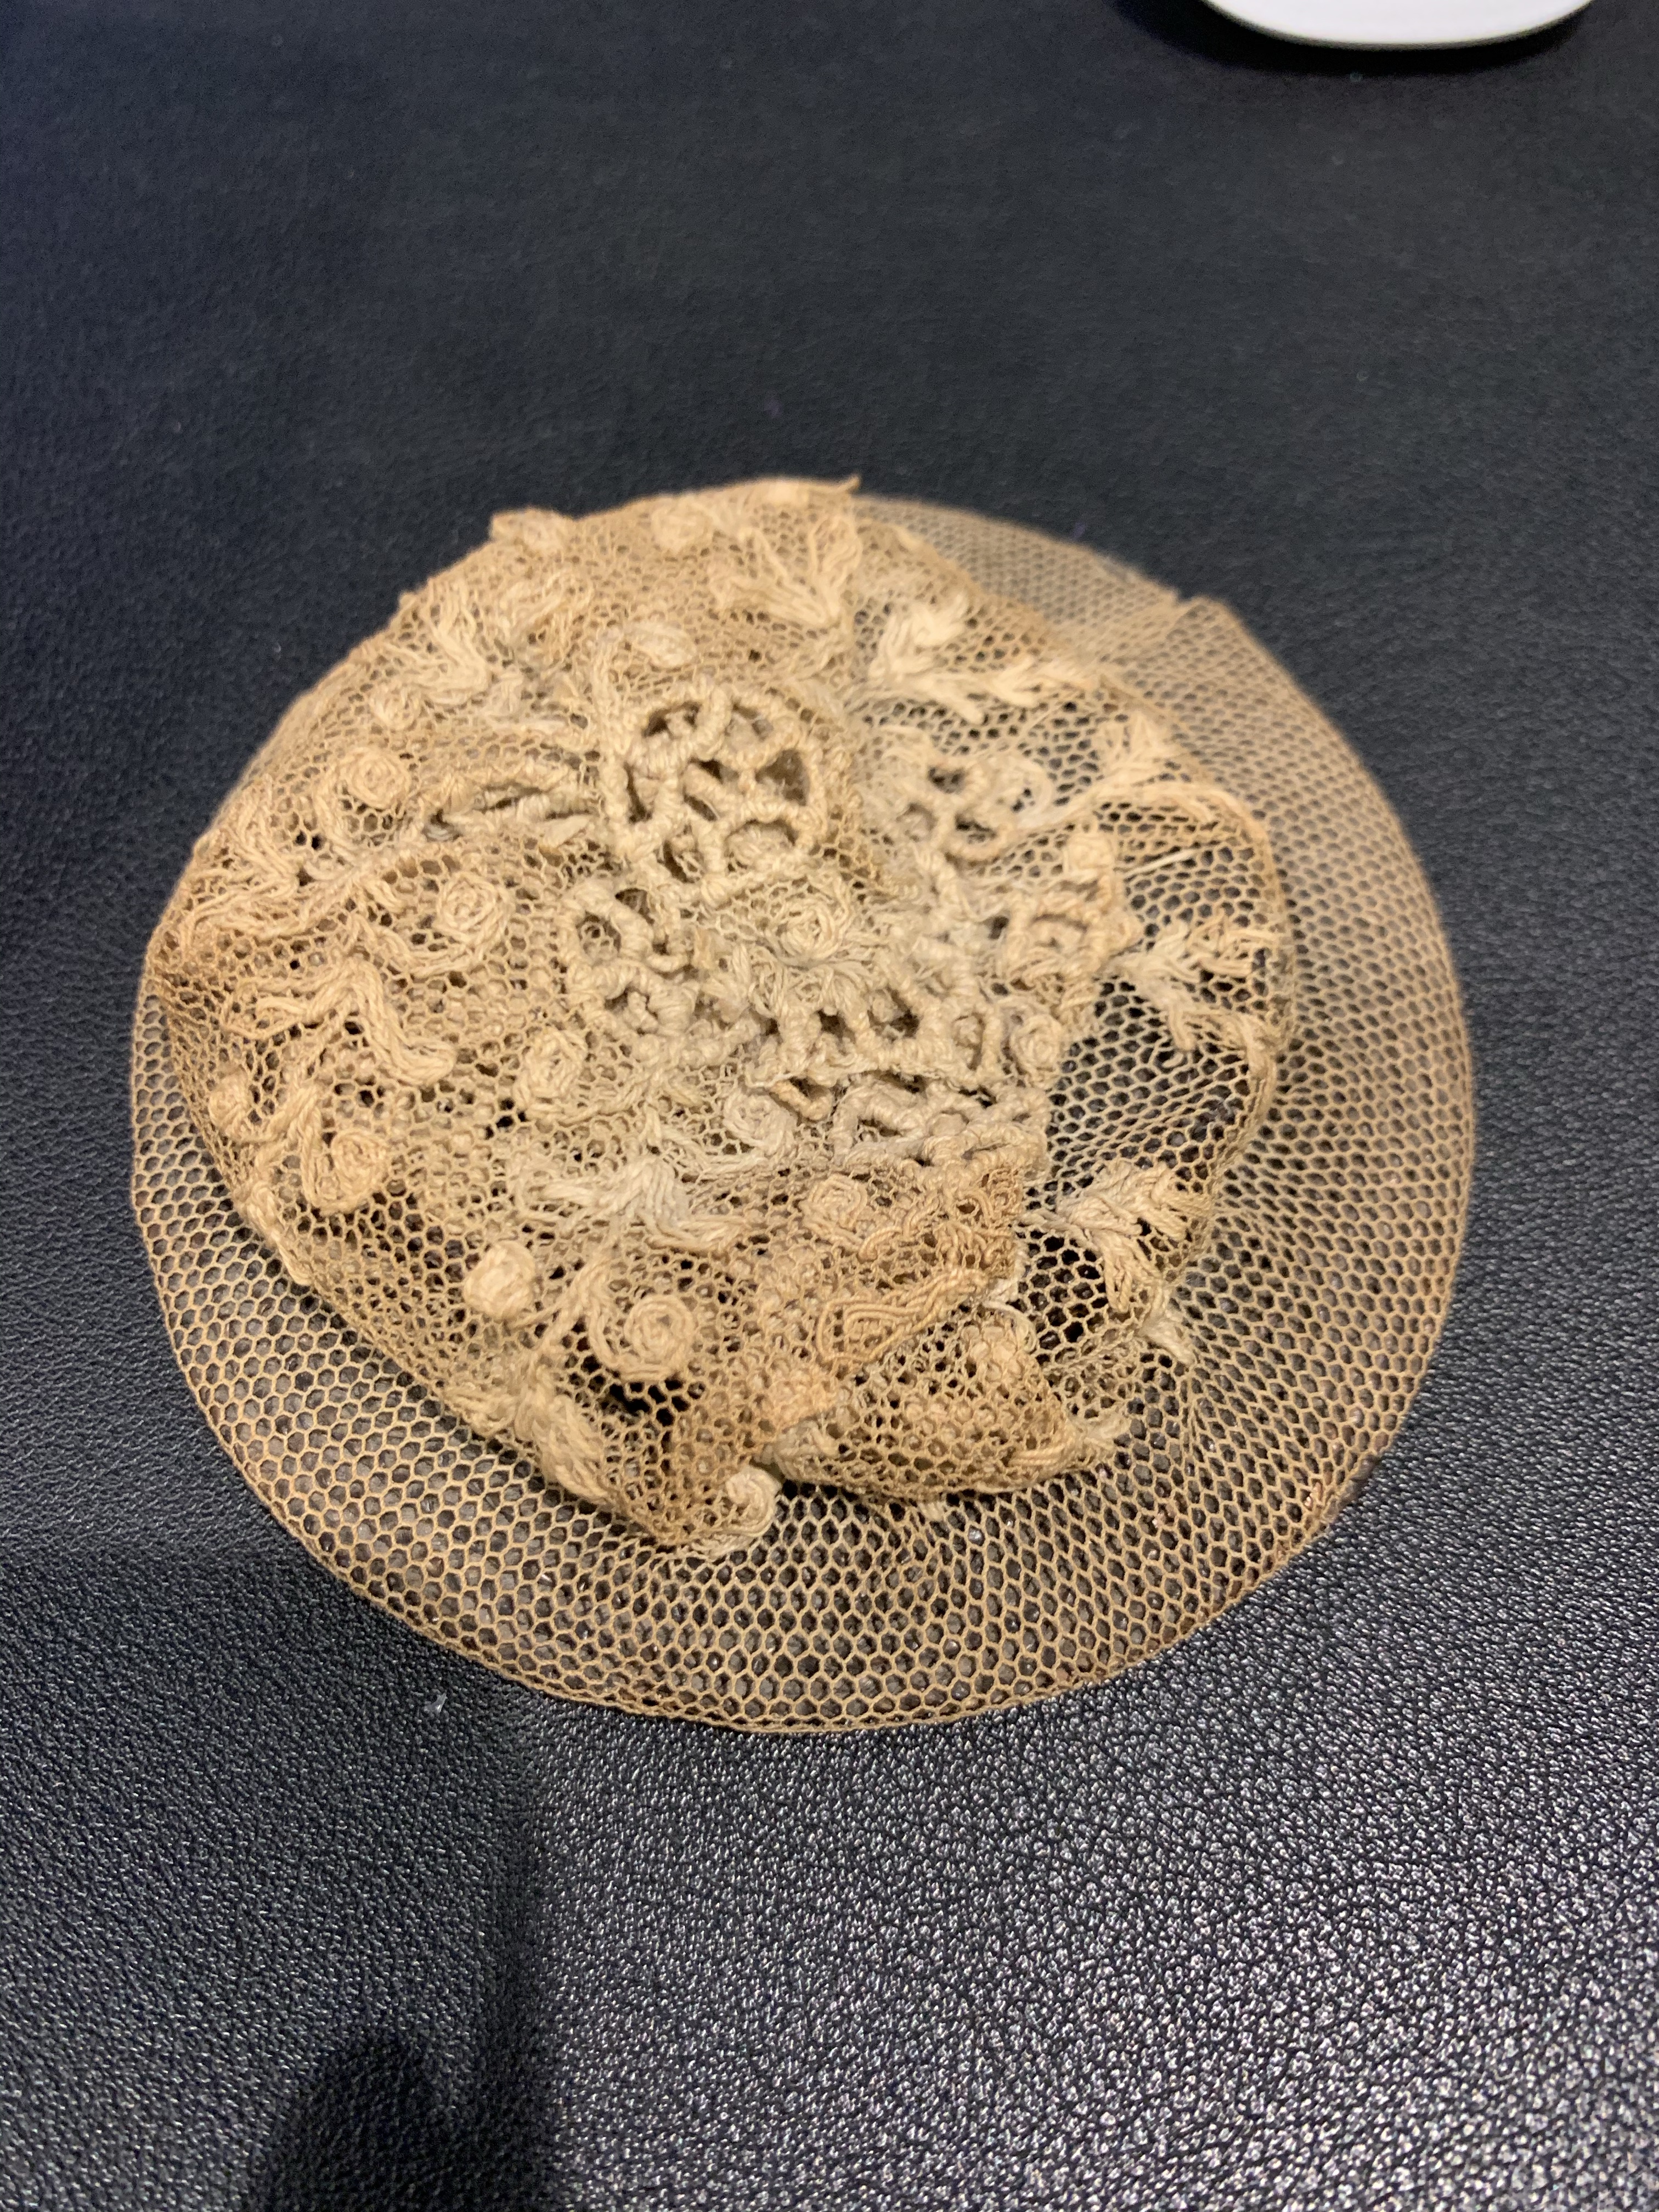
The dress is just exquisite. It is sheer and airy, so incredibly fine. The pattern likely is from the 20th century. When Paula emerged from her shipping box, I was thrilled to discover she has a hoop skirt. It’s is a single bone bridal-style hoop, but nonetheless it helps with the shape of her dress. The hoop was completely crunched up, but with some gentle adjustment it went back to a round shape. Her drawers feature some of the tiniest tucks I have ever seen.
Hooped petticoat
Tiny tucks
Fine undergarments
Paula’s dress has a bit of a train, or is in an elliptical shape. This shape came into fashion in the second half of the 1860’s, moving more fabric to the back of the skirt. You can also see in this photo the 3/4 sleeves with the repeated three rows of lace trim. The ribbon trim is an 1/8” velvet. It may have originally been a brighter teal color.
Paula in profile
The bodice of the dress features a starched wrap, probably made of batiste. I hesitate to remove the wrap to see the bodice underneath. I am not certain if this wrap piece is considered a bertha or not. A bertha was often part of a ball gown. Take a look at the tiny buttons. They are a teal color. Maybe the are really beads, I’m unsure.
Delicate wrap
Itty bitty buttons
Bodice detail
One of the unique features of Paula’s styling is her hair. I don’t know if you will be able to see in these small photos, but she has a braid that goes all round her head and then a cluster of curls on the crown of her head. This is hair styled for a ball.
Side curls
Curls & braid
Up do hairstyle
Another thing that attracted me was the inclusion of a letter from a previous owner of this doll. It was written in 1972 by an unnamed person, and explains the doll was a kit designed by Julia Hoople, and Paula was created by Merry Lane in Florence, Oregon. I think Merry Lane might be a person, but it could also have been a doll boutique. She originally had a yellow bead necklace and a white picture hat decorated with flowers. Those items have been lost to time.
Paula has joined the rest of the gang in my cabinet and I am pleased to include her in my collection. I hope you have enjoyed hearing all about her. See you again soon!
Emma is another Tasha Tudor doll I acquired off eBay. Someone is selling a kit to make an Emma for something like $50 but I found this complete doll for only $20. Such a deal – I don’t have to build her!
Emma is dated 1974. I imagine she was made around that time based on this dress. It is polyester. Not today’s polyester- this IS your grandma’s polyester.
The outfit consists of the dress, a net underskirt, polyester drawers and a hat. None of the doll kits included much dress fashion – just basic patterns and sketchy instructions. I always wonder about the person who made the doll, her clothes and their knowledge. Did they have a book? And old doll to copy?
While it was sewn competently, it’s POLYESTER! 😆 there’s no way Emma can continue to wear this. But don’t worry, I have something in mind. Since Emma is styled as a youth doll (instead of a lady doll) I am working on a cute 1876 outfit styled from La Mode Illustree. Come back soon and I’ll tell you all about her new clothes from the muslin out.
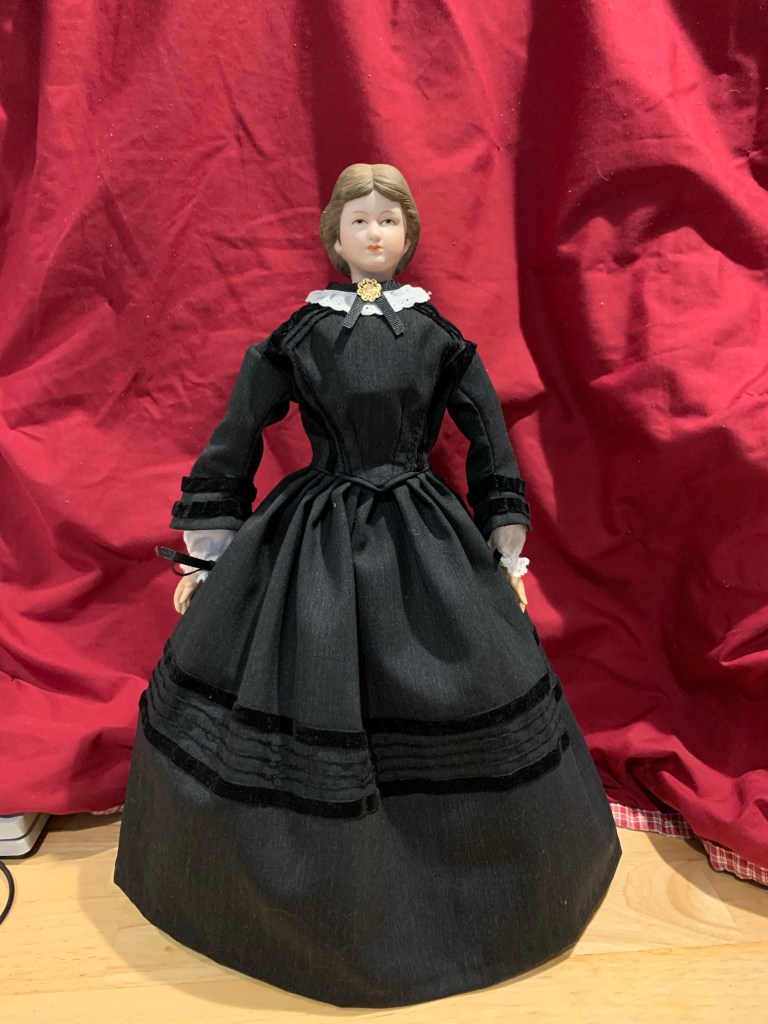
A few weeks ago I told you about building the lovely Florence Nightengale doll from Yield House. Thankfully, Florence hasn’t been sitting in her underclothes since I completed her. I was very focused on the project and spent about a week making her dress.
I decided that since Florence was a known person I would do my best to recreate a dress she wore. A photo search resulted in this image, dated to 1857.
Florence, age 37
Although we don’t really know what color her dress was, I felt that an homage to the somber nurses dress might work well. I found some gorgeous lightweight charcoal wool from MiniMagic.com. They have tons of doll appropriate fabrics, trims and more.
Studying the dress, I figured the original velvet bands were probably 2 inch wide pieces. Of course in doll scale that would not work, so I purchased 3/8” velvet trim.
Secondly, I knew I would not be able to reproduce the turned back sleeves on such small scale. I would have to compromise on that.
And granted, the dress would be made to open in the back as a doll dress, so the sharp point on the waist would also not materialize.
But, I think I did a pretty good job.
Florence, dressed
Since 1/8” velvet trim doesn’t exist that I could find, I embroidered the bars in between the velvet bands on the skirt and on the bodice.
I made her undersleeves from a fine white batiste that I had and used some delicate lace. I am not thrilled with the black ribbon in the casings, but I’m not going to remake them. As was done in her day, the undersleeves tie on just above her elbow.
The lace for her collar I had left from another project. I used a tiny medallion for the center embellishment.
I’m quite pleased with Florence Nightengale! Come back again and I’ll tell you all about Emma and her purple polyester dress.
No, not the city. This is Florence Nightengale, according to Yield House. Yield House was a mail-order craft company popular for many years in the 20th century. During the 1970s and 80s, there was a wave of reproduction doll kits that hit the market and Yield House was right in the mix of things. They may have been the most popular. They featured characters from history – George & Martha Washington, John & Abigail Adams, Florence Nightengale, Betsy Ross, plus the March sisters – Meg, Jo, Beth & Amy – as well as Pinky & Blue Boy. There were others as well, but you get the picture.
Florence in pieces
As a 10 year old girl, I made George & Martha Washington. Looking at the instructions now, which are shockingly sparse, I am amazed I made the dolls at all. It only goes to show how good my mother was. She surely coached and guided me through the process. I have distinct memories of her telling me how to gather the fabric for the skirt. My sister some years later made new clothes for George and Martha, and related to me recently that I had put on his feet opposite to correct, so his left was on the right, right on the left. Poor George! Kathy or my mother has these two dolls.
I decided in my recent obsession with dolls that I would make a Yield House doll (or two, or more, depends…). I purchased this kit from eBay and got a discount because her original hands were broken. I found replacement hands (you can find almost anything on eBay!), and then she sat in her box unmade for several months while I worked on Dottie.
The pattern pieces and box
During that time, I considered what level of accuracy I wanted for Florence. She was a truly famous woman who accomplished great things! I suppose I could shoot for accuracy if at all possible.
But first, the construction. Like I mentioned, the instructions are shockingly sparse. Make the leg, attach the arm, stuff the body, attach the head. That’s not far from reality. The first obstacle was the fact that the pattern for the muslin leg resulted in an opening much wider than the actual china piece. What to do?? I found a blog post from a doll club in Birmingham, AL which solved the problem for me. Make a dart before attaching the china piece.
You can see here that the China piece has a groove and a hole. The intention is for firm thread such as quilting thread to be wound around the piece in the groove. The benefit of the hole is that the piece can be sewn to the leg fabric. If the piece only had the groove, some methods indicate they should be glued on top of the tightly wound thread.
In Florence’s case, since I have replacement hands, she has both types of attachment. I didn’t glue the hands because I was impatient and wanted to get her finished.
The assembly of the doll went rather quickly – maybe an hour or two. I found attaching the head a bit frustrating due to the stuffing I have used. It’s very springy, so the China head kept squiggling around when I was working on securing the tapes. This method is very common in historical and reproduction China dolls.
Once she was completed, I quickly made her a chemise and drawers. I drafted these patterns from a couple different patterns I have on hand.
Third, I made her a corset. Again, it’s not really corded, but stitched to look like it is. She is a doll after all. :-) The corset took a long time to make. All that faux cording took a long time to stitch. Last I made two petticoats. During her lifetime, Florence would have worn the multiple layers of petticoats typical before the advent of the cage crinoline. The good news is I now have a standard set of undergarment patterns for any future Yield House dolls I may create. Which is entirely likely.
Next time, I’ll tell you all about the dress I made for Florence. It was a ton of work but it’s so worth it!