More undergarments

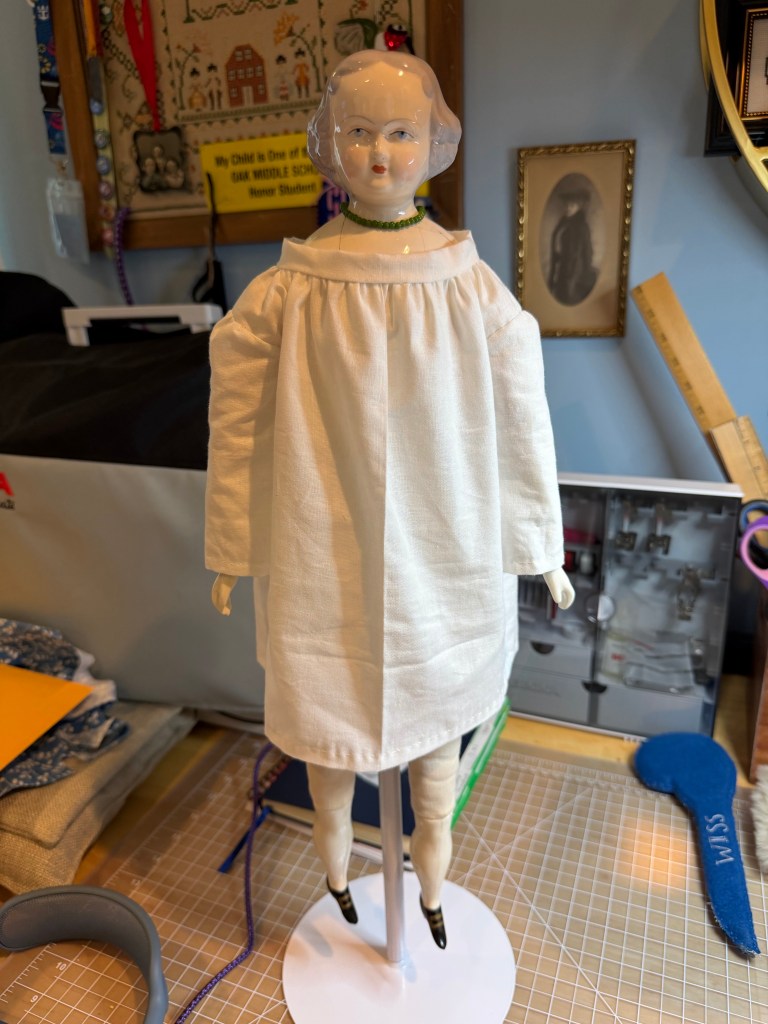
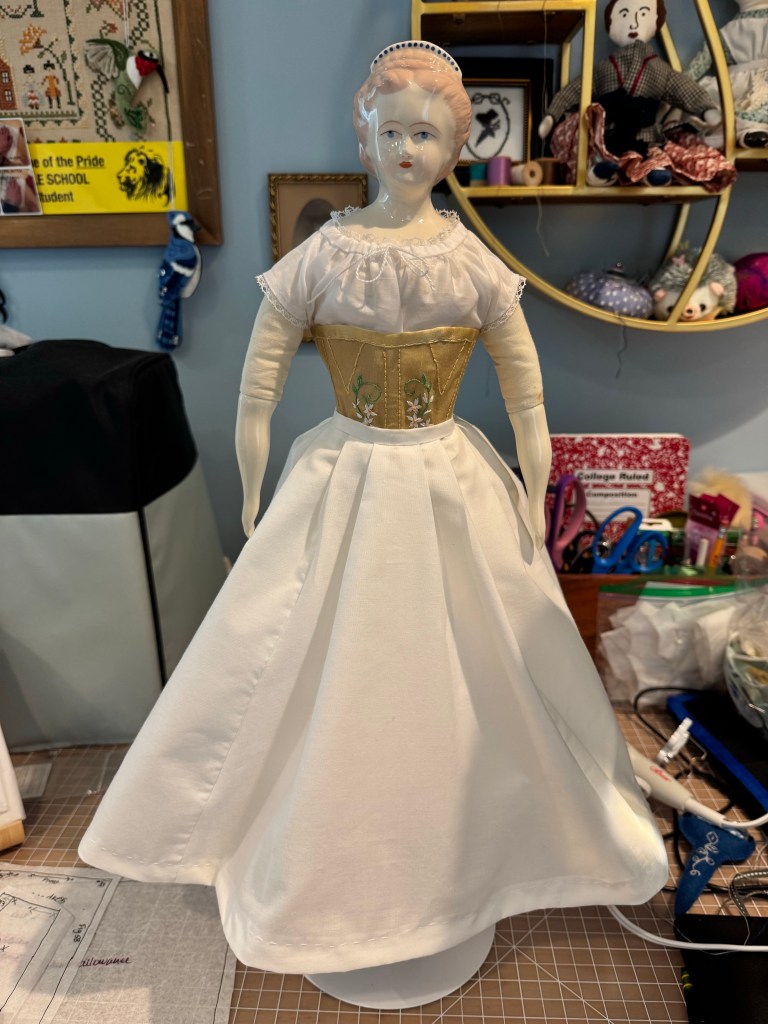
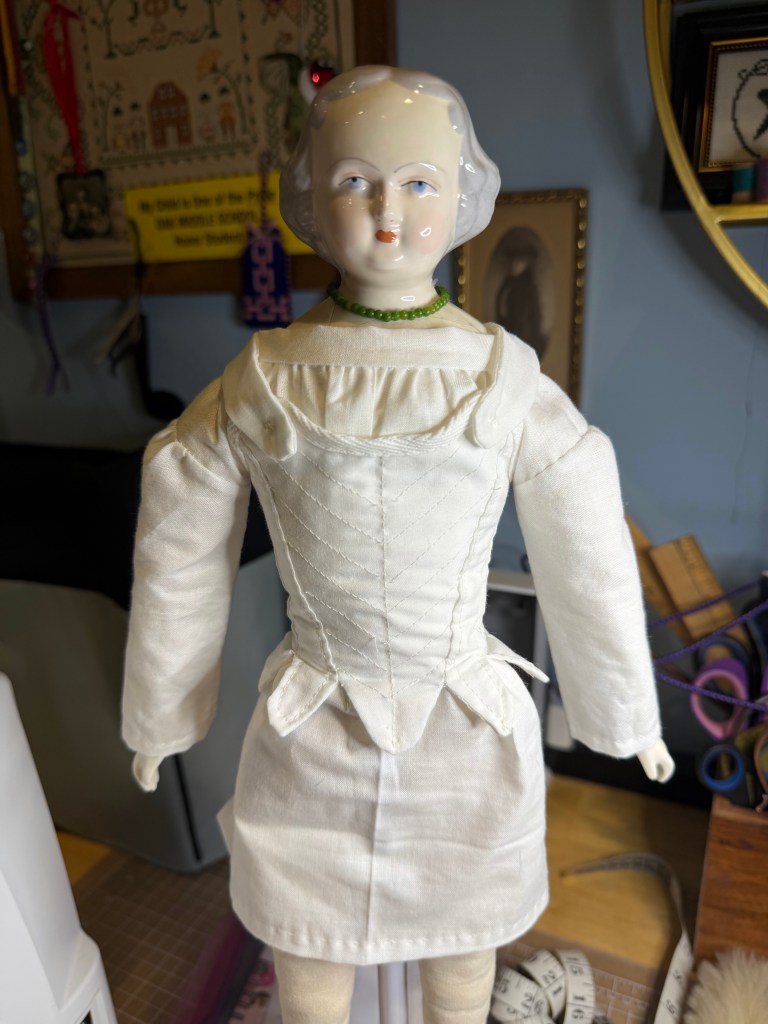
I kept working on Martha Tudor the last couple weeks and completed two more items. First up was a set of stays.

18th century stays

I used the Susan Sirkis WB14 stays pattern, upscaled it, adjusted it to fit, redrafted the adjusted pieces and then went to work.

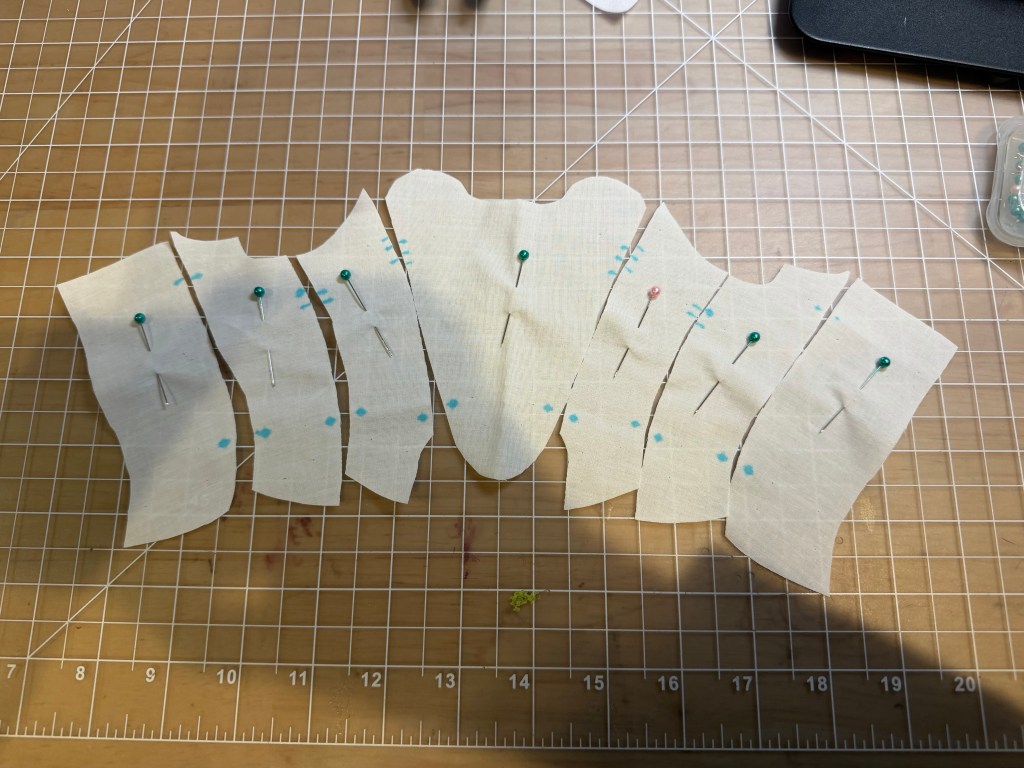
I chose to make it in two layers as I find the garments just fit more authentically with enough fabric in them. So I cut all the pieces, transferred the marks and then assembled an inner and an outer layer.

Partially completed stays

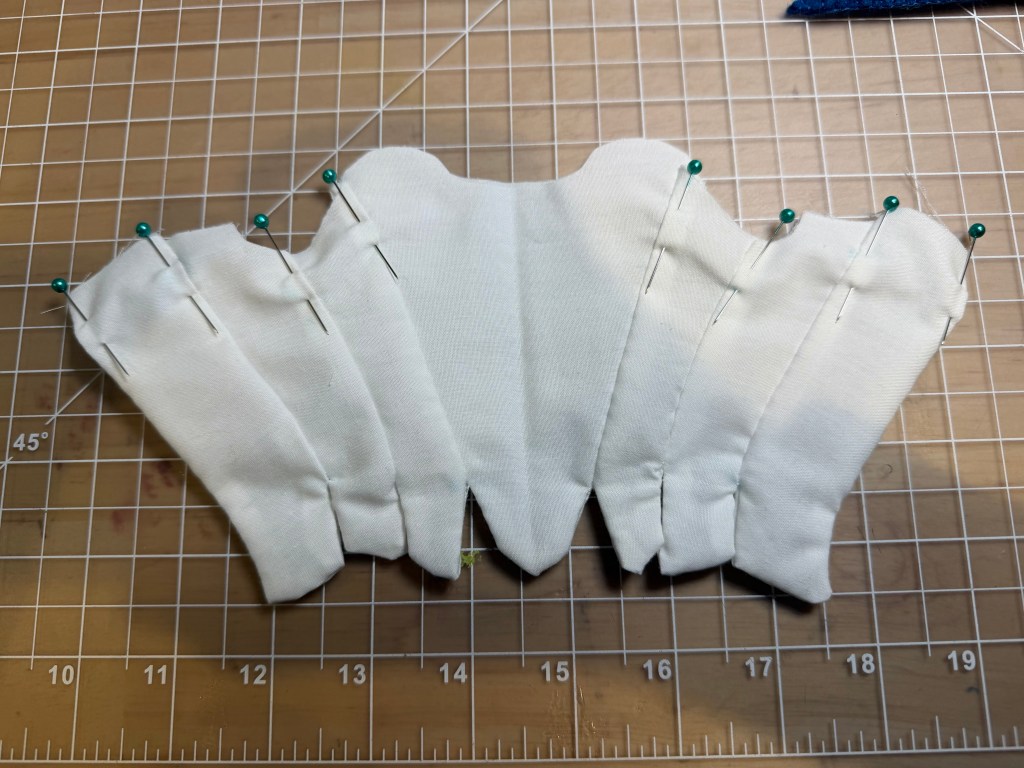
The pieces are sewn from the top edge to the waist marking. This allows for the creation of the tabs which were seen on 18th century stays. All seams are pressed toward the back. I found turning to be fiddley mostly in the tabs. I think making these stays in their original size (approximately Barbie doll size) would really be a big pain.

Final steps

I used this white cotton Petersham to bind the top edge and also stitched down all the seams. I also stitched in mock boning channels on the center front panel. I was able to use my machine for some of this work which saved so much time and gave a really clean finish. The final steps were then to stitch the eyelets and the shoulder straps.

A blood sacrifice

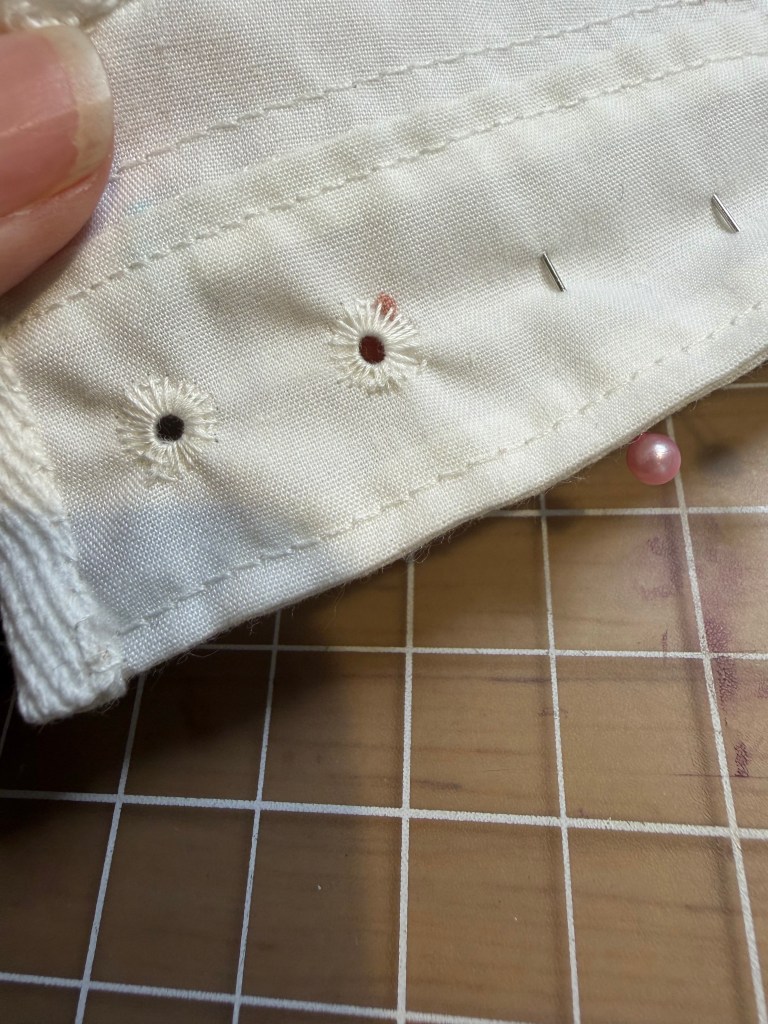
I quite like making eyelets for some reason. It’s a sort of zen process to me. But this one got me and I left some of my blood in the stays. That surely portends the rest of the clothes will come together easily, right?

Back lacing

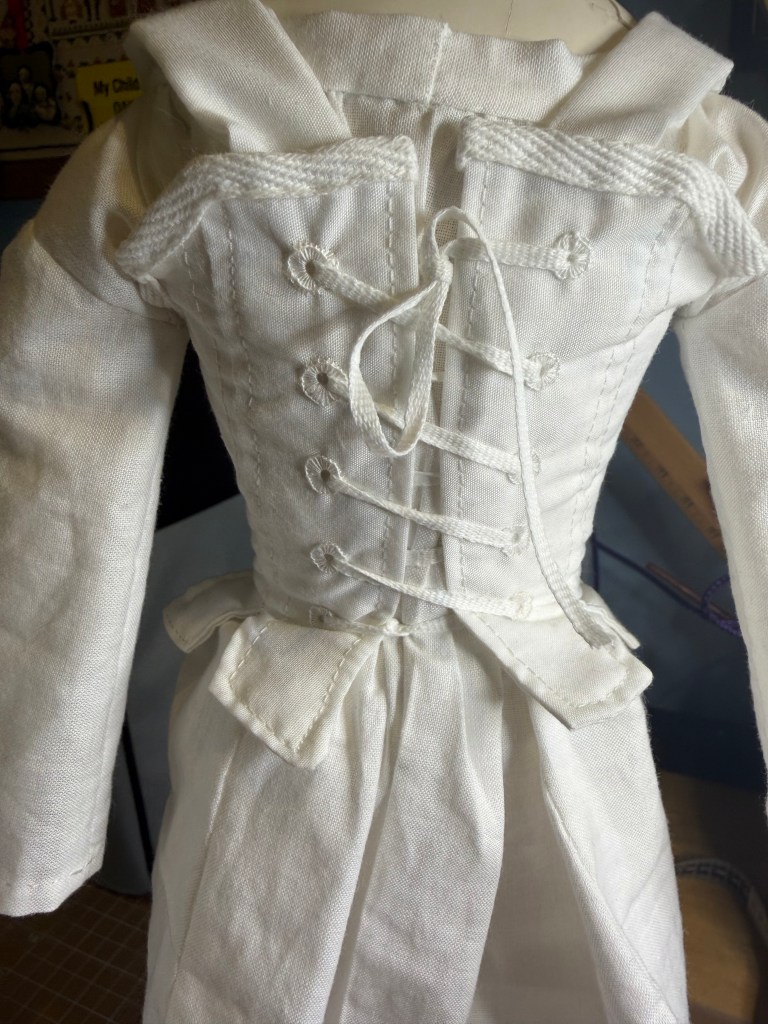
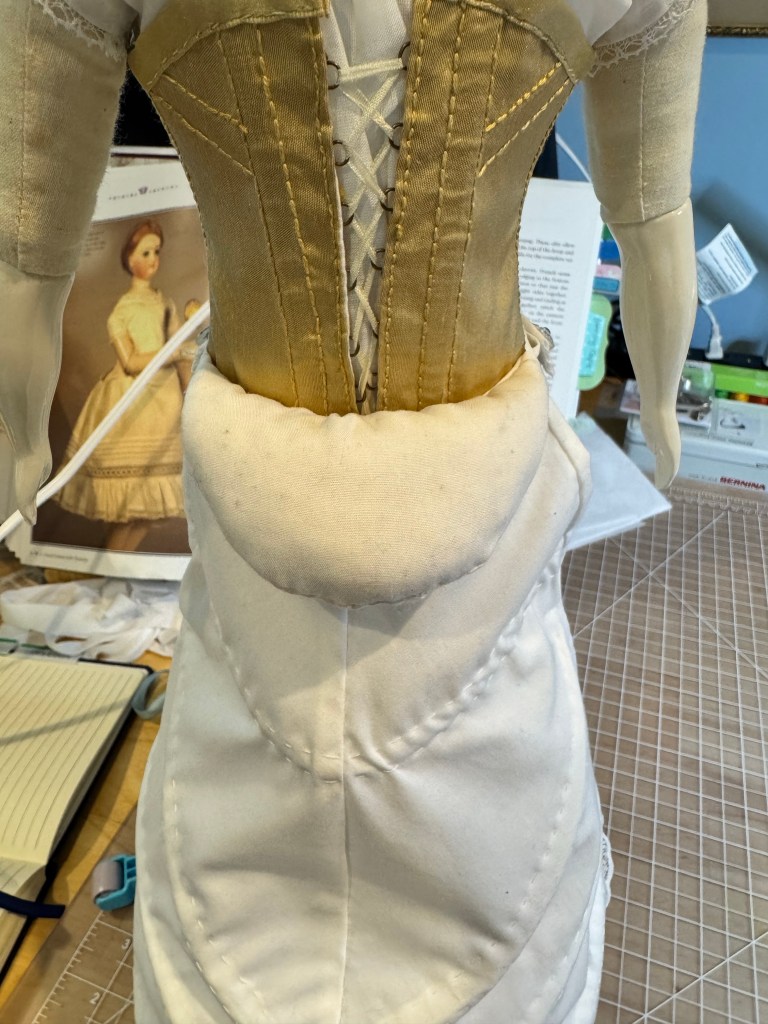
Here you can see I laced the stays from bottom to top which was apparently how they were done in this era. I’ve seen multiple videos and photos of people lacing their stays this way.

Padded panniers

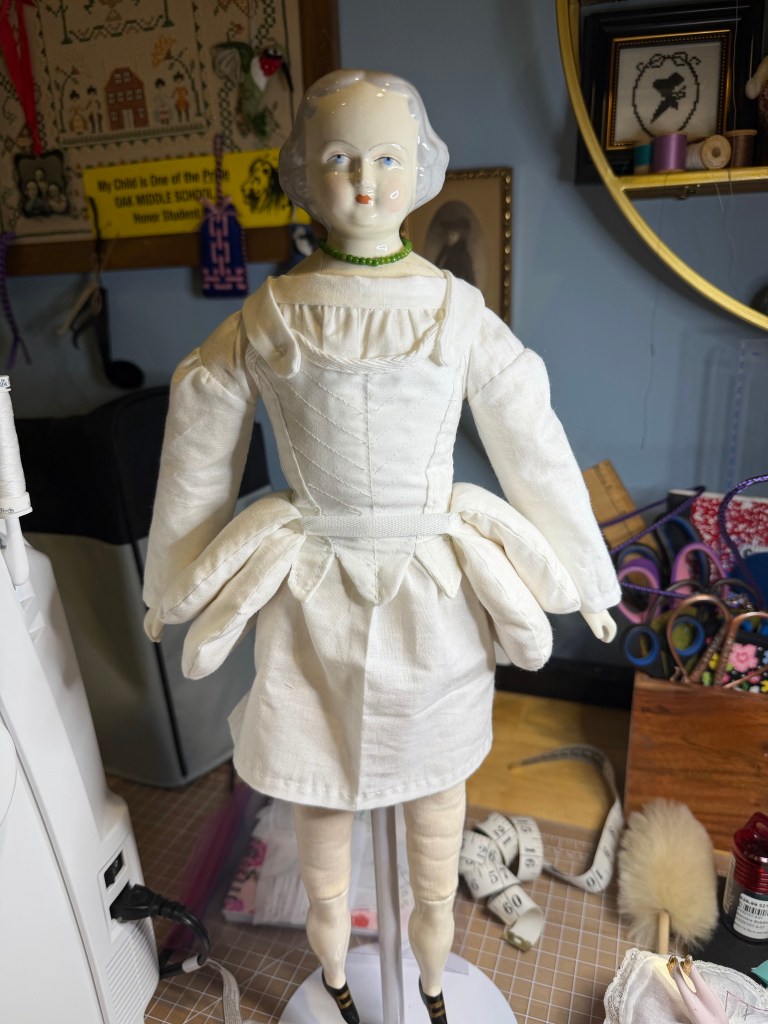
Here are the padded panniers I made. They are basically a figure 8 shape, then folded over the waistband and stitched together. They kind of look like saddlebags to me. The panniers are lightly stuffed with cotton to give them body, but not so firmly they won’t give a little under the weight of the skirt.

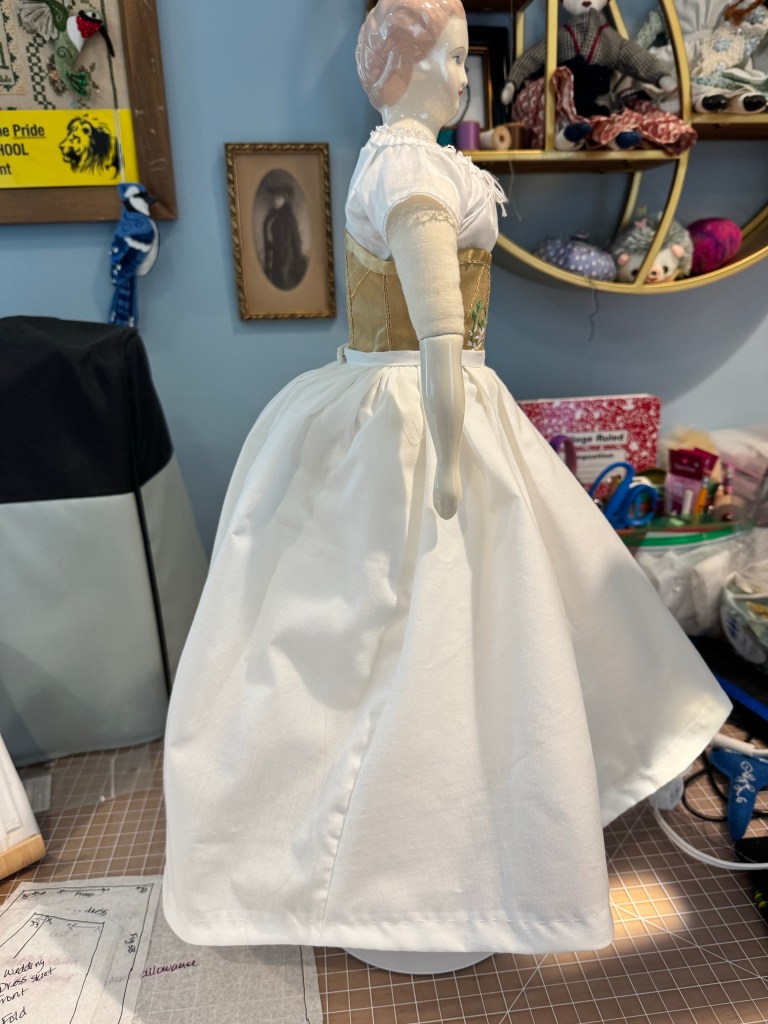
So that’s the completed undergarments! I’ve been working on the skirt – it was called the petticoat in this era but didn’t hide underneath the main skirt, it was the main skirt. Interesting how terminology evolved. Stay tuned for that garment coming up next.

Martha Tudor Part 2

I completed the very first piece of her wardrobe: a basic linen shift.

My intention with Martha is to dress her in a 1750s style. Probably I will make a robe à la francaise. This is the type of dress with a wide skirt to the sides.

Met Museum

Now, since she is from the Colonies, she isn’t going to have the exaggerated width of a court gown.

British Court Gown – Met Museum

I’ll be making some small pannier pads to hold out the sides. The robe à la francaise is characterized by Watteaux pleats on the back of the gown. These back pleats were in fashion off and on through the 19th century!

Watteaux pleats

I do have lovely fabrics selected for this project. I do not have patterns. I’ll be drafting and/or upscaling pieces from a variety of sources. The shift I made, for instance is based on a 19th century style nightgown with some changes and I drafted the sleeve.

And since Martha is another 20” doll, I’m going to try using my sewing machine for parts of the clothing. Of course no setting in sleeves, they are just too small for my sanity, but much of the rest of the garments can be machine sewn. That should save my eye sight a little bit.

Stay tuned for future updates!

A few completions

Since finishing Julia I took a short break from china dolls so I could work on Christmas. First up is Inez. In September 2024 I started this dress. Thankfully Inez is incredibly patient!

Happy Christmas!

I love the bias plaid. The bodice is a gathered front bodice with long slim sleeves and a small tuck at the cuff. I had completed most of the bodice back in 2024 and then set this project aside for others. While out shopping with my sister I found this lovely grosgrain ribbon to adorn the skirt, but it still needed something. I then found this perfect red trim. I love the festive colors all together. I actually have two additional holiday dress cuts so maybe by 2030 Emalie and Mernie will have Christmas dresses, too.

Next, for a Christmas gift, I have been planing this cute bathing costume for my sister’s doll, Dottie.

Let’s go to the beach, beach

Emalie of course is the model because it’s a gift. Many years ago, my sister and I and another friend made ourselves Victorian bathing costumes. My sister’s was this color scheme and I thought it would be so cute for her and Dottie to match.

I used the Elizabeth Stewart Clark patterns as a base, but made the standard back opening bodice into a front opening. Then, I used the drawers pattern, cut short, and joined the top and bottom with a waistband.

Union suit

It’s kind of like combination underwear. I gathered the sleeves and legs, then added the red ribbon trims. The buttons aren’t functional, it closes with hooks and eyes.

Finally, I made a sweet little skirt, not as full as the standard dress pattern calls for. This is gathered to the waistband, then the skirt buttons to the center front of the bathing costume and has a center back closure.

Ready to take a dip

I’m really pleased with this gift and I hope Dottie likes it too.

Finally, one funny little thing for me! With my hand sewing, I felt that I would like a pin cushion to keep handy. On eBay I was seeing half dolls made into pin cushions, then one day I saw these legs. I thought this was just hilarious and I knew exactly what I wanted to do!

Leggy Linda

I pictured her with frilly skirts all around, but in all honesty that would not be very practical for a pin cushion. She does have a purple silk skirt and a batiste petticoat, and that’s probably just fine. The pin cushion itself is a cotton base with emery inside.

Whoopsie!

I say that Leggy Linda the Lush had a bit too much eggnog and fell into a snowbank. Her legs are about 1.75” btw, she’s tiny.

That’s the latest for now. I am working on drafting patterns for Martha Tudor after finding a perfect 18th century inspired fabric. Stay tuned for that project coming soon!

Progress on Julia – corset cover and skirt

I haven’t made as much progress as I’d like on Julia’s wedding gown, but I did complete a couple things.

First I made a little batiste corset cover because I just know the gold silk corset could potentially show through the bodice and I don’t want that. It was a little difficult to fit to her, but right now I can’t remember why. I used French lace and mother of pearl buttons – and of course hand sewn button holes. While this pattern came from the Louise Hedrick book, it is very similar to one I made from Le Mode Illustree from 1872 or 1879.

Next I completed the skirt. I actually made a test skirt in plain cotton and that is acting as an additional petticoat. The silk satin is luscious. The skirt is fully lined. I used bias strips to create the hem and the facing is just stitched to the lining.

I had this gorgeous lightweight pink silk satin ribbon and used it to create the ruched trim by running a gathering stitch on either side about 1/8” from the edge. The sweep of the skirt hem is about 36” so I used 90” of the pink to make the trim.

Next up I am working on the undersleeves. During this era, sleeves were still a separate item that was tied on around the bicep. I’m making some organdy sleeves with gorgeous French lace at the cuff edge.

After that I will make the bodice and finally a veil. But just because I have ADHD, I made a bouquet for her to hold. It is bound in a rose colored silk ribbon and I left tails long enough to tie it to her hand.

The flowers are paper and I can’t remember now where I bought them but there was a sale so I bought all the colors. :-)

Stay tuned for more progress soon. I really want to finish the glorious wedding ensemble – of course that will necessitate rearranging my display cabinet and that can always be fun too!

Better Petticoat

I talked myself off the ledge and I’m not making a wired bustle or cage for Julia. I really just don’t have the time and as I always remind myself, she is a doll. A beautiful doll, but a doll nonetheless.

Instead, I am using the small bum roll I previously made, the petticoat I didn’t love, a second petticoat I made a bit longer than the first, and finally a petticoat made from the skirt pattern.

I think this gives the posterior enough fullness to achieve the look of 1872, while also giving me experience with the skirt pattern.

One thing I discovered from this exercise is that the pattern does not tell you what to do with the side-to-back fullness at the waist. And, the pleats in the front do not take up enough fabric to evenly distribute the front between the two sides.

Now, luckily, I have made human sized clothes with these same design elements but better instructions!

I added two pleats on either side of center front. This serves to take up enough fabric that the side panels of the skirt are actually on her sides. They were previously more to her back.

Second, I used 1/4” pleats on the back and then pressed them toward the center back. These are similar to cartridge pleating except the pleats are pressed toward the back, where cartridge pleats would hang from the waistband. Anyway, that’s what I did.

I used bias tape to create the hem because it is curved. You can see the nice train the finished wedding dress will have. I suppose I will start on the bodice mockup next but probably with paper towels.

Oops I was incorrect

I recently shared that I need to make an elliptical hoop for Julia. I really procrastinated on this, partly because it seemed like a lot of work. But also because in the back of my mind, it didn’t seem correct.

With all the fashion changes in the 19th century, why would an elliptical hoop stay in use from 1865 to 1872? It just didn’t make sense.

I’m glad I didn’t dive into that project, because after doing a bit more research and asking people more knowledgeable than me, I discovered the shape I am looking for is somewhat in between the older hoop and the not-yet invented bustle.

Wow. That is very different.

Here is an extant wedding dress from 1871 that better shows the shape achieved.

So I’m really thankful again that I didn’t start making that hoop! But now I need to figure out how to make those wire channel pocket thingies.

It was suggested I design the garment after the Truly Victorian TV108 Grand Bustle, although that seems like the next fashion era to me.

Then there is the Truly Victorian TV101 Petticoat with Wire Bustle, which again feels later to me.

I must continually remind myself this is for a 20” doll. No one would even blink if I made no bustle garment at all!!

Foundation garments

Busy, busy fingers. I have been working diligently on Julia’s foundation garments. In my last post I shared the completed chemise, drawers and corset. Today I will share the next items.

First up, I completed the empire hoop. This is the second time I’ve made this particular item and I’m less than delighted with both of them.

Side view
Back view

I feel like the hoop is meant to support a smaller skirt than Julia will likely be wearing. We shall see. The first time I made the empire hoop, I discovered the instructions didn’t tell you to hem it! Obviously I remembered that this time and added a sweet gathered lace.

I don’t love how the back just seems to collapse instead of standing out, but maybe I’m picturing the wrong thing. A grand bustle hoop would stand far out and that’s not the silhouette I’m going for here.

To compensate for the uninspired shape, I’m making a small crescent shaped cushion bustle. More like a bum roll. I saw this on a vintage recreation of an elliptical hoop and I think it’s going to provide the shape and lift/support I’m looking for here.

Vintage buttons

I do love these buttons. They are vintage glass buttons and yes, I did handsew the button holes.

I’ve considered making a different elliptical hoop based on original garments, but what a massive amount of work that will be. Talk me off the ledge!

Bummer

Later…

I’ve made the crescent shaped bum pad and I don’t love it, either! It’s possibly too full and stands out too straight of an angle from her body.

Bumper pad

If I try to flatten it down it has a better profile, but even that isn’t realistic to maintain. I also tried putting it under the empire hoop but that just threw off the way that garment hung and fit, so that was a no-go. This is just going to be set aside for the time being.

I had made the bum pad while waiting for some laces to be delivered for the petticoat.

Lacy petticoat

Here you can see the petticoat, which I do rather like. It is about 1.5” shorter than the hoop and I don’t think that is correct even though it exactly matches the measurements in the book. Le sigh.

I’m just going to focus on what I like. I like the tucks. I like the lace insertion. I like the ruffled hem.

Pretty petti, ugly hoop

At the center back are two itsy worked eyelets for the drawstring. I’m rather good at eyelets. I really should be great at buttonholes because they are just elongated eyelets, right?

The drawstring waist allows me to draw more of the fabric to the back of Julia’s body. This is perfect for the 1872 profile I am hoping to accomplish here.

Part of Julia’s issue is that she is sort of potato shaped through the body. I can’t make much of a waist on her, even with the corset. It’s not a big deal because she is a doll afterall. I just want her to be a beautiful bride once finished with the project!

Bride To Be, Julia

I started working on the new garments for Julia Tudor, who will be getting married in 1872. Based on the lovely drawing in the 1872 La Mode Illustree, she will be wearing an ivory silk satin with blush silk trimming, French lace undersleeves, and a bobinet veil.

Of course before she can don her bridal finery, she must have the appropriate undergarments. I have completed the following so far.

A fine batiste chemise with delicate lace on the neck and arm openings.

Delicate batiste drawers featuring tucks, hem lace and white embroidery in a tulip stitch.

Please ignore the messy work table!

A gold silk taffeta corset, boned and fully lined, featuring orange blossoms embroidered on the front.

Orange blossoms for good fortune
Back view showing lacing

Still to be finished are a practical corset cover of crisp cotton, a luscious petticoat featuring tucks, insertion and also lace at the hem, and an empire hoop of cotton/linen blend. I will share more as they come!

2025 Project Goals

I have a number of things I want to work on this year now Ruby is completed.

Julia Tudor

This doll is about 20” tall and will make a lovely bride. She has a tiara on her head and I am trying to figure out how to make a veil stay in place. My vision is an 1872 wedding dress in ivory and blush pink. Or it could be blush pink with ivory, I haven’t finalized that yet. I’m drafting the pattern from the 1872 La Mode Illustree’ and so far there is only one confusing bit.

Preparing for her upcoming matrimony

Amelia

I’d like to make an 1850s styled doll and give her a Bloomer Suit. This fashion was popularized by Amelia Bloomer, hence the name. I’m undecided if I will use a china headed doll or make a cloth lady doll for this. 1850s heads are rare and expensive. If I decide to make a cloth lady doll, I will try a Susan Sirkis method for attaching hair.

Could be interesting!

Amy Tudor

It’s a stretch goal for me but I would like to make this pretty bonnet head doll. I only have the head so I’ll need to decide if I will purchase china arms and legs or make fabric ones. Bonnet head dolls are based on 1840s styles even though they were produced around 1910 apparently. I’d like to dip into this time period though as I know nothing about it.

I’d like hands and feet, please

Minerva

This beautiful doll doesn’t need much but a repair to her broken foot. I had an idea that I could make boots and stockings, fill them with emery or something similar, then fit them to the broken china on her foot, pull up the stockings to hide the transition. We shall see. I got this idea from Ruby actually since she has her own boots and stockings.

My foot hurts!

Charlotte

I just acquired a 3” tall frozen Charlotte doll. Of course she’s nude. Clothing her will be a challenge due to her itty bitty size so that could be a fun little project. I have some ideas based on other frozen Charlottes with clothing I have seen.

Brr it’s so cold I’m frozen!

So there you have it – my ambitious goals for the year. Of course I’ll be posting here with my progress. And no, I haven’t forgotten the various other dolls I have to work on, they just might need to wait until 2026 lol.

Did you know I have an Instagram where I post lots of interim photos of my work? Look for me under norkio and follow for progress shots and other fun stuff.