I made this pretty blue jay for my mom. She now has a cardinal, a hummingbird and the blue jay. Hopefully soon I will find the time to make a nuthatch. My mom is in a care home and these and other crafts from my sister brighten up her room.

I made this pretty blue jay for my mom. She now has a cardinal, a hummingbird and the blue jay. Hopefully soon I will find the time to make a nuthatch. My mom is in a care home and these and other crafts from my sister brighten up her room.
I can’t believe it’s been almost a year since I made an update here! And the lovely post I wrote a couple days ago has found its way into the digital unknown so I’m starting over grr. So, almost a year ago I posted about the doll photo shoot I did and then went silent. Well, not because I wasn’t continuing my love of these dolls. There are a few photos of some of the work I did but did not talk about.

I finished this lovely dress and coat for Inez. The dress has caps or I believe they may be called sleeve jockeys that fit over the long slim sleeve. The coat is a sueded pleather and the “fur” trim is made from a fuzzy yarn I found. The coat is fully lined and don’t you just love the tiny buttons?

Mernie also got a new dress and a coat, plus a bonnet. The trim on this coat is handmade, 4-strand braid of embroidery floss. The bonnet is actually made from the pattern for the nightcap I made for Inez! It fits the little girl doll heads quite nicely, a bit better than the bonnet pattern that comes with the little girl patterns.

Emalie also has a new dress and a bolero jacket for summer wear as her dress is short sleeved. Her bonnet is from the little girl pattern. AND Emalie has her own doll now! How cute is this little bitty dolly? She’s about 3.5″ tall and of course entirely hand sewn because she is so tiny. I found this pattern in a book that a friend gave me ages ago with how-tos on all sorts of rustic dolls. She is the perfect size for sweet Emalie.

When last we saw Lydia Kidd, she was borrowing Inez’s wrapper and sheer dress, but she now has her own dress and capelette. I drafted the dress pattern based on Inez’s sizes but had to customize it heavily due to Lydia’s “linebacker” shoulders. The dress is cotton but I would have preferred to make it of silk. But hey, if I hadn’t told you would you have known? Nope. :-) Anyway, the bodice is a darted front, pagoda sleeved and has sheer under sleeves. The capelette is just delicious. It is 100% medium weight wool that someone gave me and is the perfect color for this ensemble. I found an embroidery pattern in a doll book and that inspired the pattern here. It took ages to embroider but I just absolutely love it. The capelette is also lined fully.
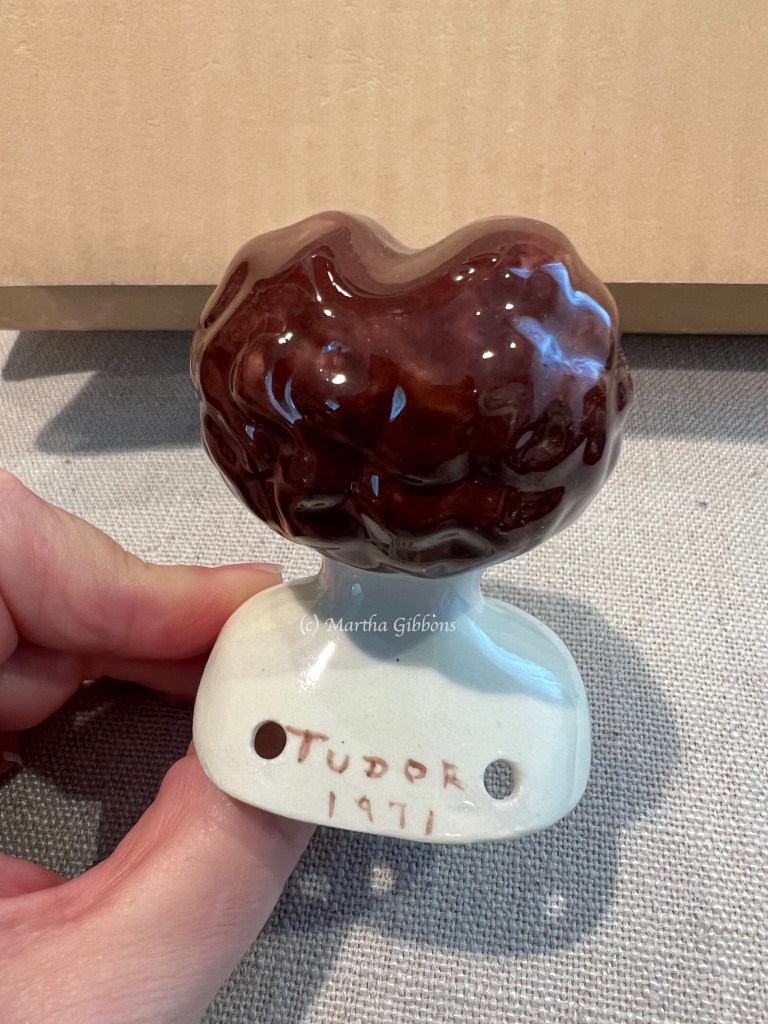
In addition to these lovely ladies, I have acquired some new Tudor dolls. As I have mentioned previously, there is surprisingly little information about the actual dolls. Tasha Tudor was a well known illustrator and doll lover, but most of the search results bring up her books about dolls or articles about her and her love of dolls. But occasionally….you find a gold mine on eBay.


Mailed in 1971, this package is all original, showing the 30 cent postage and the original sender “Tudor House” in Scarsdale, NY. Inside you see right away, there is the original catalog included for doll stores to order from!


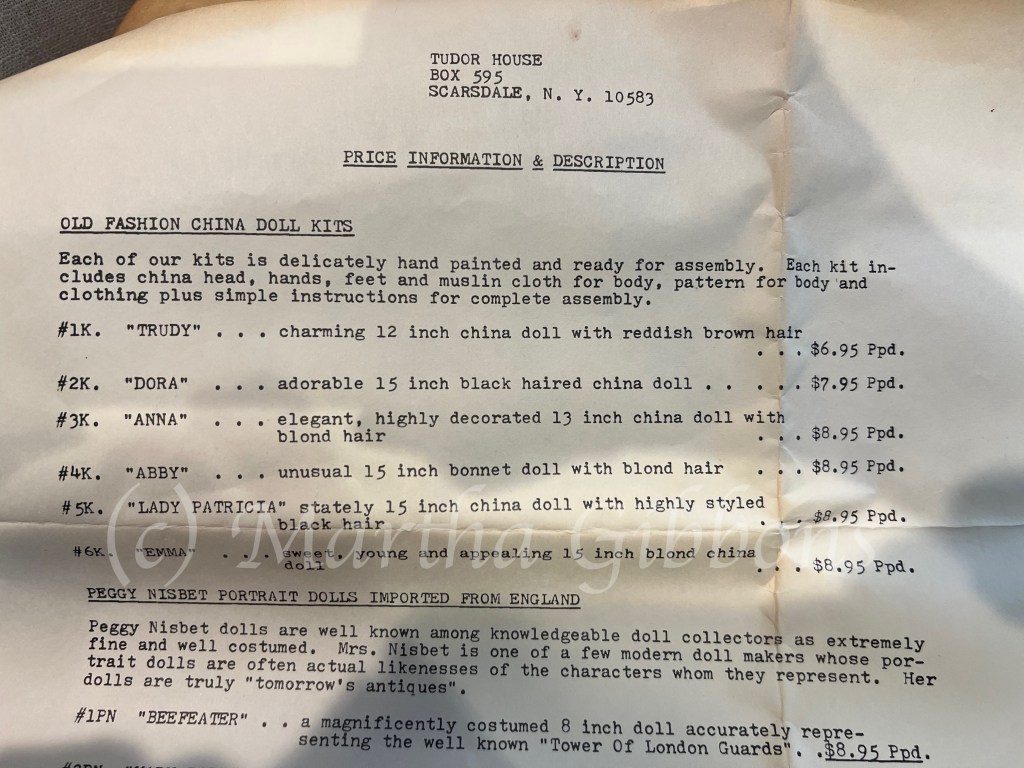
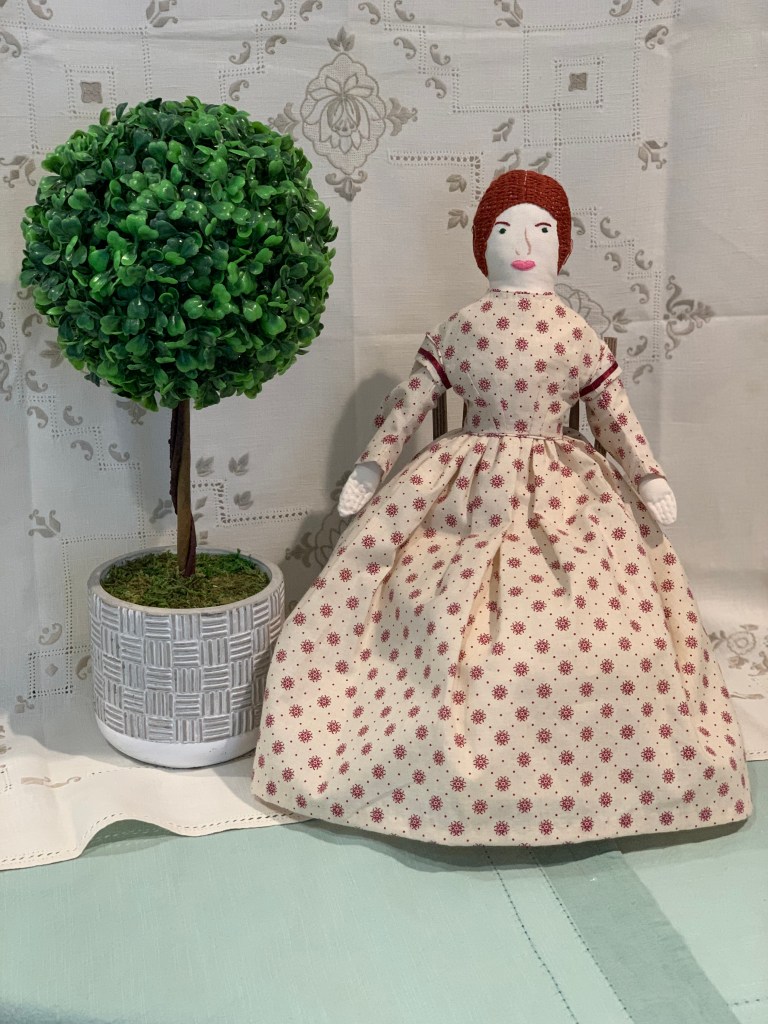
There is the lovely Lady Patricia and Emma who I have talked about on previous posts. I also have the Dora doll and I’ll tell you about her shortly. This particular box was shipped with Trudy, a lovely 1880s styled doll.
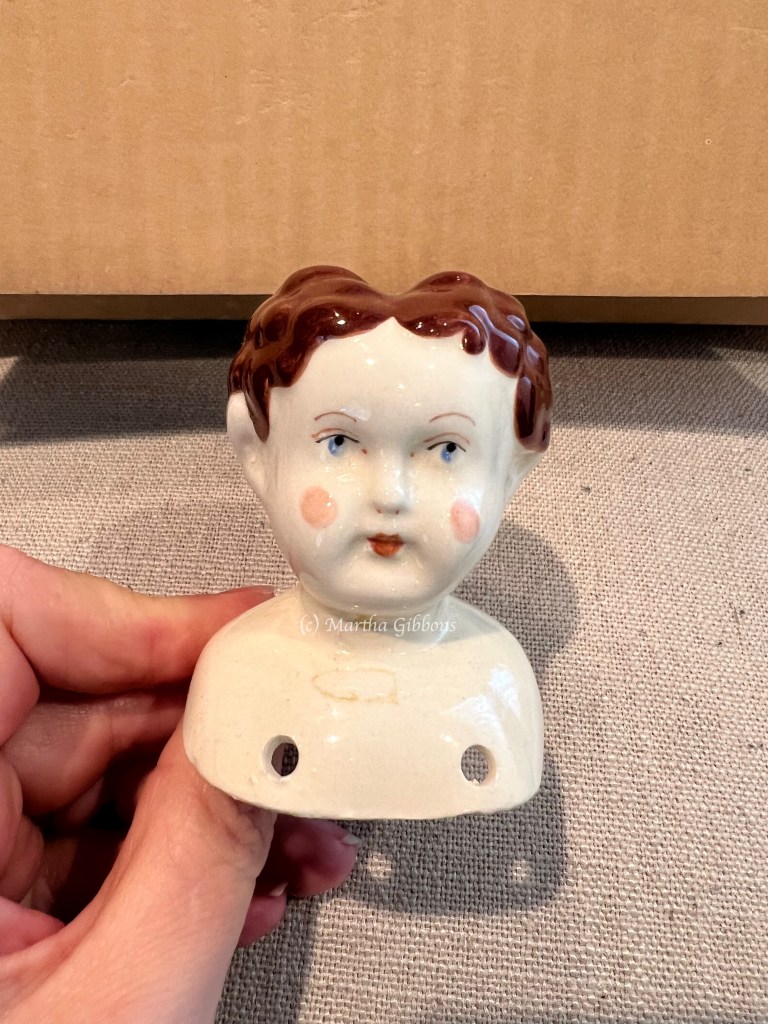
Trudy Tudor is unmade as yet, but I’ll be working on her….sometime lol. Some of the Tasha Tudor dolls have this rosy pink cheek look but on others it is less obvious. Also interesting is that this doll head does not say the doll’s name, Trudy, where all the others I have seen include that. The Lady Patricia I have is from 1973 so some time after this catalog was printed the names were added to the doll porcelain. Trudy is described as a 12″ kit, so she won’t be very tall when finished – around the same height as Hannah (aka Meg) who I made. Of course I will tell you all about Trudy as she comes to life, but it will have to be after Caroline, Julia, Lady Patricia, and a special project for Ruby.
So Dora, that is a doll I actually have two of.


This is Dora Tudor #1 (from 1974). I found her completely dressed and competently so, so she will remain in these clothes for the time being. Maybe one day I will redress her, but I love the sort of bodice wrap thing she has going on here. It reminds me of a garment that I’ve lost the name of, but it’s sometimes called a bosom friend – it’s a knitted wrap that ties around the bodice to keep a woman warm. I was thinking about her shoes and possibly just using a bit of black enamel paint to disguise where the tips were broken. You will notice that the rosy cheeks are less prominent on this doll than on Trudy.


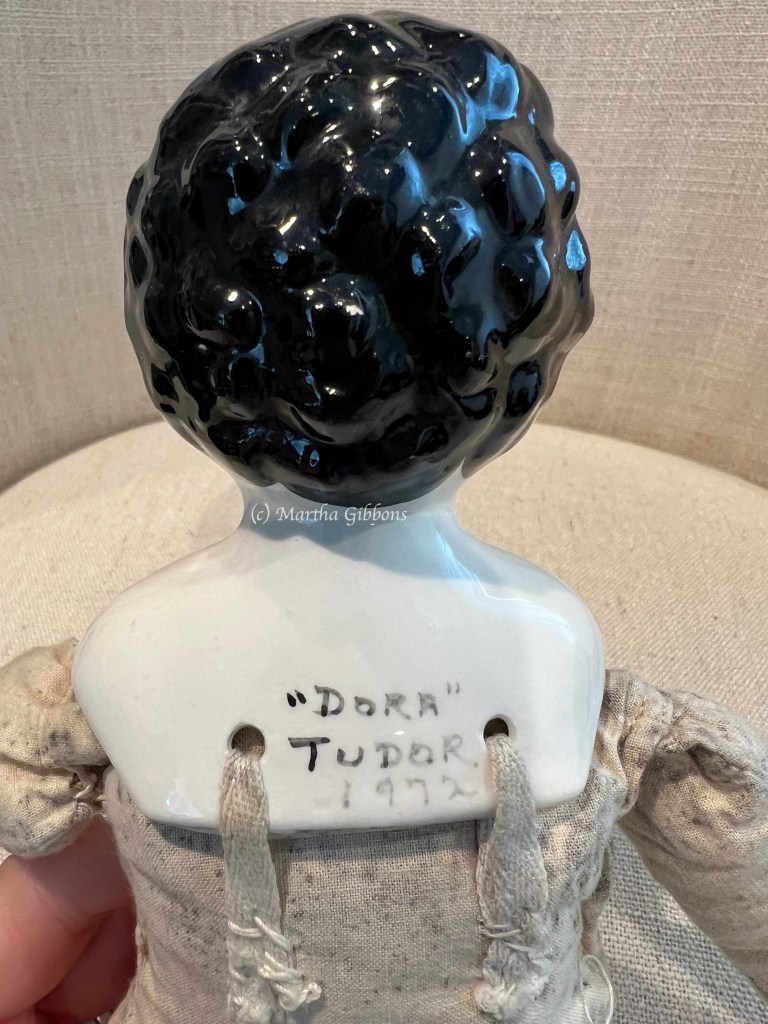
This is Dora Tudor #2 (note that her back has her name!).
Dora #2 (from 1972) has lived a dangerous life and it shows. She came naked and her body has discoloration all over it, plus there is the whole broken arm issue. I have an interesting idea to address that. Also note that the shoe style changed between 1972 and 1974. Dora #2 has flats, but Dora #1 has boots. The reason I purchased a damaged doll is to practice remaking a body and making repairs. I have been asked to update a true antique doll named Ruby that belongs to my cousin (and it belonged to her great grandmother). Ruby has a number of issues that need to be addressed, and Dora #2 is going to help me develop those skills.
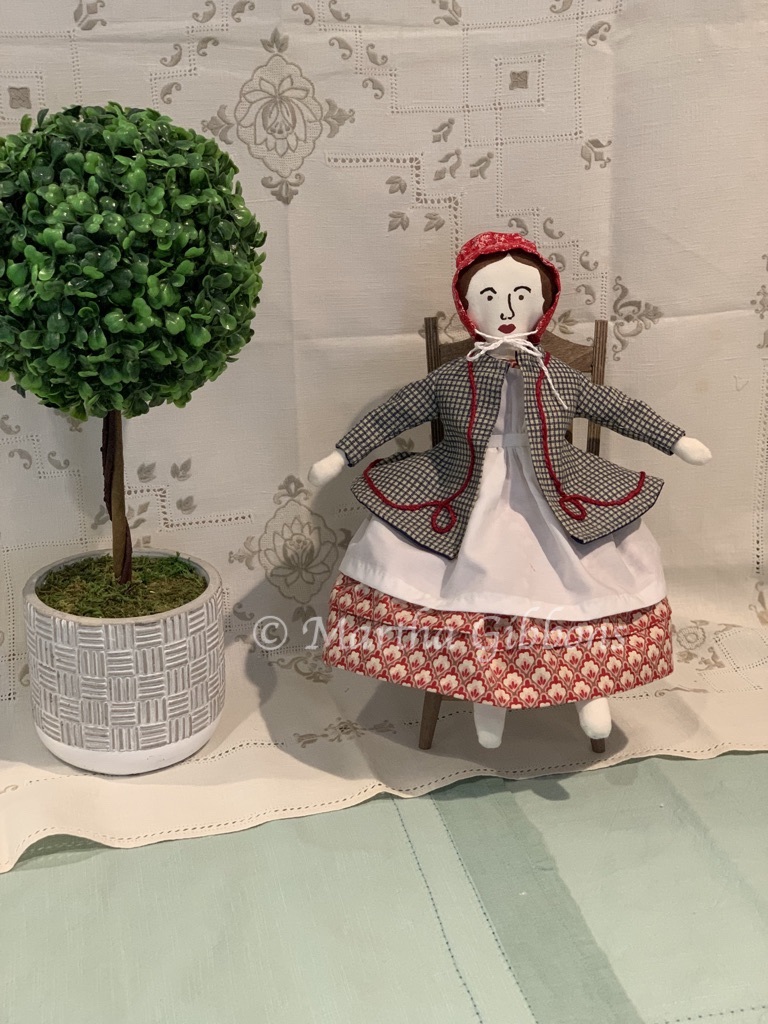
Finally, while last, not least, is Molly Tudor. I mentioned to my daughter that I had seen her on Ebay, and lo and behold, she arrived at Christmas!


Molly is sweet, even if her legs are a little cockeyed. It’s difficult to get the legs to stay straight sometimes when assembling a doll, so we just say she has a limp. Molly. has the big round rosy cheeks of youth. She’s young, featuring shorter hair than some of the others. The hair styles can cue us in to the implied age of the doll, meaning this is maybe a teen or tween doll, instead of a lady doll such as Trudy.
Now I just have to find these new Tudor dolls: Anna and Abby. Both look beautiful, Anna with a painted neckline and Abby a bonnet-head doll. I have never seen either in my eBay or Etsy hunting, but I’ll persevere!
So there you have a rather long, image heavy update on the doll situation here. If it hadn’t been for a painter who backed out at the last minute, I could have kept up my stride on doll crafting, but alas, I had to keep my office/sewing room packed for 6 months while we sorted through the contractor situation. But now that the place is painted and I’m getting my things back into their places, we can start playing dolls again!
In my last post about Lydia Kidd, you saw the sheer dress she was wearing – which I actually made for Inez. It just happened to fit Lydia quite well and I hated her being naked. But, I have been busy lately and making all sorts of things!
The Liz Clark pattern Inez is made from includes all the necessary wardrobe items a mid-nineteenth century doll would need, and I’ve been sewing my fingers off. Here’s a small update on Inez’s clothing & accessories.

Here we have a nice pinner apron. This style was popular for women working in the home. The apron bib pins onto the dress bodice, hence the name “pinner.” While the pattern is actually for a half apron, it was relatively easy to make it into this style instead.
Next, I made her a nightgown. On this one, I used a fine cotton that is incredibly soft. The embroidery was freehand in a basic pattern I made up.


And you can’t have a nightgown without a night cap.

Night caps were used to keep people warm in their unheated bedrooms. Try sleeping outside sometime – the addition of a nice cap will help you sleep comfortably all night long. I made it simple but there’s options to make it much more fancy if you like.
While on the subject of sleeping, I made a simple blanket for her.

The blanket is cotton flannel on both sides. If Inez were to sleep in an unheated room, she would probably be pretty warm with this.
I have made a few more things for her, but I’ll save those for another post. Next time, I should have an embroidered cape and maybe even a soutache embellished paletot completed. This weekend we will be at our event and I’ll be making doll clothes as well as displaying Inez, Mernie and Emalie. If you find yourself at the Huntington Beach Central Park, come find us!

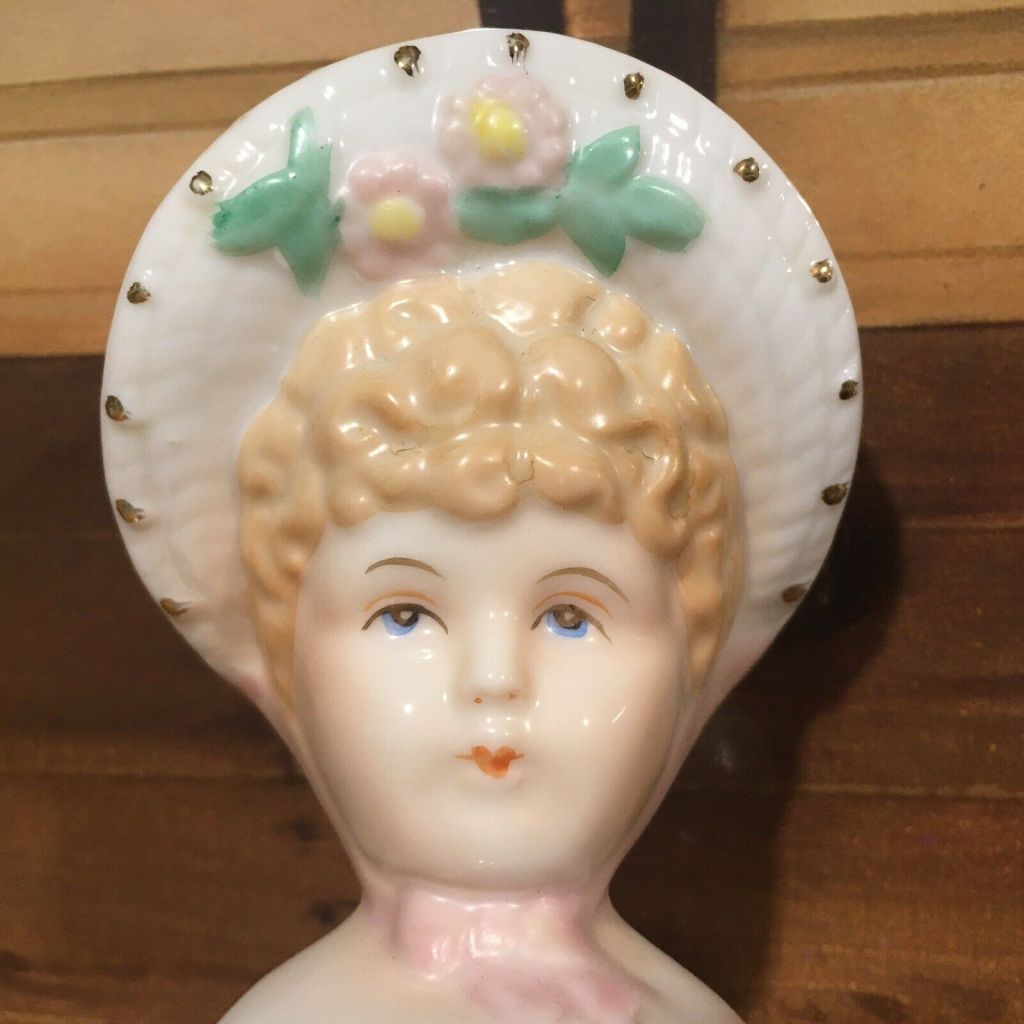
This little gal is a doll I am calling Sunbonnet Sue. I adopted her from (where else) eBay and I think she has had it rough. But I couldn’t resist her interesting features – most importantly her bonnet. The bonnet is part of the china head, and I have a lot to learn abut these fascinating dolls called Bonnet Heads.

But first a tiny bit about Sue. She is about 11″ tall from tip to toe. Her china pieces are not glossy, leading me to think this is the type of material called bisque. She has been painted and assembled quite poorly. Everything about her is a little sad, honestly.
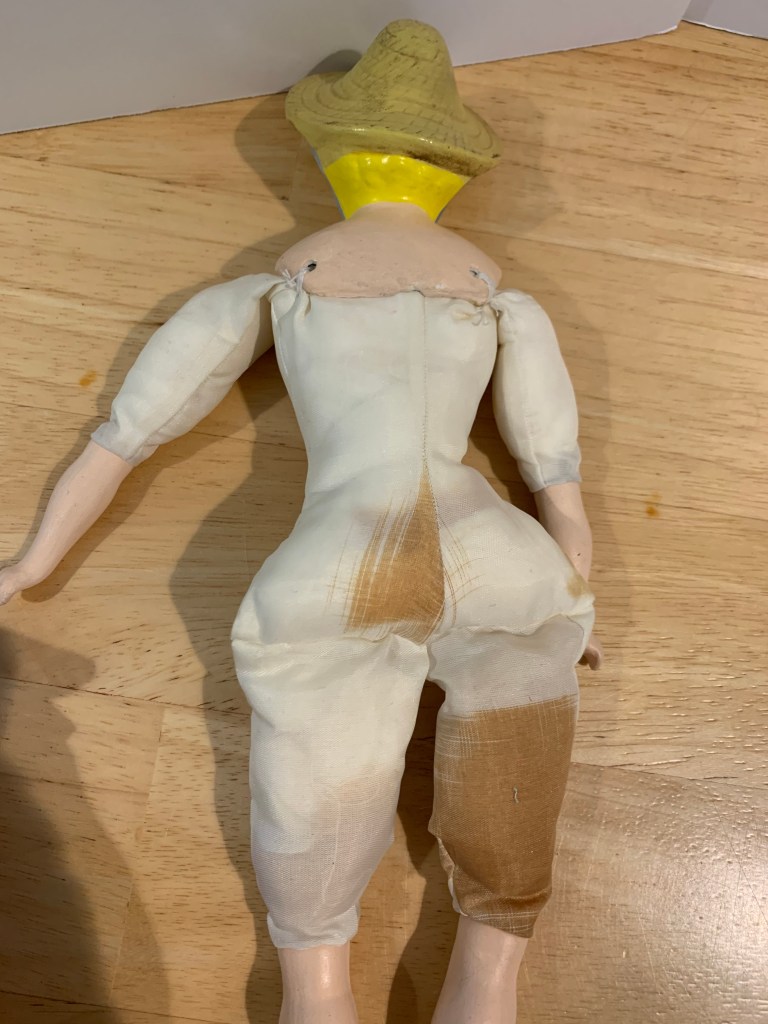
There is this strange discoloration on the fabric used to make her, which feels to me like skirt lining of all things. It’s slippery. I suppose whoever made her used whatever scraps they had laying around the sewing room. You can also see that her head was attached rather inexpertly. The center seam of her body is pulled off center toward her shoulder. Even worse, her body shape is really off. Her left leg is somewhat toward the center of her body and her right leg is offset to be under her outside of her shoulder. Poor Sue. You can also see that her feet and hands were attached badly and the dear girl is pigeon toed.
She came to me naked (as they almost always do) and I just feel for this girl. She is another perfectly imperfect doll, who has a ton of character, and who I will give a good home & decent clothing. :-)

She perfectly fits the chemise I had made for Nell ages ago and it is a better fit here, plus the drawstring neckline works well with her large head. As I was working with Sue, one of her arms came off! The arms and legs were attached with wire, which I had not seen before – but that isn’t saying much, I am really new to doll acquisition. I was able to reattach her arm and also secured her other arm as a precaution.

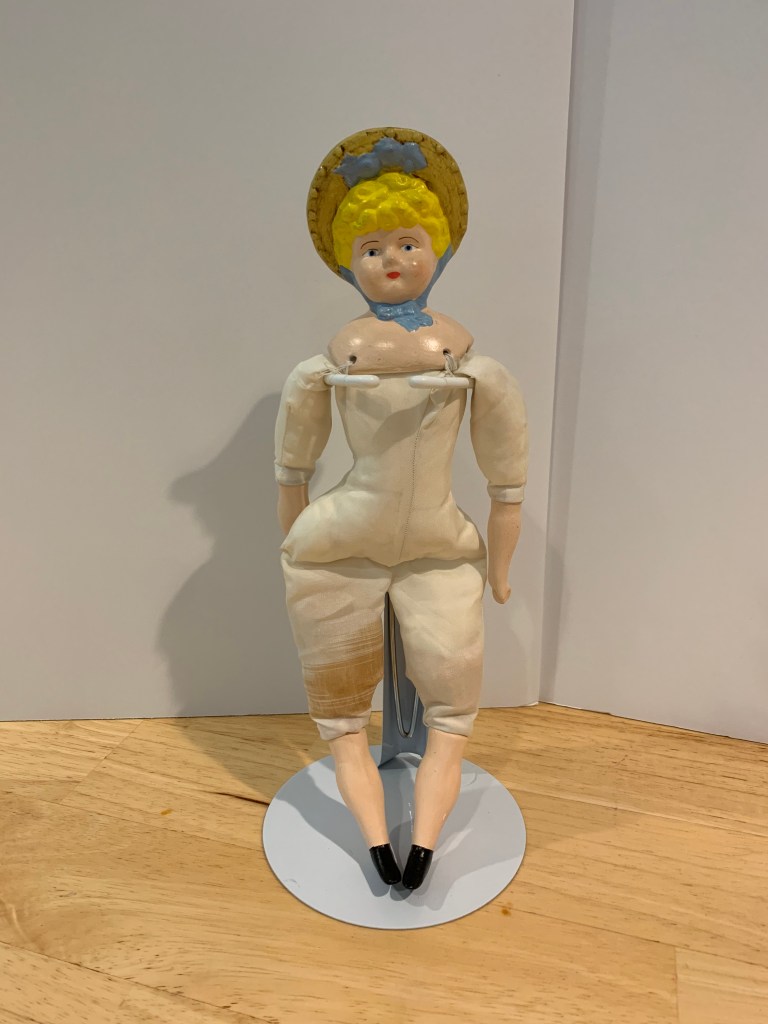
But now she is ready to relax and rest, well clothed! I love this fabric – it’s a bit brighter in person than in the photo. I have learned these bonnet-head dolls were styled to the 1830s, and the fabrics at that time were bright and cheery, which is why I chose this. The great thing about a tiny doll like this is you can make a complete dress from a fat quarter and have fabric left over for something else. In the dress, you can’t really see the problems with Sue’s construction, although it looks a bit like she has her hip cocked out to the side. Maybe she’s throwing a 180 year attitude.
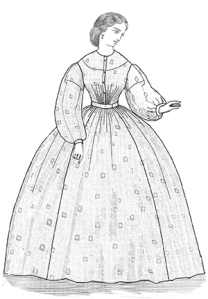
I asked in a doll collectors group about bonnet-head dolls and learned that the originals were created around 1900. There are a tremendous variety of bonnet-head styles, but Sue seems to be styled off this particular type:
As you can see, however, she was not painted with such care. During the 1980s, there were numerous kits (and they are still available on occasion on eBay) mass produced for consumers to create. My suspicion is that Sue was born during that era. It is unfortunate that her painting was not done with great detail, but I think I will enjoy her all the same. She is now safely nestled in my cabinet with some other dolls in my growing collection.
Here is an article about bonnet head dolls – much better written by people much more knowledgeable than me.
Hats Off to Bonnet-Heads via RubyLane.com
In all my spare time, I have made some more dolls. I never thought I would become so enthralled with dolls or their clothes, but 2020 was a year of sucki-ness, and I guess I actually did have some spare time. Anyway, I made a second doll from the Elizabeth Stewart Clark pattern.
This is Mernie. She has similar undergarments to Emalie, except I tried making a quilted petticoat. Since I had never even quilted before, this was quite a challenge for me. The pattern says to follow any quilting pattern. Well, I don’t know any quilting patterns, let alone an 1860s era pattern. So I made one up.

The pattern is really designed to hold the layers of fabric in place, I measured out the diamond pattern I wanted, adjusted, remeasured, then marked it out in chalk. I thought it would take forever. What I discovered was that quilting is kind of zen. I get in the zone and felt remarkably relaxed when I finished.


Mernie has a gathered front bodice with bishop sleeves. I like the gathered front, but let me just say that the cuffs of the bishop sleeve are insanely tiny. It was a challenge to finish them nicely – but one I felt up to completing.
I quite like Mernie. I feel I made improvements on my first attempt with this pattern.
I have been sitting on this pattern for several years, all while sweltering in the summer heat. I purchased my fabric easily three years ago and have been wanting a sheer dress for probably five years. Summer in multiple layers of clothing is definitely more warm than it has to be! So, this past spring, I finally decided to just do it! I have researched various patterns available on the market, including some Big Three patterns, Peachtree Mercantile, and others, but I know that Truly Victorian makes beautiful, accurate, and easy to follow patterns, which is why I settled on this one.
Truly Victorian TV447 1863 Sheer Dress
I chose a lovely sheer cotton in blue and white stripes that I found on clearance at a chain store. I know of more than one person who has made a sheer of this fabric. Hopefully we won’t all be at the same event together!

Pretty pretty
The fabric is 54″ wide, but since at the time I didn’t know what pattern I would be using I purchased 10 yards. Lucky for me, this overestimation was a good one. The sleeves on this dress are full and wide, plus since my fabric was directional, I was able to cut the stripes going from shoulder to wrist. Anyway, before any of that, I calculated my measurements and pattern size following the instructions on the pattern. The thing about the TV patterns is they allow you to custom fit your garment before you even start sewing. And once you do that, you can easily make up a muslin for a better idea on fit.

Dark image of my muslin
Sorry this is not better quality, but almost all the mirrors in my house that are big enough are impacted by light diffusion. What I learned here is that the waist of the under bodice was a little too full but the bust was a pretty good fit. So I took in the darts a bit and retested it. I did not do this all by myself, by the way. I submitted my questions to the Civilian Civil War Closet group on Facebook for hints and help – there are clothing historians, professional seamstresses and experienced clothiers there who are willing to help for free. I just couldn’t overlook that knowledge base. I also asked my friend Shelley Peters for real world tips as she has made this pattern a lot. Had I needed it, the amazing Heather McNaughten at Truly Victorian would have helped too. As an aside, this just confirms for me that this community really wants its members to succeed!
Anyway, after the changes to the muslin, I traced that as my new under bodice pattern piece and went forth to sew! This is the first time I have made my own bias and bias piping, which was used on the neckline facing and armscyes. I found the instructions sufficient, but had used better instructions on a Simplicity costume pattern and did that instead. They just made a bit more sense to my thinking, the result is the same.

Piped facing to finish the raw edges of the under bodice.

Piped armscye
The construction of the garment is for the most part very easy. I found the TV method of inserting the sleeve into the armscye backwards to what I am used to so I just adapted and made notes on the pattern.

Hand buttonholes
I sewed this in a combination of machine and hand sewing. My fabric was so very delicate that even though I have a high quality machine, it sometimes would bunch up in the feed dogs. I wound up hand sewing much of the finishing stitching, such as on the piped facings, and also hand sewed all the button holes. My reasoning here was twofold – I wanted historically accurate buttonholes and since the fabric was so delicate it was impossible for me to machine sew them to the standard I desired. I used silk thread for the buttonholes. The buttons are vintage shell buttons, much higher quality than the cheap flaked mother of pearl available these days. They were purchased through Farmhouse Fabrics.

Sleeve band
For visual interest I cut the sleeve band on the bias. Maybe there is a chance of this stretching over time, but the band is so generous around the wrist that I don’t expect that to happen.

Finished bodice
At this point, I went back to the Civilian Civil War Closet for help. The pattern does not include a collar pattern. I don’t care for my look without a collar, so I googled for tutorials. The best suggested laying the pattern pieces for the bodice front and back together as though they were sewn, then tracing the curve from center front to center back, next extending that to a simple collar width. I did that, but found mine to be fluttery and off. The amazing Liz Clark of the Sewing Academy helped me immensely with tips on how to correct this and redraft the collar. I’m delighted to say that I was successful!

Finished collar
I added the fine tatted lace which I purchased at Farmhouse Fabrics.
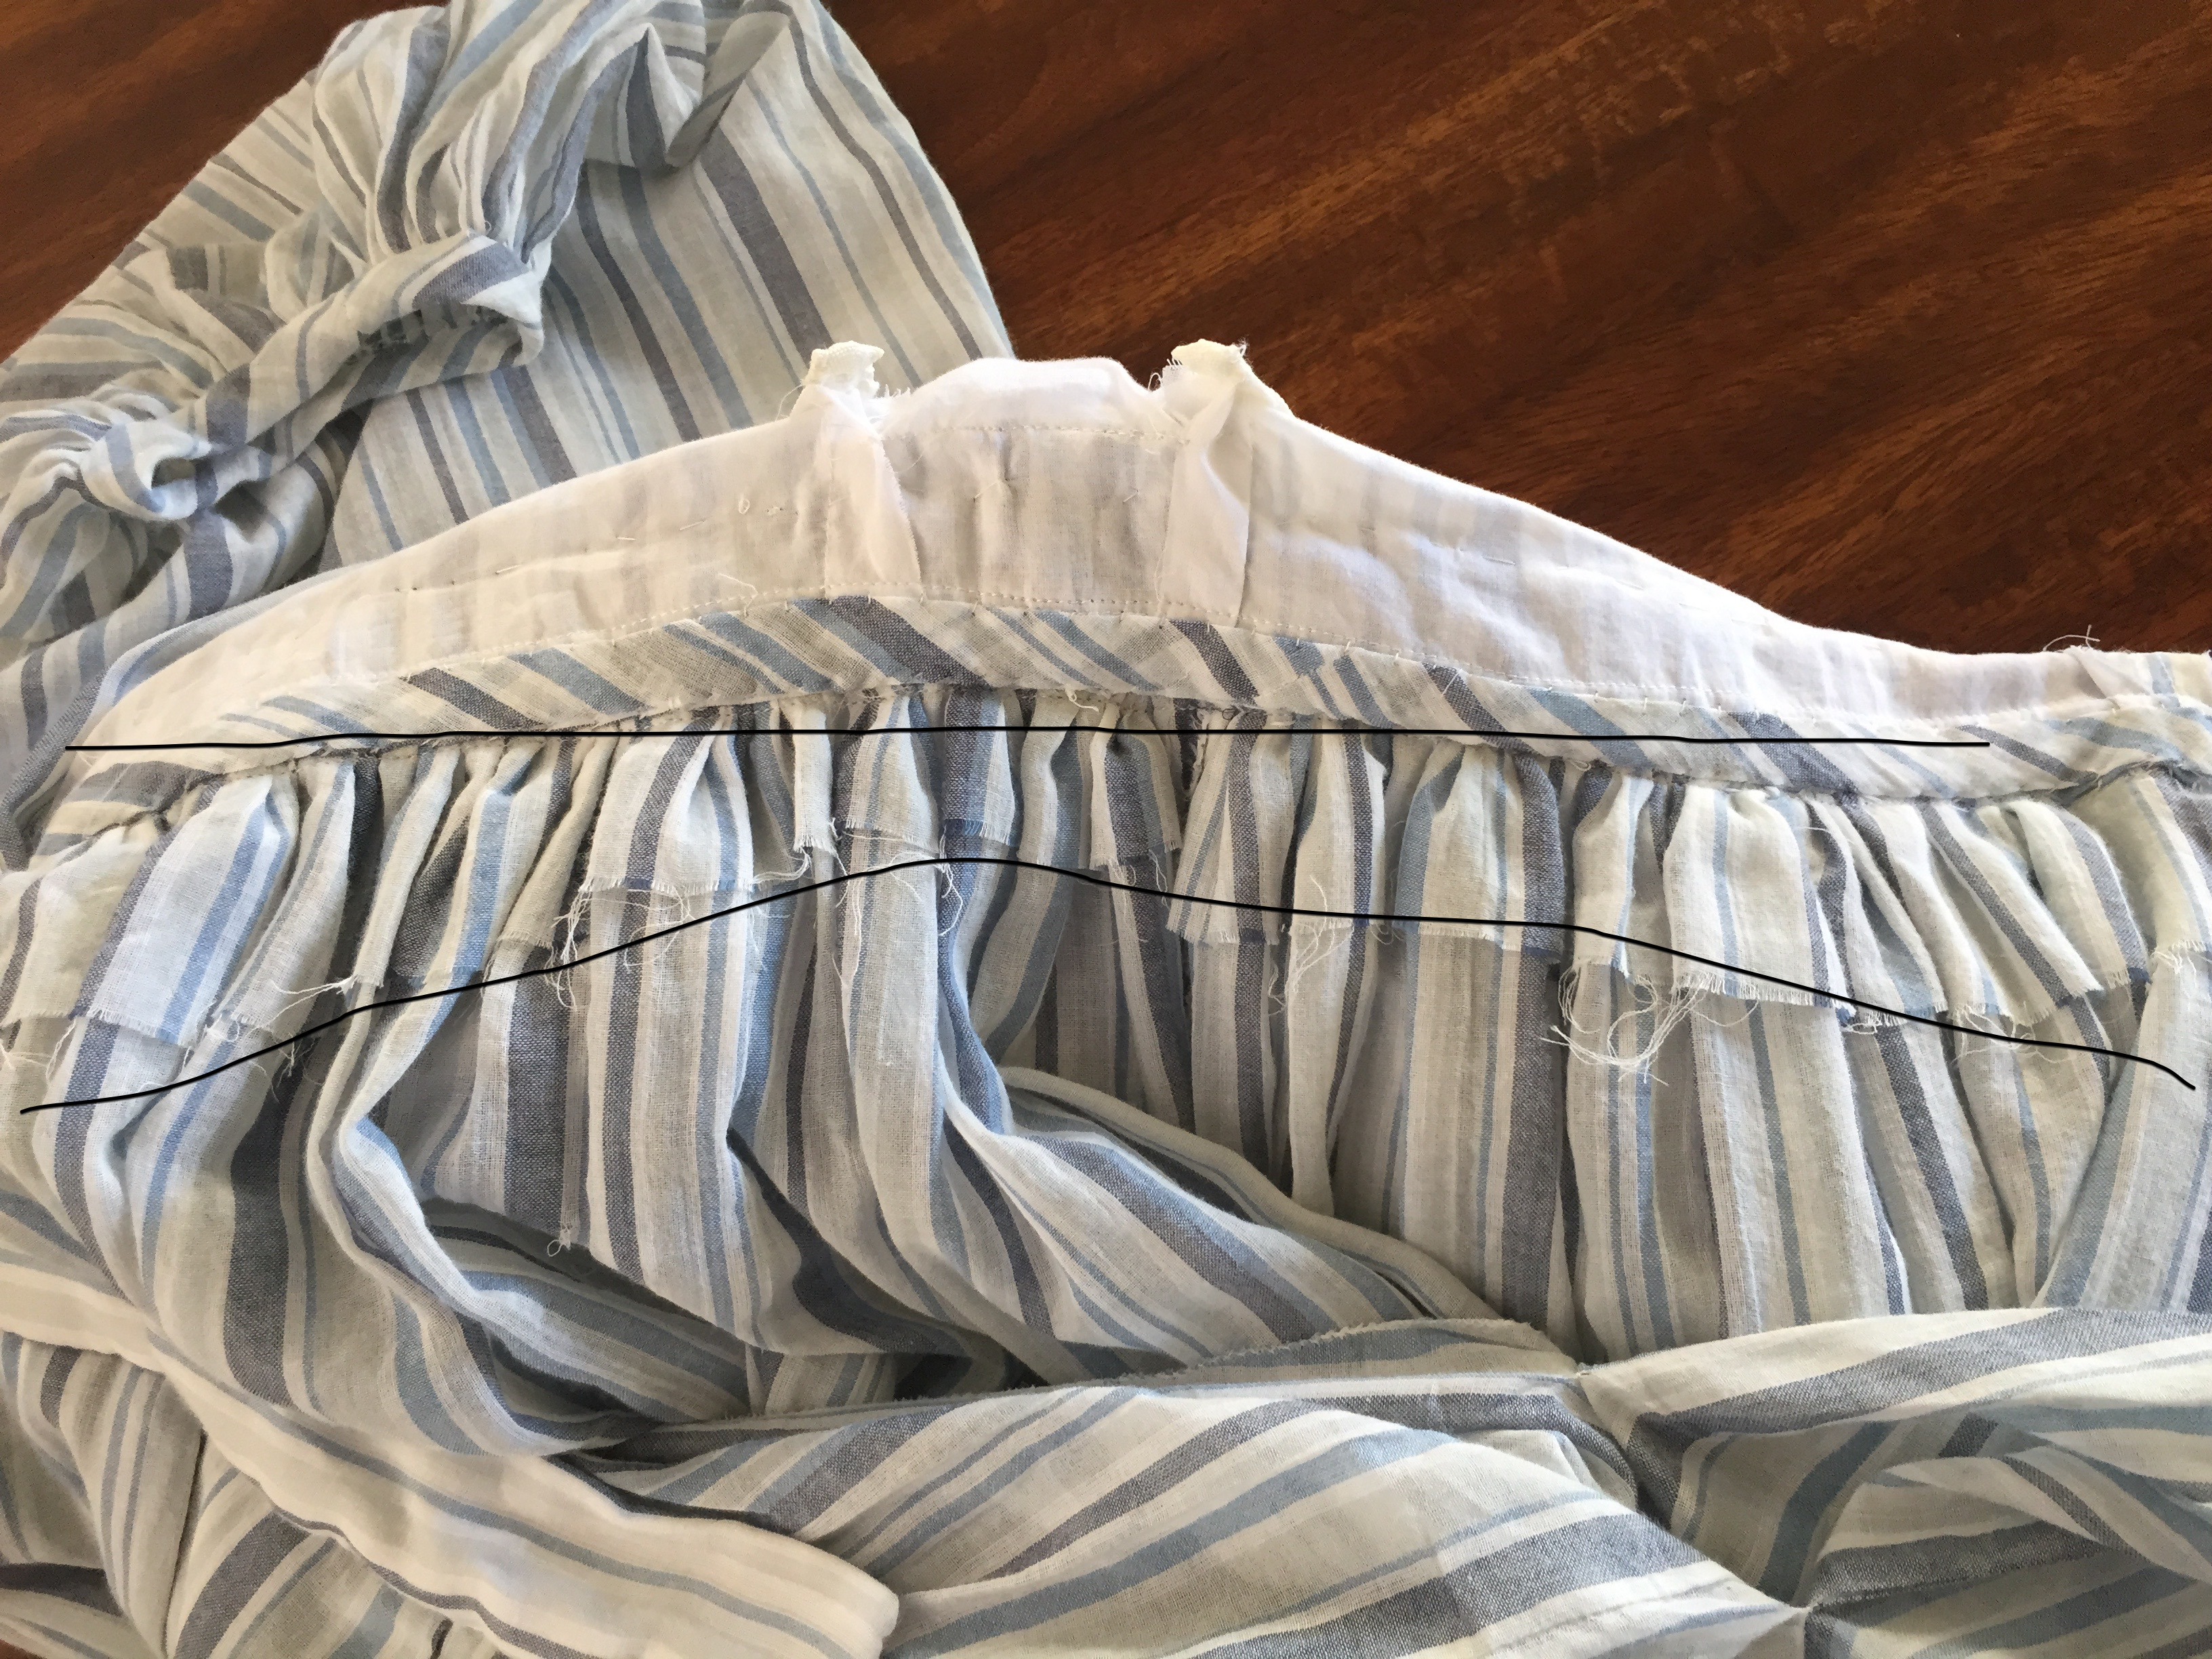
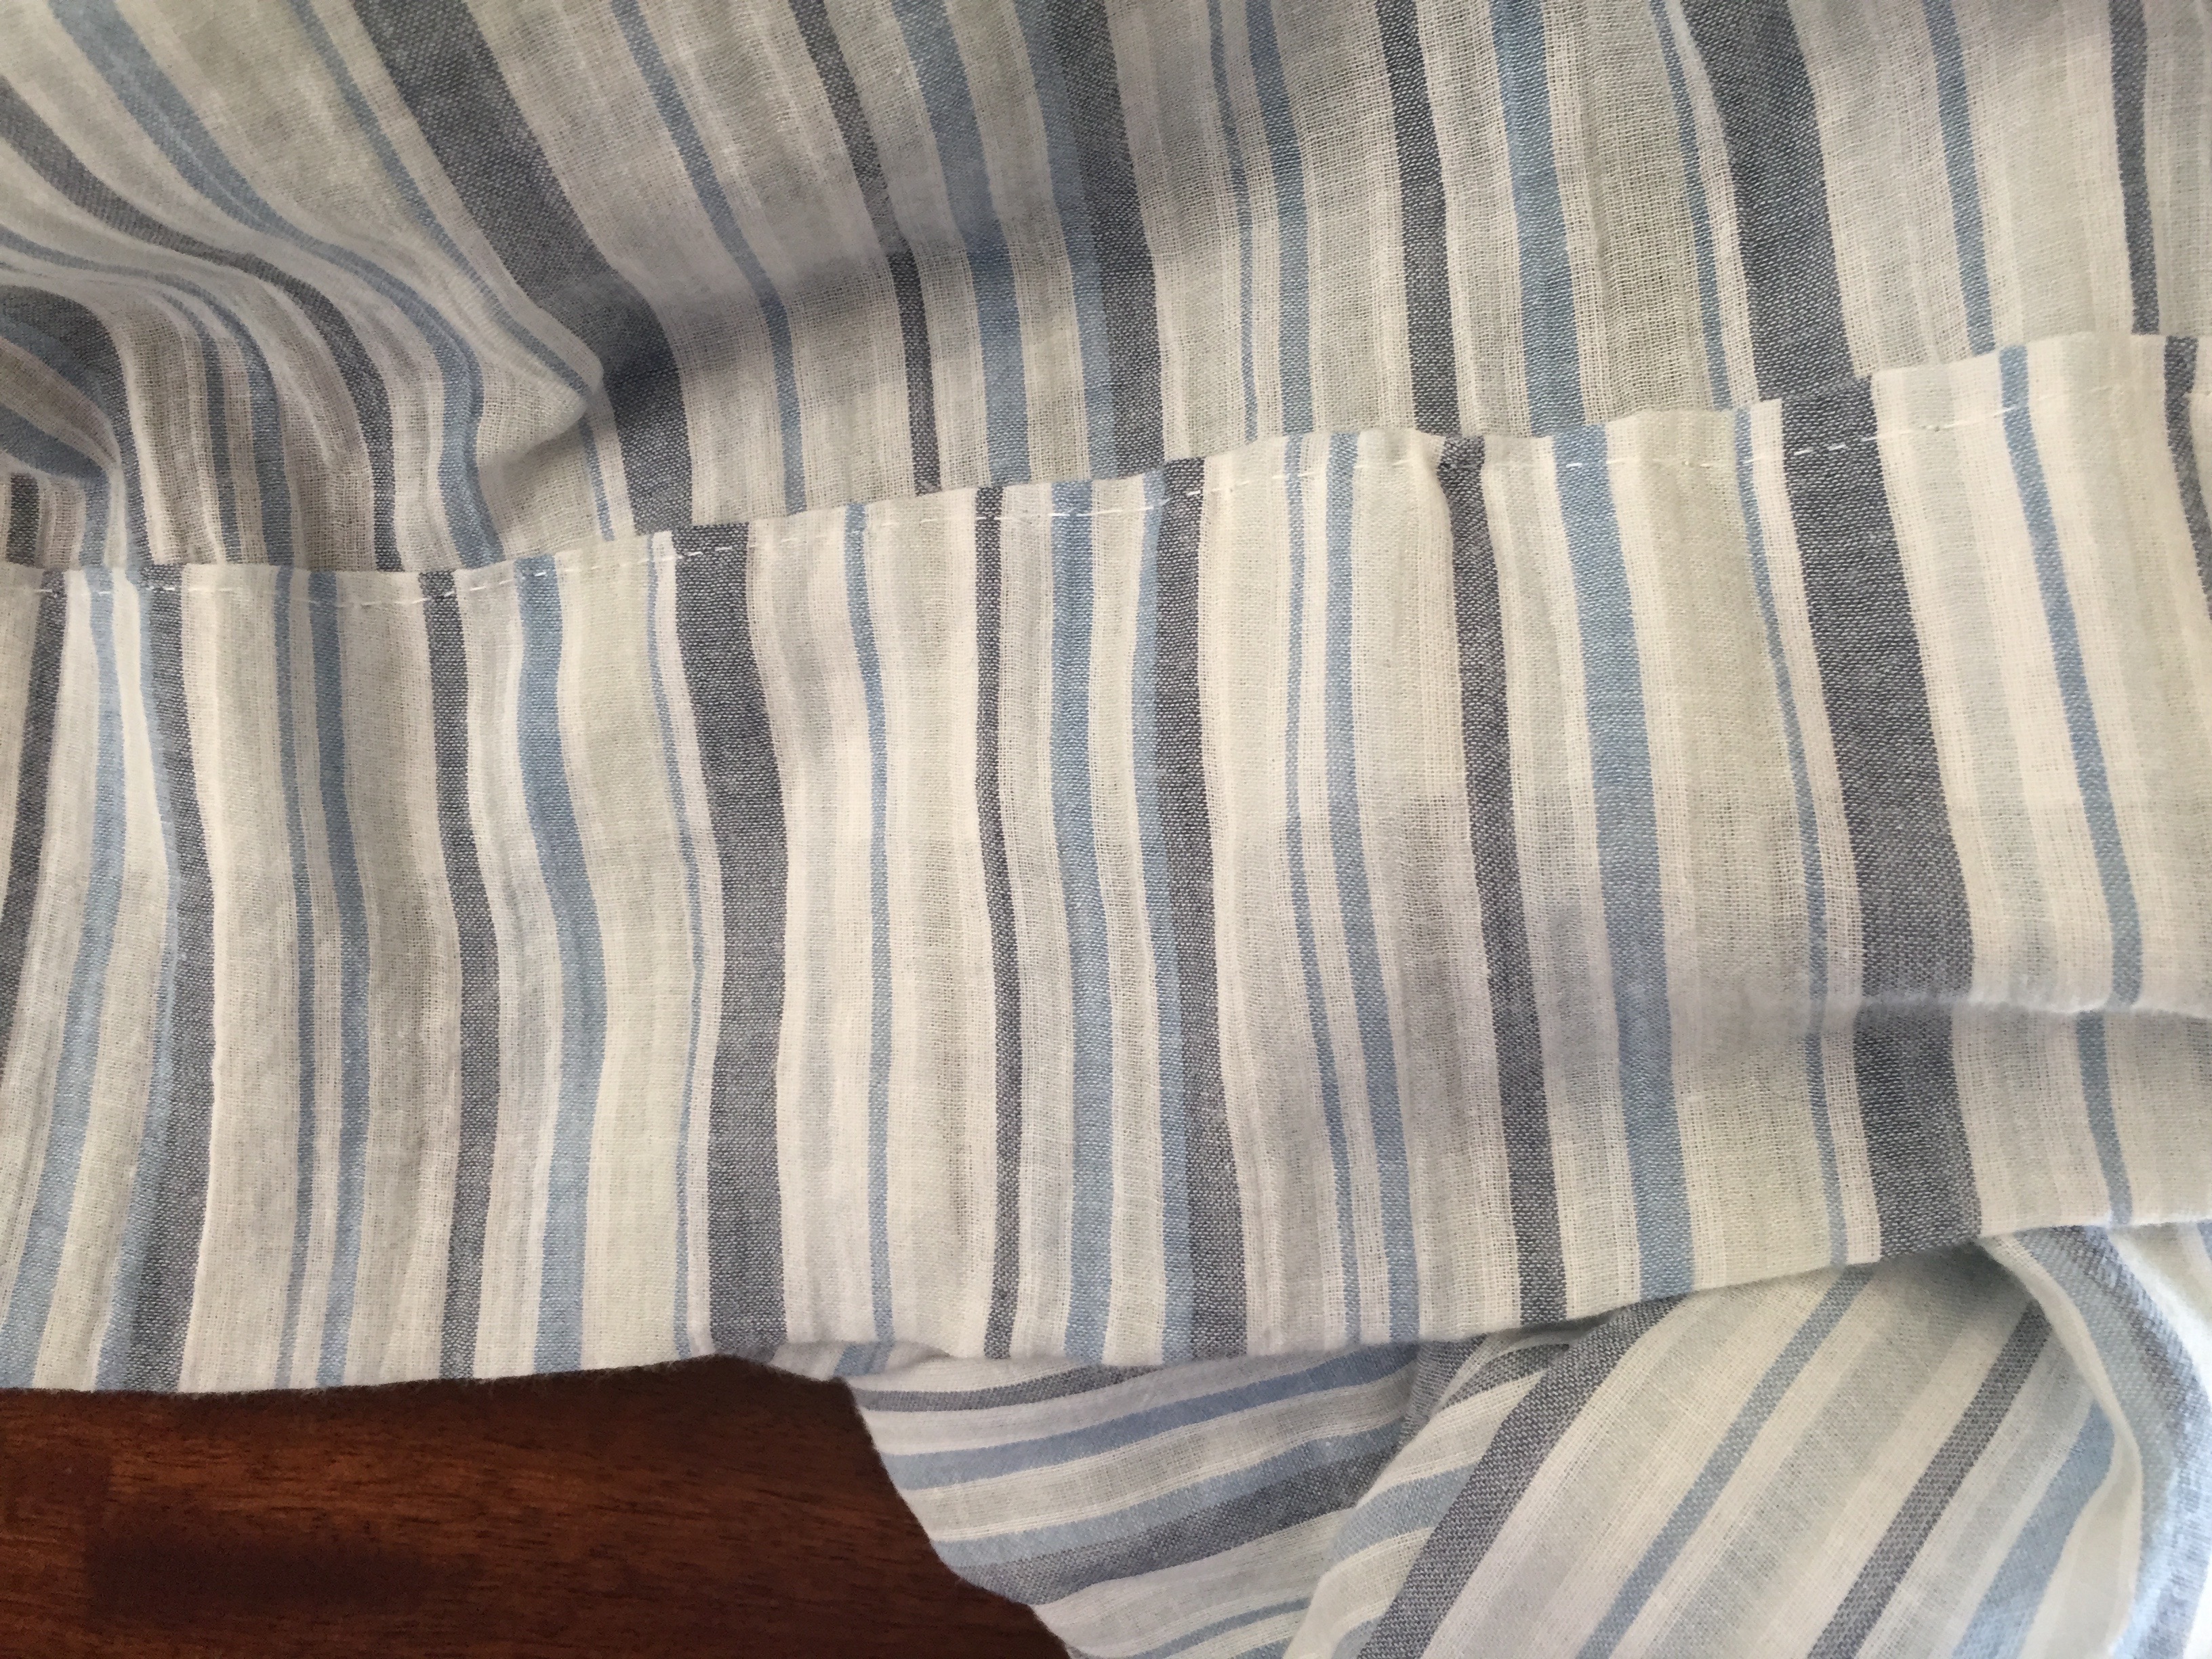
Next, waistband finishing. Since my fabric is 54″ wide, I didn’t want to cut it down to four 40″ panels to follow the TV skirt instructions. I retained the selvages as was done in historical garments, and used three panels instead of four. The skirt has a very deep pocket at the center left where the skirt pieces overlap with the waistband. Each panel was cut to the same length, but since your skirt front and skirt back are different lengths, there has to be a way to do this without cutting your fabric. Again, drawing on the Closet knowledge, I did as was suggested and folded over the waist edge of the fabric. This gave added stability to the fabric as well as achieving the lengths needed. The pattern instructions have you cut your fabric at the waist to the desired angle which will give you your length. I don’t recommend that on a sheer just because of the off chance of it tearing.
Waist inside
You can see in this very amateurly photoshopped picture the angle of the folded-over fabric. This is center back where the skirt is a bit longer than in the front.

Double box pleats
For the skirt attachment, the pattern gives you liberty to choose your preferred pleating or gathering method. Here I am showing you the double box pleats I used to pleat the skirt onto the waistband. Originally I had knife pleated the front and cartridge pleated the back, but I didn’t get enough fabric taken up in the front. So I went to the double box pleats in front and cartridge pleats in back. I’m quite happy with this look as it’s smooth and polished.
Yes that hem is hand stitched
I wanted to make sure that the hem folded straight up so the lines didn’t go off kilter, so I ended up hand sewing the hem. I used a single thread and every fourth stitch went through all layers. Every 8th stitch was taken twice to keep the thread from coming undone if it were to break for any reason. If you kept up with my thinking on the skirt width, you will realize that’s a 178″ hem. It took me a couple hours to do it.
Picture taken by an 8 year old
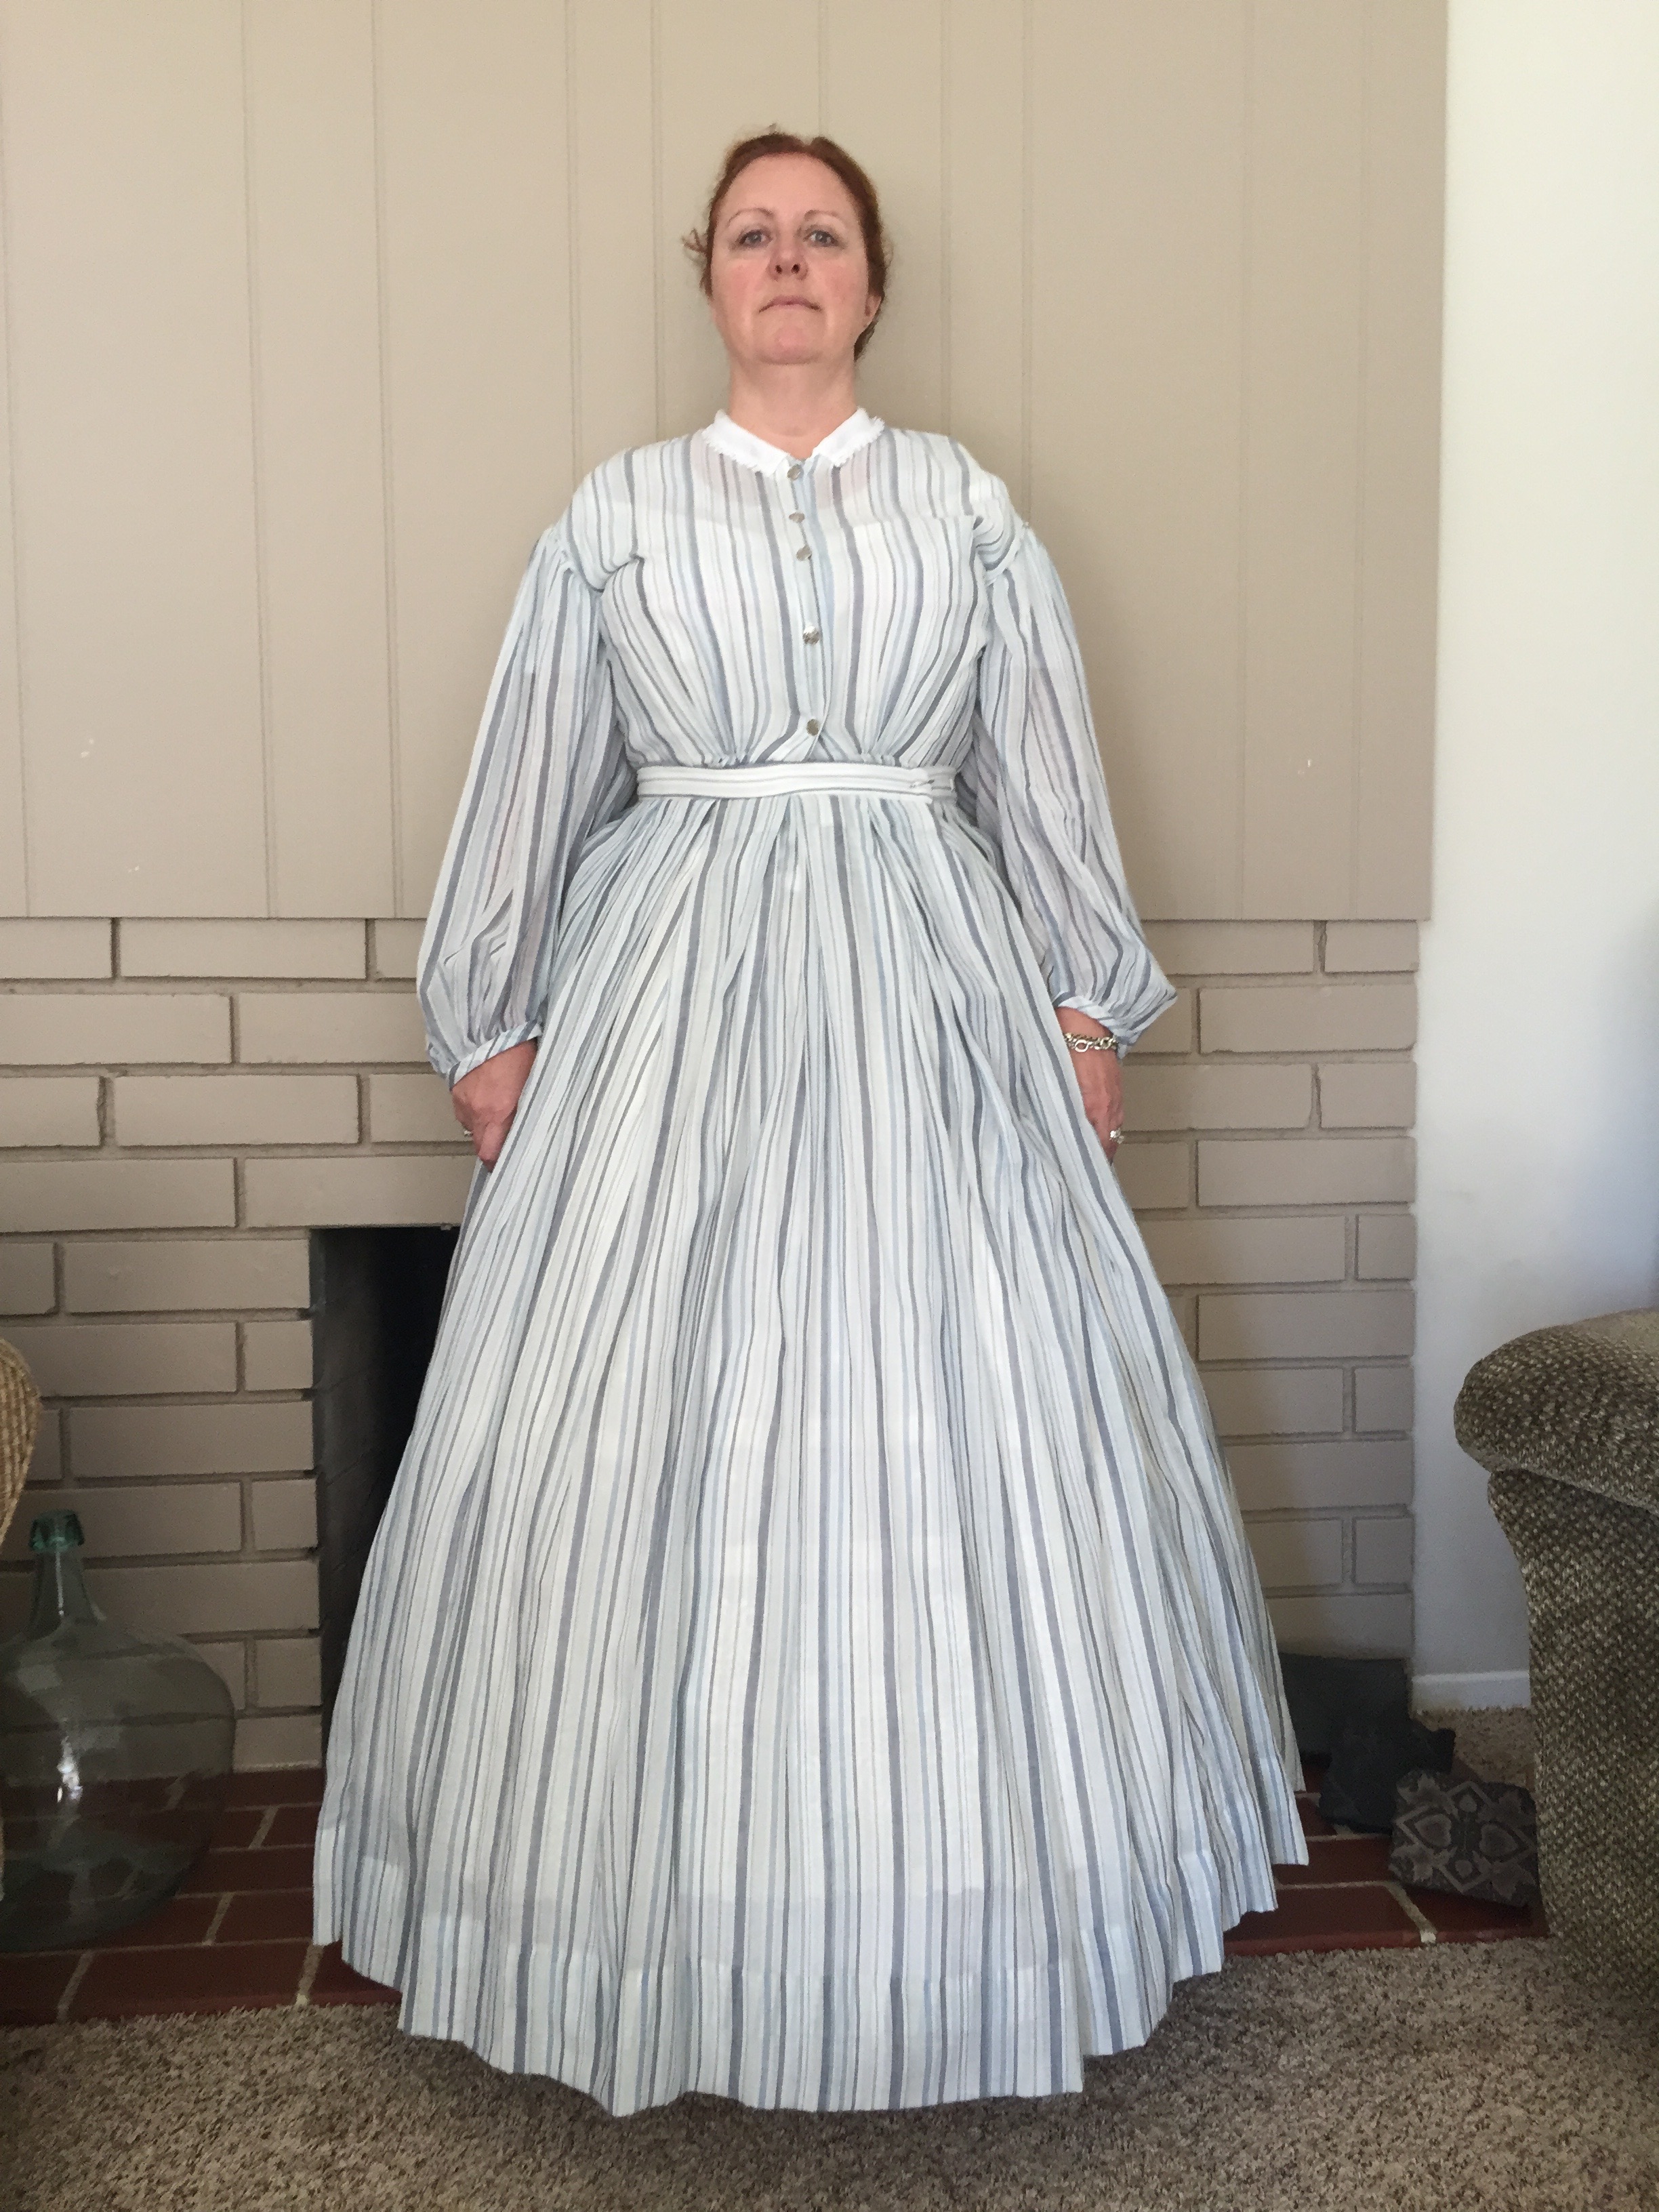
This is the finished dress, although it’s not the best picture of me lol. I’m looking down toward my daughter haha. Also, I realize that I must not have been laced as tightly in my corset as usual because I couldn’t fasten the waistband correctly. I wasn’t going to mess with it today and I’m certainly not taking the dress apart, so I’ll have to lace better next time.

Side image
Here you can see the under sleeve just below my shoulder. This makes the dress very cool and airy. I had considered adding a silk stripe down the sleeve for interest, but I decided against it as it might weigh down the fabric. I may make a belt, as the silk I have is the exact color of the darkest stripe in the fabric.
You can also see the shadow of my petticoat under the skirt. I have an eyelet petticoat with two large pleats in it. This isn’t an historically accurate petticoat and someday I will make a plain cotton one, but for now this is quite pretty.
Overall I am thrilled with the result of the Truly Victorian TV447 Sheer Dress pattern. The instructions were easy, but true to the sewing techniques available to our ancestresses. It is not a pattern for a beginner, certainly, but if you have some knowledge of sewing, you can make this pattern truly customized to your preferences. If at times the instructions don’t make sense, just take them one sentence at a time. My mother told me when in doubt just do what the instructions say. These patterns will not take you down the wrong path, trust them and you will get something incredibly beautiful. And of course, email them, ask your friends who have made the pattern, or google for help. Truly Victorian patterns are very popular due to them being among the best on the market today, so lots of people make them! I am eager to wear this dress to one of our hottest events coming up soon, Huntington Beach Civil War Days.
Links & Resources
Even your smallest members of the house need a lovey, right? I have been making these blankets for my cats and dogs for many years. My mother made them for the family dog when I was growing up. They can be placed around the house where your pet likes to sleep, they protect your light colored carpets and linens from dark colored hair deposits and pet “gunk”, and can make it so your pet can sleep on the bed without being right up in your face.

Browser likes to hang out on the stairs
To make your pet a warm bed that is also machine washable, you will need:
1 yard of cotton flannel or regular cotton
1 package of Warm & Natural batting, 34×45″ size (or any low loft batting, I just like the weight of this type)

Cozy to be
Step One
Lay out the fabric to make sure the edges are even and straight. Trim where necessary.

Trim edges
Step Two
Lay the batting on your table, then lay the fabric on top. Match the edge of the batting to the folded edge of your flannel. The flannel is going to be your guide for cutting. Cut out the batting.

Cut batting to the edge of the fabric
Step Three
You should now have one yard of flannel folded inside out and then layered on top of the batting. Keeping everything configured exactly like that, stitch around the open edges, leaving yourself a 6″ opening where you will turn the fabric. Backstitch to anchor your stitching.
Before turning, trim any edges.

Cut out extra bulk before turning
Step Four
Turn your project by reaching in through the hole and grasping the other end. Pull everything through the hole. Once it’s right side out, reach back in and pop out the corners. Next, turn in the raw edges at the opening, pin closed, then stitch.

Pin and stitch
You can either just stitch it straight down the side, or you can stitch all the way around the entire project to make a more finished look. I stitch this about 1/8″ from the edge. Finally, stitch a straight line from edge to edge in the center of the blanket. This will keep the batting from drifting around and getting lumpy in the washer or when Fido digs around in his bed for the perfect spot to settle. If you are feeling really motivated you can stitch an X from corner to corner or other designs. I find that I am not precise enough to do this and I always wind up taking a tuck in the fabric, and that makes a pucker, and that bugs me. :-)
Step Five
Present to Fluffy and collect the furry gratitude you are owed for your efforts. Start to finish this project should take about 15 minutes.

Heavy sigh….
If your pet is bigger than medium size, you can make a similar blanket using 1 yard of flannel backed with 1 yard of cotton or flannel cut into a square, and the batting sandwiched in the middle. Follow the same steps, just stitching around four sides instead of three. I suppose you could also make a kid blanket this way too. :-)
Last night was interesting. First, on the school district survey form:

Please indicate you how important?
Click to enlarge and find the error. Who is writing this stuff? This is the second grammar or syntax mistake I have found in school issued materials. These people are teaching my child, but did they actually pass the NCLB requirements for reading comprehension? Maybe they need to invest in a proofreader.
After that I figured the night would just continue in a boring fashion, until this happened:
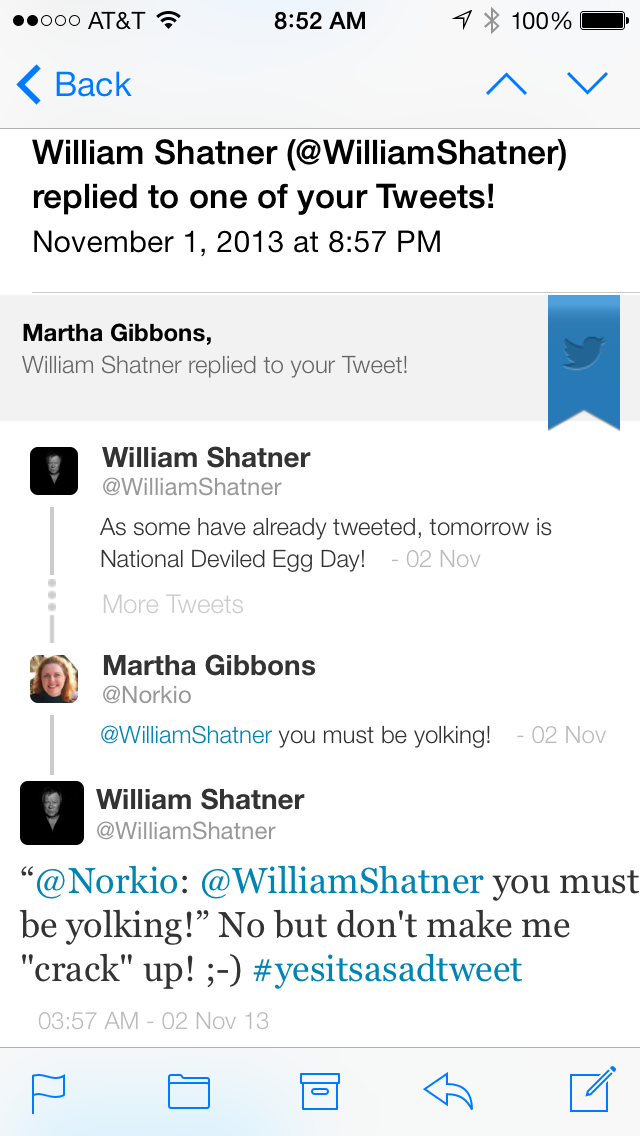
Not a yolk at all!!
William Shatner replied to my tweet. WOW. That totally made my night, and yes, I have posted this to Facebook, lol. It’s the little things in life that make you happy, right?
I love my antique bed. It has been in our family for over a hundred years. My grandfather slept in it, my mother slept in it, I slept in it, and now my daughter sleeps in it. I don’t know why a bed, such a mundane item of furniture, should hold my affections so firmly, but for some reason it does. I remember a long long time ago in Sunday School they were asking us littles about what we would be most sad to lose in a fire. I had no thought of the clothing, toys or other childhood treasures. For me, it was the bed. Even at that young age I had been captured in the spell of history, antiques and family treasures.
As a kid, I liked to crawl under the bed and look at the support structure, wondering about all the people who had slept on it. The supports of the bed originally consisted of five 2×4 slats that rest on small footers, a framed spring, and then the mattress. The top of the mattress was lower than the top of the footboard and it had a lovely sleigh bed profile. But, since that support structure was worn out and very old, my parents had a new box spring and mattress built. Of course, it is a non-standard size, so it had to be custom built. With the addition of the box spring, the top of the mattress became higher than the top of the footboard and for a while I was upset. I felt it spoiled the look of my bed. :-) We retained the slats to disperse the weight of the mattresses.
As an adult I learned about bed skirts. Particularly for an antique bed, which usually has a 12″-15″ opening below the bed, these are a great way to hide anything you store under the bed, or just give it a softer look. Since my bed has been modified from it’s original structure over the years, this project does not damage it any further. If your antique bed is in its original condition, think about whether you plan to take it on Antiques Roadshow before making alterations.
Because of the slats under my bed and the large box spring, I can’t simply lay the bed skirt over the box spring and leave it at that, so I had to devise a way to attach the skirt. First I tried a system of rails that lay over the slats, but I still had to remove the mattress (heavy) and box spring (insanely heavy) to install and remove the skirt. The other day I came up with the simplest of all methods: velcro.

Slats, underside of the bed
Here you can see the slats and a bit of the underside of the bed. I apologize for how terrible these images are, but have you ever tried to take a picture of the underside of a bed? It’s not easy, haha.

Velcro placement
I used adhesive backed velcro and placed it right on the edge of the inside underside of the bed frame.

Velcro placement on the skirt
Next, I cut the center out of the bedskirt so that I had one long ruffle. I placed the other side of the velcro along the seam of the ruffle. Do not cut on the ruffle side of the skirt – I left about 2″ of the center portion as a buffer, just in case my measurement of the drop was off. I broke the velcro into three sections – side, foot and side – making sure to allow room to go around large corner posts. First, place the velcro on the bed frame. Then place the velcro on the skirt. The measurement should match up exactly. With this particular bed, I used a queen sized skirt because the bed is not a twin and not a full. I took a large pleat in the center of the foot section to make up for the overage. Continue along the other side until the skirt is placed.

Completed bed
The finished bed looks lovely! Since my black cat likes to go under the bed to hide, it will now be much easier to remove and wash the skirt to remove her hair that sticks to the skirt. If I decide to change the skirt for some reason, I will leave the velcro in place on the bed frame, and just reuse the pieces on the skirt. Keep in mind that the adhesive may wear out over time and you may need to baste the velcro onto the skirt.
Good luck with your antique bed, just remember to work with it, not against it!
At Christmas my daughter thought her Auntie would like some coloring books, since as a six-year-old Melody likes coloring. Lucky her, Auntie likes coloring and always has. Well, I thought some coloring books for grown ups were in order, and since I liked them so much, I bought myself a set. Of course, since we love Victorian clothing, that’s the theme of the books. I finished a couple recently. My daughter was playing on her iPad and I was the one coloring. Hee hee!

Evening Attire ca. 1891

Walking Costumes ca. 1884
I hope you find yourself some good Dover Coloring books, a 100 color pencil set, and a little time to dream!
Speaking of Victorian clothing, we will be at the Southern California Civil War Association (SCCWA) reenactment at Prado Regional Park April 6-7. Visit my Victorian sister site Past Periods Press for more details.
