Embroidered Silk Handbag

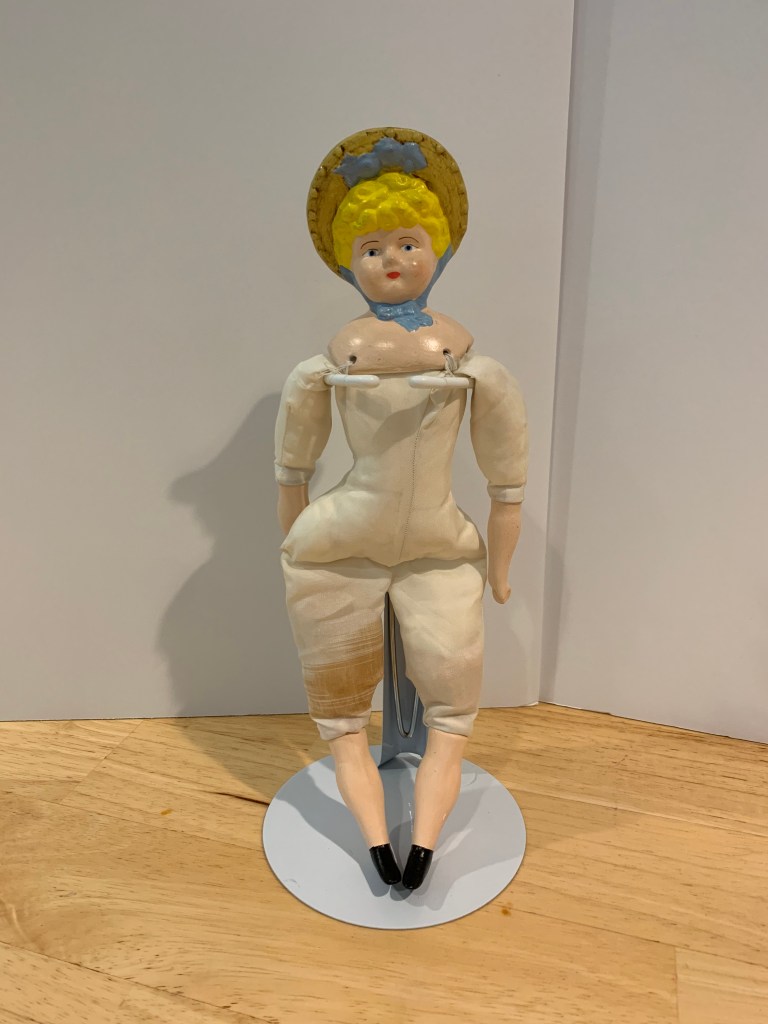
A proper Victorian lady doll must have a handbag for the various items she’d like to carry with her when visiting friends. Perhaps calling cards, a pencil, a coin and a house key might be needed during her day. I wanted to make Ruby a little handbag and devised this pretty one. You can make one too, just follow these easy instructions.

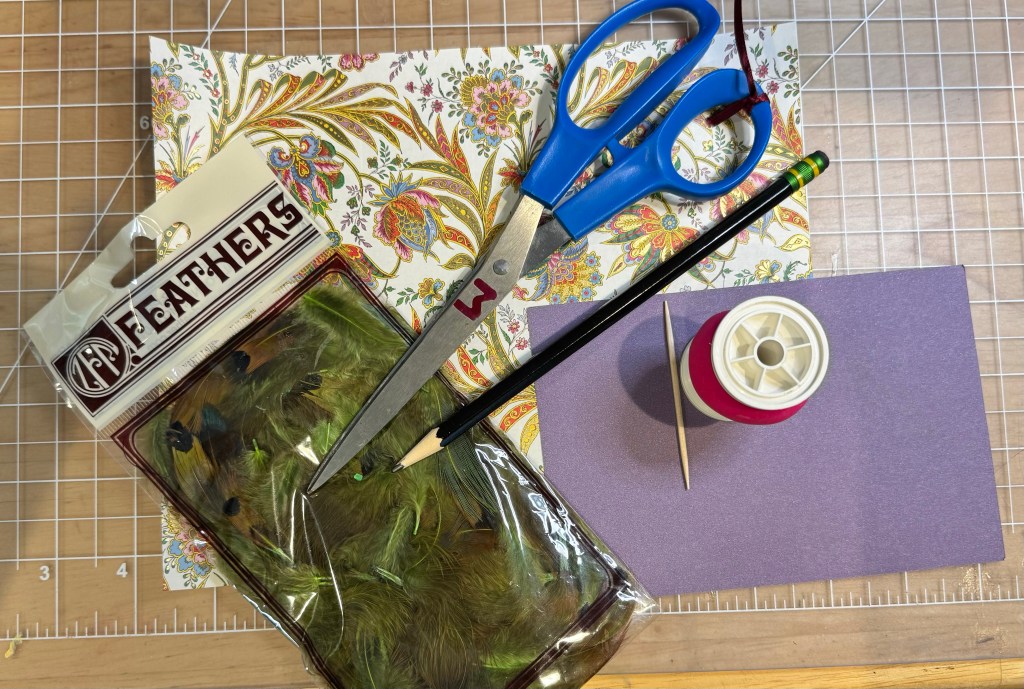
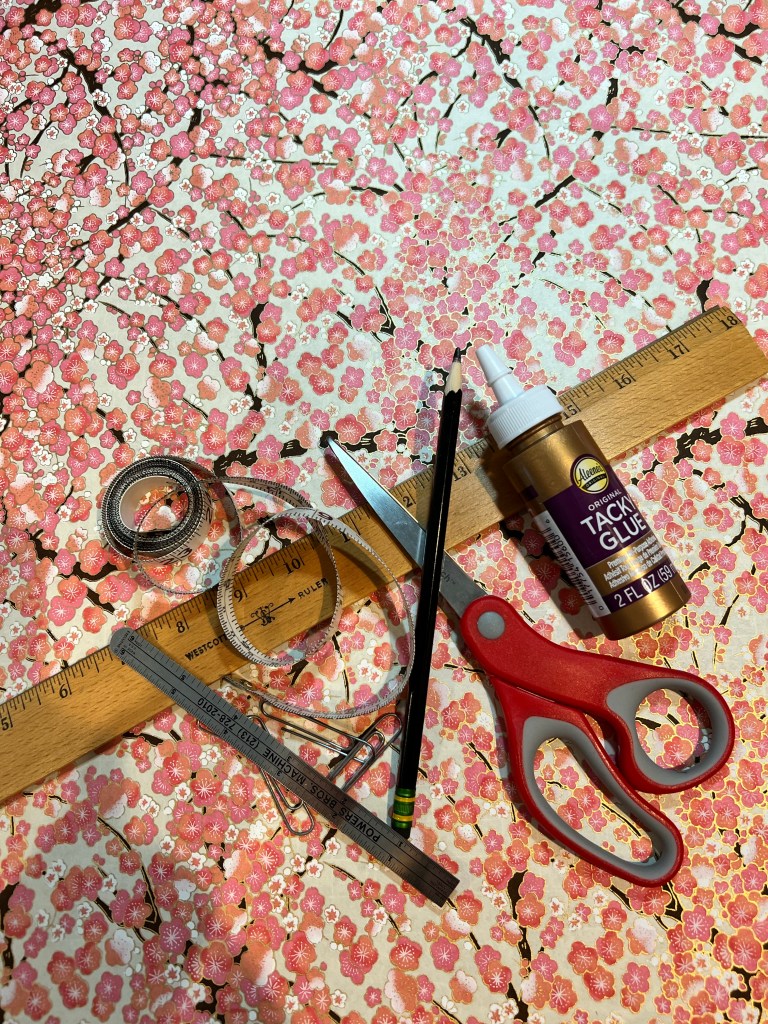
To make this embroidered silk handbag you will need:

Silk outer fabric

Cotton lining fabric

Silk thread

Sewing needle

Scissors

Pins

Embroidery floss

Embroidery needle

Tissue paper

Pencil

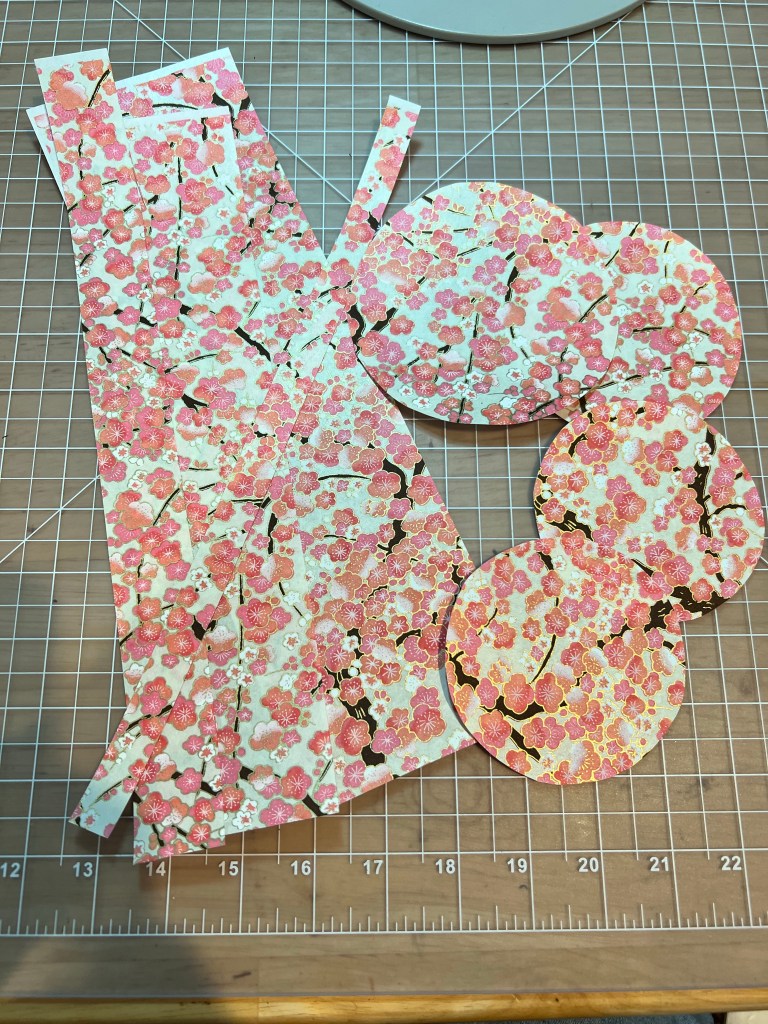
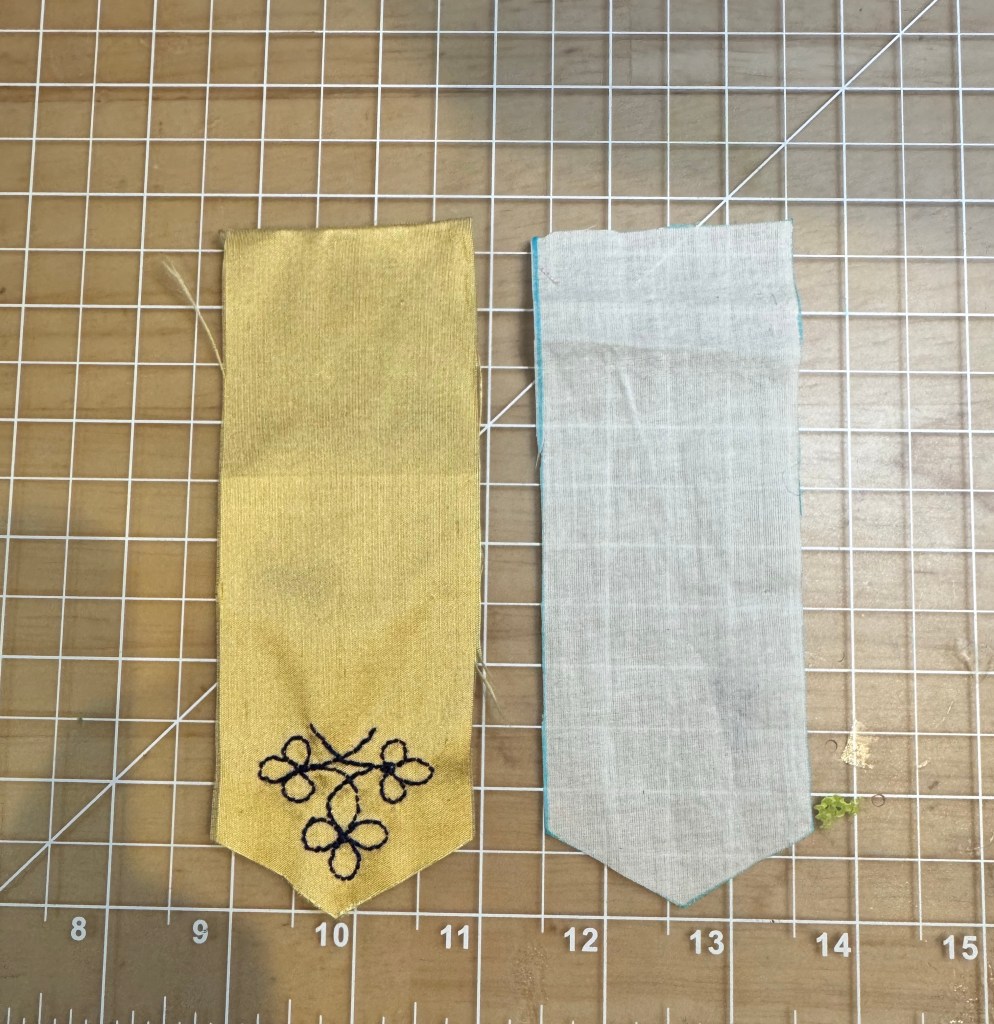
Begin by cutting one silk and one cotton piece 2 inches wide by 5 1/2” long. On one short end, make a point that is stepped back 1/2” from the end.

Forgot to take a before picture!

Trace the embroidery pattern you like onto tissue paper. I went with this continuous line art found in A French Fashion Doll’s Wardrobe.

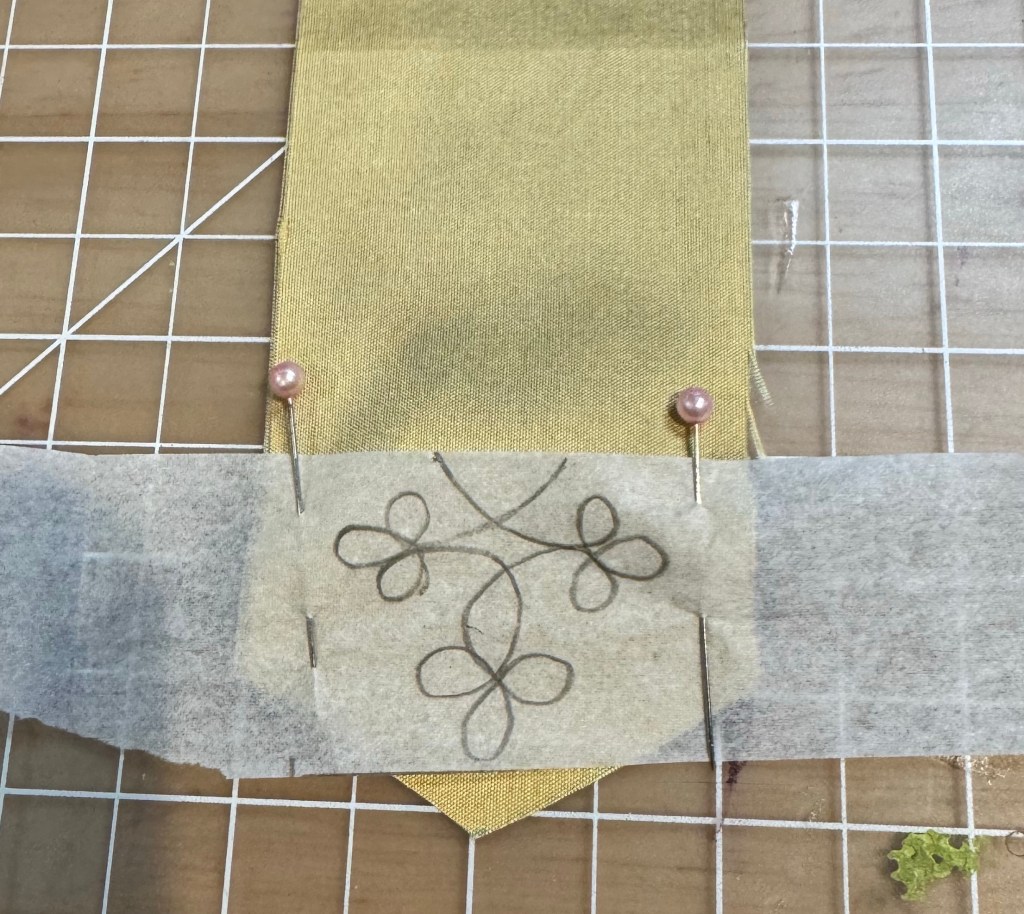
Pin that where you want your embroidery to be. Make sure to leave space for 1/8” seams on all three sides of this flap. Using 2 strands of your floss, stitch directly through the tissue paper and follow the pattern.

I chose to do this in a backstitch but you may like a split stitch or a standard embroidery stitch. Let your creativity decide. When you have to end your stitching be careful not to catch any of the silk in your anchor stitches.

Once you have completed your embroidery, tear away the tissue paper. Make sure to pick out any caught in a stitch or under a thread. I used the blunt end of a crewel needle to do this but you could also use craft tweezers.

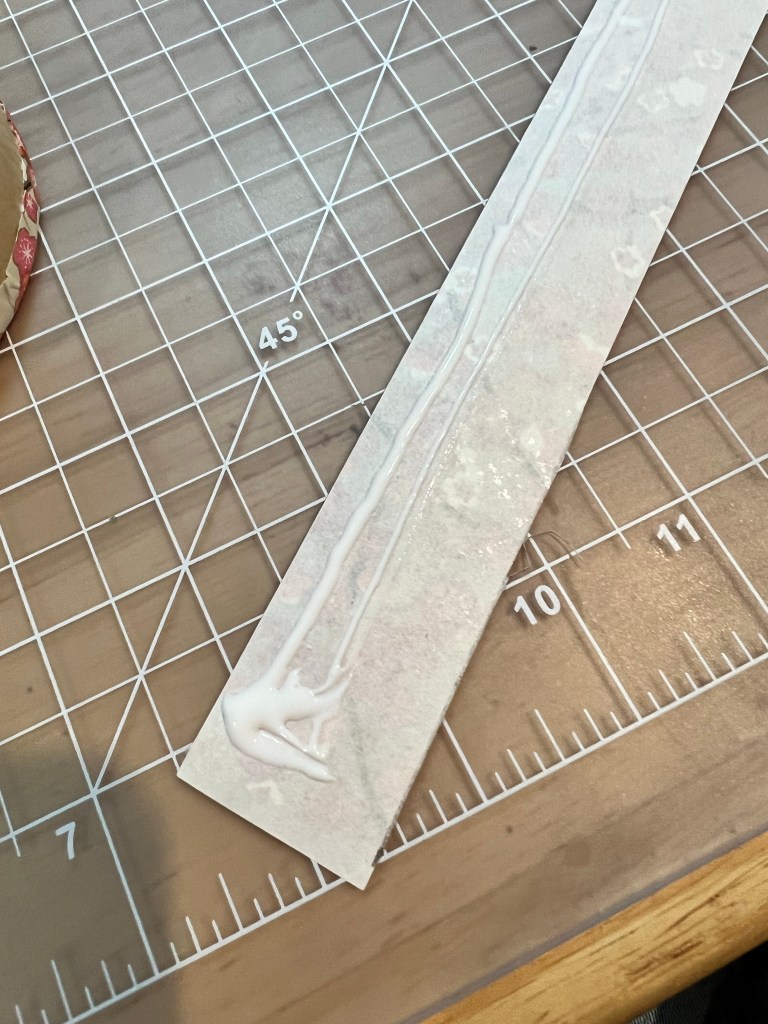
Fold right sides together so you make a 2” square pouch, and then stitch down the sides. Repeat with the lining.

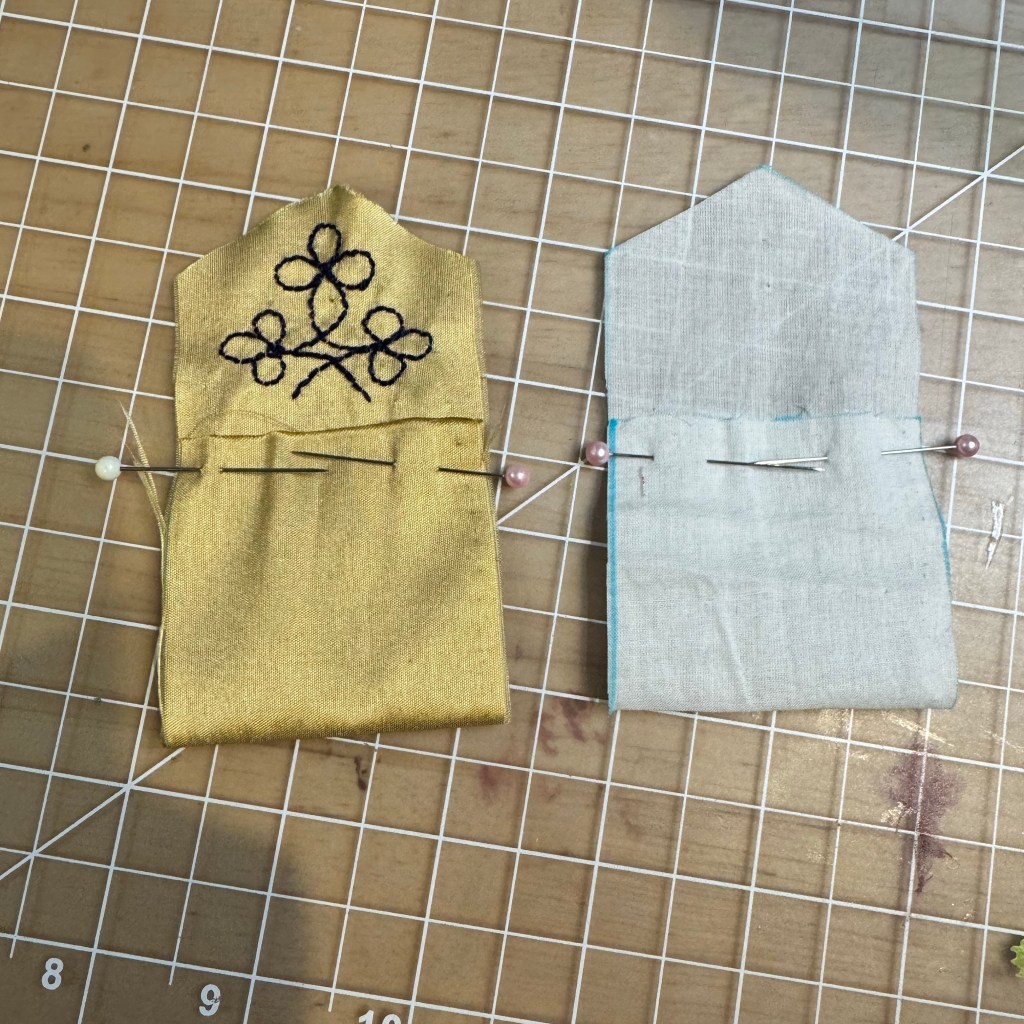
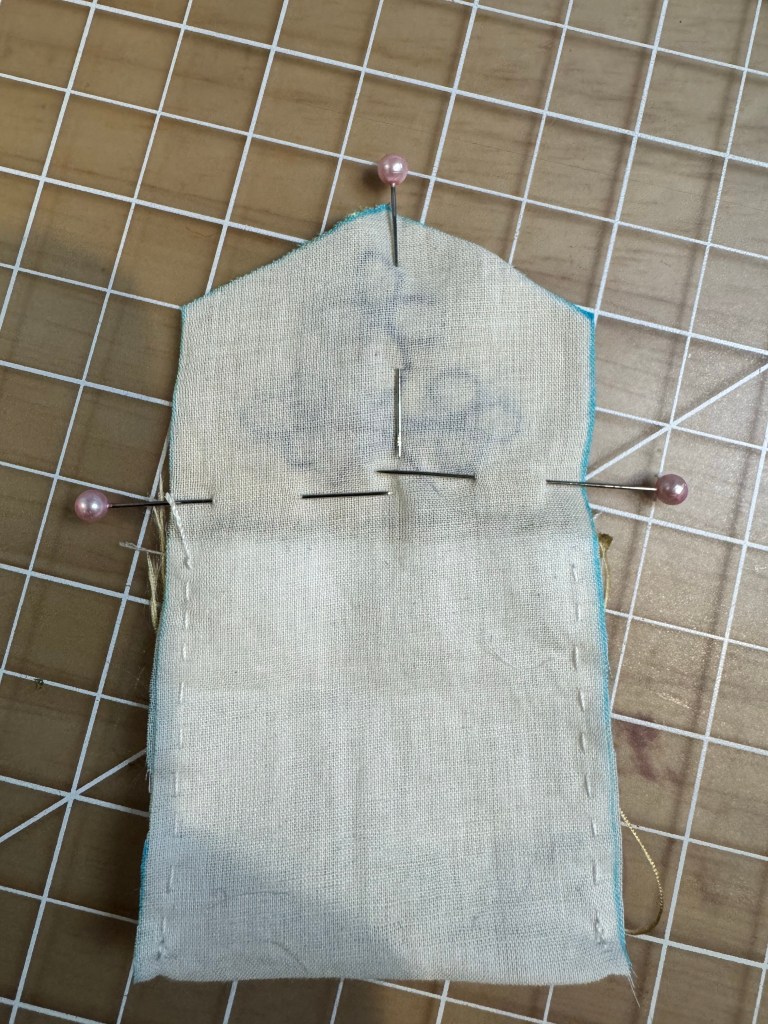
Pin the lining and silk right sides together on the flap and stitch around the flap only. Turn your work and push out the corners. If you like you can lightly iron the flap to roll the lining to the inside.

Set this aside for a moment to make your handle. This tutorial includes a braided embroidery floss handle but you could use ribbon, cord, chain, really whatever you might like as long as it isn’t too heavy.

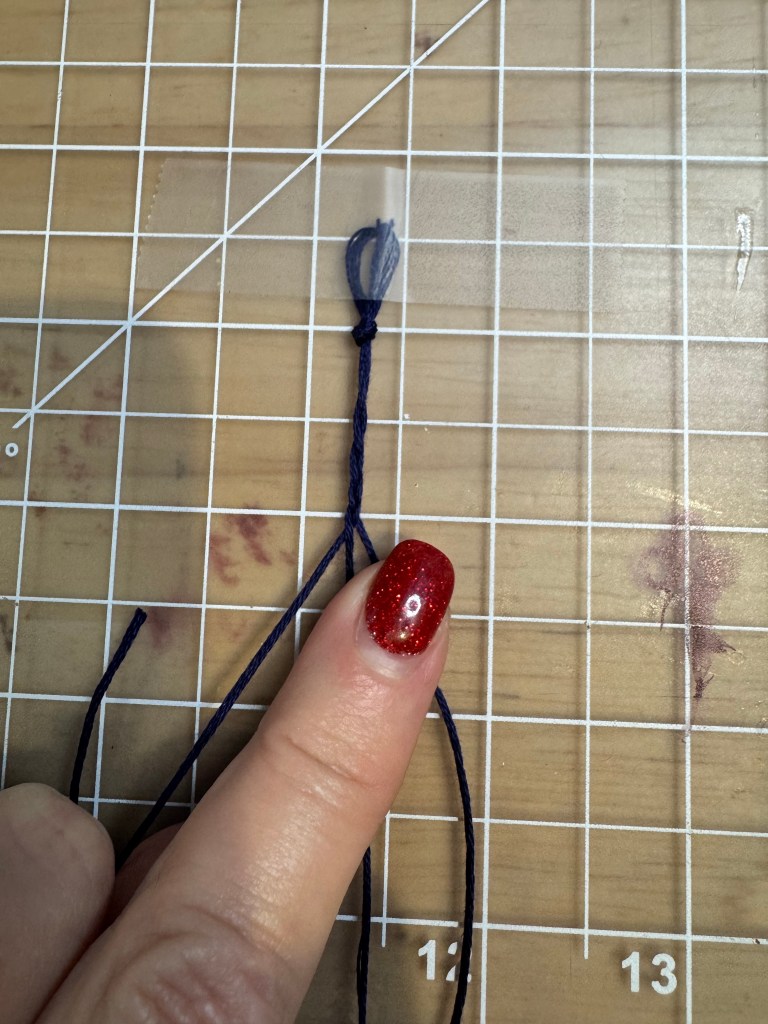
Measure out 24” of embroidery floss, then section that into three 8” strands. Knot one end, then tape it to your work surface. Braid the floss until you have 4 or 5” of braid. Knot the end and clip off the tail.

Open the silk pouch and tuck the lining inside. Make sure the corners go all the way inside.

Next tuck one end of your handle in between the silk and the lining at the flap fold. Pin that in place.

You will need to tuck under the silk and the lining so all raw edges are inside the seam. Carefully stitch a blind stitch, making at least two stitches through the handle. When you reach the other side, tuck the other handle end in and stitch through it.

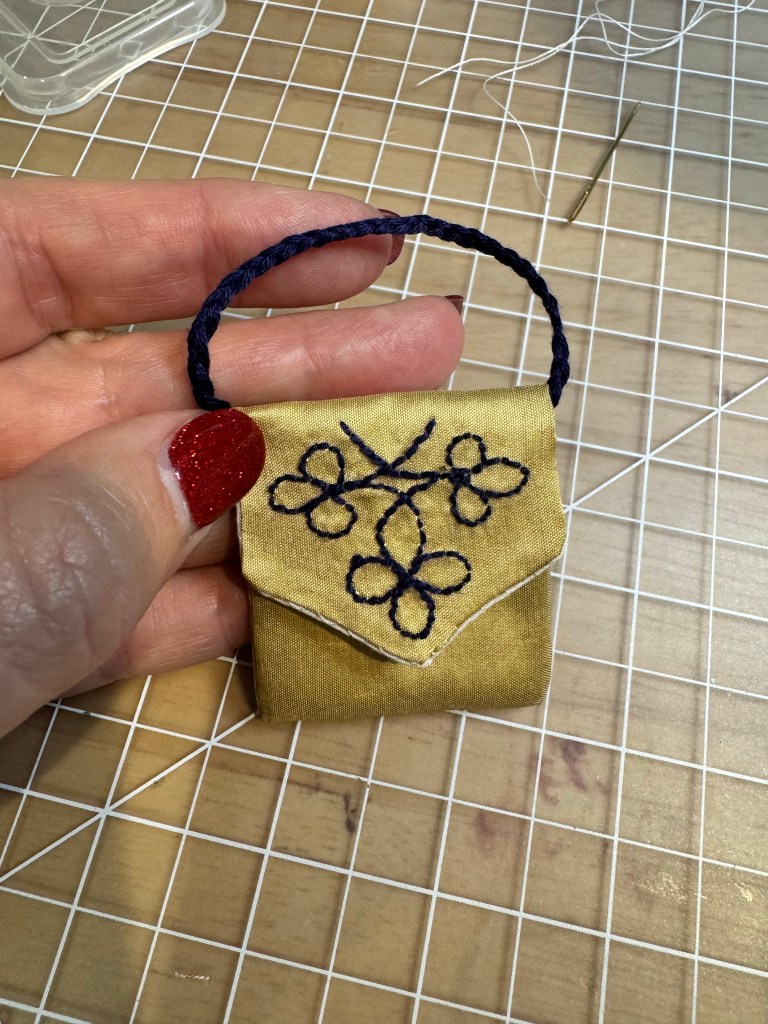
All the raw edges should be inside, the handle should be nicely secured. Finger press the flap closed so the embroidered side looks pretty. If you like you can add a hook & eye or snap. Depending on the embroidery you select you could make a buttonhole and add a decorative button.

Very pretty!

Making a Feathered Victorian Fan for a Doll

As I’m wrapping up final bits and pieces for Ruby, I’m making some accessories for her. Every Victorian lady had a fan or three, so today I made a fixed type of fan – as opposed to a folding fan that looks like a half circle when open.

This two sided fan with feathers was delightful and easy to make.

You will need:

An index card

Some fancy scrapbook paper

A toothpick

Some feathers

A pencil

A spool of thread

Scissors

Craft glue – not a glue stick

Start by tracing your spool of thread on the index card to make two circles. Cut those out.

On your scrapbook paper, try to find a pretty motif that you want to be centered on the outside of your fan. Trace the spool of thread so those motifs are centered, and then draw a 1/4” margin around that circle. Cut out on the larger circle. The index card circle will fit in the inner circle. Using a bit of glue, glue that in place.

Carefully clip around the circle to make tabs in the scrapbook paper. This will allow you to fold it over the index card.

Put some glue right at the edge of the index card circle and then fold the tabs down, pressing them into the glue. Set that aside for a moment.

From your feathers, find 3-4 that you like. I chose these really fluffy feathers, but you could use some that have a design on them, really just choose the ones you like best. Lay them onto one circle in a pleasing arrangement. Clip the hard ends if necessary.

Take the toothpick and cut off one pointed end – maybe 3/8” up the shaft. This will be the handle of your fan. Put a glob of glue on top of the feathers, and then lay the pointed end of the handle in the glue – making sure it comes out opposite the feathers. In my case, one of my motifs has a stem so I wanted the handle to come out right at that spot.

Lay the other circle on top of the feathers and press the two sides together firmly. If any glue squeezes out wipe it away with a paper towel.

Allow the glue to dry. You can tie a 1/8” satin ribbon around the handle and then tie that to the hand of your doll if you want to display it. This fan took about 10-15 minutes to make.

I hope you will try this little project and if you do please share in the comments. You can try other shapes for the index cards as well. Let your imagination soar.

Doll Hat Boxes

I threatened you with a tutorial on how to make these cute $2 craft boxes into hat boxes for your dolls, and here it is!

Naked boxes

To make these specific hat boxes (also called band boxes) you will need 1 larger sized piece of fancy wrapping paper – 18×24 is plenty. The reason for this is the outside measurement is greater than 12” which is the standard large size you will find at your local big box store. Original Victorian hat boxes came in many different shapes and sizes, but the ones we are most familiar with today are the round variety. I found reference to an enterprising young woman who created beautiful boxes covered with wallpaper so I tried to find papers that looked a bit like doll-sized wallpaper. Unfortunately I lost track of the website where I read this and can’t give you more detail.

If you are looking for a source of large format paper, you might be interested in the site Mulberry Paper and More. It’s a bit overwhelming at first, but they have an amazing selection of papers that would be perfect for this use case. This tutorial is being shown with Japanese Chiyogami Yuzen paper. I’m visual so there will be a lot of pictures to illustrate this project.

Supplies

You will need:

Tape measure

Pencil

Scissors or exacto knife

15” ruler

Sewing ruler for small, precision measurements

Craft glue

Paper towels

Craft paper

Measure your box carefully. Allow for overlaps and edges! These boxes from Dollar Tree are 3 5/8” diameter on the lower box portion and 3 7/8” diameter on the lid. The circumference is equally important. Use your tape measure to find the circumference (outside and inside) plus a 1/2” overlap. I wound up cutting the following pieces:

(1) 12 1/2” X 3 5/8” rectangle (box outside sidewall)

(1) 11 3/4” X 2 1/2” rectangle (box inside sidewall)

(1) 13” X 1 1/4” rectangle (lid outside sidewall)

(1) 12 1/2” X 5/8” rectangle (lid inside sidewall)

(2) 3 5/8” diameter circles (box inside bottom and underside)

(1) 4 1/2” diameter circle (lid outside)

(1) 3 3/4” diameter circle (lid inside)

Each piece was labeled so I would know where they went.

Once you have everything cut the assembly goes quite quickly.

1. Glue in the box inside bottom circle (for fun you could make this piece from a newspaper print which was done in the past)

Inside bottom

2. Glue in the box inside sidewall. Be careful to overlap and press out any excess glue. I forgot to take a picture of this step, sorry!

3. Glue the outside box sidewall. This piece should extend past the box edges on both top and bottom. These extended sections will be folded down.

Lower edge extension

4. Run a bead of glue where you will fold down the extended section on the bottom of the box. Then press down the paper into the glue, making overlapping wedges so the paper confirms neatly to the round shape of the box.

When it is folded down, press the paper flat firmly so the glue squishes into all the places it needs to be, and then use a paper towel to wipe off any that oozes out from under the paper.

Upper edge extension

On the upper edge, run your glue onto the paper extension. This piece is going to be folded to the inside of the box. You may want to prefold it before putting the glue. Once you have run the glue, fold the paper inside the box and press, making sure it conforms to the shape and working the glue into place with your fingers. Wipe away any that oozes out.

5. Turn the box upside down and glue on the circle to the underside. All the folded edges should be covered by this circle. Set the box piece aside to dry.

Bottom of the box

The lid will follow a similar method, except in a slightly different order.

6. Glue in the inner circle to the lid.

7. Glue in the inner lid sidewall.

Lid inside

8. Glue the outside lid circle. It may be helpful to trace the lid onto the plain side of this circle so you place the lid right in the center.

Lid centered in the circle

Next, place the glue onto the box side and fold down the paper around the circle of the lid, again working the glue evenly and wiping off any excess.

9. Glue the outside lid sidewall. To do this, put glue on only half of the paper – the other half will be folded inside the lid.

Lid sidewall

Place the paper edge just a smidge under the top edge of the lid.

Lid side placement

As you did with the box sidewall, carefully fold the paper edge to the inside. Press firmly and wipe away any glue that oozes out.

Set the pieces aside to dry thoroughly. The lid will be tight at first but as you use the box it will ease. Use the box for hats or any other storage.

Your finished fancy box!
Filled with doll treasures

Sunbonnet Sue

She’s had a hard life

This little gal is a doll I am calling Sunbonnet Sue. I adopted her from (where else) eBay and I think she has had it rough. But I couldn’t resist her interesting features – most importantly her bonnet. The bonnet is part of the china head, and I have a lot to learn abut these fascinating dolls called Bonnet Heads.

So forlorn

But first a tiny bit about Sue. She is about 11″ tall from tip to toe. Her china pieces are not glossy, leading me to think this is the type of material called bisque. She has been painted and assembled quite poorly. Everything about her is a little sad, honestly.

Weird discoloration

There is this strange discoloration on the fabric used to make her, which feels to me like skirt lining of all things. It’s slippery. I suppose whoever made her used whatever scraps they had laying around the sewing room. You can also see that her head was attached rather inexpertly. The center seam of her body is pulled off center toward her shoulder. Even worse, her body shape is really off. Her left leg is somewhat toward the center of her body and her right leg is offset to be under her outside of her shoulder. Poor Sue. You can also see that her feet and hands were attached badly and the dear girl is pigeon toed.

I’m ready to get dressed now, please

She came to me naked (as they almost always do) and I just feel for this girl. She is another perfectly imperfect doll, who has a ton of character, and who I will give a good home & decent clothing. :-)

My modesty has been preserved!

She perfectly fits the chemise I had made for Nell ages ago and it is a better fit here, plus the drawstring neckline works well with her large head. As I was working with Sue, one of her arms came off! The arms and legs were attached with wire, which I had not seen before – but that isn’t saying much, I am really new to doll acquisition. I was able to reattach her arm and also secured her other arm as a precaution.

Pretty and simple

But now she is ready to relax and rest, well clothed! I love this fabric – it’s a bit brighter in person than in the photo. I have learned these bonnet-head dolls were styled to the 1830s, and the fabrics at that time were bright and cheery, which is why I chose this. The great thing about a tiny doll like this is you can make a complete dress from a fat quarter and have fabric left over for something else. In the dress, you can’t really see the problems with Sue’s construction, although it looks a bit like she has her hip cocked out to the side. Maybe she’s throwing a 180 year attitude.

I asked in a doll collectors group about bonnet-head dolls and learned that the originals were created around 1900. There are a tremendous variety of bonnet-head styles, but Sue seems to be styled off this particular type:

Bonnet-head doll

As you can see, however, she was not painted with such care. During the 1980s, there were numerous kits (and they are still available on occasion on eBay) mass produced for consumers to create. My suspicion is that Sue was born during that era. It is unfortunate that her painting was not done with great detail, but I think I will enjoy her all the same. She is now safely nestled in my cabinet with some other dolls in my growing collection.

Here is an article about bonnet head dolls – much better written by people much more knowledgeable than me.

Hats Off to Bonnet-Heads via RubyLane.com