Nell’s 1866 Promenade Dress

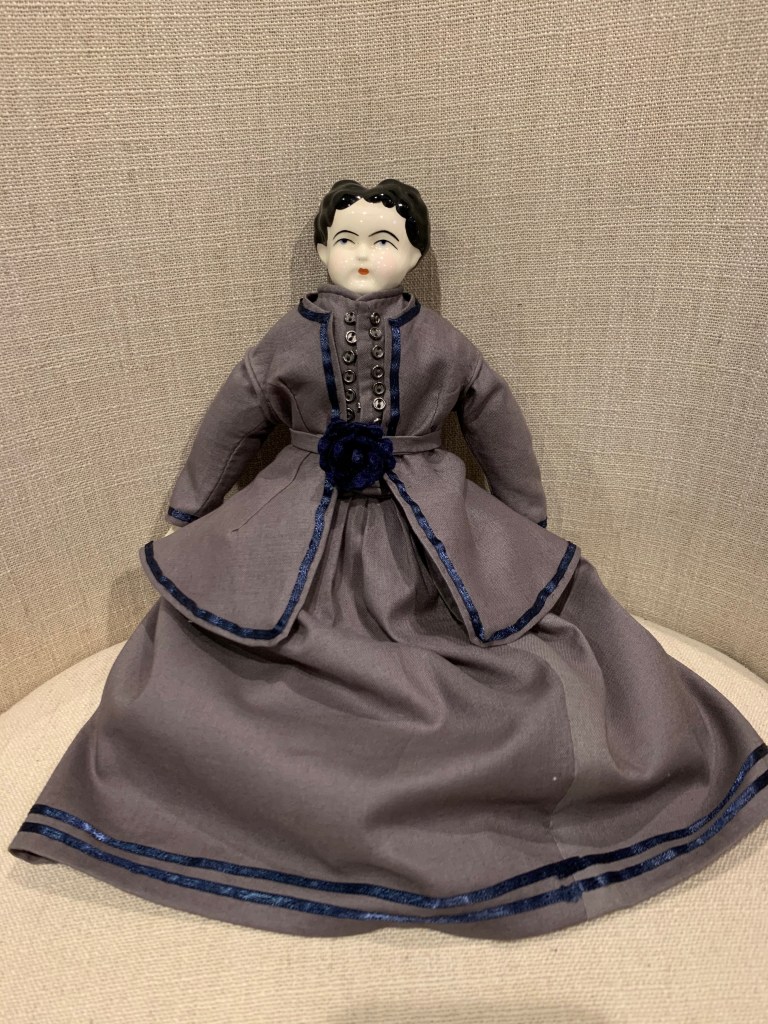
When I was researching what to make for Nell, I came across a source for La Mode Illustree, a French fashion magazine popular through the 19th century. They frequently published doll costumes as a means for girls to learn dress making. While it took me some time to commit to one of the patterns, I have finally completed one.

Being as the magazine was written in French, I first had to translate the text. I’m not fluent but I have a very basic understanding of the language, and Google translate did the heavy lifting.

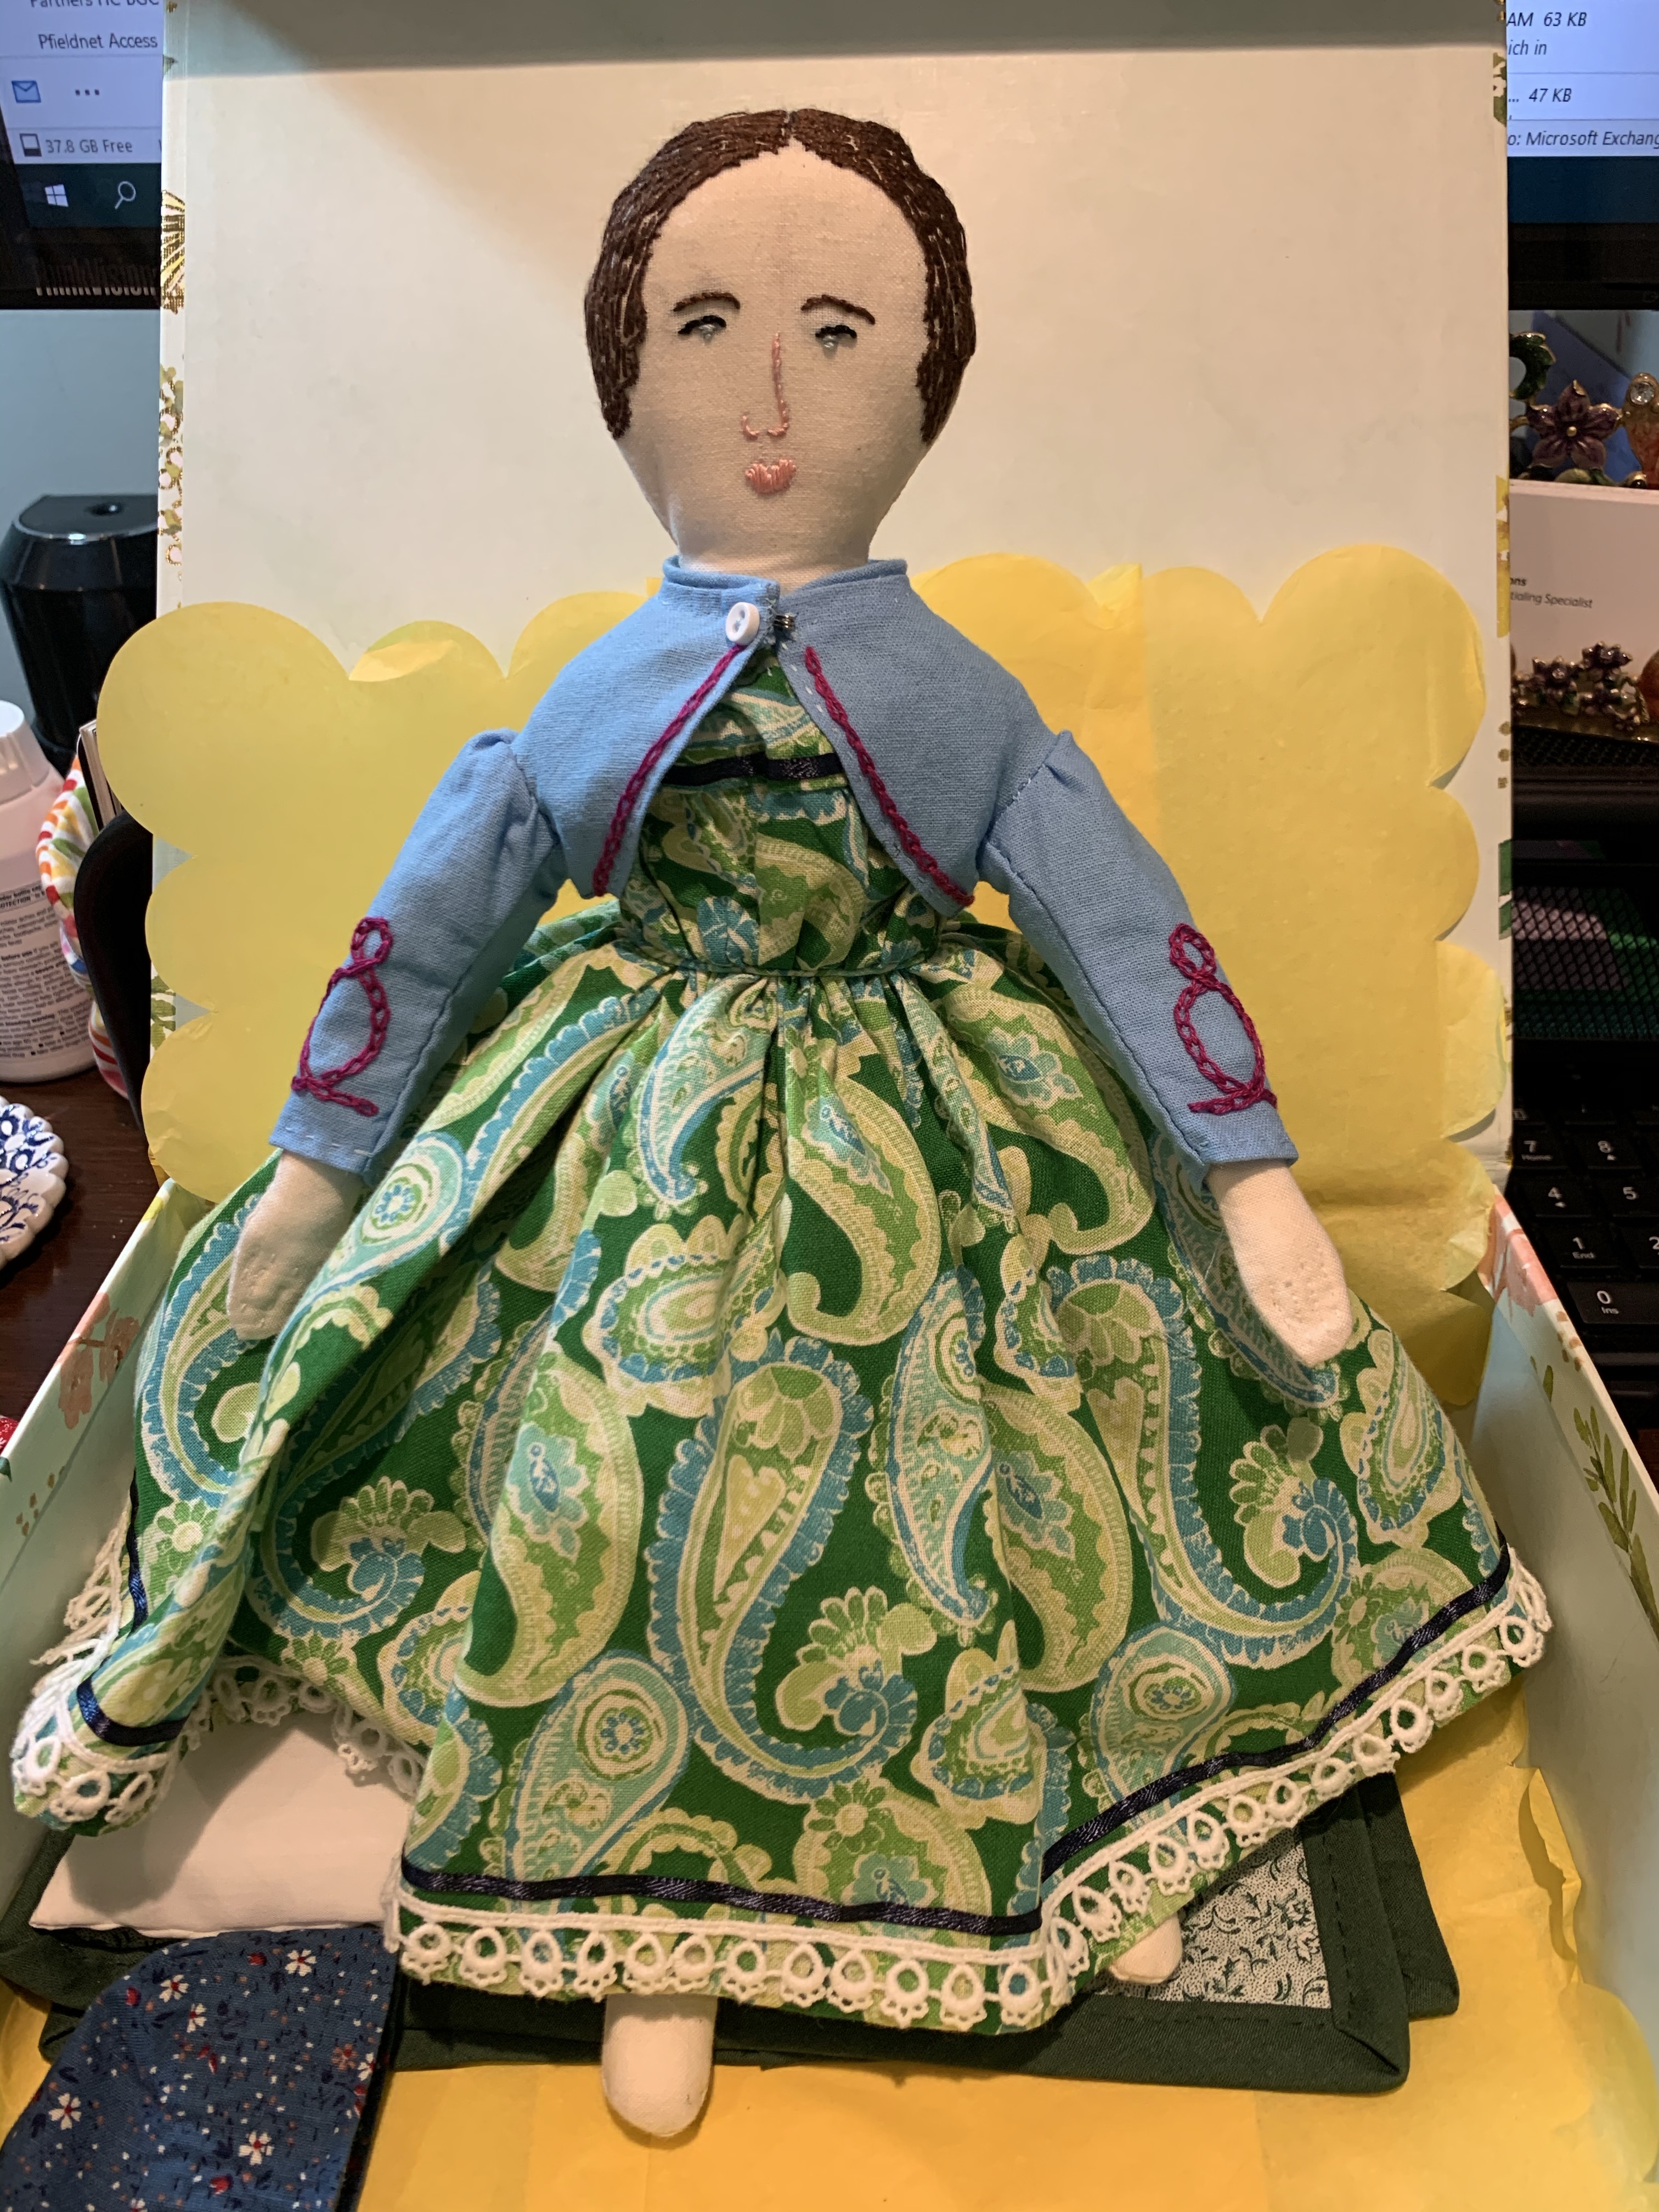
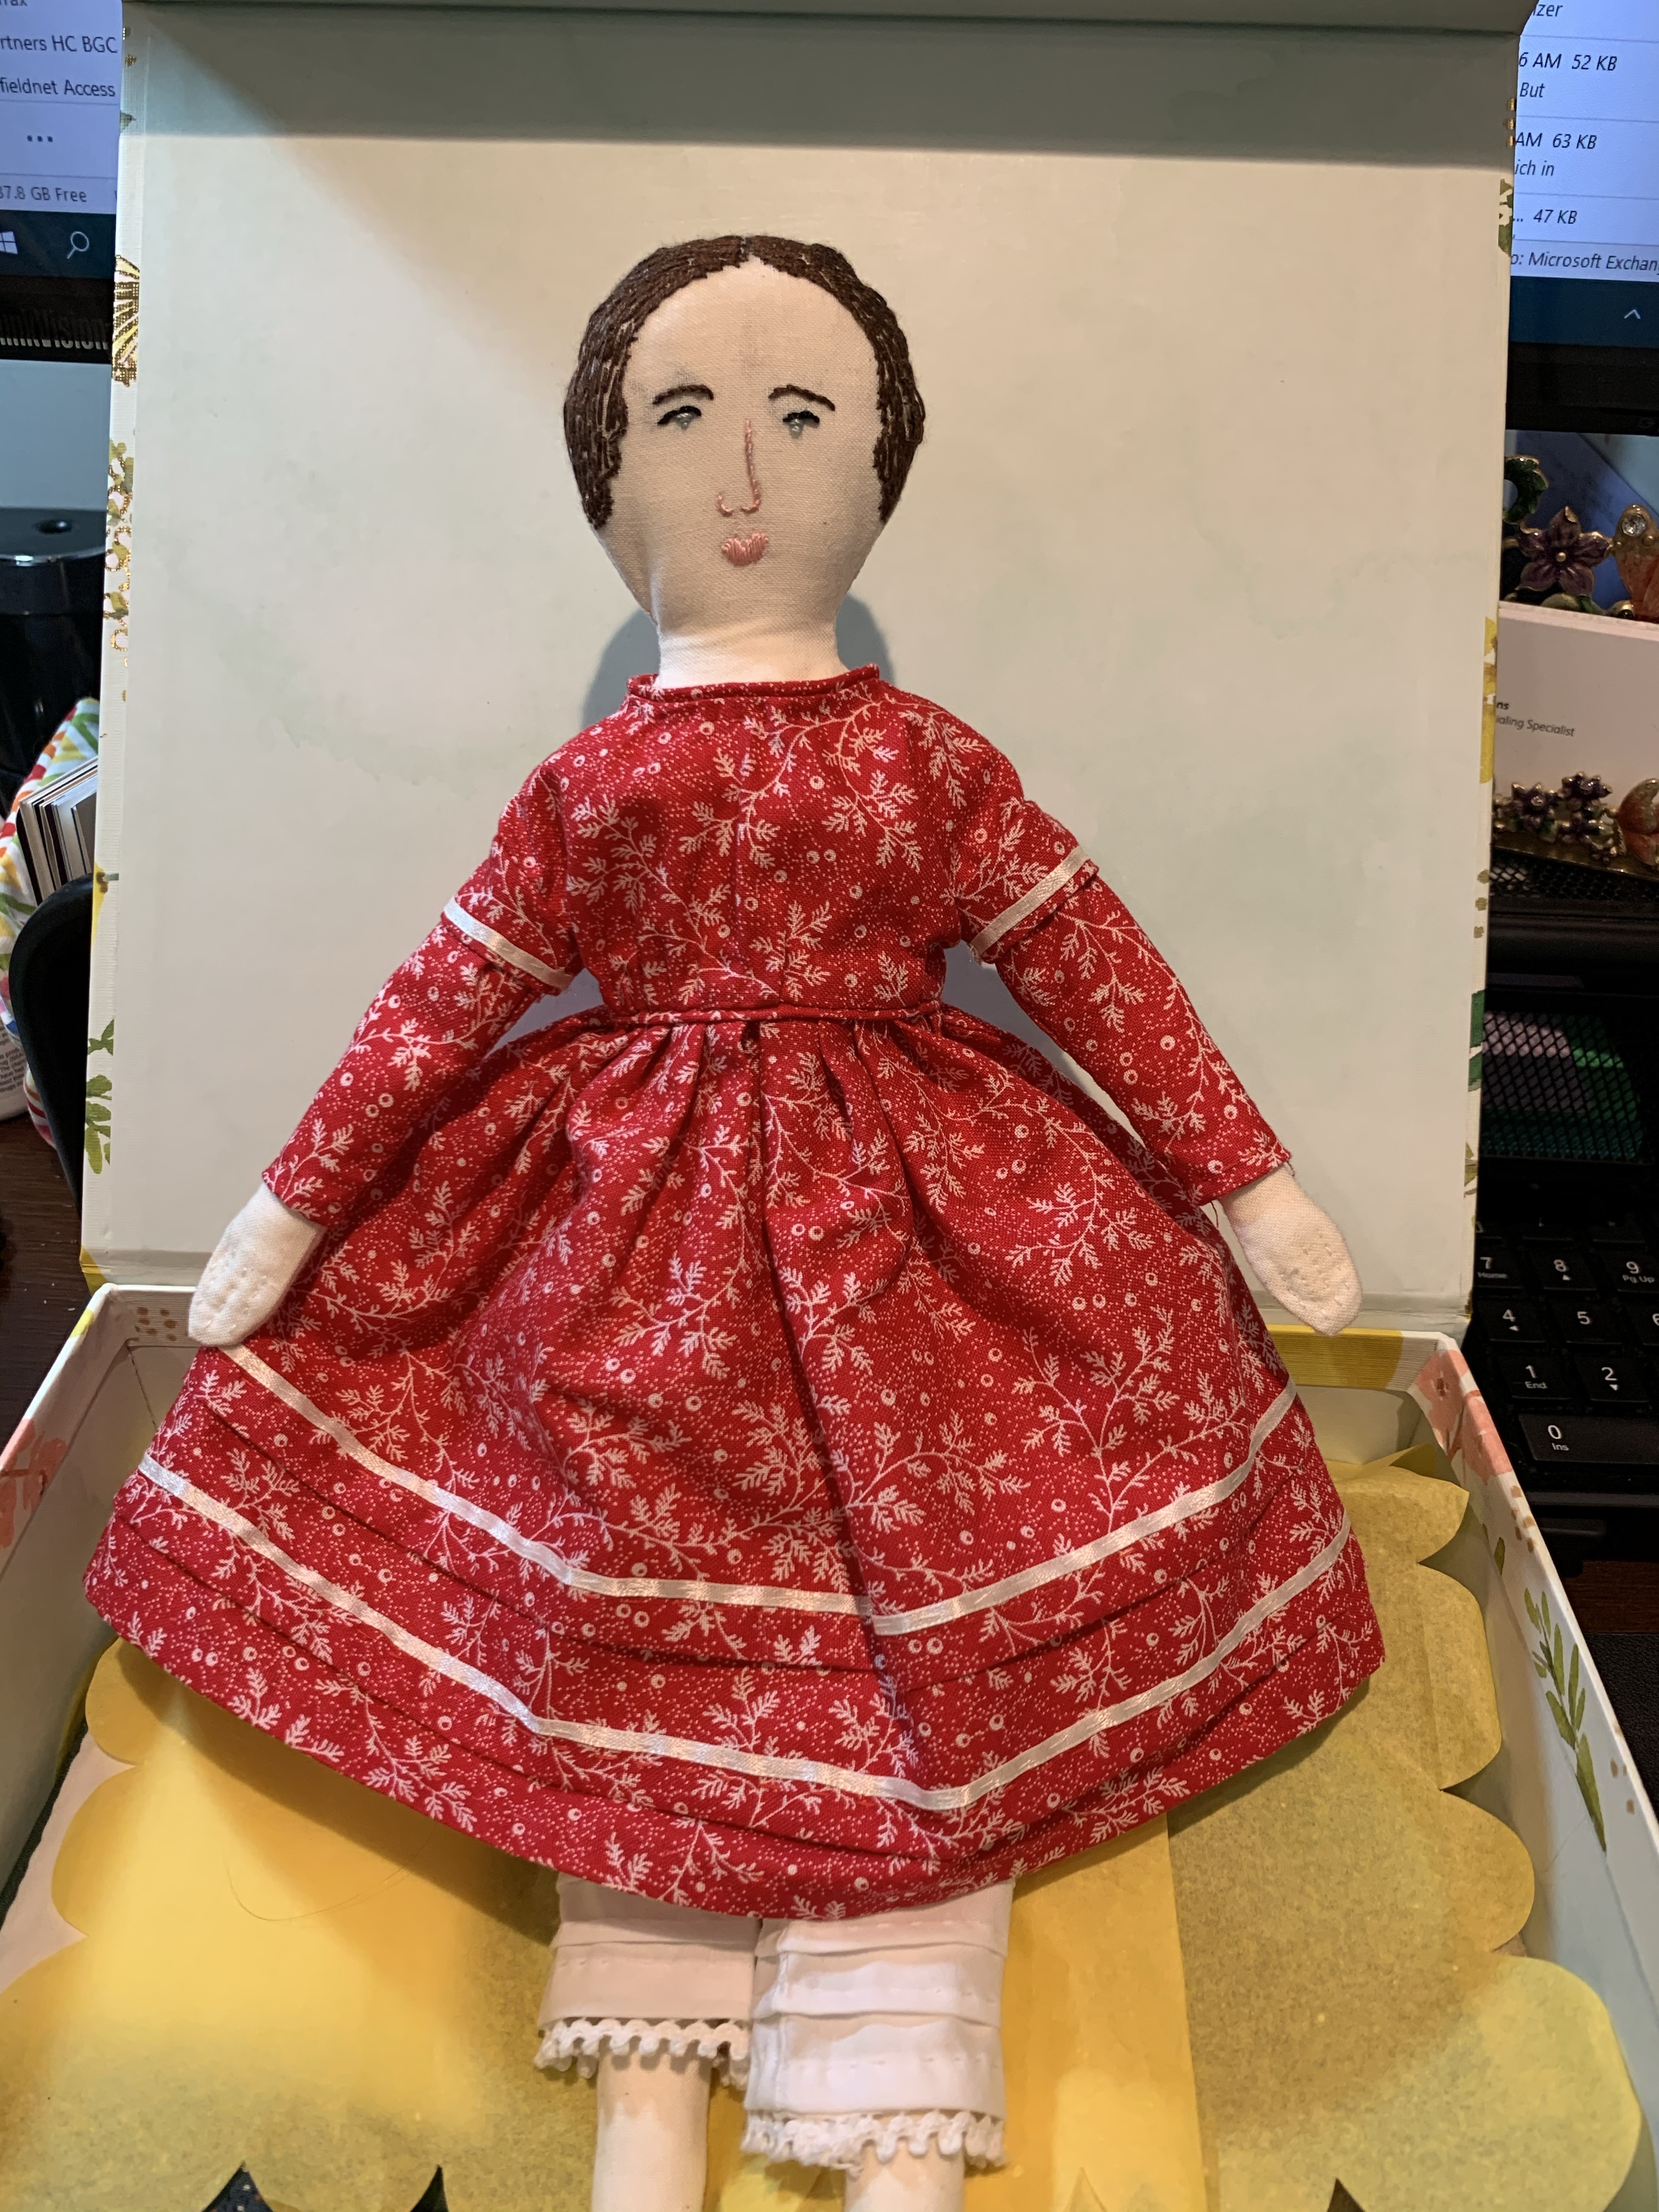
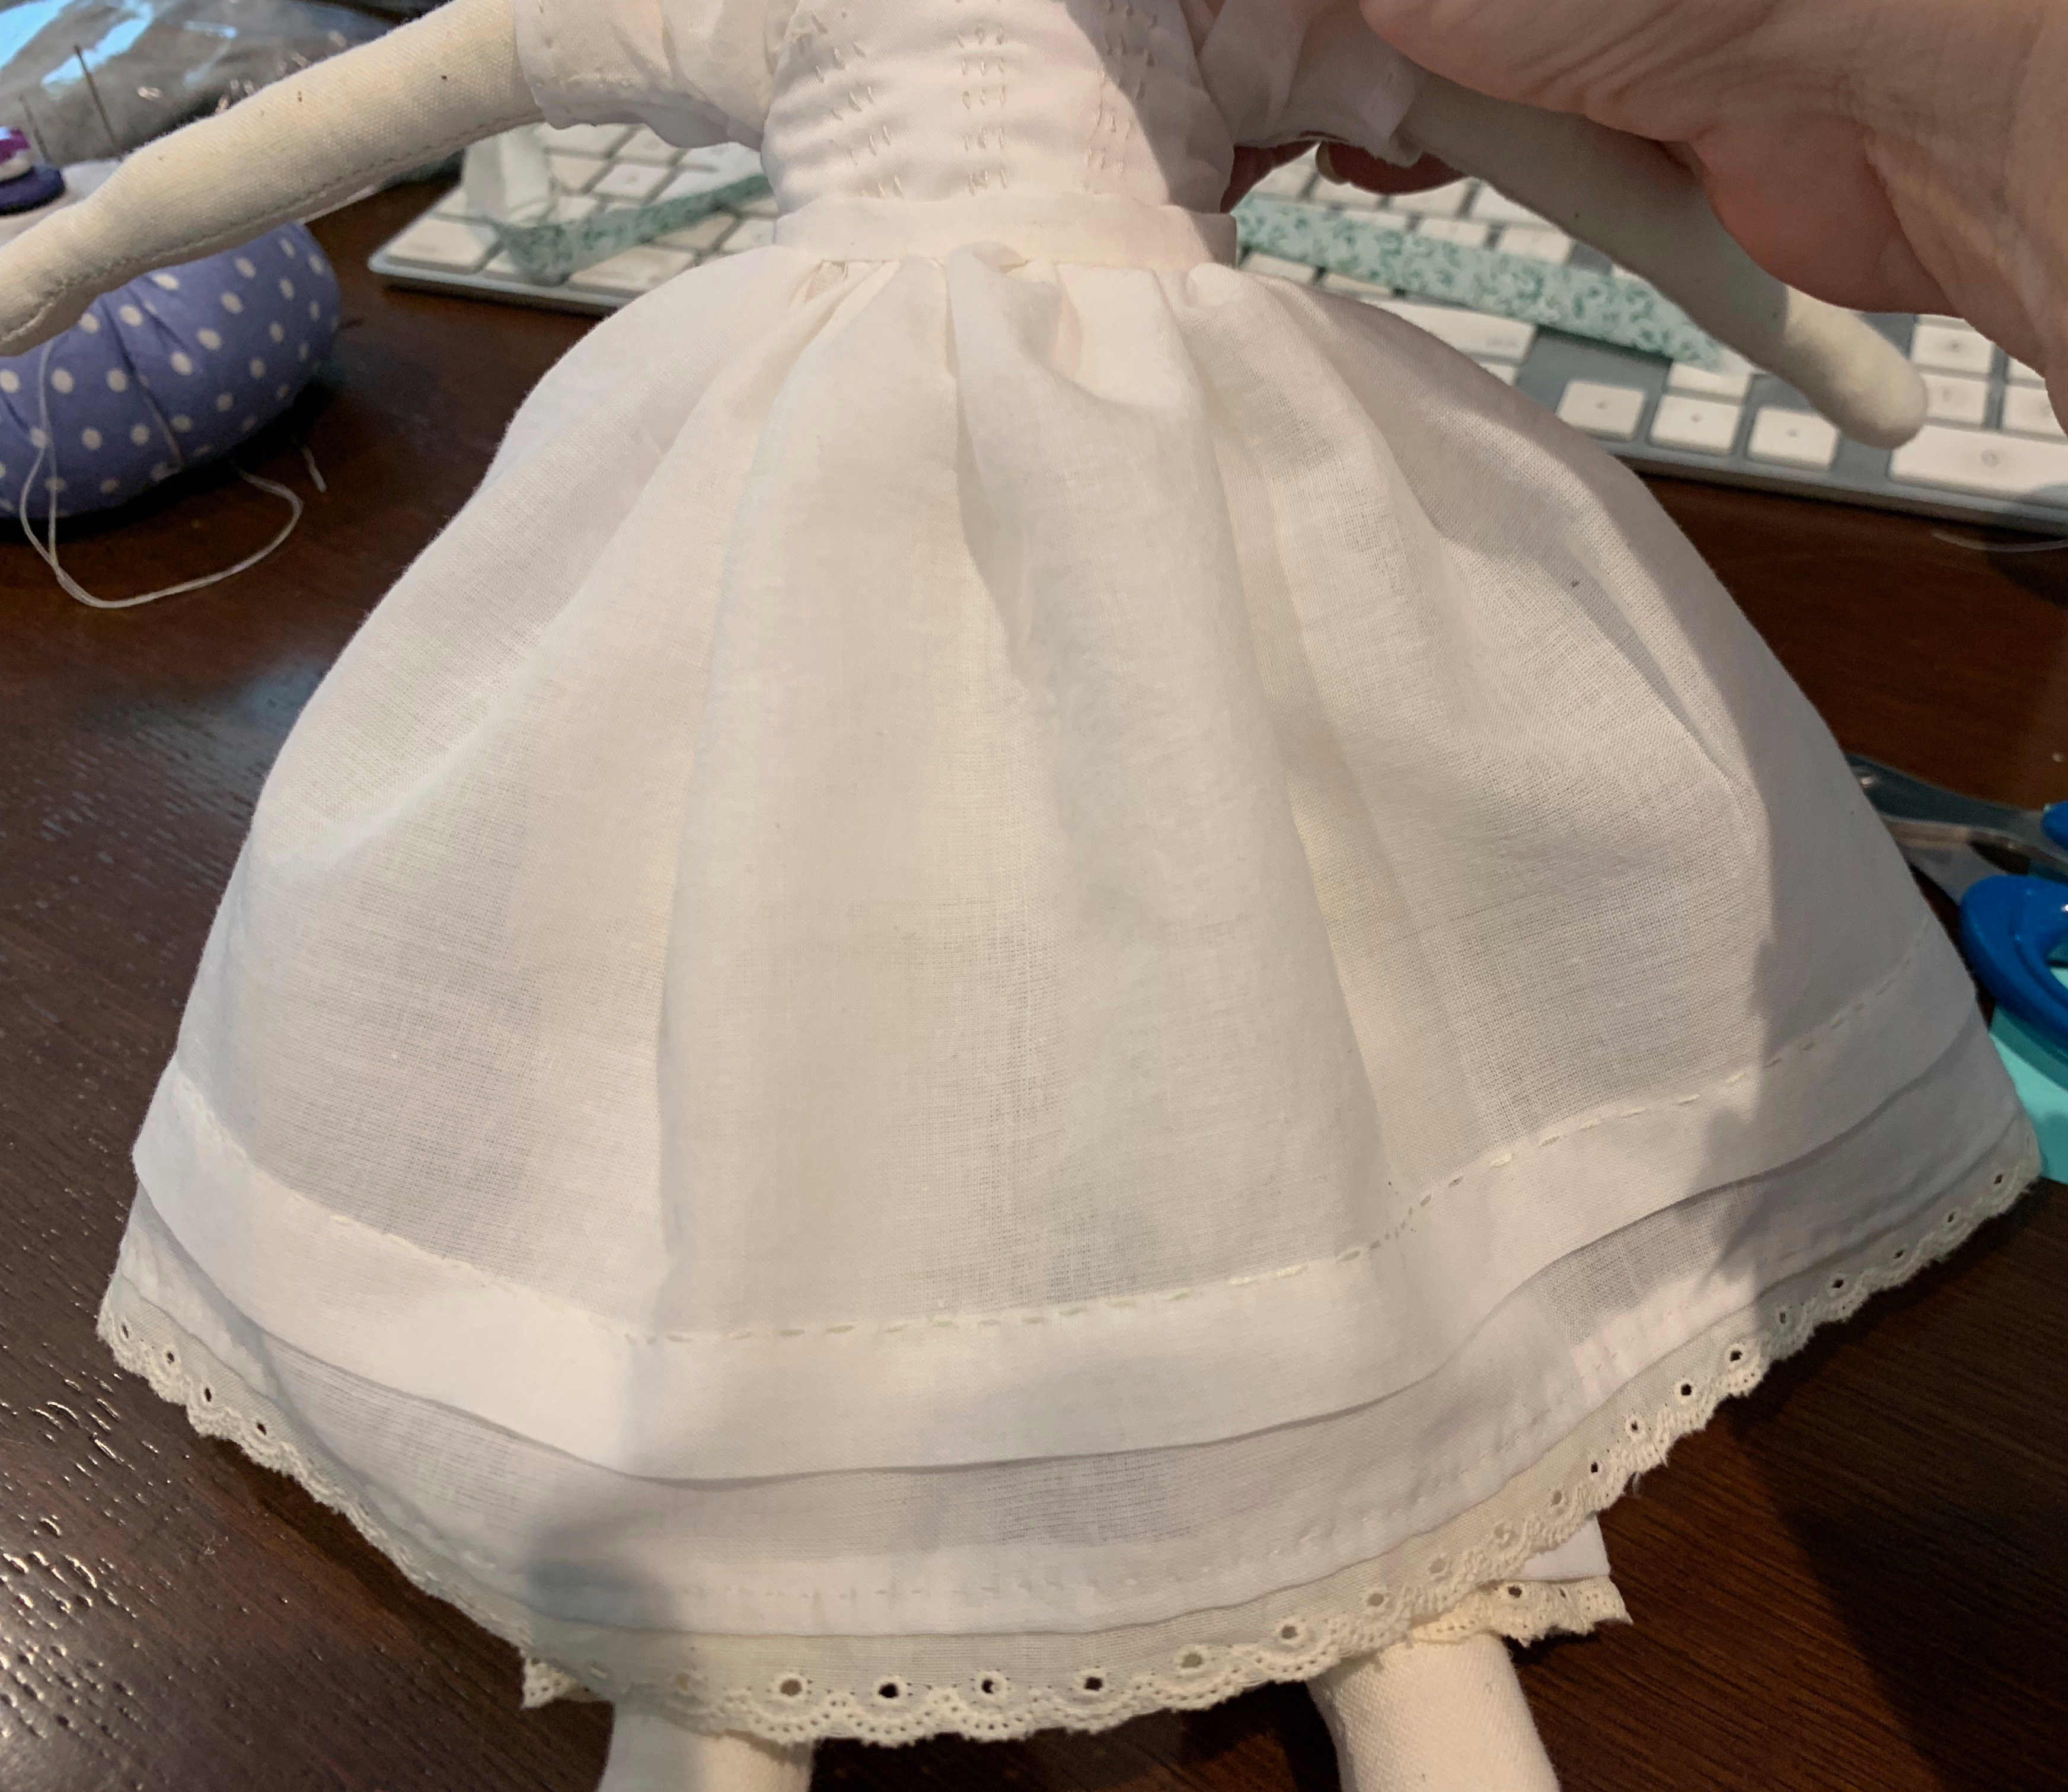
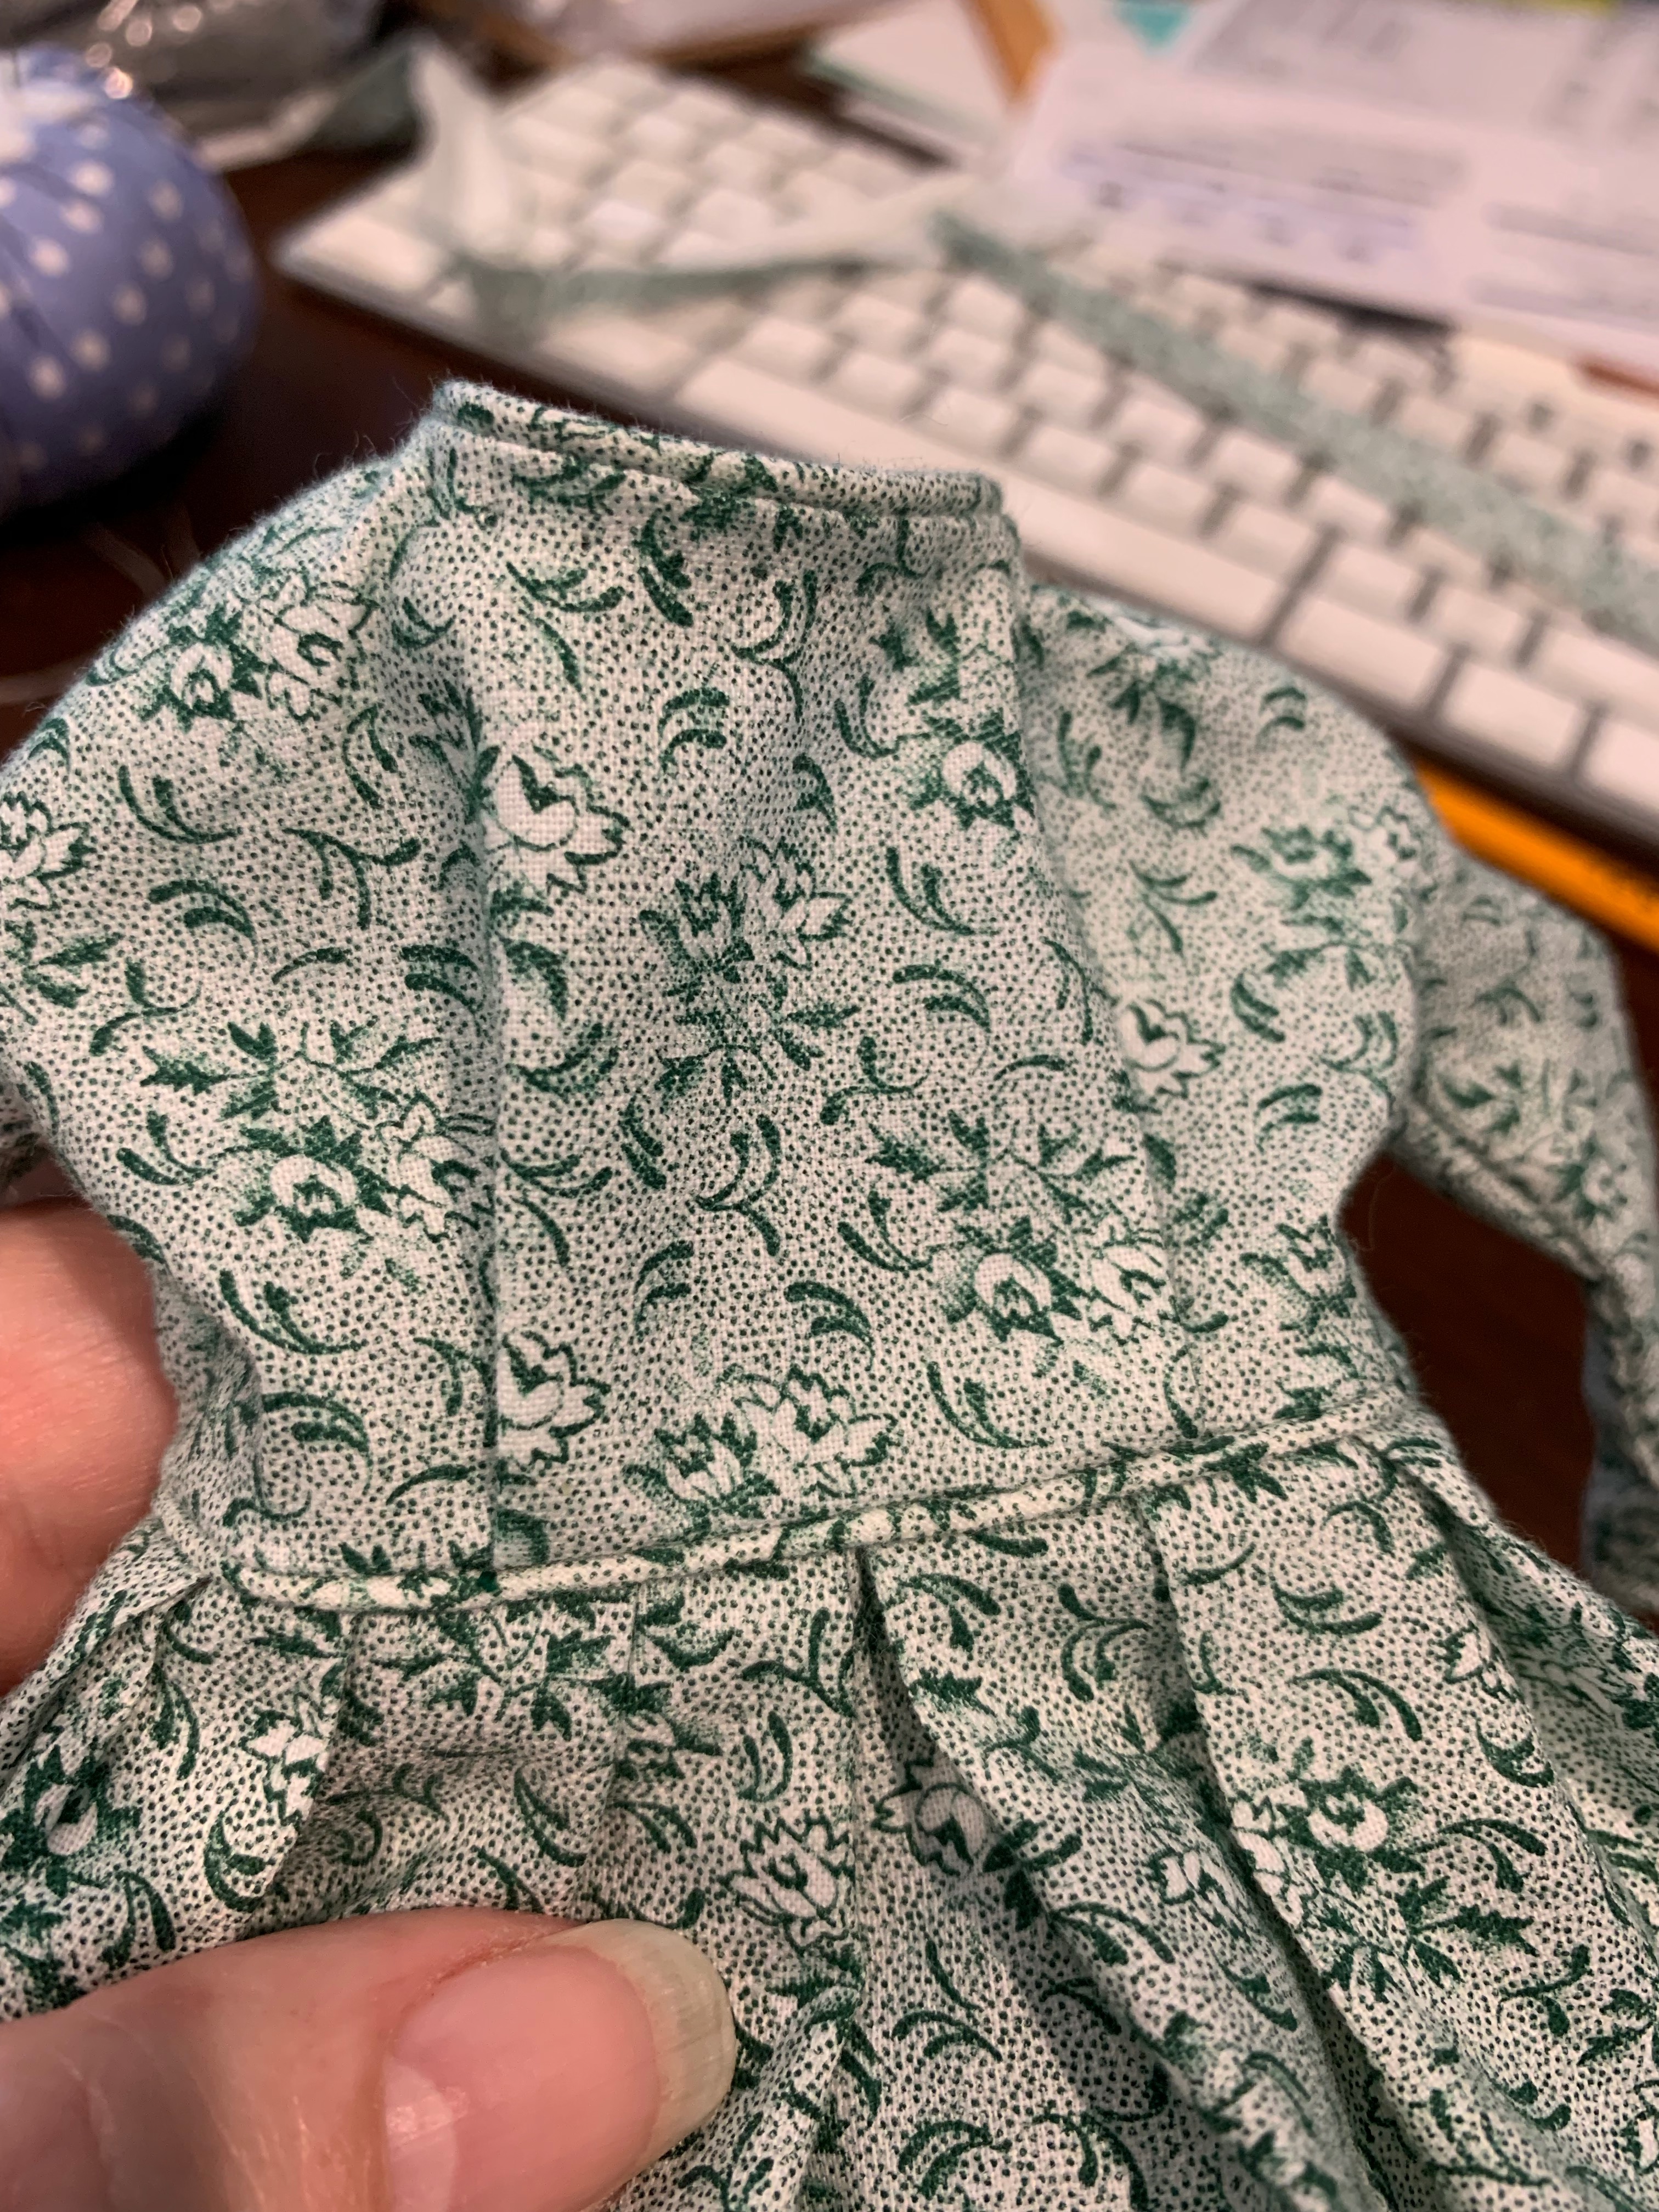
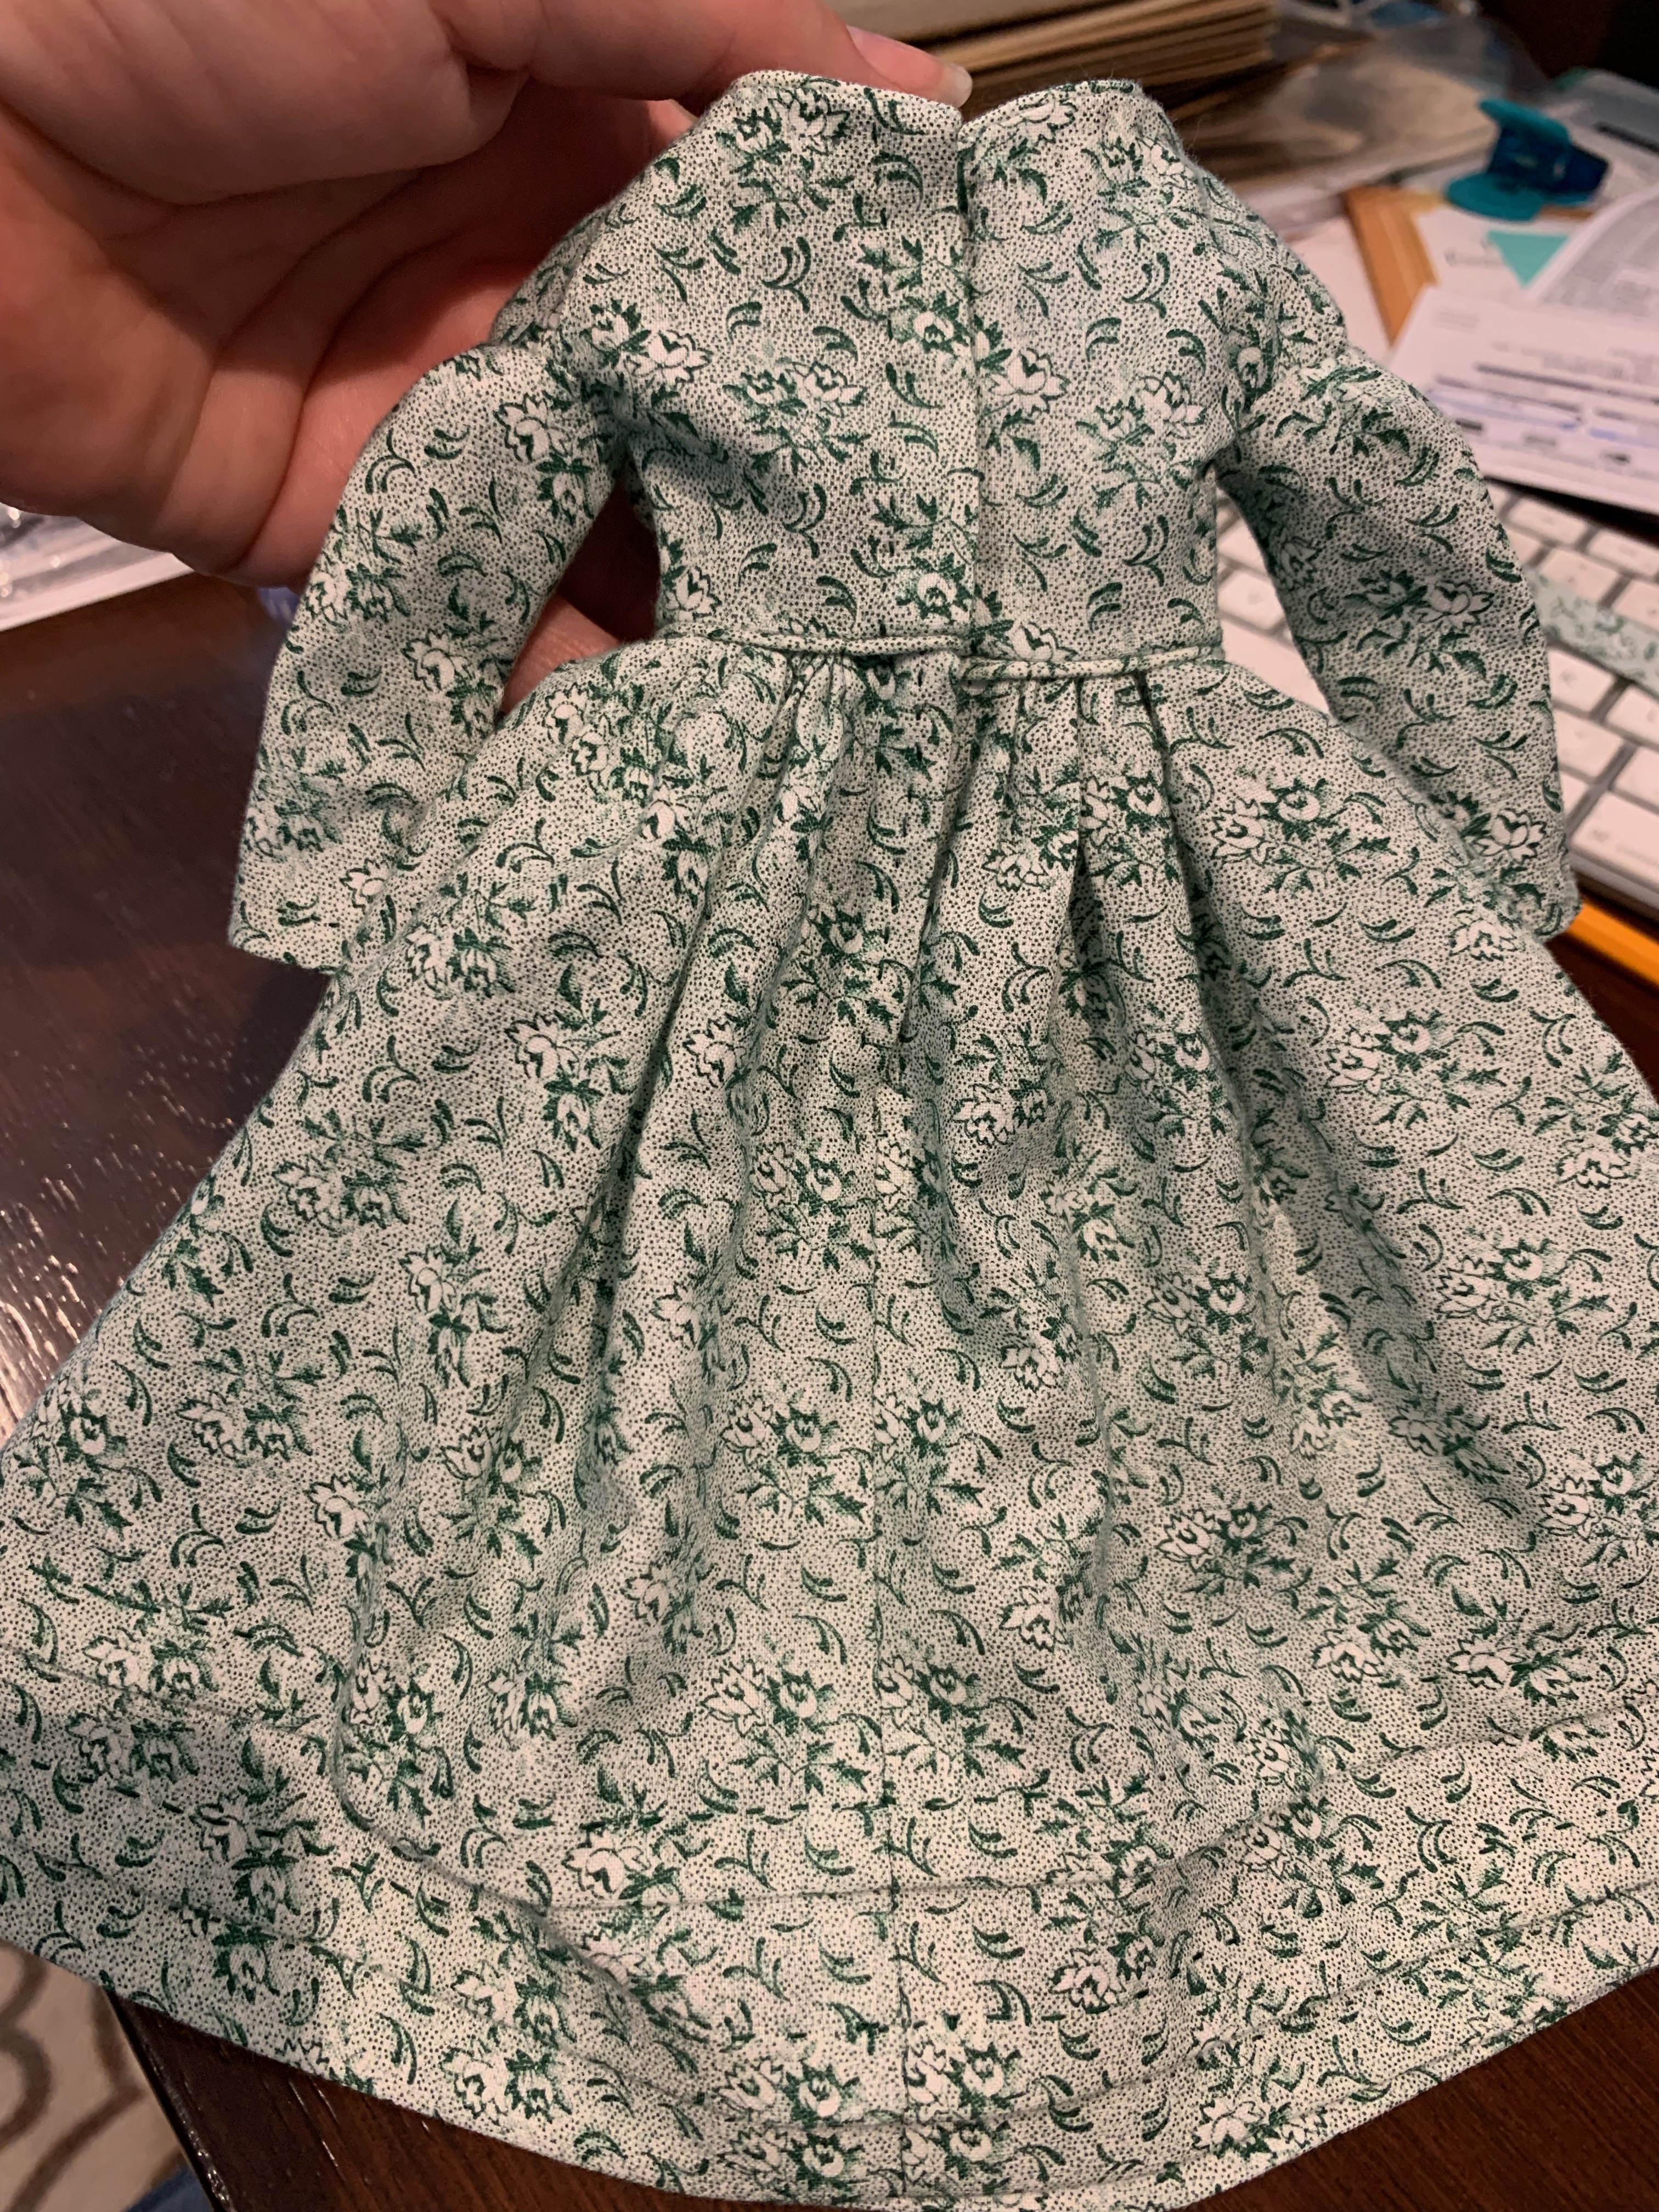
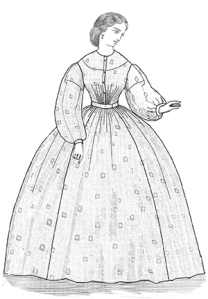
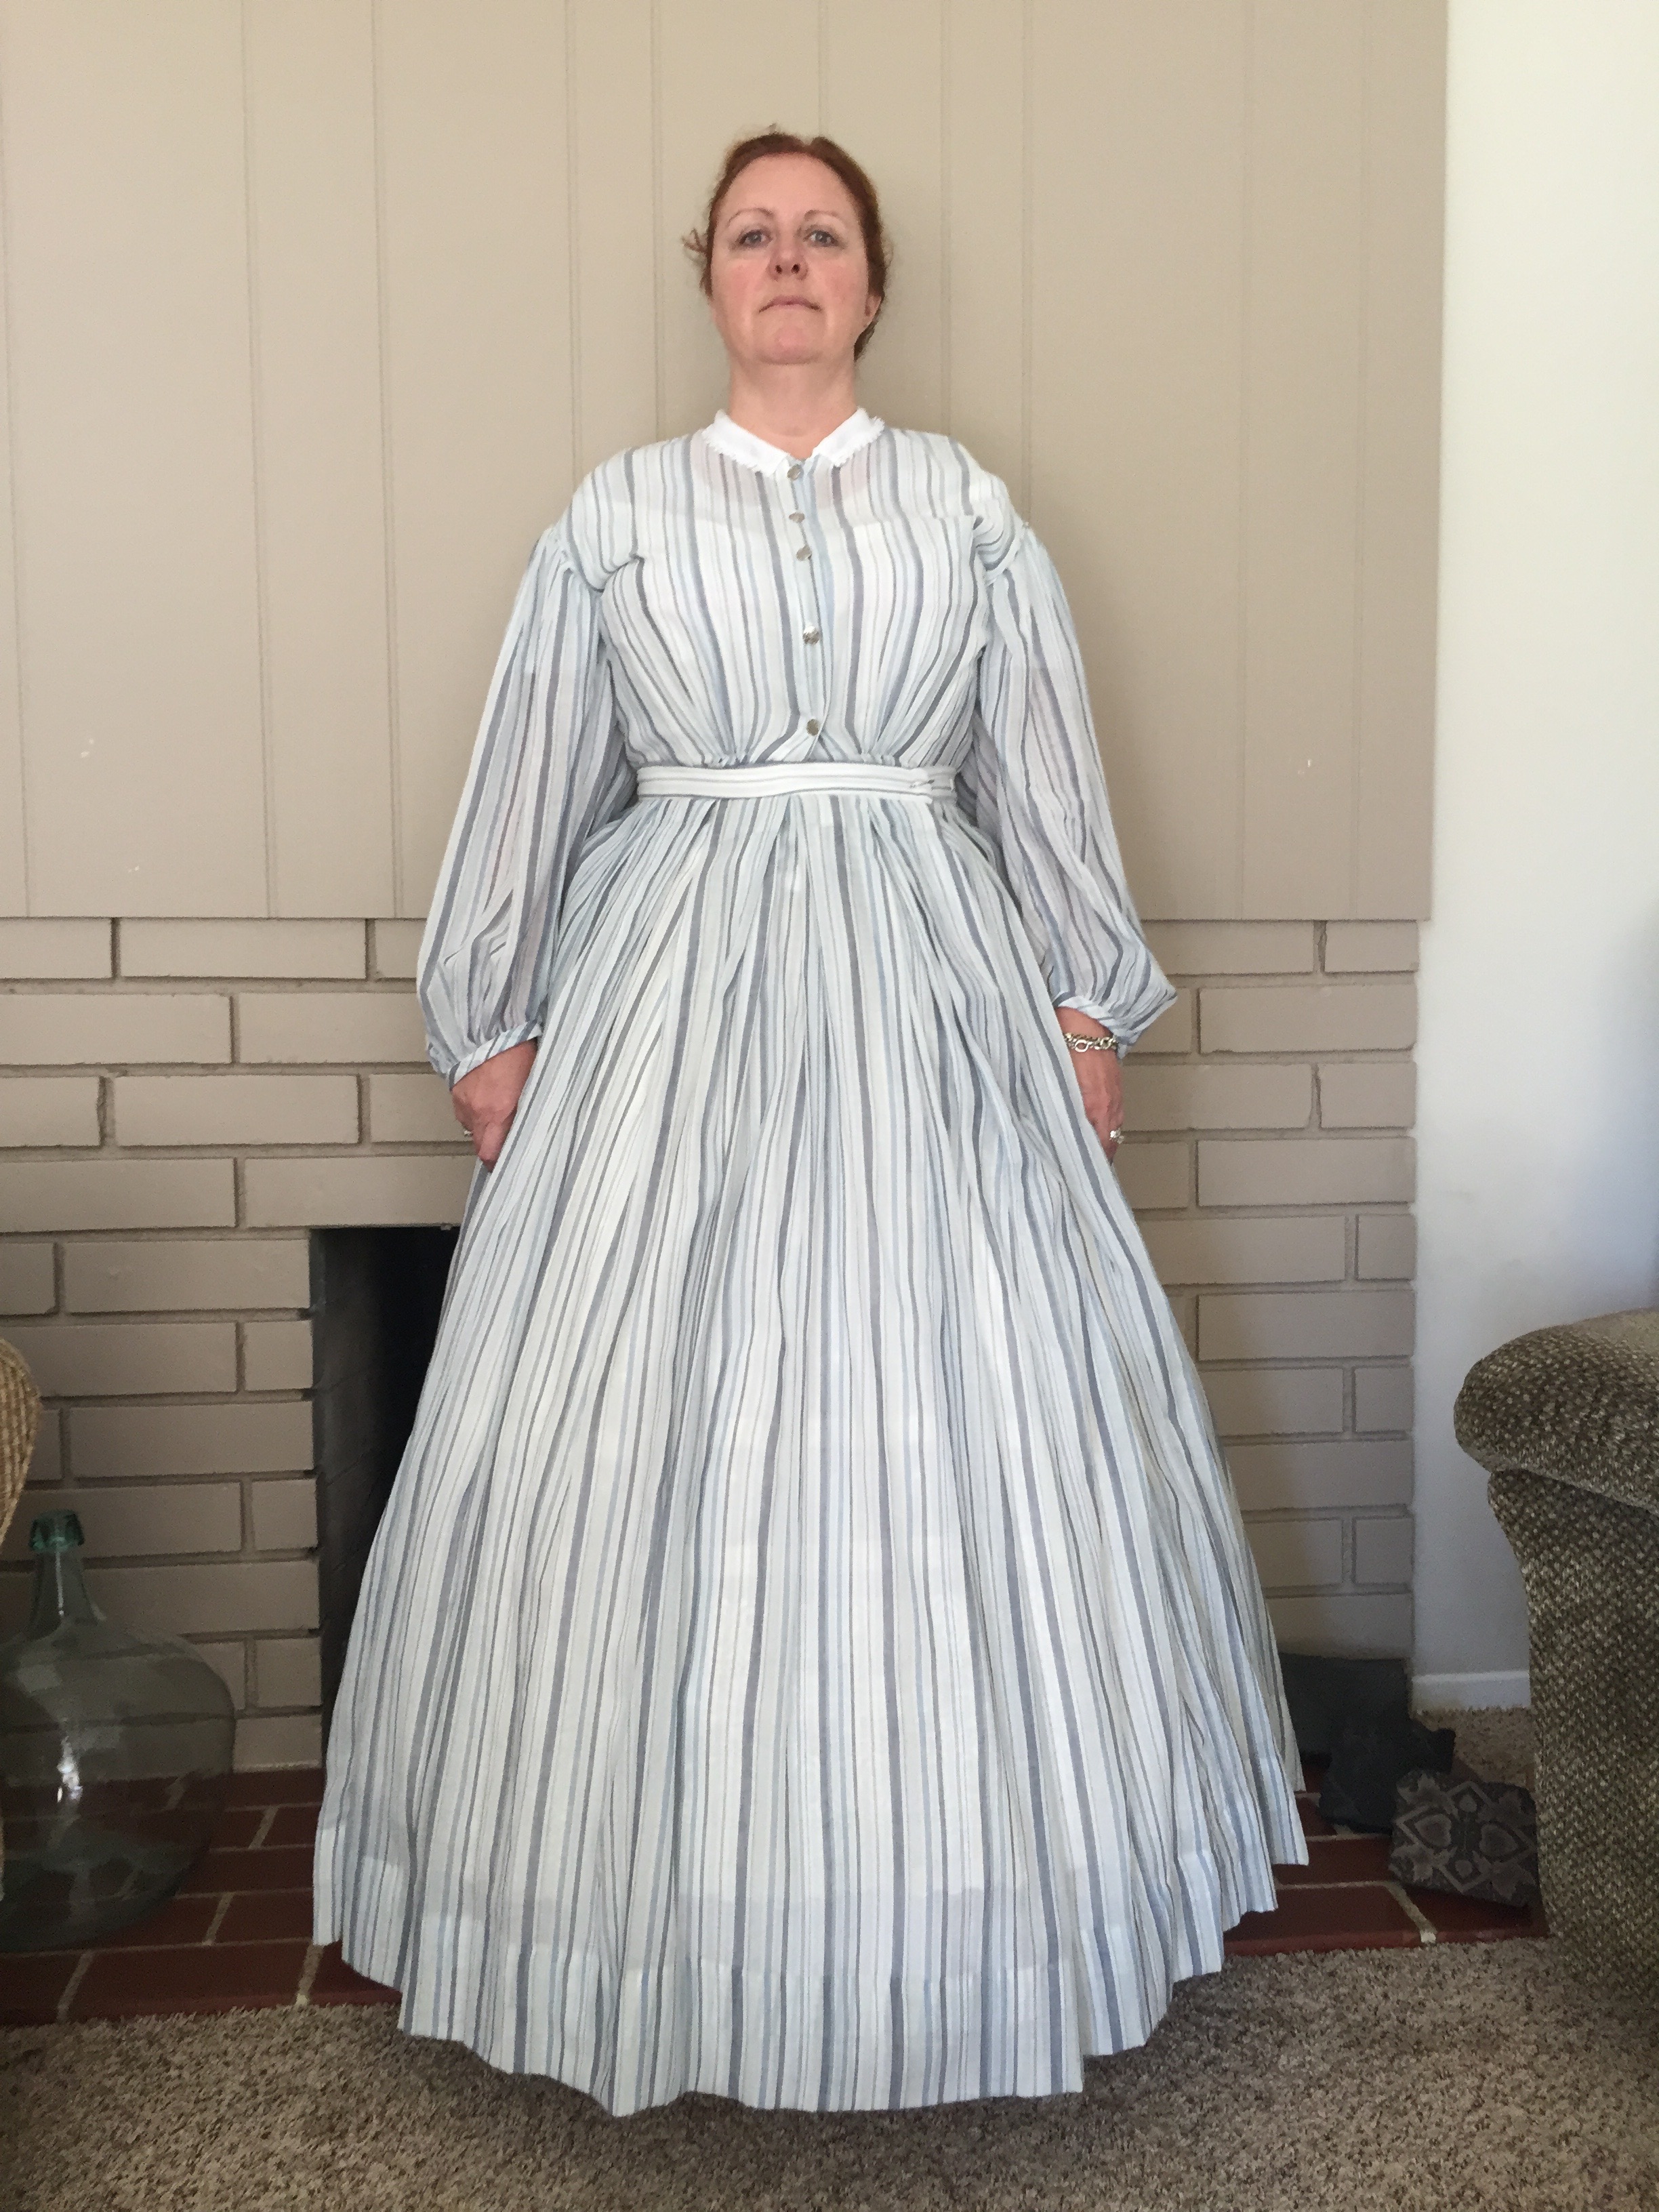
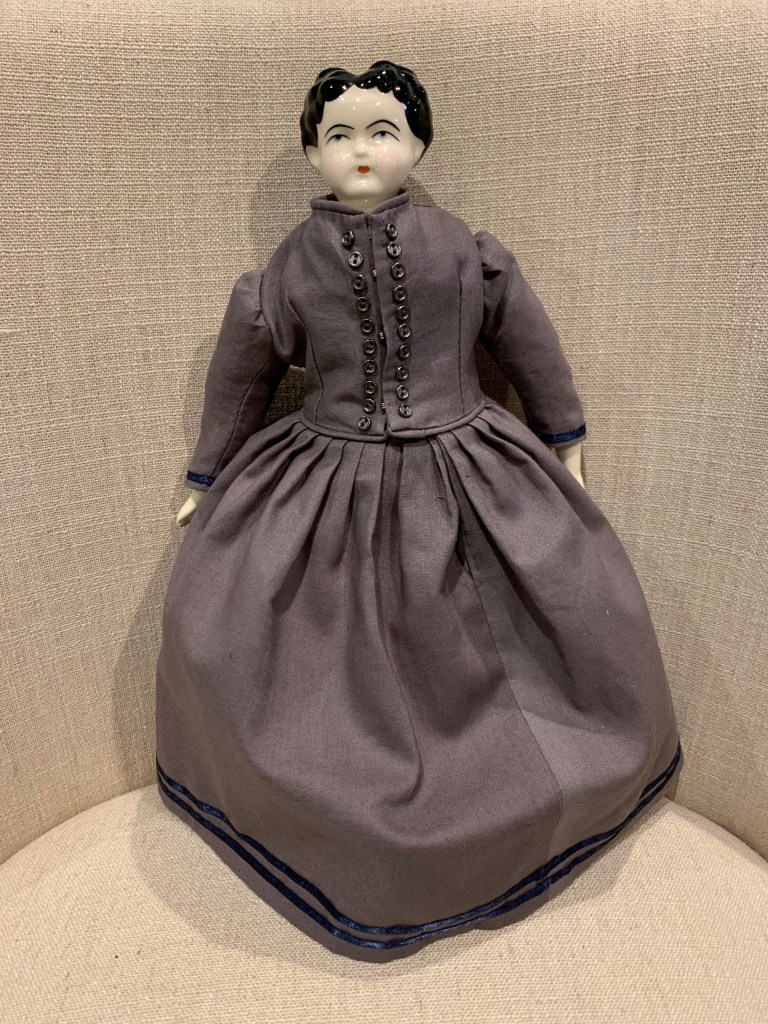
I decided to create a walking dress, or costume du promenade. It was described as being made from gray lindsay- a type of fine wool – with navy blue velvet trim. The original patterns were intended for a doll a bit larger than Nell, so I had to be careful to size it to her. I did not use wool because I don’t want to afford it for a doll, plus the majority of modern wool available at a big box retailer is a blend with a synthetic fiber to keep costs down and/or is heavier than I would need for a 12” doll. I substituted a nice cotton with a firm hand but fine weight.

Doll Sitting in Armchair

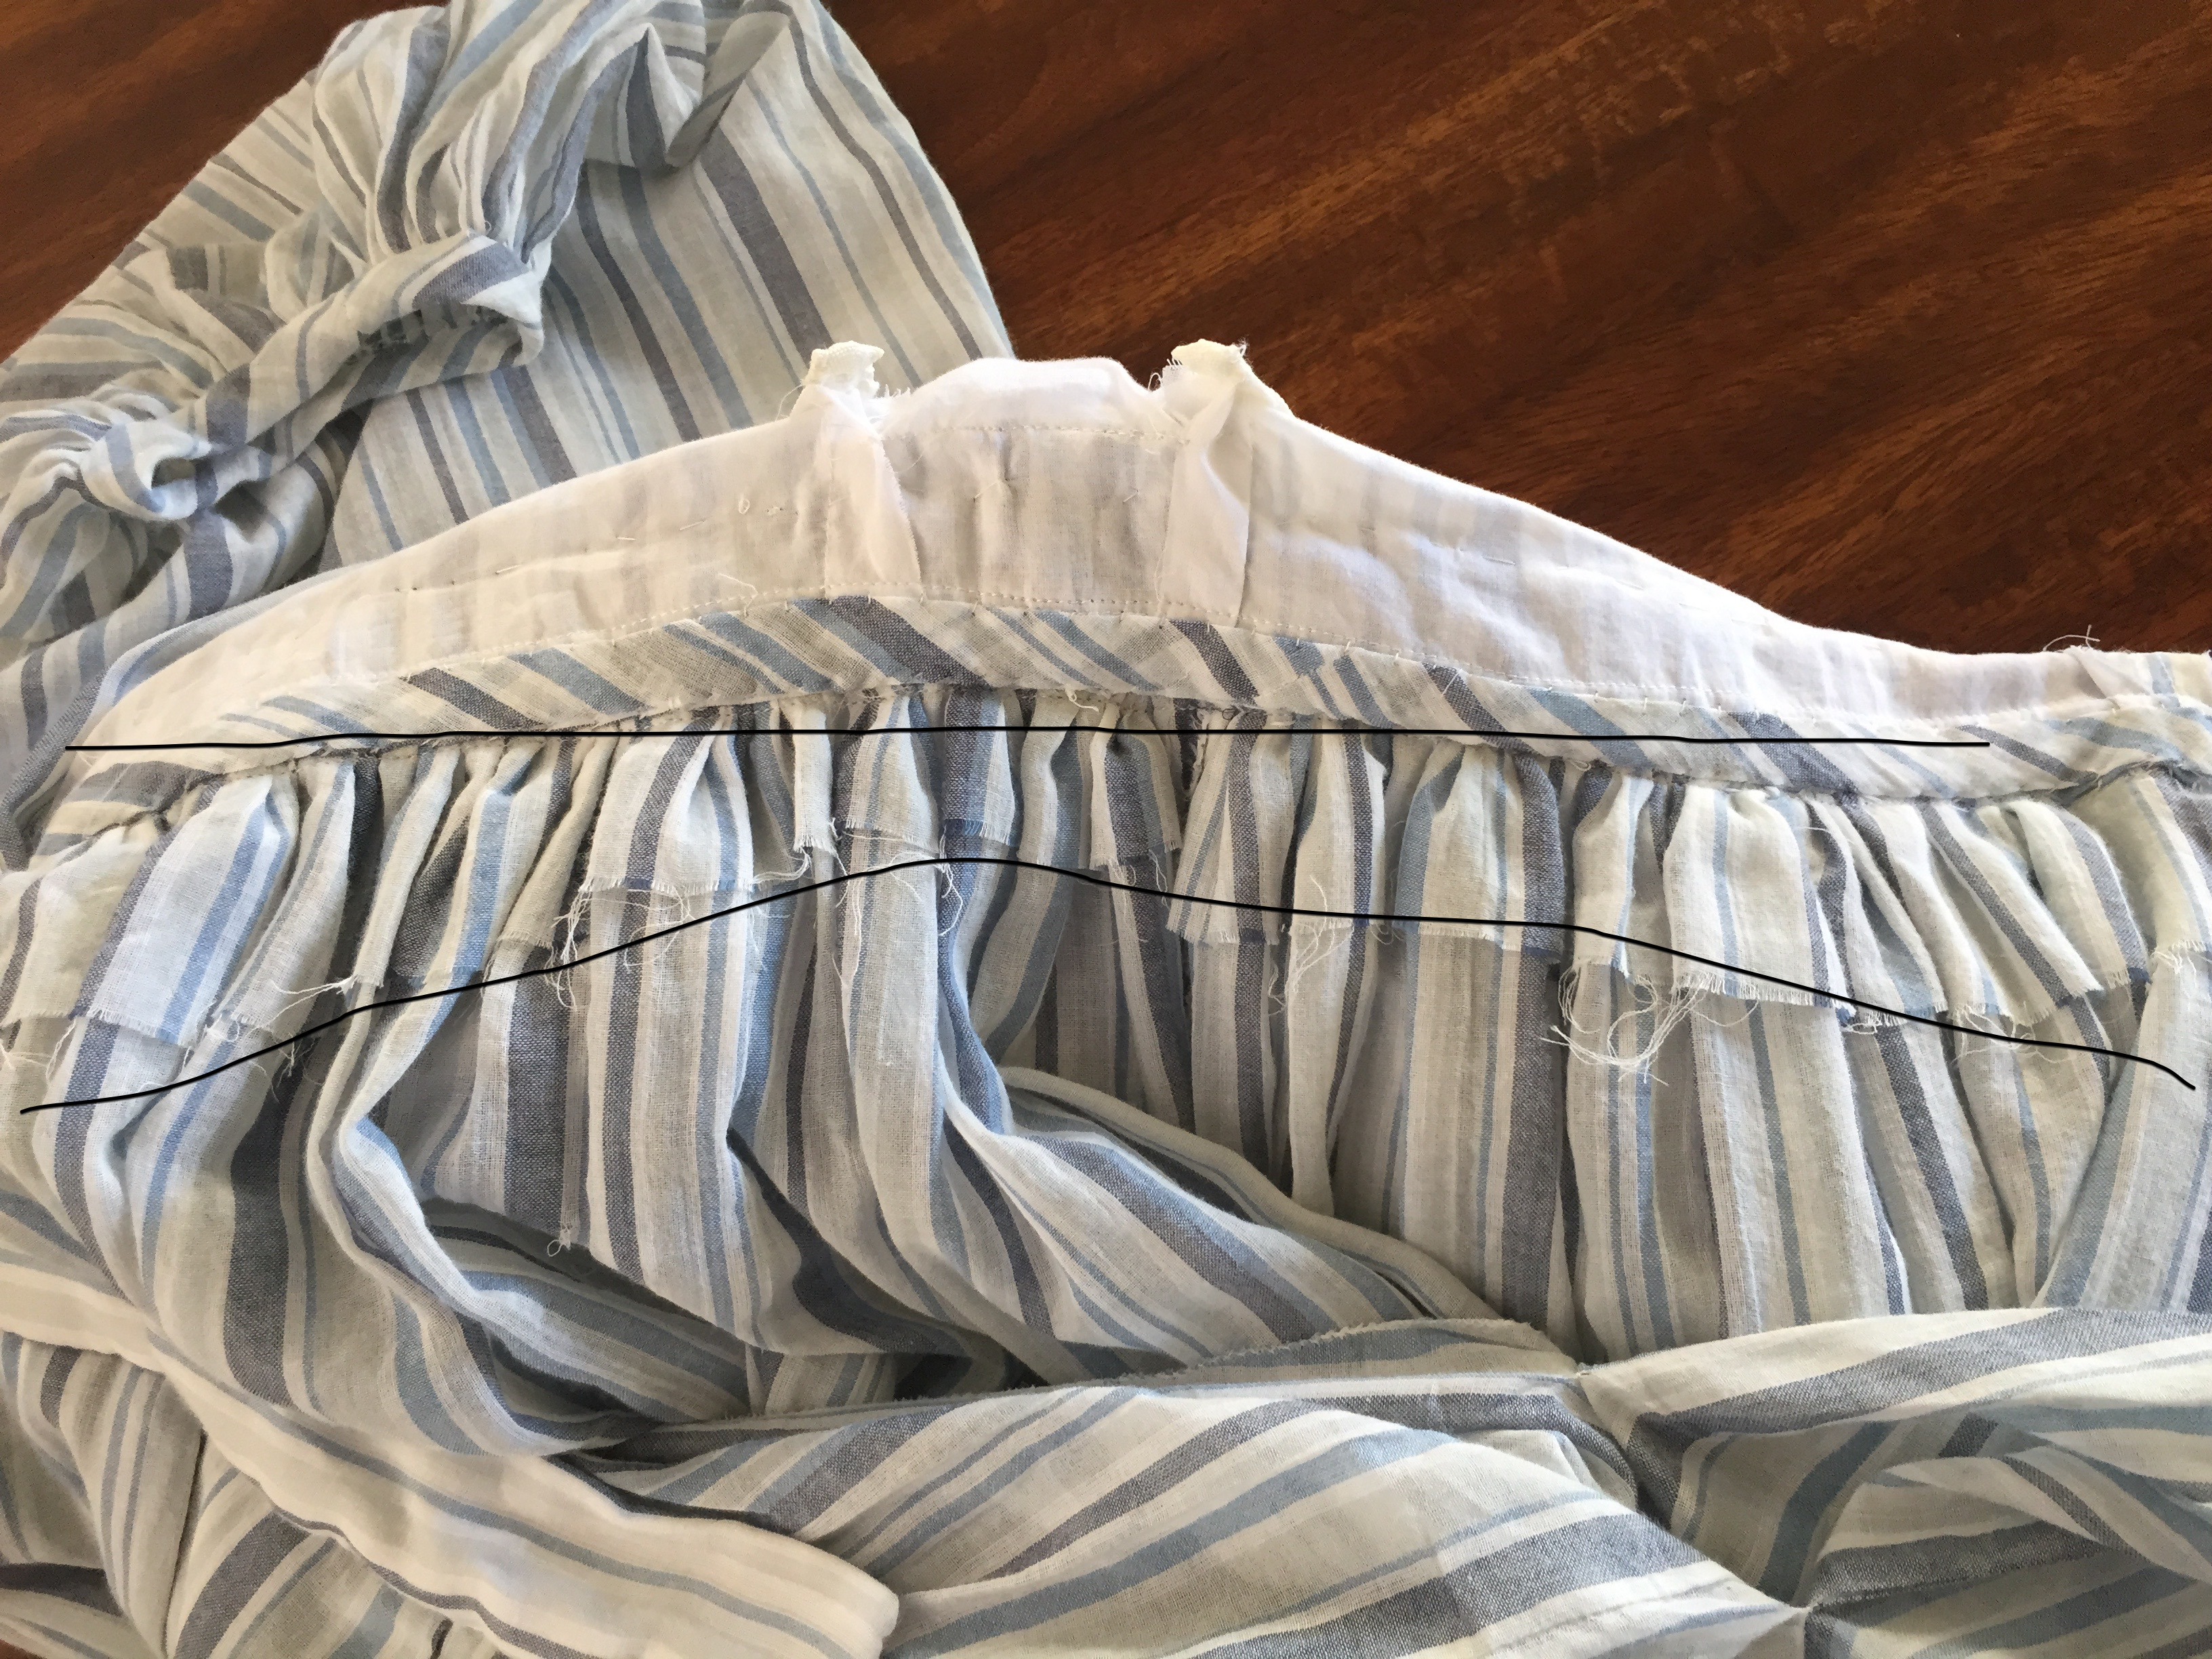
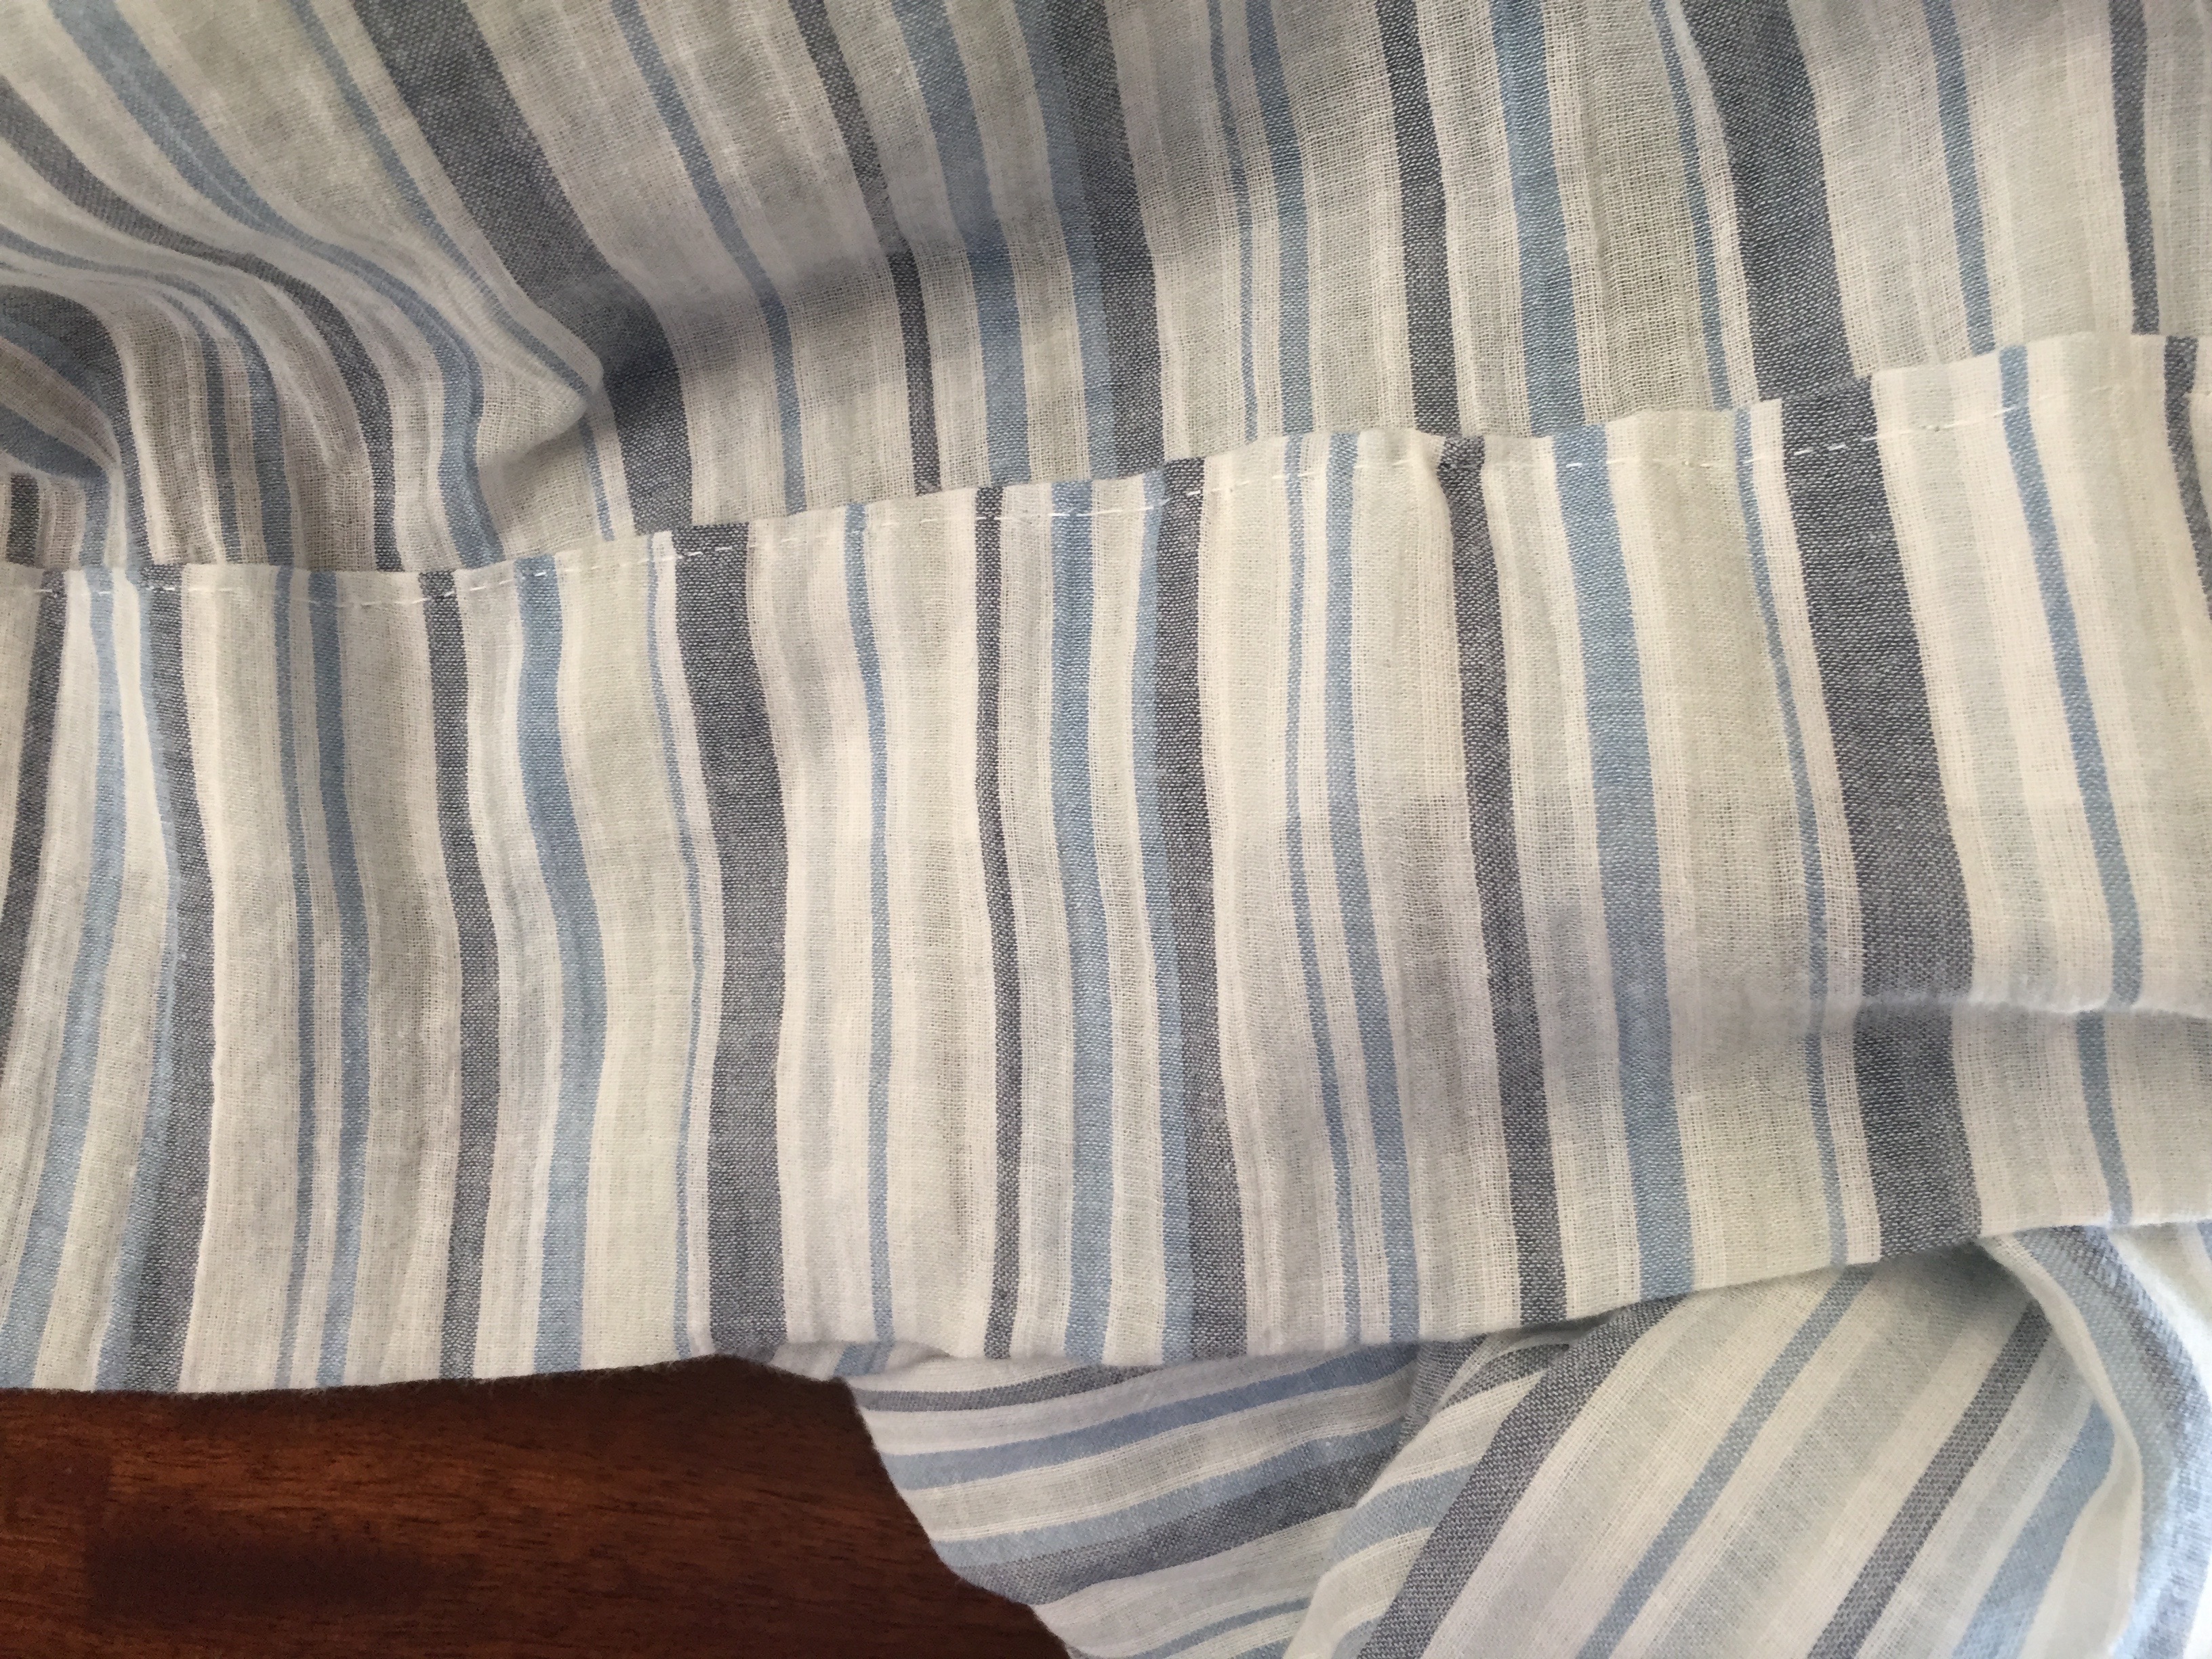
The source material includes the pattern page which has every pattern piece in the magazine all on two pages. The lines of each pattern were unique so you would find the dotted, dashed or starred lines, trace them and then make your garment. I followed this process, next having to print them and size them. I then proceeded to make a couple mock-ups of scrap to make sure it would fit Nell. It was quite an intensive process as I’m not completely knowledgeable in dressmaking. However, I persevered and eventually came up with a fit I liked.

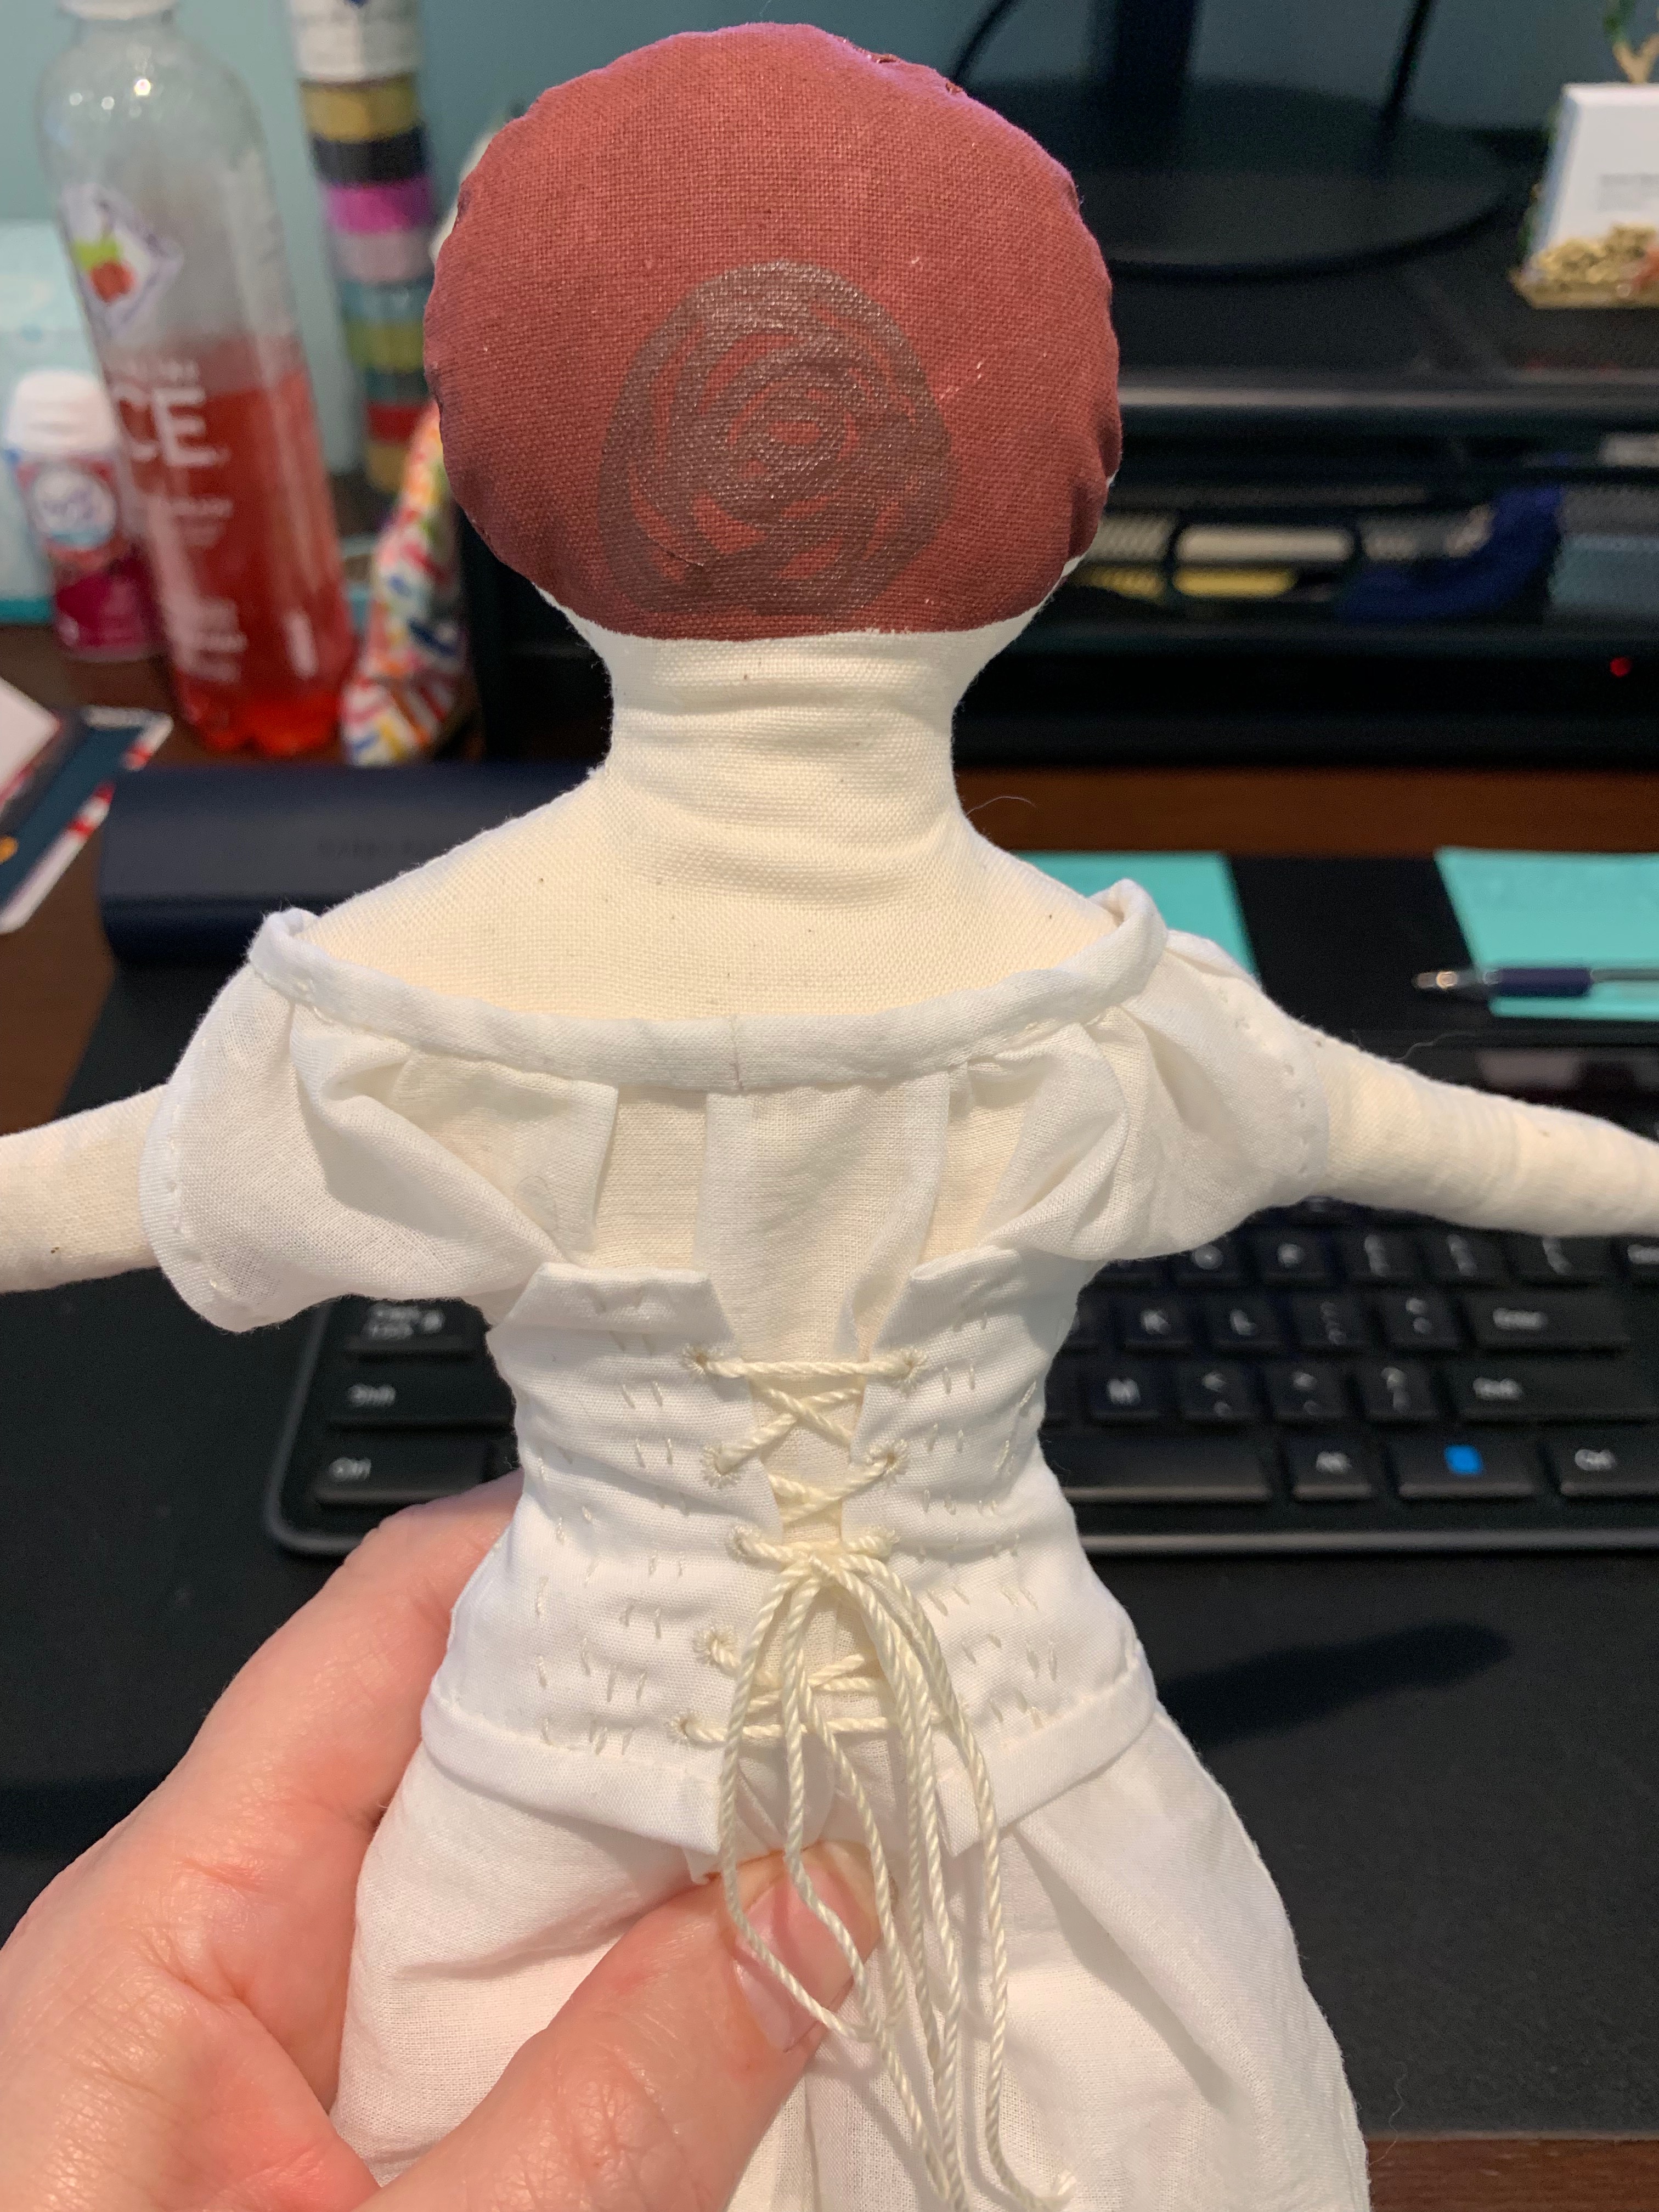
As it turns out, these doll clothes were literally miniature dresses, made exactly how full sized garments were made. They were intended to teach little girls how to sew their own clothing, which makes a lot of sense. Just, the construction methods of the nineteenth century don’t always make sense to our modern thinking. Usually doll clothes fasten in the back and the front just simulates the intended look. Fortunately I have experience at making 1860s dresses so I knew what to do with the pieces. Also, there aren’t actually any construction notes, just the pattern pieces. So, the description of this was:

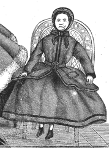
The doll is 48 centimeters tall, head not included. Her dress consists of a dress and a coat in gray lindsay. The overcoat, sleeveless, is retained by a belt. The skirt is 32 centimentres in length, 1 meter 50 centimentres wide; it is bordered with two bands in blue cotton velvet. Same trim for the sleeves and the collar of the bodice, whose figures 46 to 50 represent half. The belt clasps under a rosette. The overcoat is made from Figures 51 to 53; we put small pockets in it. The blue taffeta hat is made of stiff gauze, according to Figs. 54 and 55, furnished with archal thread, covered with taffeta, adorned with hives underneath, black lace on top.

La Mode Illustree, January 1, 1866

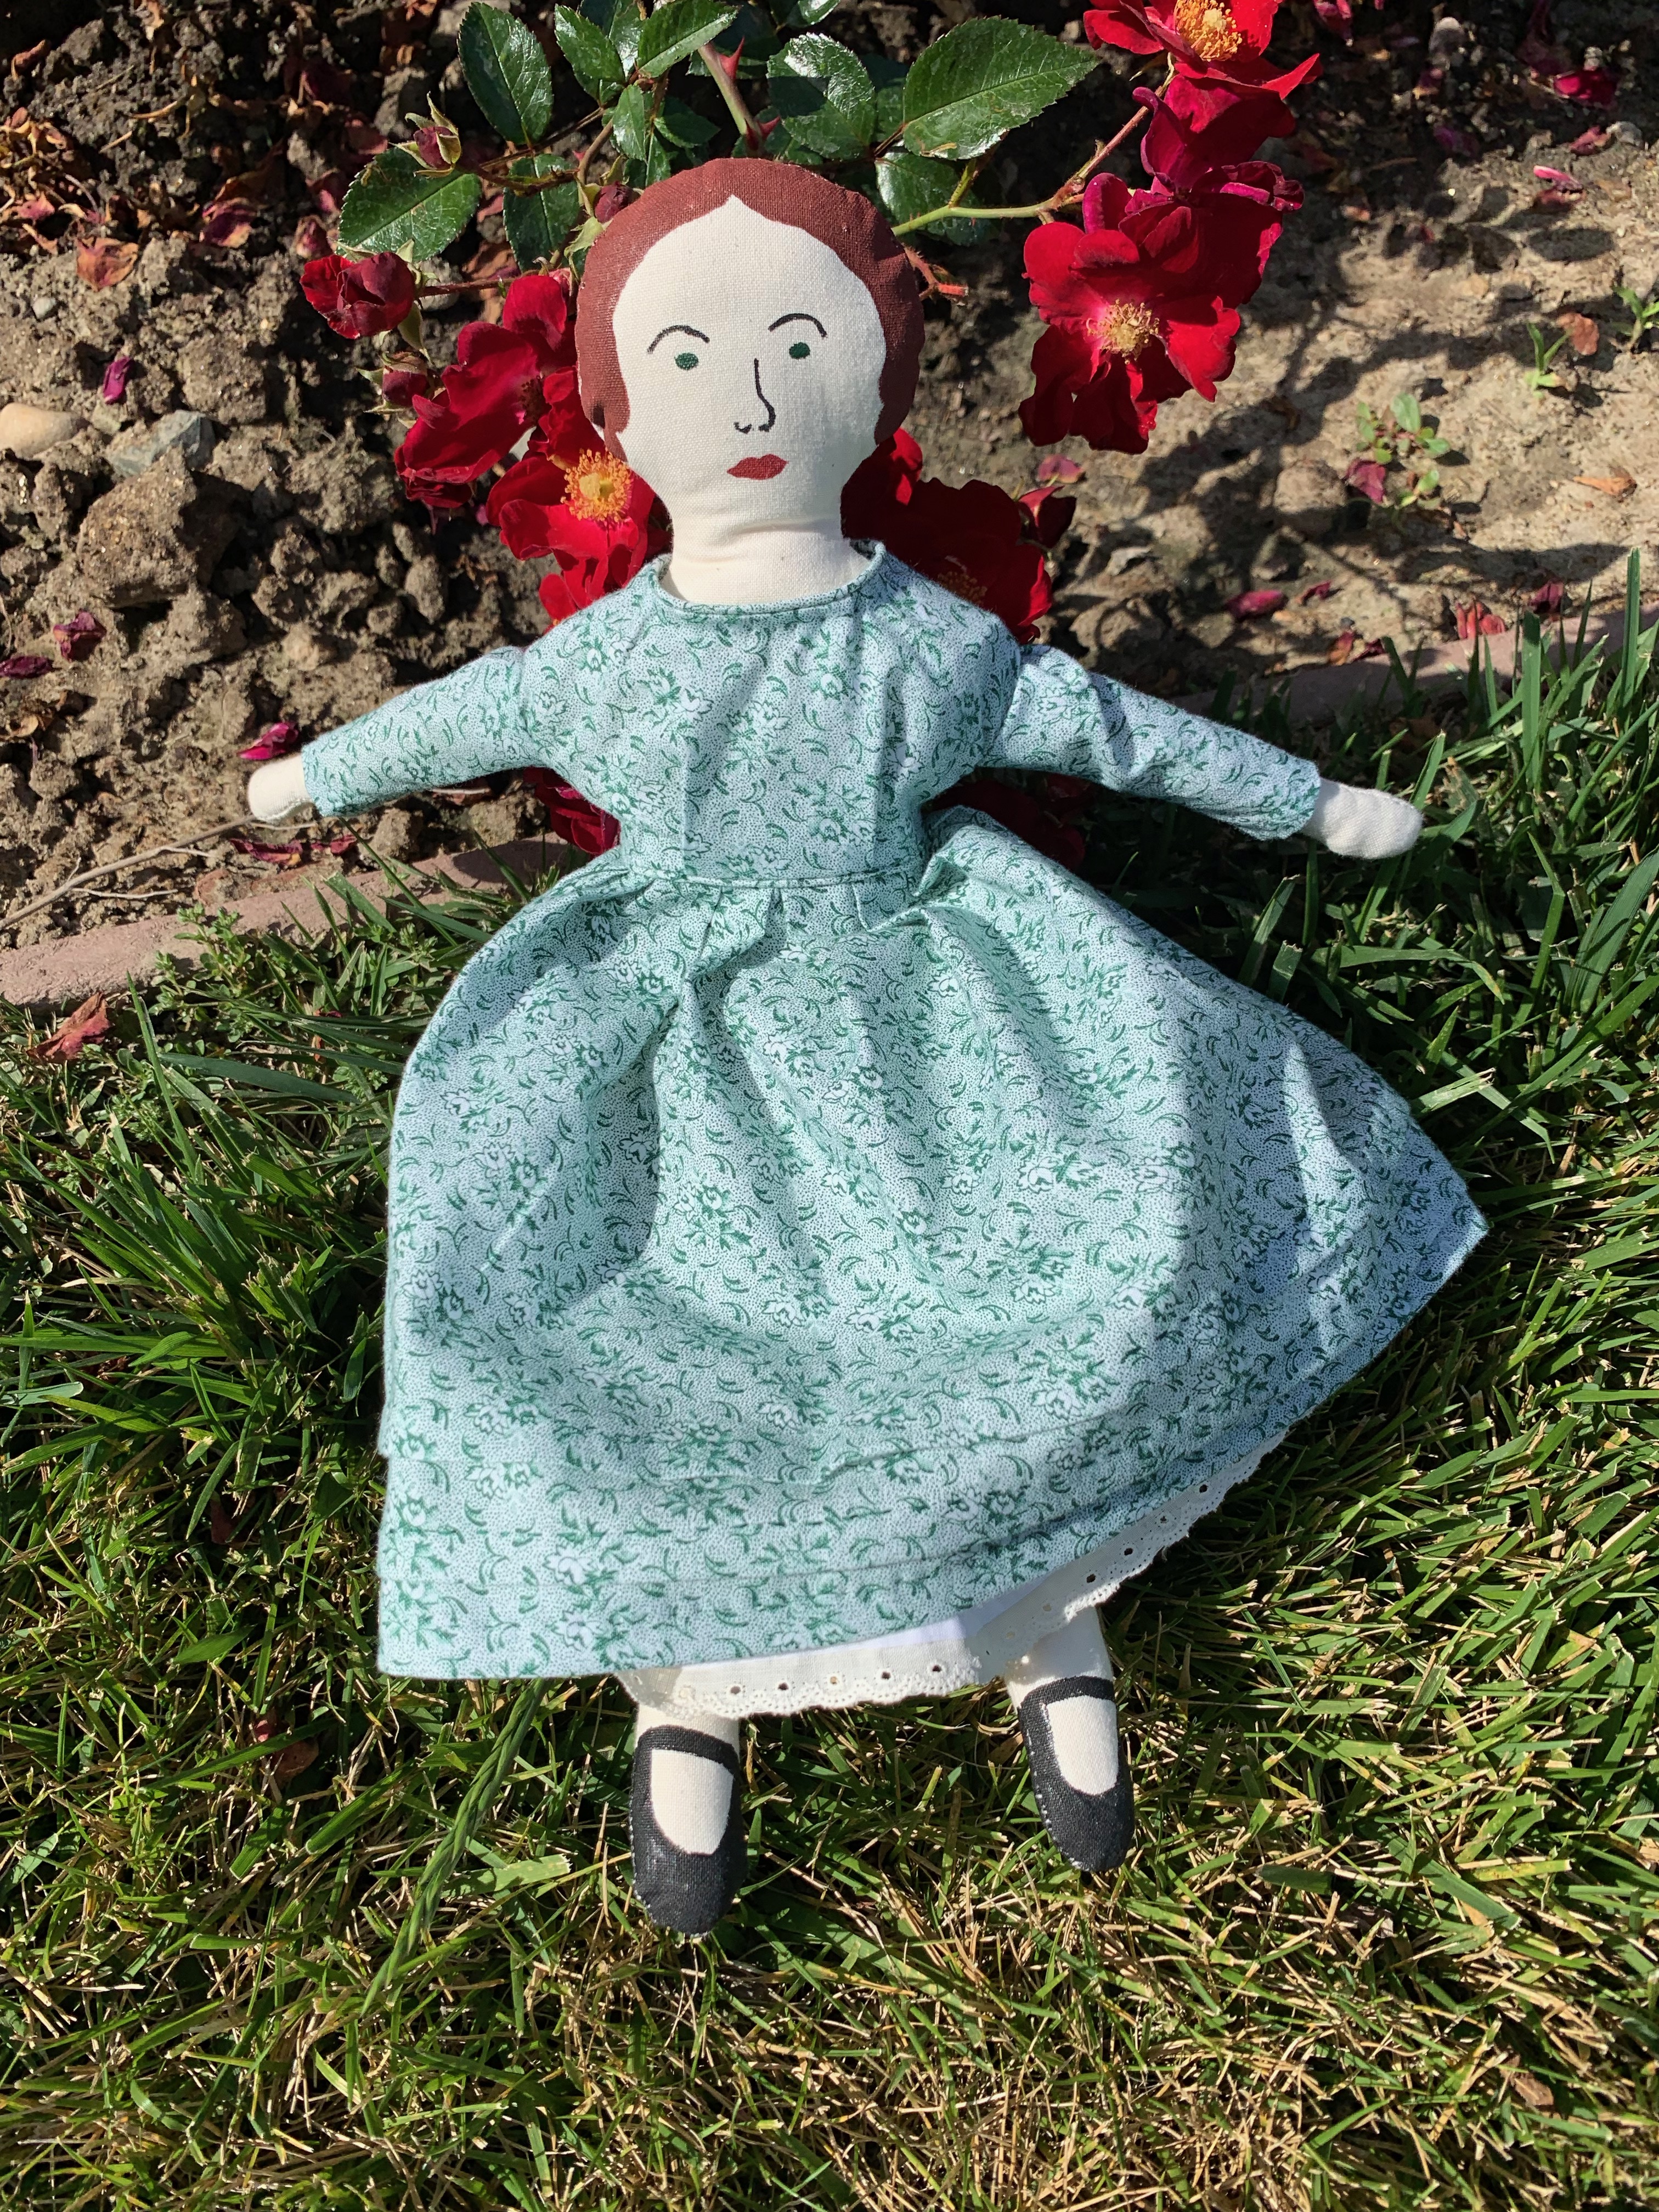
So here she is in her completed 1866 Promenade Costume. The dress includes a dogleg opening in the front, which requires careful attention to detail to ensure it stays centered. The bodice is darted as was appropriate in the era. While it shows 20 (count them all!) tiny, 5 mm buttons, they are nonfunctional and only for looks. This wasn’t unheard of in the 19th century either. I sewed on the buttons, which were squirrely to say the least, didn’t like how they looked, took them off and sewed them on again. I wound up sewing under the magnifying glass because they are tiiiiny. For reference, Nell is around 12″ – the height of a Barbie doll.

I haven’t attempted to make the hat because I have never made a hat and don’t know what to expect. But, at some point I will try it with scrap fabric. I do have some blue silk here that I have been dying to use for years.

The pattern pieces include letters in the various corners, which the person making them was expected to know meant that the two pieces with letters L and M, for instance, were to be sewn together between those two points. As I was making the third mock-up of the bodice, I started writing down the instructions. Not that I expect to share these with anyone, but it’s kind of fun to make a pattern with the sense that someone might sit down to sew your creation one day.

Since the dress is constructed exactly as an adult sized dress would have been, the knowledge of vintage clothing construction came in very handy! Perhaps one day I will convert this Promenade Dress to a dolly version that closes in the back, which would make it soooo much easier to reproduce. In its current form, it is an advanced intermediate skill level, but a dolly version would be just as pretty and much easier for less skilled hobbyists.

In the next post, I’ll dive into the construction of a cloth bodied China doll.

Dottie

This doll named Dottie was made for my sister as a Christmas gift. It’s my third making of the Little Cloth Girl pattern from Elizabeth Stewart Clark. Needless to say, I love this pattern.

You will notice an immediate difference in Dottie’s appearance from Emalie and Mernie, and that is her face & hair are embroidered. I’m not the best at embroidery (that’s my sister’s specialty), so I had to be very careful. I actually remade her face since I didn’t like the first attempt. All the embroidery is silk and I think it came out nicely. I also stitched in her fingers – not an easy task, plus she has jointed elbows and knees.

She again has the undergarments appropriate for a girl in the mid 1860s. I decided on this go-round that I would make a full wardrobe since she was a gift.

My daughter picked out this red fabric – which I just love. The dress is a darted bodice with sleeve caps.

The second dress is made from fabric my sister has picked out to make herself a dress – probably a wrapper. I thought it would be fun to surprise her, so I just asked for a 1/4 yard of any fabric. Now, once she makes up her dress, she will have a friend in a matching dress. How sweet! This dress is a gathered front yoked bodice. I really like how it turned out.

I made a quilted petticoat from flannel. While you can’t really see it, it has the same diamond pattern quilted in as Mernie’s.

The next piece I made was the basque coat. I used a sueded fabric to make it seem like wool or a heavier fabric. The trim is brown velvet and I love the nonfunctional buttons.

My favorite piece is the blue lightweight coat. Like I said earlier, I’m not much for embroidery, but I wanted this to look like it has braid, which was a common embellishment. The little button just finishes it off.

And just because I’m a glutton, I made a little handbag, a bonnet, a quilt that features all the fabrics used in the clothing, and a pillow. Oh, and inside that handbag are mini books I made. As an aside, I made another of these little bonnets for a Holiday Gift Exchange in the Historical Costuming For Dolls Facebook group. I’m not the only one obsessed with them!

I hope that you have enjoyed this tour of Dottie and her wardrobe. In the next post, I will showcase a costume made from a vintage fashion magazine.

Meet Nell

For someone who is a documented doll disliker, I have become fascinated by them. Not playing with dolls, or displaying them. And not all dolls; I like very specific styles of dolls designed in the mid-nineteenth century. Of course I can’t afford the real dolls – or, more accurately, I won’t afford them.

This doll, Nell, is a reproduction late 1860s-1870s cloth bodied doll. She has China head, hands and feet. I did not make her, but adopted her off eBay. She was designed by Tasha Tudor in 1977. I don’t know much about Tasha Tudor except to say she was an artist who loved dolls. In the 1970s there was a revival of these China head dolls sold as kits for home doll makers. Many brands offered the kits, and I don’t know how accurate they were.

Nell was poorly constructed – her legs are twisted and her arms are attached incorrectly as well as being rather fat. I could have remade her body, but I decided I love her as she is.

Sweet Nell came to me in a truly unattractive outfit. Remember she was made in the 70s. The dress was made from orange sprigged searsucker. Yikes.

Since I want to eventually use my dolls for teaching and display at history events, I could not leave her in this crazy outfit. From the muslin out, I redressed her. First came a new chemise and drawers from white cotton. I figured for a nicer doll I could have some fun with her corset and made her a corded corset with this beautiful brocade I had. Add a nice tucked petticoat and we are ready to keep going.

At some point after the first photos I remade her chemise. I never did like the first run at it. The new one is tucked to the neckband and lays much more smoothly. Unfortunately for Nell, it took me another several months to make her dress. I took a break to decide exactly what to make for her. Since she is later 1860s, I wasn’t limited to typical hoop skirt styles. While the basic bodice didn’t change too much after 1864, skirts and embellishments did.

I spent some time researching exactly what to make, delving into French fashion magazines and dreaming of the garments I would make her. And then I made a basic, almost boring, dress.

The fabric is cotton meant to mimic a patterned wool, which would commonly have been used. I modeled the dress off the amazingly versatile patterns from Liz Clark, modifying them to fit Nell. The skirt has box pleats at the waist, which were a more stylish method of attaching a skirt. It was a bit boring on its own so I added the pink ribbon bow and belt.

Next episode, look for the gift I created for my sister.

More Dolls

In all my spare time, I have made some more dolls. I never thought I would become so enthralled with dolls or their clothes, but 2020 was a year of sucki-ness, and I guess I actually did have some spare time. Anyway, I made a second doll from the Elizabeth Stewart Clark pattern.

This is Mernie. She has similar undergarments to Emalie, except I tried making a quilted petticoat. Since I had never even quilted before, this was quite a challenge for me. The pattern says to follow any quilting pattern. Well, I don’t know any quilting patterns, let alone an 1860s era pattern. So I made one up.

The pattern is really designed to hold the layers of fabric in place, I measured out the diamond pattern I wanted, adjusted, remeasured, then marked it out in chalk. I thought it would take forever. What I discovered was that quilting is kind of zen. I get in the zone and felt remarkably relaxed when I finished.

Mernie has a gathered front bodice with bishop sleeves. I like the gathered front, but let me just say that the cuffs of the bishop sleeve are insanely tiny. It was a challenge to finish them nicely – but one I felt up to completing.

I quite like Mernie. I feel I made improvements on my first attempt with this pattern.

Well hi there!

Yes, it’s been over a year since I wrote on this site. Finally I have something fun to write about – microblogging on Facebook just barely scratches the itch, but time has been a constraint too. So, here we go.

I never finished that “girls midcentury” dress project, because well, my girl has grown out of the chemise and drawers I made her, and is not really interested in history events any more (boo). She will go if I make her, but would prefer not to.

To fill the void, I have made another “child” to dress. Everyone, meet Emalie!

IMG_1266.jpeg

Emalie is based on a mid nineteenth century doll style and the pattern is a digital download from the amazing Sewing Academy by Elizabeth Stewart Clark. You can get the pattern at her website and it is easy to follow. There is also a lady sized doll that I’ll probably get next. Emalie is about 13″ tall, made from all cotton and sewn 100% by hand.

Before I was able to make her dress, I had to start at the beginning and make her! She is made from cotton muslin and stuffed with cotton. I chose to paint her face and hair as well as her little Mary Jane style shoes. Her hair is a red brown and her eyes are green. I could have done a better job at stuffing her, but since she is my first, I will have to accept the flaws. I also think I might have put her arms on upside down. The pattern was a bit unclear exactly how to position them and she just holds her arms out wide for a hug. Otherwise, making the doll body was super easy! I used cotton balls to stuff her, and just mangled them up a little bit to make them more flexible.

Next, I made her undergarments. I used a very lightweight cotton for her chemise and a stiffer cotton for her drawers. I’m not thrilled about the tucks on her left leg of the drawers as they got a little messed up. The scale is so small that even a minor mistake can take the whole seam off kilter pretty quickly. I used the same stiffer cotton for her stays.

img_1237.jpegIMG_1239.jpeg

Like how I painted a bun on the back of her head? :-)

The chemise, drawers and petticoat are edged with some vintage lace whitework that a friend of my mother’s gave to me. For the stays, I stitched in the appearance of boning channels but there aren’t actually any bones or cord in them. I didn’t want to get “too” carried away, and I knew I would be hand sewing the eyelets for the lacing. I think I spent more time on the stays than on the rest of the clothing! The stays are laced with a narrow cord. Luckily for me, I had made the actual child sized stays for my kiddo a while back so I understood the process. The pattern has mistakenly forgotten to include the construction notes on the stays. I will forgive Ms Clark because she is awesome in so many other areas!

IMG_1257

Here is her pretty petticoat with a wide 1/2″ tuck. If you ever want to fine tune or refine your hand sewing skill, a doll is a good way to do it. The pieces are small and there is almost instant gratification. I have found I can take very tiny stitches that look almost like machine stitching. It does cause some eye strain however.

Finally, I made her a pretty green dress. I selected this fabric to make a dress for Melody when she was a baby. She grew so fast, she outgrew the pattern I had! IMG_1259.jpeg

Here you can see the tiny piping at the neckline and waist. This is how dresses were made in the mid century, so I chose to do that here. The piping is made on the bias and I used the same cord that I used on the stays. It was the perfect size.

IMG_1261.jpeg

Here’s the back of the dress and you can just see the green stitching where I made the tucks in the skirt. Fortunately the thread sort of disappears in the floral pattern of the fabric. The dress, drawers and petticoat all close with a tiny hook and thread bar.

So there you have it! Miss Emalie will be visiting with us at events from now on and I’ll probably make her a pinafore at some point. She just looks so pretty, I couldn’t wait to share!

IMG_1265.jpeg

Pattern Review: TV 447 1863 Sheer Dress

I have been sitting on this pattern for several years, all while sweltering in the summer heat. I purchased my fabric easily three years ago and have been wanting a sheer dress for probably five years. Summer in multiple layers of clothing is definitely more warm than it has to be! So, this past spring, I finally decided to just do it! I have researched various patterns available on the market, including some Big Three patterns, Peachtree Mercantile, and others, but I know that Truly Victorian makes beautiful, accurate, and easy to follow patterns, which is why I settled on this one.

Truly Victorian TV447 1863 Sheer Dress

Truly Victorian TV447 1863 Sheer Dress

I chose a lovely sheer cotton in blue and white stripes that I found on clearance at a chain store. I know of more than one person who has made a sheer of this fabric. Hopefully we won’t all be at the same event together!

Pretty pretty

Pretty pretty

The fabric is 54″ wide, but since at the time I didn’t know what pattern I would be using I purchased 10 yards. Lucky for me, this overestimation was a good one. The sleeves on this dress are full and wide, plus since my fabric was directional, I was able to cut the stripes going from shoulder to wrist. Anyway, before any of that, I calculated my measurements and pattern size following the instructions on the pattern. The thing about the TV patterns is they allow you to custom fit your garment before you even start sewing. And once you do that, you can easily make up a muslin for a better idea on fit.

Dark image of my muslin

Dark image of my muslin

Sorry this is not better quality, but almost all the mirrors in my house that are big enough are impacted by light diffusion. What I learned here is that the waist of the under bodice was a little too full but the bust was a pretty good fit. So I took in the darts a bit and retested it. I did not do this all by myself, by the way. I submitted my questions to the Civilian Civil War Closet group on Facebook for hints and help – there are clothing historians, professional seamstresses and experienced clothiers there who are willing to help for free. I just couldn’t overlook that knowledge base. I also asked my friend Shelley Peters for real world tips as she has made this pattern a lot. Had I needed it, the amazing Heather McNaughten at Truly Victorian would have helped too. As an aside, this just confirms for me that this community really wants its members to succeed!

Anyway, after the changes to the muslin, I traced that as my new under bodice pattern piece and went forth to sew! This is the first time I have made my own bias and bias piping, which was used on the neckline facing and armscyes. I found the instructions sufficient, but had used better instructions on a Simplicity costume pattern and did that instead. They just made a bit more sense to my thinking, the result is the same.

IMG_2434

Piped facing to finish the raw edges of the under bodice.

IMG_2439

Piped armscye

The construction of the garment is for the most part very easy. I found the TV method of inserting the sleeve into the armscye backwards to what I am used to so I just adapted and made notes on the pattern.

Hand buttonholes

Hand buttonholes

I sewed this in a combination of machine and hand sewing. My fabric was so very delicate that even though I have a high quality machine, it sometimes would bunch up in the feed dogs. I wound up hand sewing much of the finishing stitching, such as on the piped facings, and also hand sewed all the button holes. My reasoning here was twofold – I wanted historically accurate buttonholes and since the fabric was so delicate it was impossible for me to machine sew them to the standard I desired. I used silk thread for the buttonholes. The buttons are vintage shell buttons, much higher quality than the cheap flaked mother of pearl available these days. They were purchased through Farmhouse Fabrics.

IMG_2441

Sleeve band

For visual interest I cut the sleeve band on the bias. Maybe there is a chance of this stretching over time, but the band is so generous around the wrist that I don’t expect that to happen.

IMG_1985

Finished bodice

At this point, I went back to the Civilian Civil War Closet for help. The pattern does not include a collar pattern. I don’t care for my look without a collar, so I googled for tutorials. The best suggested laying the pattern pieces for the bodice front and back together as though they were sewn, then tracing the curve from center front to center back, next extending that to a simple collar width. I did that, but found mine to be fluttery and off. The amazing Liz Clark of the Sewing Academy helped me immensely with tips on how to correct this and redraft the collar. I’m delighted to say that I was successful!

IMG_2438

Finished collar

I added the fine tatted lace which I purchased at Farmhouse Fabrics.

Next, waistband finishing. Since my fabric is 54″ wide, I didn’t want to cut it down to  four 40″ panels to follow the TV skirt instructions. I retained the selvages as was done in historical garments, and used three panels instead of four. The skirt has a very deep pocket at the center left where the skirt pieces overlap with the waistband. Each panel was cut to the same length, but since your skirt front and skirt back are different lengths, there has to be a way to do this without cutting your fabric. Again, drawing on the Closet knowledge, I did as was suggested and folded over the waist edge of the fabric. This gave added stability to the fabric as well as achieving the lengths needed. The pattern instructions have you cut your fabric at the waist to the desired angle which will give you your length. I don’t recommend that on a sheer just because of the off chance of it tearing.

IMG_2446 -1

Waist inside

You can see in this very amateurly photoshopped picture the angle of the folded-over fabric. This is center back where the skirt is a bit longer than in the front.

IMG_2443

Double box pleats

For the skirt attachment, the pattern gives you liberty to choose your preferred pleating or gathering method. Here I am showing you the double box pleats I used to pleat the skirt onto the waistband. Originally I had knife pleated the front and cartridge pleated the back, but I didn’t get enough fabric taken up in the front. So I went to the double box pleats in front and cartridge pleats in back. I’m quite happy with this look as it’s smooth and polished.

IMG_2445

Yes that hem is hand stitched

I wanted to make sure that the hem folded straight up so the lines didn’t go off kilter, so I ended up hand sewing the hem. I used a single thread and every fourth stitch went through all layers. Every 8th stitch was taken twice to keep the thread from coming undone if it were to break for any reason. If you kept up with my thinking on the skirt width, you will realize that’s a 178″ hem. It took me a couple hours to do it.

IMG_2447

Picture taken by an 8 year old

This is the finished dress, although it’s not the best picture of me lol. I’m looking down toward my daughter haha. Also, I realize that I must not have been laced as tightly in my corset as usual because I couldn’t fasten the waistband correctly. I wasn’t going to mess with it today and I’m certainly not taking the dress apart, so I’ll have to lace better next time.

IMG_2450 (1)

Side image

Here you can see the under sleeve just below my shoulder. This makes the dress very cool and airy. I had considered adding a silk stripe down the sleeve for interest, but I decided against it as it might weigh down the fabric. I may make a belt, as the silk I have is the exact color of the darkest stripe in the fabric.

You can also see the shadow of my petticoat under the skirt. I have an eyelet petticoat with two large pleats in it. This isn’t an historically accurate petticoat and someday I will make a plain cotton one, but for now this is quite pretty.

Overall I am thrilled with the result of the Truly Victorian TV447 Sheer Dress pattern. The instructions were easy, but true to the sewing techniques available to our ancestresses. It is not a pattern for a beginner, certainly, but if you have some knowledge of sewing, you can make this pattern truly customized to your preferences. If at times the instructions don’t make sense, just take them one sentence at a time. My mother told me when in doubt just do what the instructions say. These patterns will not take you down the wrong path, trust them and you will get something incredibly beautiful. And of course, email them, ask your friends who have made the pattern, or google for help. Truly Victorian patterns are very popular due to them being among the best on the market today, so lots of people make them! I am eager to wear this dress to one of our hottest events coming up soon, Huntington Beach Civil War Days.

Links & Resources

Truly Victorian

Farmhouse Fabrics

Civilian Civil War Closet

Sewing Academy

Huntington Beach Civil War Days

Making an easy blanket for your pet

Even your smallest members of the house need a lovey, right? I have been making these blankets for my cats and dogs for many years. My mother made them for the family dog when I was growing up. They can be placed around the house where your pet likes to sleep, they protect your light colored carpets and linens from dark colored hair deposits and pet “gunk”, and can make it so your pet can sleep on the bed without being right up in your face.

Browser likes to hang out on the stairs

Browser likes to hang out on the stairs

To make your pet a warm bed that is also machine washable, you will need:

1 yard of cotton flannel or regular cotton

1 package of Warm & Natural batting, 34×45″ size (or any low loft batting, I just like the weight of this type)

Cozy to be

Cozy to be

Step One

Lay out the fabric to make sure the edges are even and straight. Trim where necessary.

Trim edges

Trim edges

Step Two

Lay the batting on your table, then lay the fabric on top. Match the edge of the batting to the folded edge of your flannel. The flannel is going to be your guide for cutting. Cut out the batting.

Cut batting to the edge of the fabric

Cut batting to the edge of the fabric

Step Three

You should now have one yard of flannel folded inside out and then layered on top of the batting. Keeping everything configured exactly like that, stitch around the open edges, leaving yourself a 6″ opening where you will turn the fabric. Backstitch to anchor your stitching.

Before turning, trim any edges.

Cut out extra bulk before turning

Cut out extra bulk before turning

Step Four

Turn your project by reaching in through the hole and grasping the other end. Pull everything through the hole. Once it’s right side out, reach back in and pop out the corners. Next, turn in the raw edges at the opening, pin closed, then stitch.

Pin and stitch

Pin and stitch

You can either just stitch it straight down the side, or you can stitch all the way around the entire project to make a more finished look. I stitch this about 1/8″ from the edge. Finally, stitch a straight line from edge to edge in the center of the blanket. This will keep the batting from drifting around and getting lumpy in the washer or when Fido digs around in his bed for the perfect spot to settle. If you are feeling really motivated you can stitch an X from corner to corner or other designs. I find that I am not precise enough to do this and I always wind up taking a tuck in the fabric, and that makes a pucker, and that bugs me. :-)

Step Five

Present to Fluffy and collect the furry gratitude you are owed for your efforts. Start to finish this project should take about 15 minutes.

Heavy sigh....

Heavy sigh….

If your pet is bigger than medium size, you can make a similar blanket using 1 yard of flannel backed with 1 yard of cotton or flannel cut into a square, and the batting sandwiched in the middle. Follow the same steps, just stitching around four sides instead of three. I suppose you could also make a kid blanket this way too.  :-)

Pattern review: Simplicity 2569 Princess Dress

Melody asked me to make her a purple princess dress for her birthday, since we are having a princess themed birthday party for her upcoming 6th birthday. We looked at different pictures, I assessed just how crazy this might be, and went over to Joanne’s to buy fabric.

Princess dresses galore

Princess dresses galore

Melody selected view A, which is the blue one shown above. The pattern calls for many yards of tulle and satin, plus some tissue lame for the inset and sleeve puffs, and a little trim. Right out of the gate I ran into difficulties, because Joanne’s had two completely different lavenders – one a pink lavender and one a blue lavender. After much deliberation (no joke, easily 30 minutes) I decided on the blue lavender. It just has a more of a true lavender look to me, besides the fact that Melody already has a Rapunzel dress that is in a more pink lavender. Next, I was thinking of using an embellished chiffon in the collection in place of the top layer of tulle, but Joanne’s had exactly 1/2 yard too little.

Once that obstacle was overcome, the cutter discovered that they had exactly 1/2 yard too little of the coordinating lining fabric.

Say what, Joanne?

Say what, Joanne?

Anyway, I’m flexible, made some adjustments then went home to get this project started. I had selected an iridescent sheer instead of the tissue lame because they didn’t have a silver lame, only gold and it didn’t look good with the lavender. Let me just say, I am pleased with the results but I really regret that fabric. It was very slippery. I backed it with white satin, flatlined them and treated them as one piece. The pattern has you apply this triangle shaped piece to the bodice front in the first step, fine. But upon reading through the pattern, they have you glue the trim on at the end. That didn’t work for me because I know my daughter. That trim would be ripped off within the first day. Here’s my second regret about this dress. I picked out a really pretty sequined trim that matched the fabric perfectly; it was sold by the spool so I couldn’t open it in the store. It was elasticized! And the sequins are made from something stronger than titanium because I broke three – yes three – needles stitching it on. Now I understand that Simplicity wanted the trim to lay on top of the seam because after sewing, turning and finishing the bodice I can see that part of the trim tucks inside and it’s not a “perfect” look. However, if you use something that doesn’t have sequins, why in the world would you not sew it on? A regular ribbon or floral trim is going to be just fine stitched inside the seam and it will be a much more finished look. So there.

The rest of the dress was so easy! The puffed sleeve is a two-part sleeve, meaning you cut a small piece out of the tissue lame (or slippery annoying iridescent stuff, in my case) and apply it to a regular sleeve piece. The gathering of the fabric gives you the puff and it is really very easy. The skirt is two layers of tulle plus an underskirt. My only thought is that you really want to use fine tulle here because a rougher one might be a bit scratchy on the inside. Also, the waist is finished by turning the seams toward the bodice and top stitching. With the horrid titanium sequins I had going on, I did not top stitch that section.

I found the directions for the back opening a tiny bit confusing. They have you extend and press back 1/2″ of the tulle on the center back, but it is unclear as to exactly where it is to be placed. Looking back, I can see now it was supposed to have been folded back and placed along the zipper placement line, not the raw edge. This would allow for there to be a gap in the tulle allowing the zipper to pass through nicely and the stitching to be neat and tidy. While you won’t be able to find it on this dress, I had to do some fancy zipper foot work to make that spot work.

With those two minor criticisms, however, I’d say this is a nice pattern. It’s not a beginner pattern, but certainly not an expert level either.

But, what do you think? It fits well and I made it large so she can wear it for more than a minute. I haven’t made the hat.

Ta dah!

Ta dah!

I’m considering going back and making one of cotton for a certain little girl who’s birthday is in July.

UPDATE: I went back and made the hat. It took about 30 minutes from start to finish, and darn if I didn’t find some regular purple ric-rac that I could have used on the dress instead of the sequins! Anyway, here are my thoughts on the hat. The instructions have you apply fusible interfacing to the inside of the hat, and the pattern requirements call for lightweight fusible interfacing. If you want the hat to flop over like one of those funny men’s nightcaps from 200 years ago, go ahead and use the lightweight. Otherwise, use a heavyweight fusible interfacing. Second, they have you hand stitch the tulle to the point of the hat after it’s finished. I don’t know about you, but my hands do not fit into that tiny diameter point. I suggest either catching the tulle in the seam when you stitch that, or attaching the tulle to the fabric before the seam is sewn. Finally, my daughter just didn’t want to wear the hat for more than a couple minutes at a time so I didn’t bother with the elastic band for under the chin, but you could easily replace that with ribbon ties stitched into the hat at the time you make the narrow hem. Way more secure, less hand sewing, and actually realistic historically speaking. :-)