I’m coming to realize that the dolls I sew for are FAR better dressed than I have ever been or ever will be. You have seen the chemise and fussy drawers that Ruby is now enjoying. Lovely soft cotton voile with silken trims and lace. Ooh la la.
The next garment I have made for Ruby is really, if I don’t say so myself, amazing. Just because a lady is 130 odd years old does not mean she wants any old clothing, am I right? So, Ruby and I talked – it was a bit one sided if you must know – and she told me how she has always wanted a decadent silk brocade corset.
And how could I say no to that?? For my own reenacting adventures, I have a lovely coutil corset with fancy lace trim. I know how it makes ME feel, so yes, Ruby would like to feel fancy too. No doubt!
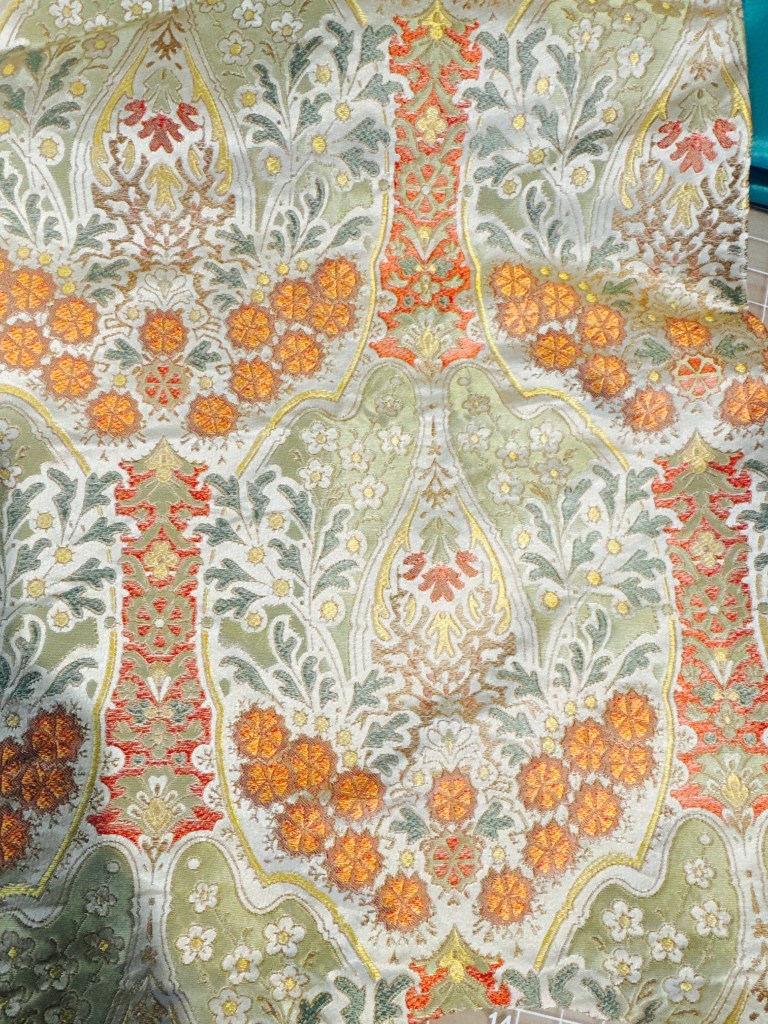
I looked into my silks and found “just the thing” for this project. It’s a gorgeous silk brocade in autumn colors. I particularly like the rust-colored flowers and green botanicals.
Caroline was kind enough to lend her corset to Ruby to try on, and it is a good fit. I pulled out the pattern I drafted for Caroline which was drawn from the book —- A French Fashion Doll’s Wardrobe by Louise Hedrick. When I made the corset for Caroline I followed the instructions but I had been a bit surprised the garment was only a single layer of fabric.
This time I decided to make it with a cotton lining, more similar to how IRL corsets are constructed. To complete this, I cut each piece in the silk brocade and also in white cotton. The two layers are stitched separately, then placed right sides together to stitch the center back seam. The piece was then turned right side out for the top stitching that creates some of the structure and also the boning channels.
I realized as I was creating this garment for Ruby that I made a slight error on Caroline’s. It doesn’t impact the actual item so I won’t change it.
The top stitching is done in a golden wheat colored silk thread, doubled. The back stitch adds an attractive detail and has the duel purpose of binding the two layers securely. It’s like the pieces are quilted together.

There are five bones in the corset – center front, one on each side of center back, and one each angled on the side front. If you decide to undertake this project I recommend angling the ends of the side front bones so they fit neatly into the channel.
The last couple steps are adding the grommets and binding the edges. I happened to have this silk ribbon that perfectly matches the thread I’ve been using. And I love that the brass grommets work perfectly with the fabric.


Et voila! Ruby looks lovely in her new, fancy corset!


Pretty, fancy! Lucky Ruby, it will be a beautiful secret underneath the rest of her clothing!