Follow along: Caroline’s Reveal

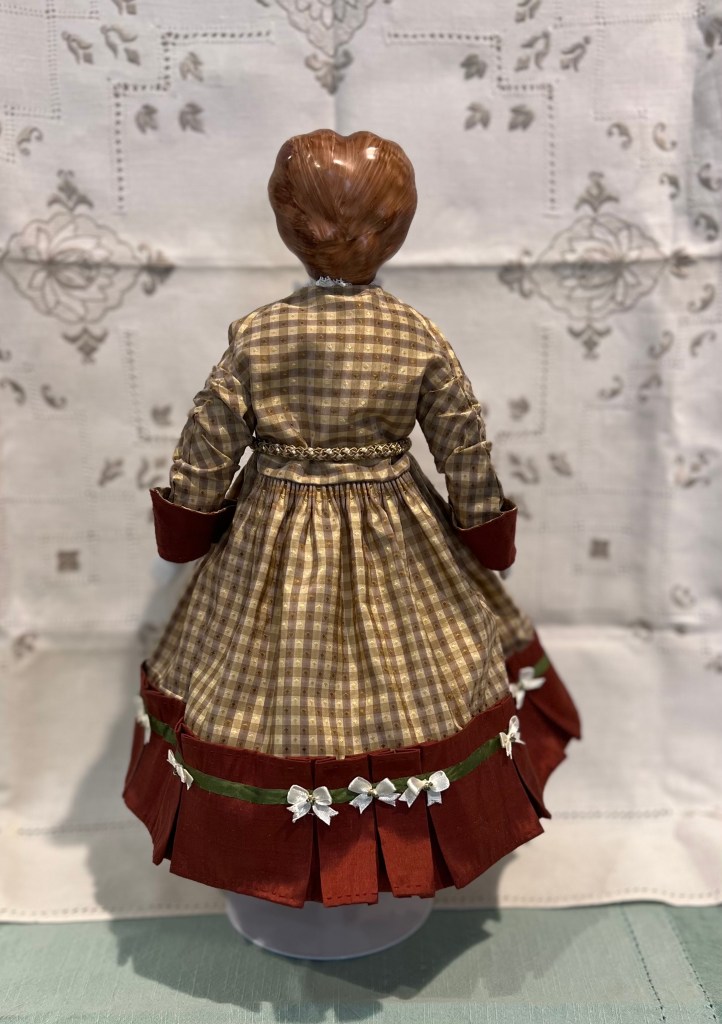
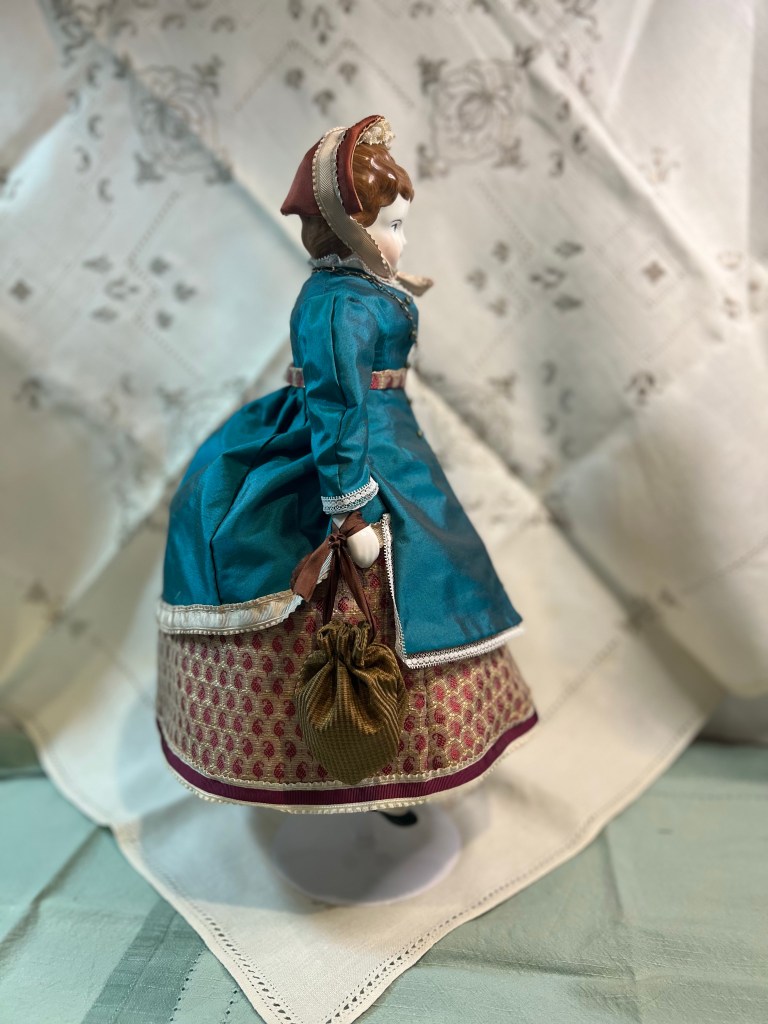
My friends, this has been quite a journey, but I am so proud to say that Caroline is now fully clothed and ready to visit the shops or take a stroll with a friend. It has been a year of work off & on. I have challenged my skills and learned so much through this project. I hope you will enjoy the big reveal!

Silk brocade and taffeta

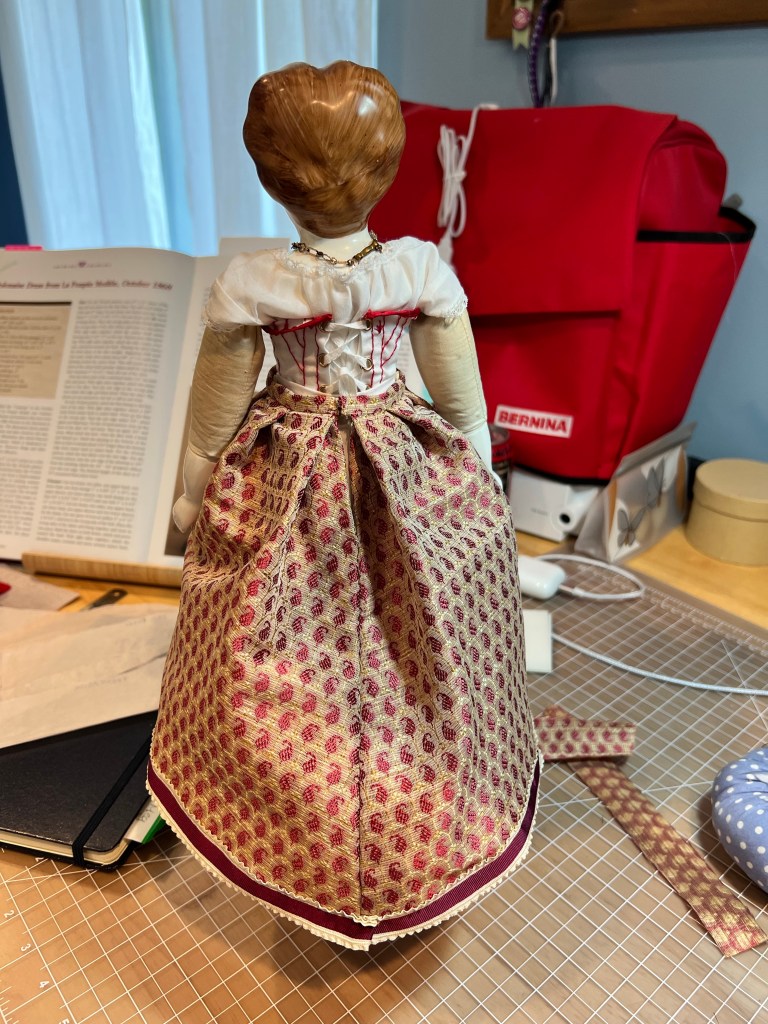
I have previously shared the skirt, made of silk brocade. Paired with this turquoise silk taffeta, the ensemble is going to make some of my other dolls positively green with envy.

Shopping ready

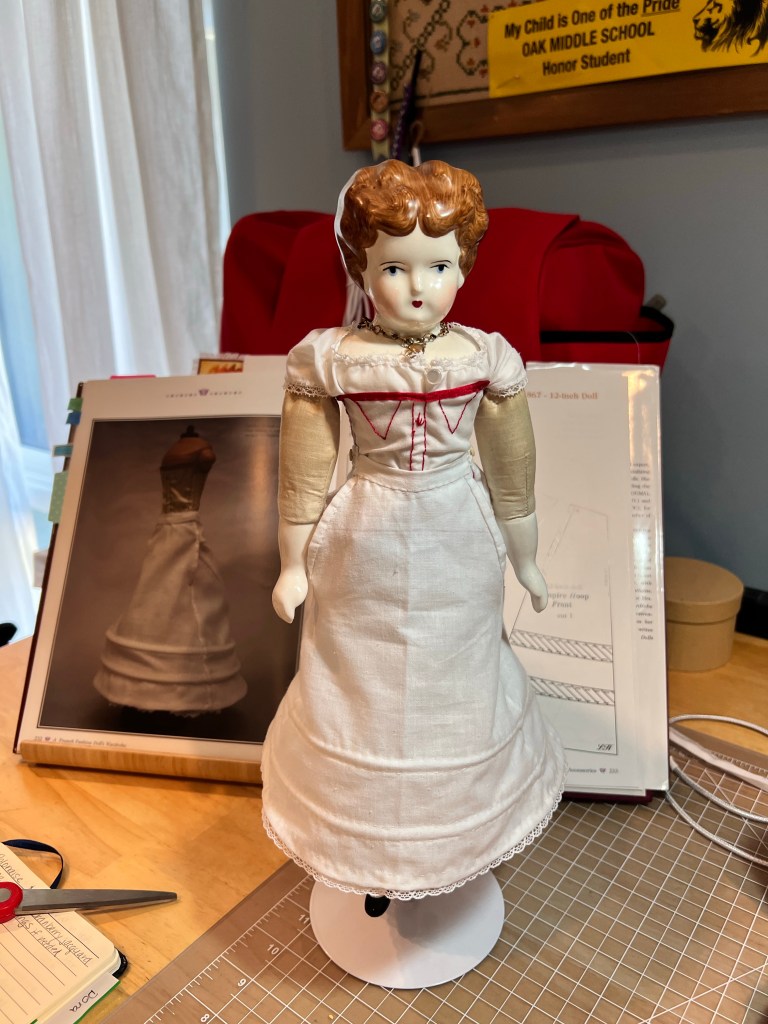
The book I used, A French Fashion Doll’s Wardrobe by Louise Hedrick, included instructions down to the little details such as how to make covered buttons and the “easy” way to make a rolled edge.

Back view

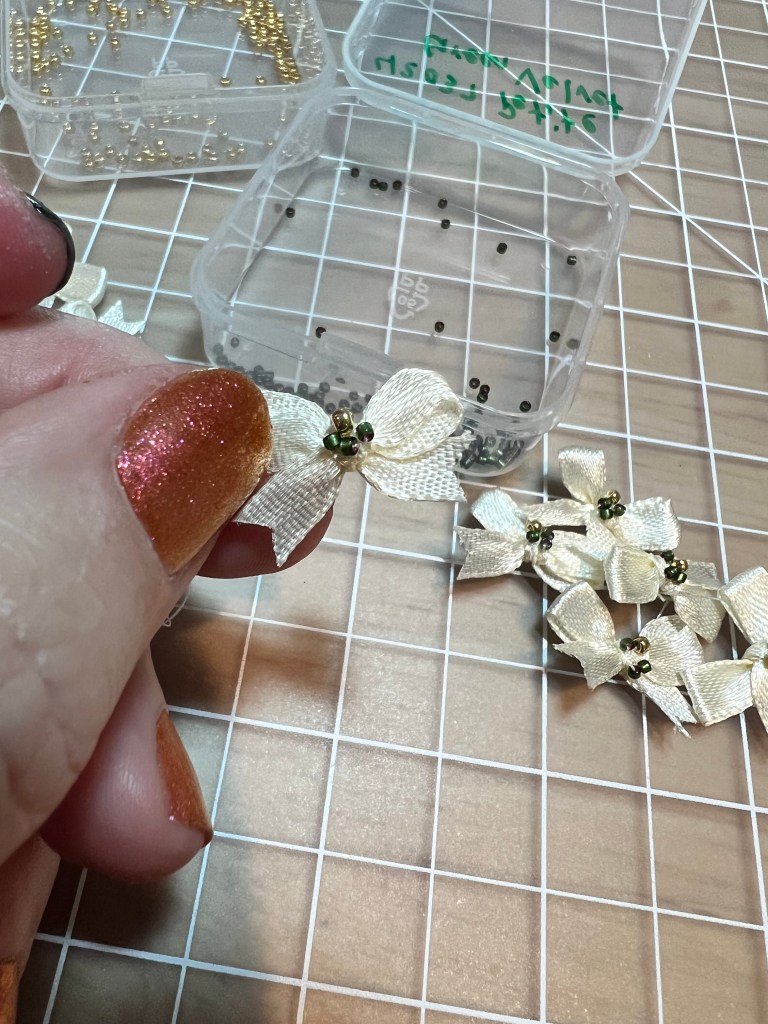
While the directions called for pleats at the hem of the skirt and polonaise, I really didn’t want to make a mile of tiny pleats. I chose this fluted silk ribbon to contrast and tie the pieces together at the same time. I used some 4mm buttons that are nonfunctional on the front, and hooks & thread bars to close the polonaise.

The pattern for the reticule came from Brown House Dolls – BHD 334 Purses & Muff. It is a silk outer with silk lining.

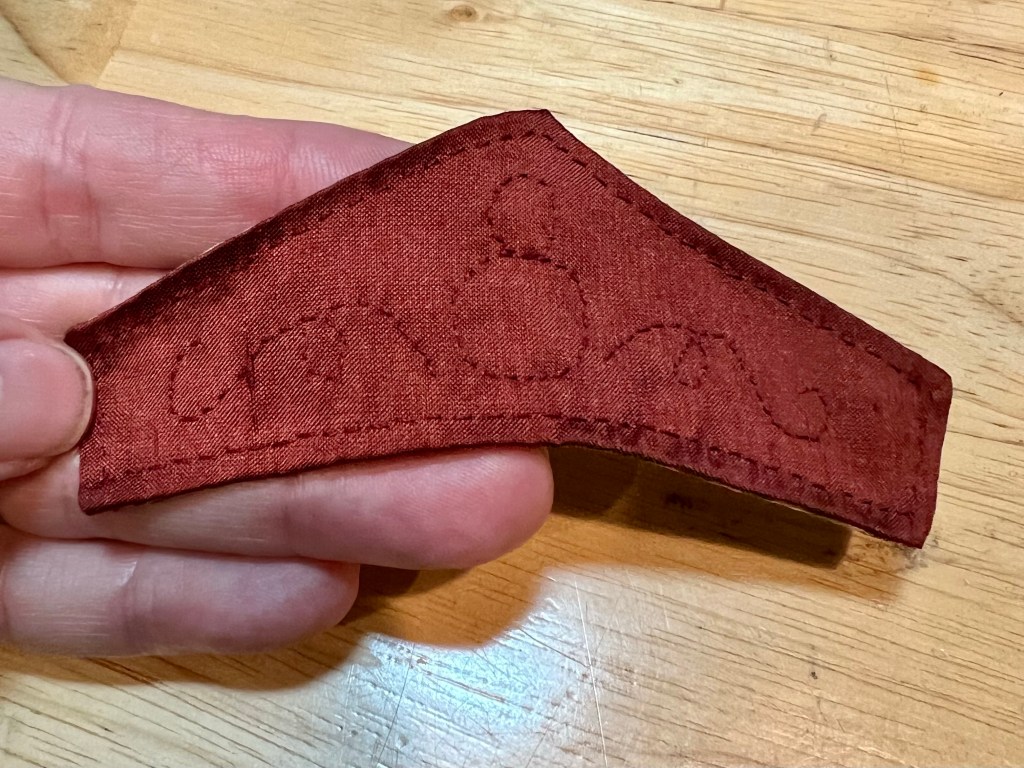
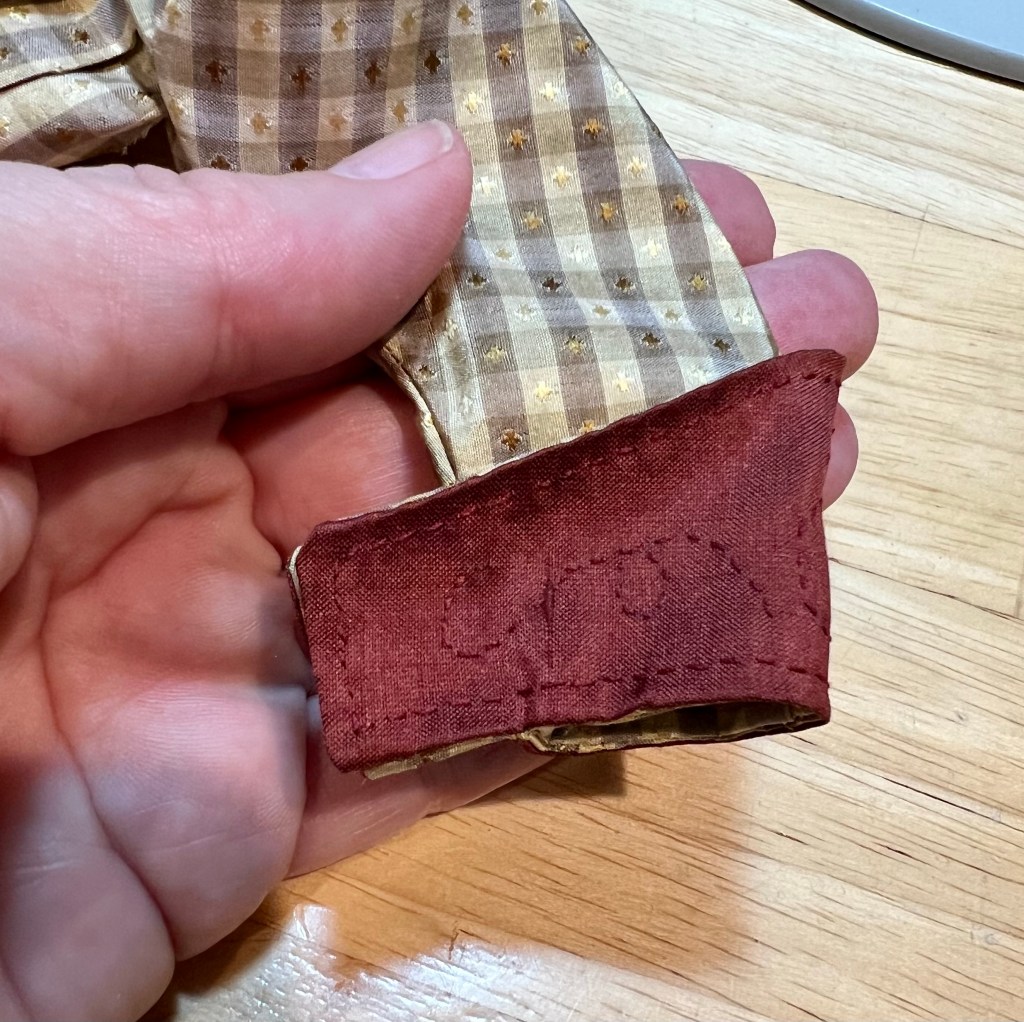
The bonnet was inspired by a Susan Sirkis Wish Booklet but I don’t remember which one. I traced out the pattern ages ago and just upsized it for Caroline. The bonnet is made from silk taffeta in a gorgeous rust color with a lining that is shot with cream and rust. It uses hat wire on the front brim to hold its shape.

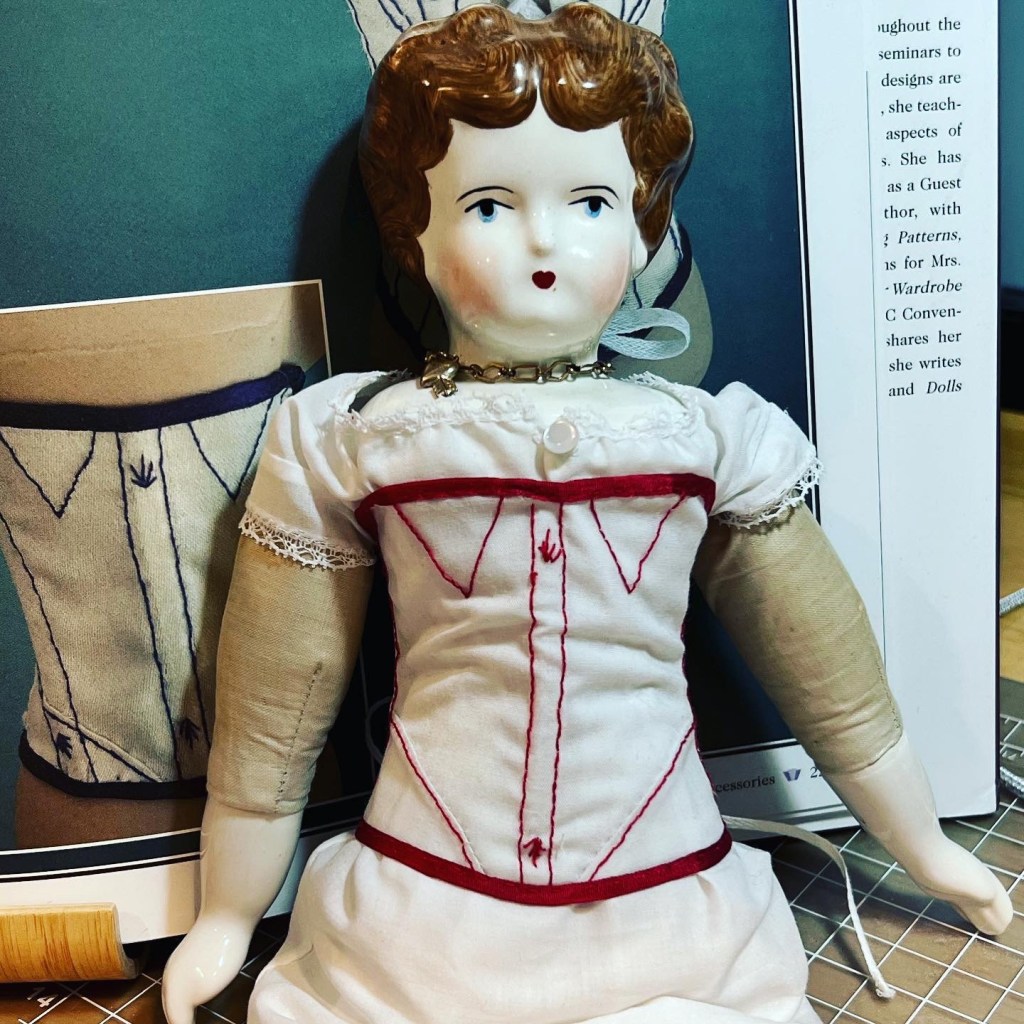
So there you have it. Caroline came to me naked except for the necklace she is wearing, a hole in her leg and who knows what else in her past. I wanted to dress her in finery, and while it was a long journey, we have made it!

Bonus – remember that dressing gown? :-)

Follow along: A Finished Skirt

We are in the home stretch now! I’m quite excited and already working on the next piece of Caroline’s wardrobe, but thought I’d take a moment to pause and share the finished skirt.

Front view

The skirt is a lovely silk brocade that I bought from a costuming friend a few years ago. The pattern is cranberry colored paisleys on a tan field with small golden threads shot through to frame the paisley motifs. I believe the pattern expected readers to use a lighter weight silk than this but I don’t thinks it is too much of a problem.

Back pleats

It is fully lined with white cotton batiste. this gives the skirt quite a firm body. I managed to get it to stand on its own.

The seams must be whipped to control the fray – either pressed open and whipped to the lining or whipped closed. On the lower hem, I chose to use bias tape as a facing to cut down on bulk. It has the added benefit of making it easier to curve the hem – it’s not straight – so it doesn’t ripple. If you used a lighter weight fabric you could easily make a standard hem. I also chose this fluted ribbon trim instead of pleats or fringe. It suits my style and Caroline likes it too.

Side view

I will share the polonaise soon. It’s coming together quickly and I will hopefully be finished with it by next week! Exciting. There may be a hat and maybe even a reticule. Fun fact: in French reticule means ridiculous.

Follow Along: Empire Hoop

This is another piece of Caroline’s wardrobe that came together fairly quickly. Unfortunately this is the first piece I don’t completely love.

Front view

I made this piece from lightweight linen and the three basic pieces are fast to construct. Frankly, the casings for the inside of the garment also came together easily and quickly. It’s not a difficult item to construct.

Side view

The frustration began with the overlapping of the wires at center back. This was sooo fidly. The instructions say to overlap by 1/4” and bind the two pieces together with thread. I found this to be tricky at best. Because the gauge of hat wire used, it is not very flexible and so quite difficult to manipulate into place, then get it to hold still while tying it together and not accidentally stitching the piece to the body of the garment. All this machination mangled the raw edges of the casings. Since the instructions are a bit sparse here, should you want to make this item I recommend leaving some length at the ends of the casings, shaping the wire as desired, and then sewing the casings closed. These are doll clothes and it’s not like Caroline is going to be walking around causing the wires to shift. I wish I had thought about that before I spent so much time at this juncture of the project.

Back view

The second area of frustration was the binding of the side openings. I believe this pattern is based on recreating an original and honestly, maybe this bit should have been updated. Rather than four individual pieces of binding, it might be easier to use one longer piece that would also encase the lowest point of the opening. This raw edge is left exposed by following this pattern and I would prefer it to be encased.

Final critique, no where in the instructions do they tell you to hem the garment. I recommend doing this before you add the boning. And maybe even add the lace trim at the same time. Once the boning is in, the skirt behaves very differently from an unstructured garment. Just my two cents.

I don’t super love the outcome based on these issues and I can’t seem to get the wires shaped the way I want them. Maybe I’m overthinking it.

Yes I put the petticoat over it

Follow Along: Doll Corsetry

Hello again, doll loving friends! A variety of side projects and real life stuff has kept me from this particular project, but I’m so thrilled to have completed it!

Caroline’s new corset

This little project felt intimidating at first, but once I did up a mock up and made a couple adjustments, it came together in a few hours.

If you have ever made an IRL corset, this one will feel a bit incomplete because it is made with only one layer of fabric. IRL corsets are made with several layers and no thread tails will be visible. Since this is not in fact a real corset, there are some differences. :-)

The five pieces come together very easily. Boning channels are added to the inside with colored thread, which has the added benefit of the decor color. The flossing is added after the boning and since the instructions didn’t give any detail, I used the flossing to secure the boning in place inside the boning channel.

The book included no photos of the inside of the garment, so I’ve taken some for your viewing pleasure.

It is necessary to make the inside very tidy.

The brass eyelets were quite easy to add. I think if I were to make another of these, I’d extend the center back by about 1/8”. The boning channel is supposed to stitch down the raw edge of the fabric, but with only 1/4” folded under and the need to allow for the 1/8” eyelets, it’s a little more crowded than I’d like.

But ooh la la, it’s so sweetly pretty! This garment is particularly useful for Caroline since her body is sagging a bit from age & settling inside (sounds a bit like me, too haha). You will want to bind the ends of the twill tape ties in a faux aiglet to they will thread through the eyelets and not fray. To do that, bind them in thread several times and knot it once or twice very neatly & tightly.

Next for Caroline will be either her hoop skirt or a corset cover. See you again soon!

Follow Along: petticoat

The third installment of Caroline’s undergarments is this ruffled petticoat.

You will see it mirrors the three tucks seen on the drawers and also the insertion lace. The lower edge of the petticoat is made of a doubled piece that sandwiches the lower edge of the insertion, making everything nice and clean on the inside.

The ruffle is made by gathering on a narrow cord. Depending on the size of your doll, you could use pearle cotton or even some embroidery floss if you don’t have a narrow enough cord. The gathered ruffle is then stitched onto the lower edge.

The waist is gathered with 1/8” twill tape inside a casing. It calls for worked buttonholes but for some reason I am better at eyelets so that’s what I did. The benefit of a gathered waist here is that the petticoat can change shape for different eras. Right now I have much of the petticoat to Caroline’s back since I’m making her a bustle dress, but I could easily reshape this to the nice round shape of the 1860s.

Up next will be a fun one – a boned hoop skirt and then her corset. See you again soon!

Follow Along: Loverly loverly

My Gram used to say “ah loverly loverly” sometimes when she saw something pretty or made her happy. Today I am saying loverly loverly about the latest finished item for Caroline.

A full set of drawers!

What with various demands on my weekends I finally got some “me” time Saturday and finished these drawers. I just love how they turned out! the front is pleated to the waistband for a tidy appearance.

Lots of tiny tucks

As you can see here, I used Swiss cotton insertion and edging. I felt like they would give me a better result and I’m very pleased with how they look.

And here is the back where the fabric is gathered to the waistband. Also a worked buttonhole and antique mother of pearl button.

The next piece of the project will be the petticoat. See you again soon!

Follow Along: Pretty, pretty

A teaser

Sometimes, mistakes are needed to make you slow down, pay closer attention and really focus on details. When I made the lovely but too-small drawers recently I spent a lot of time thinking about how I’d do them differently. I realized I’d made some errors on the tucks. I didn’t like the way the insertion turned out. (My doll Mernie however, loves her new drawers lol.)

So after many side projects and time to consider things, I’ve started a second pair of drawers for Caroline. I tried on her the 1875 drawers I made for Emma a couple years ago and then adjusted the waistline per that pattern. No, the drawers aren’t exact to the book I’m working out of, but it’s not like there are Doll Drawers Police ™️ who will be checking them haha.

I decided to go with Swiss cotton insertion and edging. It’s more sturdy for this tiny project and I think it still gives a lovely result. Sadly this is only one half of the drawers and I’ve been terribly busy so not gotten a chance to make the other half. Soon, I promise! Check out Farmhouse Fabrics, the source of this lace, fabric and much more that I use for doll clothing.

Follow Along: Caroline’s Wrapper

When I started this follow along series back in July, I didn’t imagine I would be so sidetracked, but here we are. In August, I made a significant mistake on some drawers and decided I’d make something else instead. But rather than going on to the petticoat, I decided that Caroline should have a dressing gown. If you’ve read even one entry about my doll dressmaking, you know that I can’t just do things the easy way.

I found myself browsing through the silk remnants I have collected over the years with doll dresses in mind. I kept coming back to these two that paired very nicely, and I could easily picture in a wrapper. A lady’s wrapper of course is sort of like her bathrobe, but in the Victorian style, the higher social status or wealth of a lady, the nicer fabrics she would enjoy for such a mundane garment.

Last time, I shared the inspiration photo from La Mode Illustree December 1875.

It was described as being made in blue and gold striped canvas, and while I like many elements of the design, I of course have to do things my own way.

I love the sand/tan plaid and how it pairs with the rust colored silk. The different green silk ribbons make an excellent accent, and the final touches of the bows and the tassled tie just bring it all together. The Victorian era was not shy of embellishment. The bows were beaded, each with gold and green beads (shout out to @sisterkathy55 for the beading tips and supplies!). The buttons have a crest embossed on them, befitting a lady of some wealth.

The original pattern pieces for the 1875 wrapper were honestly quite confusing, so I adapted a different pattern and also took inspiration from some human-size patterns as well. The pleated front of the wrapper is based on the Laughing Moon #120 1840-1860 pleated wrapper pattern.

This time, I’m not going to tell you where the mistakes are or what I did wrong or could have done better, except to say that I hate sewing button holes. All the seams are French seams, meaning the raw edges are enclosed, which will prevent fraying – something silk loves to do.

Yes, the buttons are functional. I also stitched in a gorgeous design on the cuff.

So there you have it, Caroline’s completely unnecessary dressing gown that took a month to make and is unbelievably beautiful. No I did not make her a fussy day cap and I wish you wouldn’t ask me things like that because now I’ll have to make one…..

Follow along: I’m obsessed

This is just one little piece of Caroline’s dressing gown. This is the cuff of her sleeve. It is only 3” wide. I spent at least an hour quilting in that pattern. It’s gorgeous, but yeah, I’m nuts. :-) I sure hope I can duplicate this on the other cuff!

Free handed stitching

Here it is on the sleeve. We are in the home stretch and I will reveal the full dressing gown soon!

Pretty, pretty

Follow Along: I made a boo-boo

Look at these lovely drawers! They are exquisite with the delicate insertion and tiny ticks.

Pretty drawers

Part of making these clothes is of course making mistakes. Grr. These absolutely beautiful drawers don’t fit.

Tiny ticks and lace

Although I measured and used my paper towel muslins, the legs are just a smidge too narrow. The waist is also too small. Rats. The lace separated from the head as I pulled the drawers onto Caroline and I had to go back and resew all the insertion.

While I am waiting for some replacement lace, I’m soldiering on with something else. I decided to make Caroline her own dressing gown in an amazing silk I have in a copper & golden brown plaid with rust silk accents. As we know that Inez’s dressing gown fit a bit big, I’m tailoring the pattern to Caroline and also taking inspiration from a Victorian French drawing.

French Dressing Gown

Stay tuned for the results of this experiment!