When I undertook this project, I knew I would need to do some customizing of the patterns in the book I am using. Many dolls, such as Huret dolls, are made all the same size & shape, and so easier to dress out of patterns for Huret dolls. This particular book features French fashion dolls of a different brand, but similar style – a fixed body size & shape. The user simply traces the pattern pieces, makes up the garments and voila, the doll has new clothing! But with other dolls, whether historical or modern reproductions, the bodies have been made by an individual consumer out of fabric and some kind of filling, while the head, hands and feet are porcelain. Each doll becomes customized by the skills (or lack of skill) of the creator. Whether inexpert, like my Sunbonnet Sue, or highly precise, like my Hannah, the doll bodies are unique. Sometimes, shoulders are wide, arms are fat, legs are skinny, etc. It is all dependent upon the person who created the doll, and while certainly, a single person might create numerous dolls from a single pattern and each is precisely created, more often than not in the collector market, doll bodies are not uniform.
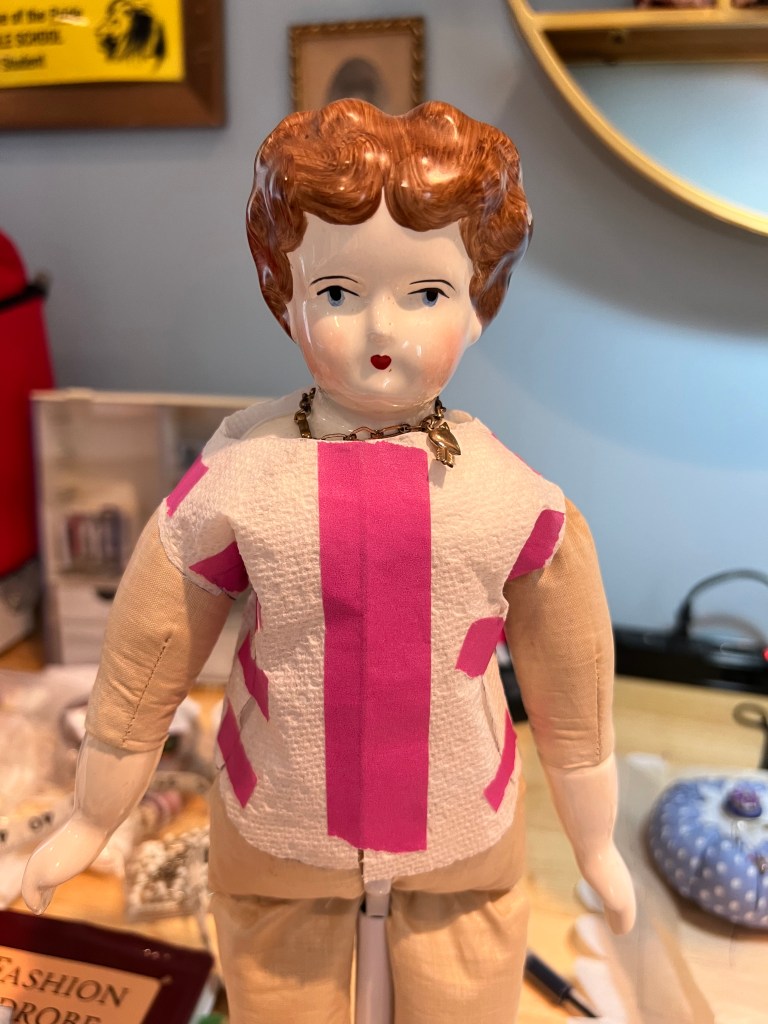
With Caroline, I found that the settling of her filling over the years has made her a bit…bottom heavy…and her waist and bust are a bit deflated. Her arms are fat, though not the largest arms I have seen. Her waist is high, making her body almost a triangle shape (flat bust, wide hips).
As I worked through the details of fitting pieces to her, I asked myself if I really wanted to make mock up after mock up in muslin, and the answer was “no.” The book suggested a paper towel mock up, and this has become my new favorite way to test doll patterns! Oh my goodness, it’s such a time saver. Simply cut the pattern piece as you normally would, but of durable paper towel. Use masking tape to connect the pieces with the appropriate overlap to simulate the seams. In most cases seams on doll clothes are 1/4″.
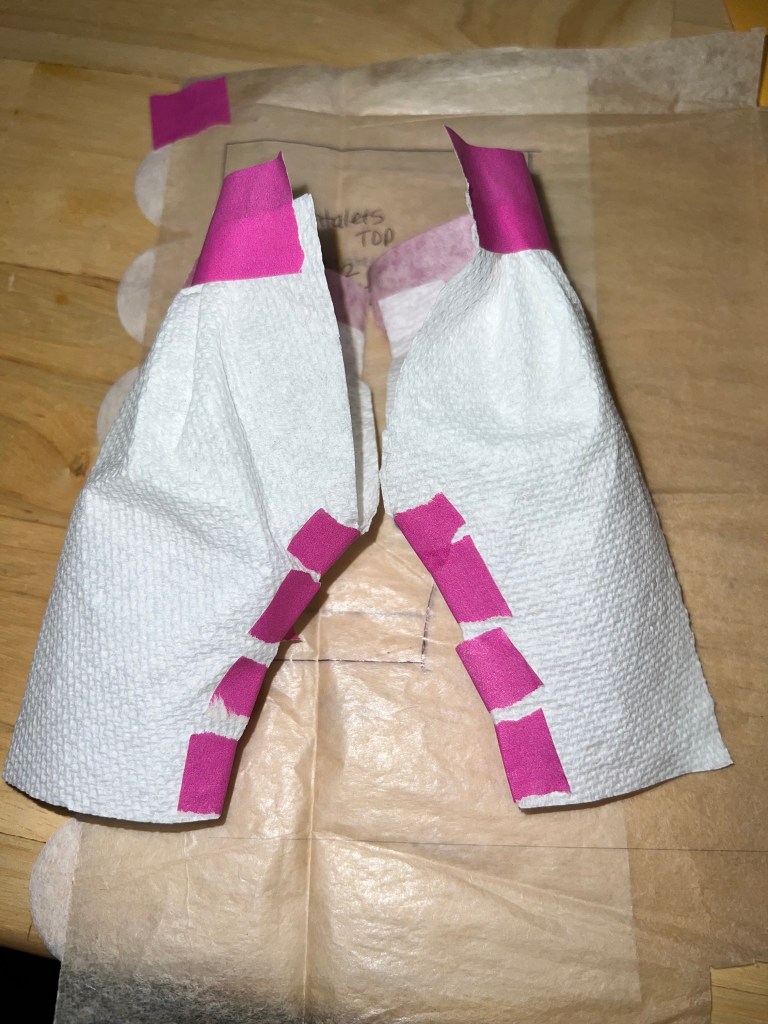
This quick, inexpensive method to test and modify patterns to customize them is truly genius. In order to size the pieces, however, I did have to enlarge them. The patterns are for a 12″ doll and Caroline is 14.5″. What’s a quick way to enlarge something? In the past I have used trial & error, complicated math and just drawing & tracing repeatedly. These methods leave something to be desired for me. It can be really frustrating to enlarge & print, then only to find the piece is too big or small. Sigh. BUT, this time I tried to be smart.

I did a bunch of measuring. First, I measured Caroline everywhere – arm and leg circumference, waist, bust, back-neck, waist to ankle, everything. Then, using the paper towel method, I made a mock up of the chemise, put it on her, opened it up with scissors, added the width and length I wanted, then remeasured the finished item. The new measurements gave me a percentage of increase. Next, I took pictures of the pattern pieces with a ruler next to them.
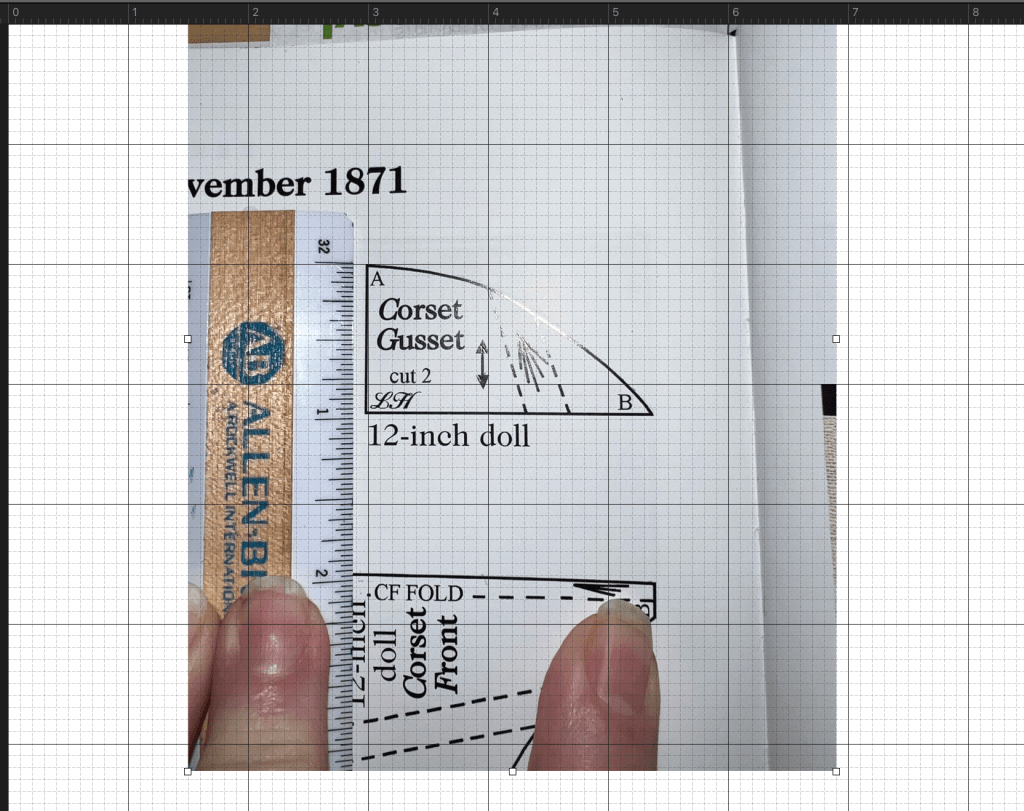
I then used a website to calculate the new measurements of the piece. Then, into Pixelmator Pro (there is a free version of Pixelmator available for Mac and you can find other similar apps for PC), I turned on the grid, placed the image and then enlarged it until the sides were the length I wanted. Print, cut out and hold up to the doll. On some pieces I made an additional paper towel mock up to verify sizing. When I felt confident the sizing was right, I traced out the pieces onto tissue paper. Was it a lot of work? Yes. Is it worth it? Also yes.
I’ve just finished the first item and the fit is perfect!


Leave a comment